

SaminCam
-
Posts
723 -
Joined
-
Last visited
-
Days Won
2
Content Type
Events
Profiles
Forums
Media Demo
Everything posted by SaminCam
-

Eduard / Hasegawa 1/72 Liberator GR Mk.V Coastal Command
SaminCam replied to SaminCam's topic in Work in Progress - Aircraft
Evening all, hope everyone is well and enjoying the much needed sunshine! Progress is being made with the B-24. I finally got some coloured paint on the upper wings and fuselage though the missing wing in the photo is still in the paint shop for final touch ups. I'm pretty happy with where I've got to with this, there's a hint of pre-shade showing through and the masked chips have worked quite well (I'll get some better photos of these up later...). The colours look a little bit bright and the chips a bit too stark at the moment but fairly confident it'll look about right once its been varnished and weathered with oils and pastels. Once the other wing is done I'll mask the top sides and start on the white underbelly. Thanks for dropping by! Sam p.s. Liberator wings are too long and result in ropey out of focus photos!- 227 replies
-
- 17
-

-

-
Eduard / Hasegawa 1/72 Liberator GR Mk.V Coastal Command
SaminCam replied to SaminCam's topic in Work in Progress - Aircraft
Evening all, "real" painting has begun this weekend! First thing I've done is add little dabs of maskol on the aluminium patches. These are mostly located around the engines as I thought this is where the wear and tear would predominantly happen. I've had a practice with this technique on a trusty p-51 paintmule and it works ok, it's also much more straightforward than hairspray chipping. The maskol is painted on with a fine brush which I keep moist with water so it doesn't get too "gloopy". The only place I wanted heavy chipping was on the front of the intakes and here the maskol is dabbed on with a sponge and touched up with some more brush work: Once happy with the maskol chipping I started to pre-shade with thinned tamiya medium grey over the rubber black base. First pass shown here: ...and the second pass with a little more white and a light brown added: This is now pretty much ready for the dark slate grey to go on top - I'm going to add this in a few very light coats so that I can pick the right moment to stop without obliterating the preshading work. Wish me luck!- 227 replies
-
- 13
-
-
Eduard / Hasegawa 1/72 Liberator GR Mk.V Coastal Command
SaminCam replied to SaminCam's topic in Work in Progress - Aircraft
Half a roll of tape later and the first masking session effort is pretty much complete! Preshading and coloured paint to follow soon! @Jackson Duvalier, thanks for the tips on the lights, I'm a little way off having to tackle these yet but the Bondic tip is great, I'd seen something similar elsewhere but couldn't remember the brand...- 227 replies
-
- 10
-
-
Eduard / Hasegawa 1/72 Liberator GR Mk.V Coastal Command
SaminCam replied to SaminCam's topic in Work in Progress - Aircraft
Evening all, weekly update here, nothing too exciting to show as most of the work over the last few days has gone into getting the undercoat down. The silver splodges are going to receive some carefully applied masking fluid which will be removed later to create chips. I've still never really nailed this effect so trying a slightly different approach this time, fingers crossed! Once this is done I'm going to build up a "marble effect" over the black base which will hopefully provide a bit of life to the final coat that goes on top. I'm starting with the dark grey and green on top so there's going to be plenty of masking over the next few days! -
Eduard / Hasegawa 1/72 Liberator GR Mk.V Coastal Command
SaminCam replied to SaminCam's topic in Work in Progress - Aircraft
@Stew Dapple @elger @Doolie, thanks for the tips gents, I've started to play around melting some clear plastic sprue to see what I can do - I nearly got a teardrop using the eduard template trick but when I came to cut it off it pinged off to never be seen again, d'oh! Anyway, don't need them yet but can see the promise. Engines painted up now, these are out of the box and I think look pretty good - the close up makes the black wash look a bit clumsy but happy with them when viewed with the naked eye and installed in the nacelle: I'm also getting the wings prepared for some paint: wheel bays have been painted with alclad over matt black base and now getting carefully masked. The nacelles are glued on (no filler required) and the hole for the resin turbochargers made ready. I'll probably glue the painted engines in place, and mask them so that I can add the inlet lips before starting to paint the wing. One thing I have to remember is to mask the wing root where it inserts into the fuselage - this fits beautifully at the moment but I suspect will be too tight if it gets a few layers of paint on.- 227 replies
-
- 11
-
-
Eurgh, not fun, glad you're both on the mend now and looking forward to seeing some of the B17 taking shape. I've been lucky and dodged covid so far (touch wood), second jab next week but if I'm going to get it will be when snotty nosed students start to return in the autumn and we'll (hopefully) be able to start teaching them in person again...
-
Framing is looking great Rob! Hope you're not feeling too ropey?
-
Eduard / Hasegawa 1/72 Liberator GR Mk.V Coastal Command
SaminCam replied to SaminCam's topic in Work in Progress - Aircraft
Thanks! Yep, just saw you have used a "gem" as a landing light and will give it a go, I've found a pack that goes down to 1.5mm and comes with a set of tweezers and a dotting pen! -
Eduard / Hasegawa 1/72 Liberator GR Mk.V Coastal Command
SaminCam replied to SaminCam's topic in Work in Progress - Aircraft
@LorenSharp asked about the landing lights on the Eduard/hasegawa kit and I've taken some snaps of the instructions and circled all of the lights in red (sorry the photos aren't great). This page shows the the coloured lights between bomb bay doors and leading edge light on port wing. Inset bottom right also shows the tip lights being removed I think: This one has light by wheel bay and on undersides of wing tip: And finally there are blue lights shown at back of spine and on tail plane: Talking of lights does anyone have any good hacks for lights/lenses? I was looking at cheap sets of shiny gems for decorating fingernails (that'll confuse the algorithms) but couldn't find any which weren't faceted. Also wondering about whether you could make little lenses from heated clear sprue or plastic packaging somehow... I'll let you know if I get anywhere! Finally, bit of extra detail added with ammo belts in the dorsal turret (inspired by @Navy Bird and @LorenSharp) light was lousy for photos but you get the idea: -
Eduard / Hasegawa 1/72 Liberator GR Mk.V Coastal Command
SaminCam replied to SaminCam's topic in Work in Progress - Aircraft
@Navy Bird's nose gear was definitely funkier! I cheated a little bit by adding some plastic between the main part of the gear and the wheelbay roof so the weight is carried in compression through a fairly sturdy piece of plastic rather than bending, cantilevered off the bulkhead. Either way you can't see much of it so build straight out of the box would have been ok as well. I'll have a look at the Eduard instructions this evening and check for lights, I think there are some others on the wings in addition to the wing tip lights. I'll take some snaps and post what I find. -
Eduard / Hasegawa 1/72 Liberator GR Mk.V Coastal Command
SaminCam replied to SaminCam's topic in Work in Progress - Aircraft
Thankyou! I've been following your PB4Y2 and taking lots of inspiration along the way, it's a beast! The interior is awesome and browsing through again it has reminded me to add some ammo belts to the turrets, a job for this evening if I can get some time at the bench. This comment goes well with @Jackson Duvalier's at the top of this page about the "period-correct smells"... 😆 -
Eduard / Hasegawa 1/72 Liberator GR Mk.V Coastal Command
SaminCam replied to SaminCam's topic in Work in Progress - Aircraft
Thanks gents, welcome aboard! Afraid things move pretty slowly on my builds but trying to keep this one updated as I go. Thanks Rob, you're B17 is looking great and can't wait to see the B24 take shape. Over the weekend I started painting up various bits and pieces and I'm now pretty much there with the gun turrets: These are painted using the same techniques as the rest of the insides - undercoat of alclad aluminium sealed in with gloss varnish, coat of hairspray, a few little dabs of masking fluid, top coat of dark green, then maskol removed and bit more chipping done with water and an old brush. I find the combination of a bit of masking fluid and the hairspray chipping works quite well as you get different types and sizes of chips. No idea if this is accurate but certainly makes these parts look more interesting. The guns were hand painted with black then dry brushed to get the metallic look. Finally it gets brought together with a flat varnish coat on top. The "domes" (can't think of a better word) which go on these have been masked and frames painted inside so they are ready to be added too. I'll glue the dorsal turret in place on the fuselage to fill the hole but the rear turret can probably wait to be added later so I don't snap the guns off! I've already started the engines as well so might have another update later in the week. Cheers!- 227 replies
-
- 15
-
-
-
Eduard / Hasegawa 1/72 Liberator GR Mk.V Coastal Command
SaminCam replied to SaminCam's topic in Work in Progress - Aircraft
Afternoon all, the Liberator is gradually moving forward and I think I'm almost at that stage when you get some external paint on and it suddenly comes too life! For now though I have been getting the little sub-assemblies like gun turrets and undercarriage together, ready for a shot of paint. The turrets go together without too much hassle though in places the instructions are a bit confusing (I'm sure some of the number call outs are wrong...) and the masks don't fit quite as well as usual for Eduard. I've also masked up the insides of the turrets so I can paint both sides. Undercarriage and engines are from the kit and look pretty good, the wheels and exhausts are improved with the resin sets: So with all these pieces ready I was able to do a realistic dry fit and balance test, up on its legs - this included the turret at the back which doesn't weigh much but has the biggest lever arm. I've pretty much packed tungsten shot from a shotgun cartridge in every space available, including the engine nacelles and... it's there! It's just about nose-down with propellers, engines, front cowling and front turret still to add - these will all help as they are forward of the pivot point about the wheels. Afraid I don't know how much weight all of this added up to (must be approaching 100g though) and also the shot is distributed all over the place in the spots which can't be seen - realised too late I should have done a version with the "chin" as this would be a great place to stash some weight right at the front! Next I'll get the little bits and pieces painted and then give the wings a shot of the rubber black undercoat. Thanks for stopping by!- 227 replies
-
- 18
-
-
Great work Alan, this is awesome!
-
Eduard / Hasegawa 1/72 Liberator GR Mk.V Coastal Command
SaminCam replied to SaminCam's topic in Work in Progress - Aircraft
Evening all, I've made some good progress on the fuselage and it's now got a black base layer with seams pretty much all filled. The last few days I've started on the wings and engines so airbrush away and back to glue, sprue gue and sand paper. First step was to pack some more tungsten shot in the engine nacelles, glued in with two part epoxy and a bit more security provided by plasticard backing: I've also ground away the turbocharger duct with a little power tool (would be tough without): The resin turbochargers are really nice and worth the effort I think. On the other hand I'm not convinced the resin replacement engines are anything special so probably going to keep it simple and use the kit ones. Here's where I've got to this evening: the wings are glued together, I've got one nacelle attached and the production line for the rest is up and running. The fit is pretty good throughout, I've been using a bit of sprue gue and elbow grease on the seams and don't think there's going to be much, if any, filler required. Thanks for dropping in, enjoy the rest of the weekend!- 227 replies
-
- 18
-
-
Eduard / Hasegawa 1/72 Liberator GR Mk.V Coastal Command
SaminCam replied to SaminCam's topic in Work in Progress - Aircraft
@bigbadbadge@Cookenbacher @(ex)Sgtrafman @Fritag @Navy Bird, thanks all, the encouragement is greatly appreciated! I've been on a lovely getaway to Northumberland for the last week so not much progress to report. Before going I worked away at the joins on the nose section and got them as good as I could. Having sanded a fair bit of plastic away I also did my best reinstating rivet holes with a micro drill and rescribing panel lines. You can see in the photos below that it's looking ok though the fit along the magnet held panel line has worked out better on one side than the other... Since getting back I've added the fuselage windows - these fit well once you realise the edges are sloped slightly so you have to get their orientation correct. Again, these have been masked with the super helpful Eduard mask sheet. I've also dry fitted spare parts over the big hatches on the side and squeezed on the bomb bay doors in the closed position to protect the paint job inside. So this is the state of play this evening. It's got its "stealth" coat on - a thin layer of tamiya rubber black which I find is good for showing up imperfections and provides a good base for a mottled preshade which also doesn't mind being masked later on: Tough to photo at this stage but hopefully I'll have some more progress to report soon. Thanks for dropping by! Sam- 227 replies
-
- 17
-
-
Looking good Alan, the tape framing seems to work well. I love the blurred props and the shot below has convinced me I need there to be a mosquito in my life in the not too far distant future!
-
Eduard / Hasegawa 1/72 Liberator GR Mk.V Coastal Command
SaminCam replied to SaminCam's topic in Work in Progress - Aircraft
Thanks Jackson, the masking on the outside is all down to the Eduard pre-cuts which come in the "Riders in the Sky" boxing. On the inside I do lots of little pieces rather than trying to get one single piece the right size and shape - works ok for me! This morning I made some good progress on the nose section. First I used a small clamp to squeeze the side walls together so they line up with the front greenhouse piece - I just about remembered to paint and fit the nose machine gun as well! As mentioned above I gave the mating surfaces a good clean before gluing as the slight tension in the sidewalls has to be resisted with just the nose piece. A few hours later it seems to have worked ok! The join isn't perfect but after bit of a fettling and whittling I should be able to get to something I'm happy with. The really good news is that the removable "lid" over the cockpit fits really well - the join will never be as good as if it is glued but it's not bad and it's a compromise I'm willing to accept to be able to see inside. For those who missed this earlier, the top section is held on with a neobidium magnet secured in place behind the instrument panel and a little strip of metal glued on to the top piece. This snaps together satisfyingly and when removed gives a pretty good view of the front section, cockpit and radio operators compartment behind. I'm actually surprised how well this all fits and shows how well engineered the original Hasegawa kit is. Overall it's not too difficult a modification to make and I recommend giving it a go if you want to see inside your B-24! Next, I'm back to sanding, filling and fettling; most of the fuselage is getting there but the newly glued area around the nose needs some tlc. Thanks for dropping by, more soon!- 227 replies
-
- 27
-
-
Eduard / Hasegawa 1/72 Liberator GR Mk.V Coastal Command
SaminCam replied to SaminCam's topic in Work in Progress - Aircraft
Evening all! Slow progress here as life starts to get back a bit more to normal (weddings, in person meetings at work, England get to a final in a major championship?!?!?!) but the fuselage is together and I'm starting to get on top of the seams. I've also masked inside and out of the transparencies ready for paint and once this is done will fit the nose glazing. This bit might be a bit tricky as the removable "lid" means that the nose piece has to hold the nose side walls in the right position. I've ordered some small clamps to help hold everything in place and will make sure to clear any paint off the mating surfaces so I get a good plastic to plastic bond. The magnetic lid looks like it will fit well but a little bit of fettling will be needed to make it as clean a join as possible - I'll get some more photos up once I've got it all working. ps @Jackson Duvalier I'm not sure how well appreciated the smell of acrylic paint and tamiya extra thin would have been over the North Atlantic!- 227 replies
-
- 18
-
-
This is great Rob, your dry brushing technique on the floors looks VERY effective 👍
-
This is just super Jonathan! Gorgeous photos and I really enjoyed following along with the fantastic WiP. Will definitely be using this as a reference when I finally get around to making my own 'A'
-
☺️ thanks Tony, sorry to hear the mojo is low and glad you are enjoying my fiddling around with endless slithers of plasticard! I'm not always happy with what I produce but enjoy the feeling of turning my brain off for a little while each day and in the end see something to like about each model I finish. I also definitely think that BM is a better way to waste your time online than ranting on Twitter or scrolling mindlessly on Instagram... as well as the fantastic modelling and photography I really appreciate the writing, which is so often interesting, funny and even sometimes heartwarming! Good luck with the next project, hope the mojo returns! Ps definitely agree with fresh air and exercise, I think more than anything that keeps me sane!
-
Eduard / Hasegawa 1/72 Liberator GR Mk.V Coastal Command
SaminCam replied to SaminCam's topic in Work in Progress - Aircraft
@bigbadbadge @TonyOD thanks gents, glad you like her! Fuselage halves together this evening, the fit is pretty good though will need the usual fill, sand, fill, sand, fill, sand on the seams. Will try and get an update together later in the week. -
Eduard / Hasegawa 1/72 Liberator GR Mk.V Coastal Command
SaminCam replied to SaminCam's topic in Work in Progress - Aircraft
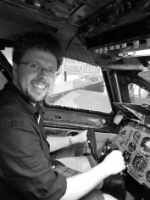
Afternoon all! I've finally finished the interior of the Liberator and thought I'd grab a couple of snaps in the photo box before she gets closed up. The last few bits were to add the open hatches in the rear compartment which are painted white to match the eventual outside colour, finish off a bit of weathering on the side walls in the front and paint and glue in place the front landing gear: Interior details in the nose - I'm hoping some of these will be visible as I'm going to have a removeable top nose section, held on with a magnet which you can see behind the instrument panel: Just spotted that I've missed a few wires on one side of the instrument panel - bit more work to do!. The details are a mix of the Eduard etch, quickboost oxygen bottle and my own scratch made bits and pieces: Working backwards the detail in the bomb bay is all provided by the Eduard etch set which go in easily and adds lots of interest once painted up: Finally, in the rear compartment I added fuselage frames, wooden boxes and the ammo belt along with the lovely yellow oxygen bottles. You can't really see much through the open hatches so I haven't gone crazy with weathering or adding wires to the walls but the things that are there definitely give a nice sense that the model has an interior: Hopefully I'll get the fuselage halves together before the end of the weekend and then I'll turn my attention to assembling the main wings. Thanks for dropping by!- 227 replies
-
- 27
-
-
Eduard / Hasegawa 1/72 Liberator GR Mk.V Coastal Command
SaminCam replied to SaminCam's topic in Work in Progress - Aircraft
@Stew Dapple @Harry Lime Thanks gents! Nearly ready to close up now so thought I'd better do some work on the front undercarriage. Inspired by @Navy Bird 's efforts I wanted to improve on the kit offering but instead of starting from scratch, which Bill has done brilliantly on his PB4Y-2, I whittled away with a drill and sharp knife to form the individual struts. Not perfect (not as good as Bill's!) but they'll do since not much will be visible - I also added a little extra bit of plastic so that the main strut carries the weight - dry fitted it all feels fairly sturdy (famous last words with all that extra weight?!?). Quick question: what do people think about colour of the landing gear? Should it be aluminium or perhaps white to match the undersides? Any ideas greatly welcomed!
