
caterhamnut
-
Posts
523 -
Joined
-
Last visited
-
Days Won
1
Content Type
Events
Profiles
Forums
Media Demo
Everything posted by caterhamnut
-

Osprey Eggplane or Nigel's throwdown tribute
caterhamnut replied to georgeusa's topic in Ready for Inspection - Aircraft
Found this thread a year late! Love these little models - managed to get most of them I think. Once I make a few MFH kits, I'm going to try one of these complicated beasties Actually, what I'm doing is making the Blackbird SR-71 version, with EVEN MORE detail with the intention of photoshopping it onto the USS Intrepid aircraft carrier that happens to sit under my apartment window here in NYC. If you have seen those amazing pictures where a chap has added Star Wars craft to 'real' scenes, you will know what I mean. -
Dave - guys, thanks so much. Really appreciate your time in giving me some more info. I think my gran was pretty ahead of her time! Just need to get MFH to make one of these in 1/9 I heard the sidecar was known as a Zeppelin ?!
-
Jaguar XJR-9...sort of. Not MFH!
caterhamnut replied to caterhamnut's topic in Work In Progress - Vehicles
Finally - a use for those PE saw blades! Very nice fine cut... ...next stage is to start filling in bulkheads with plastic card, before creating engine. Was going to do interior with door open, but I think removing the door would be too delicate...I'll do a basic interior that you may see through the windows... -
'40 Ford Custom Pickup (Revell 1:24)
caterhamnut replied to wimbledon99's topic in Work In Progress - Vehicles
Thank you sir! -
Hey bike people Can any of you identify either of these bikes in these very old pictures - they are my Gran and Grandad, way back in the day! I'd love one of these bikes to be available in model form.... Many thanks, Angus
-
'40 Ford Custom Pickup (Revell 1:24)
caterhamnut replied to wimbledon99's topic in Work In Progress - Vehicles
Great colour - how did you remove the chrome? cheers -
Jaguar XJR-9...sort of. Not MFH!
caterhamnut replied to caterhamnut's topic in Work In Progress - Vehicles
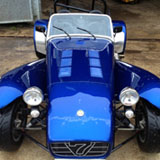
Hi Carl - I so have a problem... Already seen those cute resin cars on HLJ. Saw 'em, liked 'em - bought 'em They are cool - got both types of Caterhams for future fun. Also some other 'classics' - like Escorts, MG's, VW etc etc! -
Another WIP. I need a fun project I can easily move around - circumstances here in NYC mean I have to keep ferrying models around to work on them either at home or the office - this one will be easy to do that with... Really like those cartoon style cars - in fact I draw my own.. ...and sometimes play with Photoshop... ...playing with proportion. So I like this little kits that came out of Japan in the 80's and 90's. Here is a little Williams F1 car in the same style... So the plan with this Jag is to make it, but add loads of detail - split the panels, show the engine etc. That's the plan - lets see how it goes Then once done, I might play around with 'inserting' the model into 'real' period photos with some photoshop trickery.... They also do egg planes - but that is for a different forum!
-
Caterham R500 Custom Build - 1/12
caterhamnut replied to caterhamnut's topic in Work In Progress - Vehicles
Different car - similar story -
Caterham R500 Custom Build - 1/12
caterhamnut replied to caterhamnut's topic in Work In Progress - Vehicles
Wow - that is crazy - totally scratch built! Not a fan of the additional 'bodywork' and flared nose cone, but you can't fault the modelling.... Mine is pretty crude in reality - bits of plastic and filler - not machined metal or very 'sharp'... -
Caterham R500 Custom Build - 1/12
caterhamnut replied to caterhamnut's topic in Work In Progress - Vehicles
The 3 Tamiya kits come with two different prop shaft tunnel covers for the interior. The classic and 'BDR Special' versions come with an older version, where the central tunnel is simply a curved aluminium panel, covered in carpet - the hand brake is located under the dashboard on the passenger side - as seen on this kit. The JPE Kit comes with a squared off, leather covered tunnel top - as seen on all more recent Caterhams - which is what I need for my yellow car. However the kit version doesn't have a handbrake - which I need. At the top is the aluminium tunnel in the kit - next down is the cover that comes with the JPE. I cast a copy of this and fashioned a handbrake section, complete with leather gaitor. I then used this to make another casting for use on my models - in this case just the yellow car. The ali topped gear lever is a sewing pin. In situ... Blue car has powder coated ali tunnel - no hand brake, so I can use the original kit part (you can also see the different dashboard layout on this car) -
Caterham R500 Custom Build - 1/12
caterhamnut replied to caterhamnut's topic in Work In Progress - Vehicles
So - this is where I started in 2015! ...but I was not happy with that. I used some carbon decal to cover the dash after cleaning off the above detail, and re-did it with scratch parts. I made the toggle switches by flattening some wire rod Of course two different layouts... Both have Stack digital dash boards... Tiny rocker switches added... -
Very very nice - can I ask what paint you used for the blue?
-
Caterham R500 Custom Build - 1/12
caterhamnut replied to caterhamnut's topic in Work In Progress - Vehicles
Hi Rob, Yep - cage was a requirement for those race cars - at least I am pretty sure they were. As I mentioned, the cage for the lower race series is even cruder - much more upright. I don't even have a windscreen or doors on mine, let alone a cage I had thought about vacuum forming - the only way to get the thickness close to scale - a 3D printed component would have to be artificially thickened... What material would you recommend for carving in this particular case? -
Caterham R500 Custom Build - 1/12
caterhamnut replied to caterhamnut's topic in Work In Progress - Vehicles
Kit prices now are silly. Mark, the one you helped with wasn't black and gold was it? Had a friend in the club who was ex RAF pilot, pretty sure he was out there. He had a stunning black Caterhamnut, and had gold plated every metal part - windscreen surround, wheels, headlights - all the fittings. Looked amazing - very Lotus JPS. He had been able to do it as he knew a bloke with a massive plating tank, which they used to plate things like Temples and shrines!! So he literally chucked all the bits in the tank when something else was being plated....I'll dig out a picture! -
Caterham R500 Custom Build - 1/12
caterhamnut replied to caterhamnut's topic in Work In Progress - Vehicles
Obviously the wheels are totally different. Kit comes with minilite-style alloys with pretty normal tyres - probably around 14-15" R500 has 13" wheels, split rims and magnesium hubs, and ACB10 tyres - or slicks. Back when I started the kit I got a friend to draw up the wheel centres in 3D CAD ..and used a fancy milling machine to cut some centres. After testing in metal, we actually made them in styrene. Came out great - one of the jobs I have to do now I am restarting these kits is the rest of the wheels - rims and tyres. Not sure how yet. Probably 3D printer - maybe get some machined...we'll see. And finally, in order to bring us up to date - the dashboard. The plastic dash in the kit is nothing like the race car - which has a Stack dash, electrical cut-off switches and knobs etc etc - and of course each car was different. So I started by cleaning all the details off the model dash. The with the wonders of photoshop, I made some images of each dash and scaled it to the right size, stick them on the plastic dashes and started to make the detail, using wire, cut plastic tubes etc. And that, my friends, is pretty much where I had got to! One of the big hold ups was how to make the carbon race seats - they are only about 4mm thick in 1/1 scale, and rather curvy. I had no idea how I was going to make them - learn some 3D CAD and use a 3D printer - maybe now, 10 years later, the technology is more accessible. The comfy - but old style seat from the kit. So now, 12 years after I started, and about 10 years since I last did anything with them, I am starting again! Everything from now on is current work! The big jobs are: The seats! wheels & tyres interior decals - lots of race decals I started with the dash... -
Caterham R500 Custom Build - 1/12
caterhamnut replied to caterhamnut's topic in Work In Progress - Vehicles
Time for more details... The front screw is where the cage mounts - model and on the real car... Laptime sender... The indicators in the model are a very old style bent plate - the later cars have a more rounded shroud... -
Caterham R500 Custom Build - 1/12
caterhamnut replied to caterhamnut's topic in Work In Progress - Vehicles
I took some images from the photos I had taken, and by reducing them and scaling them in front of the model by eye, I made some 'actual size 1/12' pictures. I think I measured some 'hard points' on the photos and compared to the model until it was right... To make the cage I took some black plastic tubing and inserted coat hanger wire so that I could shape the tube into the correct curves - I made some MDF templates to fold the wire around, and it actually worked really well. Actually I think these cages are my fav part of the scratch built stuff, as they really make the car look like the race car - I also really like the shape of the SLR cage - the curves and the rake look really good IMO compared to the much more square Academy-type cages, where you can still use the windscreens.... The model cages fit in exactly the same way as the real ones - mounted at the back in the boot and at the windscreen mounts at the front. Had to make two, and they are interchangeable -
Caterham R500 Custom Build - 1/12
caterhamnut replied to caterhamnut's topic in Work In Progress - Vehicles
Of course not finished yet!! (those last few pics I took recently, hence the headlights etc - they come later in the WIP!) Some more 'finished' pictures from back then... And an old image I did to show what was used from the kit (the red bits) ok - on to the next stage - roll cages. The race cars have full SLR safety cages - the Tamiya kits come with a very poor chromed roll bar, that is way to low but what they had in Japan! So I would have to scratch build the cages... -
Caterham R500 Custom Build - 1/12
caterhamnut replied to caterhamnut's topic in Work In Progress - Vehicles
Right - so that was the engine bay pretty much finished... I'll post some real/model pictures - think I got it pretty close -
Caterham R500 Custom Build - 1/12
caterhamnut replied to caterhamnut's topic in Work In Progress - Vehicles
Brilliant! You'll be able to compare 1/12 to 1/1 I made a (much older!) Academy car as a wedding gift for an owner (from me) - didn't do the engine detail - or the decals (didn't now how to then!) - I should probably go back and touch up!! -
Caterham R500 Custom Build - 1/12
caterhamnut replied to caterhamnut's topic in Work In Progress - Vehicles
Had to make the fan on the front of the radiator. I think the round outer piece was part of a 35mm film plastic canister... You can also see the corrugated tube that makes up the intake manifolds that come up from an airscoop under the radiator (a fatal design floor on the first R500 cars - the real car this is modeled on scooped up cement dust on track from this intake that was positioned about 3 inches above the track surface - engine rebuild!) This piping is a bitch on the real car and equally tight and tortuous on a 1/12 scale model - but its accurate -
Caterham R500 Custom Build - 1/12
caterhamnut replied to caterhamnut's topic in Work In Progress - Vehicles
Meanwhile in blue-car world... Although it had the same engine, the layout of wiring and pipes is different... -
Caterham R500 Custom Build - 1/12
caterhamnut replied to caterhamnut's topic in Work In Progress - Vehicles
Cheers guys... Right - bit more piping - radiator hoses... More wires, radiator and Apollo tank (oil swirl tank in front of the cambelt cover) top rad hose and coolant expansion tank. In fact that coolant tank and the brake fluid reservoir are the only 'kit' parts in the engine bay - everything else is scratch built. ooh yes, and the blue rag around the top of the dry-sump oil filler neck Of course at the same time, I was also building the second engine for the blue car...you can see details like dry sump pump belt on this shot... No Webers on these cars - had to make roller barrels... Now carbon airbox that goes over the roller-barrels. I was doing this model 'by-eye' - from the photos - so not able to scale much - took a few goes at this bit to make it fit and look right... ...but quite pleased with the result - I faked the carbon look by spraying grey primer very lightly through some fine mesh - had no idea you could get carbon fibre decals!! It works... -
Another scratch build ... Lola T70
caterhamnut replied to albergman's topic in Work In Progress - Vehicles
I think those two 3/4 shots of the car before it had the complete covering of color look beautiful - almost like barn finds. Brilliant.
