-
Posts
965 -
Joined
-
Last visited
greggles.w's Achievements

Obsessed Member (4/9)
2.6k
Reputation
-

1/72 - SAIMAN 202M by Kora Models - released - new boxing
greggles.w replied to Homebee's topic in The Rumourmonger
Anyone here got a spare set of the civilian decals, specifically for the cream coloured racer No.2 I-SEPI? I work in 1/48 & have purchased one at that scale by Italian Kits, but looking to add it to my civil racers. Seeking a set of decals to scan & a scale up … or maybe someone can scan for me?? thanks, g.- 11 replies
-
- 202
- Kora Models
-
(and 1 more)
Tagged with:
-

1/43 racing driver figures and related, white metal
greggles.w replied to Farmer matt's topic in Vehicle Discussion
Hello Mr. LDM! I can attest to the charming nature of these. There is one currently piloting my Short Crusader… I think he looks the part, even if others refer to him as ‘the malteser!’ @Courageous While waiting impatiently for that to be built he moonlighted briefly for test flights in other projects … And more recently two more are saddling up for a future flight in my Ambrosini… I like them for their period simplicity, appropriate to interwar golden era aviation: lack of headsets in flying helmets, and torsos unencumbered by life jackets, oxygen tubes or five point harnesses. 👍 -

Percival Vega Gull RAAF / Racer #49
greggles.w replied to greggles.w's topic in Work in Progress - Aircraft
No, I did not finish .. But also Mark - No, I did not forget !! The pendulum of family fate, having swung into the dark & then cruelly hung defying gravity, seems ready to leisurely swing back to allow me to re-engage in the near future! However when I do I will be superseding this thread. One key reason being that I well & truly missed the deadline for inclusion in the Club’s comprehensive RAAF 100th anniversary display. Thankfully @Romeo Alpha Yankee stepped in and made up for my shortfall, and the display was complete - and a great success. So I will be jumping straight to the civil air race livery. As I am still not yet set up to build again I have dipped back into research re the racer, and I need to account for new discoveries. A search on Trove delivered some hundreds of contemporary articles in regional and major state newspapers from across Australia reporting on the Race. I now have some extra gossip to relay re the pilot & his wife, the machine, the race & the controversies arising, together with a range of useful additional photos of the aircraft & crew, albeit at reduced newsprint resolution. More importantly the incomplete information I posted at the start of this thread is muddled. Sometimes just embarrassingly so - I misidentified a passenger as pilot - but in other ways more significantly. Not least: I have now discovered that I was headed toward painting the plane the wrong colour!!! I will post a link here as soon as I launch the new thread … Thanks for your interest -
Arrived today from Brazil! Christen Eagle I. Complete in original box, decals, Vacform canopy (& matching resin buck to cast a replacement), all the bits & bobs and typed paperwork. Beautiful lustrous castings … Happy future project …
-
greggles.w started following Round the Pylons , Lawrence Designs and Models (LDM) info. and Bugatti racer Special Hobby 1/48th.
-
Here’s another angle on this thread: just where did these kits end up? Well for starters, I have few sourced from such diverse places as: - Knight Twister, from Japan - Caudron C.460, from USA - DH.82A Tiger Moth, from UK - Pitts S2.A Special, from Japan - & now on order from Brazil, Christen Eagle I (all relocated/ing to Australia)
-
Sorry for the delayed response - yes of course, please do!
-
Sharing my joy with fellow LDM aficionados .. I have sourced an LDM Christen Eagle I - similar to that featured in this thread - from all places .. São Paulo Brazil! Payment processing & postage to Australia imminent. So soon I will be either a happy owner of this colourful bird, or otherwise an excellent case study in how dupes get scammed on the internet …
-
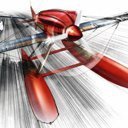
Hello all, another notch forward, this time it's the tail feathers. The kit horizontal stabilisers have squared-off joining faces, which do not match the tapering curve of the rear fuselage. I don't have definitive plans to measure against, but it seems to me the kit parts also have some excess at that end with the intent that they can be ground down to suit ... at least this is what I elected to do. A little bit of cardboard scaffolding to suspend the parts in place ... ... which allowed for a 'bendy rule' strip nestled into the curve of the junction as above, so an offset line could be marked. Top left below shows that discrepancy between the squared of part ends & the extent of curve that they need to interface with. Excess ground off (bottom left) then a thin sheet of styrene rolled into the curve for the fairing, drilling & embedding of brass fixing pins ... After that, back in the jig to fix in place ... A little bit of pressure needed to get the styrene fairing to follow the curves. There's still a bit of gap filling to be done to finalise the works. Full disclosure - I suspect these could be more accurately mounted a little further aft, and I think the relative proportions of horizontal to vertical fins may not be true. However in the absence of definitive detailed drawings I elected to settle for a compromise that utilised the kit parts & best suited my subjective eye. That cowling & canopy have eaten up my scratchbuild budget for this project!! All the control surfaces had panel lines re-scribed too. So the list of 'outdoors' tasks remaining is getting very short now!
-
A most enjoyable & comprehensive read! That said, it is an unfortunate cause-for-pause to bring things to an intermission. I do understand the sentiment, I dropped & damaged my Auster Autocar fuselage - worked on for many months - just as I was applying what I believed would be the penultimate coat of primer. My reaction was just as yours - back in the box for you!! I have only recently had enough emotional detachment to let me pull it out & start repairs, several months later! I have a Dora Wings Vega Gull underway (yes, yes, I know, I know) & have similarly been intrigued & impressed by the kit’s thoughtful parts breakdown. Though I too have tinkered a bit with the intent. Glad to have belatedly discovered this one, now following along. ps, not sure if you inflict F’Book on yourself, but if so, then you may be interested in this group … https://m.facebook.com/groups/1028631820490934/
-
Thanks David, Ian, Terry - nice to share the madness! While waiting for putty to cure I made a start on the cockpit, first task being to address the monumentally thick (+2mm!) resin slab sides (top left below). So I rigged another 'bendy rule' guide thingy from layers of thin & flexible styrene, that fixed with a bit of double-sided tape to the outer fuselage (bottom left below). This gave a consistent offset thickness which guided scribing down into the top edge. I then ran a drafting pen nib along this groove to flood it with ink, followed by a light sand across the top to leave guide lines ... Thereafter much grinding & sanding & removing bulk from the inside out, up to & including the thickness of the line until the black disappeared & the cockpit tub sloshed with a resin-dust slurry ... That looks a bit more plausible! A little nose bridgework done since last update & cowling top plate added - with inset edges to house canopy. Floor to be added to cover that mess. Now @Courageous Stuart, as you identified, the principle elements to fill this cockpit tub - now with additional shoulder room - are the pilots! Meet Giorgio Parodi & Sig. Frassinelli. I've not found much - not even first name - on Frassinelli down the back there, but Parodi up front was just the type of swashbuckling Golden Era sports pilot we like! Amongst other things he was a founding partner of a motorcycle company in the interwar period, one that took the name of his business partner, a certain Mr (Moto) Guzzi!! Parodi flew in both world wars, in the latter flying Breda & Stukas, and lived on into the 1960's. Not so easy to find suitable pilot figures for this era. We of course need the distinctive flying helmet & goggles, but without all the WWII clutter of integral headphones, oxygen masks, lifejackets etc etc .. even shoulder seatbelt straps seem superfluous for many racers of this period. After much fruitless searching, my go-to for a pilot of this era are from this range ... Same era, but racing car driver figures, nevertheless suitably dressed & equipped. They are scaled 1/43 but their dimensions fall within the typical body 'bell curve' for 1/48. Here just for you Stuart, a very rough & ready mockup, each perched on a tuffet of blue-tac .. hmmm, seems I've a little scratch in the canopy there to deal with later ... sigh!
-
I shall introduce you next post to two ‘signori sprezzatura’ (& that’s not Italian for malteser!)
-
No Ian ....... not yet 😉. I have thought one of those would be just the thing for custom masks, say for registration lettering ... Only one piece to report on, so best .. get to the point. Spinner! I'm planning an in-flight display, as is my preference, and as with similar past projects I will forgo propeller blades & just present a highly polished (spinning reeeaally fast) spinner. The Ambrosini seems to have acquired a progression of propellers in it's short active life, including some like so, with the lumps & bumps of an exposed propeller hub .. Those warty things don't work so well with the display intent, so I'm selecting this one-piece prop with spinner ... To fabricate this I laminated up no less than five lengths of evergeen styrene tubes, sleeved by their telescoping internal / external diameters. Not sure why there is a comprehensive range of tubes available, but not similar range of rod? At the centre a brass rod, and the tube projections were varied to sleeve into the nose .. Buongiorno Pinocchio!! After lopping the excess off, the brass was slipped into the drill chuck - my 'lathe' - and turned to shape. The bulk form is now done. There's a bit of fine surface filling to be done to address little pits & divots at a few of the 'tree rings' where tubes weren't fully welded together. Also need plug that little hole & bring the tip to a point ... This job shuffled up the task list as it's one which needs shaped in context with the full-length form, fuselage - canopy - nose - spinner. To this end, again, the vacform buck + styrene draw is most helpful. I've come to realise that as I next work up the cockpit detail, the opening will be closing up & I'll no longer be able to insert the buck. So I'm seeking to clear any tasks such as this first ...
-
Hi Dave, it’s Tamiya Epoxy Putty ‘Quick Type’. I’m finding it very user friendly, workable with a little water at hand for whenever it gets a bit sticky. Most times I’ve used it in fairly heavy applications, so I’ve conservatively left it 18 - 24hrs before sanding, so I can’t actually attest to how ‘quick’ this ‘type’ is. Look for it in the green box seen at back of this earlier image ..
-

Dewoitine D.500, French Air Force 1937
greggles.w replied to Dave Slowbuild's topic in Ready for Inspection - Aircraft
Nicely done Dave, lovely silver sheen. Congratulations. Most impressed by your judgement re improvements - especially that this included removal of detail for a more ‘true’ outcome. -
G'evening & thanks all for the enthusiasm for the canopy! That's the plan Ian .. which reminds me I keep forgetting to try a strip of that aluminium tape on a clear PETG offcut to see how the adhesive face looks when seen through the canopy from the other side. That may change my plans ... OK, well then, here you go ... At last post I had anchored the bulkhead (bedhead?) at the back of the cockpit & then applied epoxy behind. This doubtless could be done more efficiently, or at least more elegantly ... I'm afraid cake frosting has never been my skill! A reminder that back at an earlier stage I had been thinking ahead to this moment, affixing a styrene 'spine' to the raised ridgeline profile, coordinated with the emerging canopy ... ... the theory being to sand back the epoxy until the tope edge of this guide appeared. Well, as evidenced by the second helping of cake frosting seen below, it turned out that guide was .. misguided! Too shallow .. As seen above, the canopy buck overlaid with the spare opaque styrene draw stands in nicely for the clear canopy, allowing me to keep that at a safe distance from all things scratchy. With Ambrosini's lovely sweeping ridgeline profile now formed in 2D elevation, a centreline was drafted for me to work to & protect as the remaining 3D form is extracted from putty ... I elected to start forming the upper 'hump' first. To define a line to work down to I rigged up this flexible 'bendy rule' from brass rod, eyeballed the desired subtle curve from photos & marked on the surface ... After quite some tentative work the upper hump was pinched in, say 80% done, then tape to flip the guide line ready to finish off the lower portion that merges into the fuselage ... And after yet more tentative work I think that starboard side is now finished in bulk. Here I'm stopping for now. I'll return to bring the port side up to match when refreshed, hopefully soon.
- 107 replies
-
- 11
-


