Jump to content

Search the Community

Showing results for tags 'Trimaster'.

  • Search By Tags

    Type tags separated by commas.
  • Search By Author

Content Type


Calendars

  • Community Calendar
  • Group Builds
  • Model Show Calendar

Forums

  • Forum Functionality & Forum Software Help and Support
    • FAQs
    • Help & Support for Forum Issues
    • New Members
  • Aircraft Modelling
    • Military Aircraft Modelling Discussion by Era
    • Civil Aircraft Modelling Discussion by Era
    • Work in Progress - Aircraft
    • Ready for Inspection - Aircraft
    • Aircraft Related Subjects
  • AFV Modelling (armour, military vehicles & artillery)
    • Armour Discussion by Era
    • Work in Progress - Armour
    • Ready for Inspection - Armour
    • Armour Related Subjects
    • large Scale AFVs (1:16 and above)
  • Maritime Modelling (Ships and subs)
    • Maritime Discussion by era
    • Work in Progress - Maritime
    • Ready for Inspection - Maritime
  • Vehicle Modelling (non-military)
    • Vehicle Discussion
    • Work In Progress - Vehicles
    • Ready For Inspection - Vehicles
  • Science Fiction & RealSpace
    • Science Fiction Discussion
    • RealSpace Discussion
    • Work In Progress - SF & RealSpace
    • Ready for Inspection - SF & RealSpace
  • Figure Modeling
    • Figure Discussion
    • Figure Work In Progress
    • Figure Ready for Inspection
  • Dioramas, Vignettes & Scenery
    • Diorama Chat
    • Work In Progress - Dioramas
    • Ready For Inspection - Dioramas
  • Reviews, News & Walkarounds
    • Reviews
    • Current News
    • Build Articles
    • Tips & Tricks
    • Walkarounds
  • Modeling using 3D Printing
    • 3D Printing Basics
    • 3D Printing Chat
    • 3D Makerspace
  • Modelling
    • Group Builds
    • The Rumourmonger
    • Manufacturer News
    • Other Modelling Genres
    • Britmodeller Yearbooks
    • Tools & Tips
  • General Discussion
    • Chat
    • Shows
    • Photography
    • Members' Wishlists
  • Shops, manufacturers & vendors
    • Aerocraft Models
    • Air-craft.net
    • BlackMike Models
    • Bring-It!
    • Freightdog Models
    • fantasy Printshop
    • Fonthill Media
    • Hypersonic Models
    • Iliad Design
    • KLP Publishing
    • L'Arsenal 2.0
    • Litaki Models
    • Marmaduke Press Decals
    • MikroMir
    • Paulus Victor Decals
    • Red Roo Models
    • RES/KIT
    • Sovereign Hobbies
    • Videoaviation Italy
    • Wingleader Publications
  • Archive
    • 2007 Group Builds
    • 2008 Group Builds
    • 2009 Group Builds
    • 2010 Group Builds
    • 2011 Group Builds
    • 2012 Group Builds
    • 2013 Group Builds

Find results in...

Find results that contain...


Date Created

  • Start

    End


Last Updated

  • Start

    End


Filter by number of...

Joined

  • Start

    End


Group


AIM


MSN


Website URL


ICQ


Yahoo


Jabber


Skype


Location


Interests

Found 8 results

  1. Hello folks, Joining in with what I think is the youngest, most well known and often built kit of the fantastic array to be seen in this GB, Trimaster (nearly*) 1/48 Ta-152H-1. According to Scalemates: - it first came out in 1989 under the Trimaster brand (reference MA-9). - the first reboxing was made by Dragon with ref. 5501 in 1991 - there have been multiple repops since by Dragon (DML), Hasegawa, Italeri and most recently Hobby 2000. This boxing from 2021 is from Dragon and part of a "Trimaster collection" (ref. 5577). *nearly because the original included white metal parts for the exhausts, gear legs, engine braces and a pilot figure. A new plastic sprue (G) has replaced these - except for the pilot figure (none included) - in the first Dragon and later boxings. Developed in 1944 by Kurt Tank, the father of the Fw-190, the Ta-152 saw service in the very late stages of WWII and was produced in limited numbers. According to different sources it's varying between 70 en 167, of which possibly no more than a dozen were the most advanced H-O and H-1 versions, recognizable at their larger wingspan of 14,5 m. The rest were C models with a shorter wingspan (11m). It was powered by a 2550 cv Junkers Jumo 213E inverted V12 liquid-cooled engine (with compressor and water/methanol "overboost" injection). The Ta-152H always fascinated me with its sleek lines and above all overly long peculiar "glider like" wings. In my opinion, it's one of the most impressive WWII fighters. It was able to reach an altitude of 41.000 ft. (with a piston engine!) and the only Luftwaffe propeller airplane able to intercept PR Mosquitoes flying high and fast. That tells a lot, doesn't it? The box contents consist of - 7 sprues (6 in grey plastic, 1 for the clear parts) packaged in 3 bags (1 for the transparencies) - 1 decal sheet by Cartograf - 2 small photoetch frets (including b.o seatbelts and back armor plate) - instructions folder Now let's have a look at the kit. The instructions include a paint chart but only referring to GSI-Gunze/Mr. Color - Mr. Hobby aqueous range: There is a diagram of the sprues. The instructions only show the scheme for Yellow 3 which I think was part of 7/JG301 but there are other markings available on the decal sheet. Not yet sure if that's the one I'll build: These impressive wings (30 cm wingspan), with seemingly slightly warped ends: Fuselage and one-part cowling (remember, it's a 1989 kit): Engraved panel lines, riveting. Very neat and impressive, especially considering the age of the kit and of the moulds: The engine is a small kit in itself. Separate panels are present to show the engine but you'll have to cut the fuselage halves accordingly: Instrument panel and side consoles with very crisply moulded detail (even if looking too pronounced): The clear parts are commendably thin but will benefit from some buffing: Photoetched parts: Decal sheet with markings for different planes: Out of the box, you can't say it's not a newly tooled kit. Looking on the internet, the kit somewhat suffers from the usual bad reputation of Dragon. I mean "great to look at, a lot less to build" because of bad fit and fiddly engineering. From the numerous builds I could find in our beloved BM forums, it does seem far from unbuildable. Have a nice evening. Cheers. Pat.
  2. I bought this kit from a colleague some 15 years ago, and it wasn't brand new back then. I am not sure why I bought it as I already had a bunch Doras - most likely it was the included Bombentorpedo ... The kit is actually, especially considering its age, pretty good: whitemetal for the landing gear, 3 small PE frames, metal tubes for the guns, the decals include all numerals (1 to 10) with different styles for a few of them. The decals were still fine. So I finally finished it in a somewhat Luft '46 cammo (and yes, I do know that the Reichsverteidigungsband does not match the badge on the engine cover, it just kind of happened and I liked the looks and so I didn't correct it. I mean: Luft '46!). Build out of the box with the exception of Eduard seat belts, as I chose not to use the included pilot. Minimum weathering. With the BT 400 on the side, used in my weapons collection and not on the actual plane: And with the other Fw190s and a TA 152: As always, thanks for looking and any comments welcome! Cheers
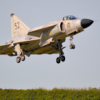
  3. I last built one of these, from the old Italeri kit, about 18 months ago. However, I was inspired to build another one after reading Axel Urbanke's excellent article on Ta152 operations in a recent edition of 'Luftwaffe in Focus', which also throws some more light on the tactical numbers and colours used by the various staffeln and stabsschwarm that operated the Ta152 within JG 301. Anyway, this is 'red 2' of 10. staffel, III/JG 301, built from the Trimaster offering of this kit. Didn't seem to go together as well as the Italeri offering, but that might just be me. Painted mostly with a mixture of Vallejo and Mig acrylics. Hope you like it Edited to add a few more pics in different lighting. I really must sort out my photography skills (or lack of them)...
  4. Hi All; Here's the latest off the bench. I enjoyed this one very much indeed, and am quite pleased with how it turned out. As all of them are of course, this one has a couple of flaws too, but nothing I couldn't live with. Critique welcome, I tried a different approach with the paints which one of the pics amply illustrates... Craft paint and Windex, who'd have thought... Except the red underside, the model was airbrushed with these (Pine Green was a nice match for RLM82 but the RLM83 required a mix). Cheers; Mark.
  5. Almost 20 years ago I started my Trimaster FW 190D-9 after buying an Eagle cal set of decals. The kit had been in my stash for quite a few years and was the best available kit of this aircraft at the time, then Tamiya bought their kit out so I thought why not build them both and do a comparison. Well life got in the way and they both sat in a box awaiting undercarriage and propellers. Earlier this year I got them out and had to decide what to do with them, use them as paint mules, scrap or finish them. Despite a better kit being available (Eduard) I decided to finish them off, so I used Eduard seat belts, spiral masks and resin wheels and here they are. Finished in Extracolour enamel paints they are a bit of a time capsule, but still interesting. Thanks for looking.
  6. Hello, The one on the bench. If any question about the captions in french, let me know ! Have a good day !
  7. Hello Folks, As my A-10 is currently stalled whilst I work out how to resolve a few issues I thought I would start on another kit. Just to stop the dust from settling on my workbench of course! Its the Trimaster kit of the Heinkel He162A-2 in 1/48 with a resin pit by Aires, etch from Eduard and Montex masks. I bought this kit and the associated aftermarket as a 'job lot' at Sword and Lance in Darlington in 2014. And thought it would be a nice quick and easy build to keep me occupied. It was the box picture and the resin bits taped to the lid that caught my attention (the opportunity to add extra details to cockpit and engine!). The box was still sealed in it's cellophane. Anyway, here is the obligatory in box shot... 'Only three sprues included in the box? hmm that's not much for your money' thought I and then I decided to have a look inside the little blue 'packing' box on the right, and these fell out... Sorry about the poor photo I didn't realise it was part in shadow until too late. I'll include better shots later in the build. Etched detail parts for the cockpit and engine, and a set of PE hinges (to assemble!) for the cowlings. There's also white metal landing gear, ejector seat, and even a cast nose weight shaped to fit in the nose! The remainder are bits of brass rod, wire, tube etc, for the other details. I wonder why the original owner bought the resin pit and Eduard etch? Speaking of which, here's the aftermarket... And a better picture of the resin 'pit before cleanup. Well, these things don't build themselves, so better get started.... More to follow later Al (Edit to correct typo's)
  8. Hello folks, I have finally finished my Heinkel. This is the Trimaster kit with Aires resin cockpit and some bits from the Eduard etched set. The kit included some etched and whitemetal parts, e.g. cockpit details, hinges for the engine nacelles etc. I know there wasn't a real need for the resin 'pit but I bought it as a second hand (unstarted) job lot (Kit, Eduard etch, Aires cockpit and montex masks) at Sword and Lance last year, so decided to use this as a test bed as this is my first time using resin, and etched components, and also the first time i've tried weathering, and I'm quite pleased with the reuslts. The markings are all masked and painted, with the exception of the serial number on the tail, the crest on the side of the cockpit, and the 'no push' markings. The decals were a bit on the thick side and the carrier film stands out a bit, but overall not too bad. Anyway here it is, comments welcome... Thanks for taking the time to look. Al
×
×
  • Create New...