Search the Community
Showing results for tags '3Dprint'.
Found 7 results
-
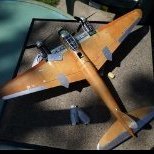
Ok so I’ve wanted to add one of these to my collection for ages and definitely fits the project cancelled brief. I also have a pretty goon set of plans courtesy of the December 1982 edition of scale models. And now the final pieces of the puzzle have fallen into place. I have a as pretty good ( when it works) 3D printer and have finally bitten the bullet and started using 3D CAD on my home PC ( first the free fusion 360 which is good but I have 20 years plus professional solidworks experience) and bought a Solidworks for maker’s subscription…. So the plan is first to CAD up the Saunders Roe then print it, build it and paint it. Still haven’t decided which scale, I have a scratch built Caproni campini as well as a Gloster whittle and a Heinkel 170 in the stash all in 1/48 so I’m leaning that way but it’ll be quite a large build so maybe 1/72 that said it’d be pretty cute in 1/144 hmm probably do that one anyway. Anyhoo CAD first then printing decisions. Once completed I’ll probably make the files and prints available for a modest fee.
- 105 replies
-
- 14
-

-
- Solidworks
- 3Dprint
- (and 1 more)
-
The dry painting with gold went quickly, and now the figure is already finished. For the background, I painted musou black on a piece of cardboard to get a rich black. I have noted that there is also a fleece from musou, it seems to be a good background for taking photos.
-
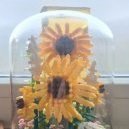
This was my first 3d printed project, I download the files for this and made the model smaller then the original printed version this is about 6" long.
-
 Hello The last 2 years, I was busy with this quite demanding project. And now I am pretty happy to finally share the result . I built side by side two Kittyhawk boxings, both in French Markings: a Mirage 2000-5F during Operation Harmattan (Lybia) in 2011, and a 2000D from Operation Chammal (Iraq/Syria) in 2015. The builds were far from "From the box" so to say... Kittyhawk... well is Kittyhawk you know. Interesting subject, quite nice details, but mistakes, lacks, or incomplete intructions. So I had to provide a lot of work to bring the models to the higher standard they deserve. It was mainly done with the help of 3D printing. Non exhaustive list of addons: - Exhaust: Reskit - Cockpit -5: Renaissance - Cockpit 2000D: 3D+Quinta - Seats: Grandmodels - Wing Tanks RPL541 542: FFSMC - PE parts: Eduard - Wheels: 3D - RPL522 ventral tank: 3D - Missiles & Pylones: 3D - GUB24: 3D - Decals: Uprise et FFSMC - Figures: Reedoak The Mirage 2000-5F: And the Mirage 2000D: The full WIP is detailed in 80 pages of french Cocardes magazine, with English captions. You can order it on their website. Hope you like them! Regards Romain
- 48 replies
-
- 109
-
-

-
- Mirage 2000
- Kittyhawk
- (and 1 more)
-
Started a 1/16 scratch build of the Cadillac Gage '34" turret' (aka T50) today, using the information from a visit to the Australian War Memorial Annex and obtained online from Armorama: 1/1: 1/16: With the correctly scaled spacer. Very rough at the moment. Depending on how this part goes, I'll build my car (APC) from East Timor, 1999, from the Mech Battalion.
- 99 replies
-
- 6
-
-
- Scratch print
- CAD
- (and 1 more)
-
 This is the Otis M Mecha which I bought the stl files from Industria Mechanica and printed. There were over 80 files in the set and it took me about a week to print including short-shots and replacements. It was was first serious sojourn into 3D printing with my Longer Orange but I enjoyed t and it was relatively easy to do, Anyhows having printed (bagged and tagged here under) and cleaned alot of the parts I came to the conclusion that I didn't want a standard Mecha with feet and wheels. I also had serious issues getting the pelvis printed. In the end I just took the best of a bad lot and milliputtied the gaps. This and the gatling gun were the most troublesome parts to print. I decided to do a static mecha in a bunker-AAA type setting. Above the packing materials form the 3D printer and an old lid of a pot. What you are looking at is the midsection of the mecha heavily modified to act as the body with retracted legs. All of the pimping and extra detailling has been coverd with a layer of MrSurfacer to even out some of the detail. I added alot and there is more to come in the form of piping and cabels. The cockpit was pretty dull out of the printer with little detail so I went nuts inthere adding in stuff most of which will be hidden .......... The vision port on top of the roof is the intake form a 1:48 Hurricane and most of the detail is just Evergreen. I will add more during the weekend as I am further along than what I show above. Regards Brian
 -
Pick up these two from a member of my model club who printed it for me. Cheers Tim. Its was printed at 50% and its still a 125mm tall, so a farly big figure. Started with dry fitted and then a coat of primer. There are a few bits that need a bit of extra work, there is a small hole in the body and the cape is not a great fit at the moment but it's thick enough to sand down to fit. Other than that ts a really nice looking figure and I will be painting with lots of weathering and grime.