Search the Community
Showing results for tags 'Bi-plane'.
Found 4 results
-
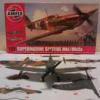
de Havilland Tiger Moth (A02106A) 1:72 Airfix The de Havilland Tiger Moth was one of the most important and widely produced trainer aircraft to have seen service with the RAF. It was designed by Geoffrey de Havilland himself in the 1930s and was based on the Gypsy Moth, suitably redesigned to meet Air Ministry Specification 13/31. In comparison to its predecessor, the Tiger Moth's wings were swept and repositioned, and the cockpits were redesigned to make escape easier. The airframe was also strengthened and the engine exhaust system was re-engineered. The Tiger Moth entered service with the RAF in 1932 and remained in use until well after the war. Over 8,000 examples were completed, and the type also served with the Royal Australian Air Force, the Royal Canadian Air Force and the Royal New Zealand Air Force as well as a great many other military and civilian operators. In service it proved itself to be ideally suited to its role, being easy enough to fly, but challenging enough to weed out weaker students without killing them. It was also cheap and easy to maintain. Further variants would be the DH.82C fitted with an enclosed hood for cold weather operations in Canada, and the Queen Bee, which was an unmanned radio-controlled target drone that resulted in a thinning of the herd of surviving airframes. Always popular with civilian users, many Tiger Moths found their way into private ownership after the War, with many maintained in flying condition to this day. The Kit This is a reboxing of a 2013 tooling from Airfix, and arrives in a small top-opening box with a painting of the subject matter on top, flying against a reddish sky. Inside the box are three sprues of grey styrene, a small clear sprue, the instruction booklet that is printed in colour on matt paper, plus a separate glossy sheet detailing the rigging process. Detail is excellent for the tiny size of the aircraft, and includes moulded-in features in the cockpit interior, and well-defined ribbing and scalloping of the wings, plus a couple of pilot figures, one of whom has no lower legs. There are a few ejector-pin marks that you may want to fill in the cockpit, although they may well be invisible once the model is completed. Construction begins with the cockpit, starting with a skeletal floor with rear bulkhead moulded into it, onto which the semi-conformal front seat and fairing, plus the rear seat are fitted, adding control columns into the sockets in front of each seat. You have a choice of installing the pilots at this stage, using the chap with complete legs in the front, and the shortened legs at the rear, both with moulded-in parachutes and leather flying helmets with goggles as befits the period. The port fuselage half can have the two crew doors cut away along the engraved line on the inside, and if you select this option, you should also drill out a pair of flashed-over holes under the cut-outs, which will hold the new door parts in place with less concern about knocking them off accidentally during handling. The same process is then carried out (or not) on the starboard fuselage, painting the cockpit interior once you have completed any surgery, and remembering to paint the inner faces of the open doors as required. The port fuselage has the two instrument panels and their decals applied, accompanied by the cockpit assembly, after which the fuselage can be closed and the seams dealt with in your preferred manner. The engine cowling is a separate moulding that is ostensibly complete, needing just an intake on the starboard side, and the exhausts from the inside, slotting into a groove that holds the carrier for the four stubs that merge into one at an angle. The two-blade prop is fixed in place by a pin inserted from the rear, taking care with the glue if you want it to remain mobile. Installation of the lower wing is next, which is a single part with a narrow strip that nestles into a groove under the fuselage to obtain the correct dihedral. The upper wing has a radiator insert added to the underside to prevent sink-marks due to over-thick plastic, and this has two sets of cabane struts installed to its sides, ready to join it to the fuselage with the two pairs of interplane struts further outboard. Both strut pairs have sections of sprue between them, and you are instructed to leave these intact until after the wings are mated, to ensure they are correctly oriented, and you are assisted with this by the letter L or R stamped into the sprue along with an arrow to designate the front, which is very helpful. The elevators are a single part that fits in a recess in the rear of the fuselage and is supported from underneath by a pair of diagonal struts, with a tail-skid slipped into the rearmost tip of the fuselage. The tail fin with integral rudder slots into a recess in the top of the elevator part, completing the empennage. The final steps involve installing the main gear legs, which consist of a bow-tie framework with stub axles, and a pair of supports that link it to under the nose cowling, fitting the wheels to the ends of the axle so that the model can stand on its own wheels for the first time, and at this stage you may want to sand a little flat-spot at the bottom of the wheels to give the impression of weight on the tyres. A pair of three-pane windscreens are found on the small clear sprue, and one is inserted into the depression in front of each cockpit cut-out, using a suitable non-fogging glue to fix them in position. The last step shows the sprues between the interplane struts being cut away and made good, at which point you may have to do a little touch-up painting if you use that technique. The main instructions don’t mention rigging, and we haven’t either yet. A separate sheet of diagrams shows where rigging will be required from the front, with letter codes indicating detail drawings from the side that will be useful in assisting you with placement, as will the box art and any reference material you happen to have at hand. Markings There are two entirely different decal options in this boxing, one in US service in England, the other in the antipodes in service of Australia. From the box you can build one of the following: 353rd Fighter Group, USAAF, Station 366/RAF Metfield, Suffolk, England, September 1943 - Pilot: Maj. Glenn E Duncan HMAS Albatross/NAS Nowra, Royal Australian Navy, New South Wales, Australia, 1950s Decals are by Cartograf, which is a guarantee of good registration, sharpness and colour density, with a thin gloss carrier film cut close to the printed areas. Conclusion The Tiger Moth is a small aircraft, but well-loved. This kit from Airfix might be a little over 10 years old, but the detail is excellent, and the build should be straight-forward. If you’re feeling “advanced”, you can add rigging to the build process, which should result in a well-detailed replica of this biplane trainer. Highly recommended. Review sample courtesy of
-
 Hi all. Our state show (QMHE for the locals) finished a week ago and as per usual I snaffled a few kits from the retailers, second hand dealer and the Sunday swap and sell. One of them was the 1/48 Academy Grumman F3F-2. Accurate Miniatures initially released the kit in 2000 and as most are aware they folded quite some time ago. Thankfully, numerous manufacturers have bought the moulds and those kits are now available again. Over the last few days I've painted and assembled the interior and engine. A small photo etch is provided that spruces the engine up with ignition leads. Followed by some painted and weathering it's come up a treat though I've made a tiny modification. The drive spline that attaches to the back of the propeller hub was a tight fit. I've installed some tube into the engine with an ID of 1.2mm and a corresponding piece with an OD of 1.2mm into the back of the prop hub. It allows a snug fit and aligns the prop with the centreline of the engine. The interior dresses up nicely with some paint and dark washes. I drilled the instrument faces so I could lay the decal onto the back of the IP. I sanded the IP thinner than it was but not thin enough as you can't really see the dial faces. For anyone building it I suggest laying the decals straight onto the painted kit item. Considering this a 23 year kit, everything so far has gone together effortlessly. More soon. Cheers, Mick https://i.postimg.cc/6qcMfT5G/IMG20230827123422.jpg
- 16 replies
-
- 11
-

-
- Grumman F3F-2
- Bi-plane
- (and 1 more)
-
Here is the progress of my build of Ansaldo SVA 5 by Fly 1/72
-
 Well, this is the first of my builds that I have posted on Britmodeller. I'm aware that it does not come up to the standard of most of that posted here but I feel that building it has brought me on as a modeller, and we all have to start somewhere! The kit I chose to make is by Czechoslovakian (as they were then) manufacturers KP (Kovozávody Prostejov) and represents an Avia B.534* fighter aircraft which was one of a small number which, as part of the Slovak Insurgent Airforce, provided air support to the 1944 Slovak National Uprising. A fine fighter in its day (in fact, I have seen it described as the apogee of bi-plane fighter design), following the Nazi dismembering of Czechoslovakia it had largely become a second-line aircraft by 1944 when Slovak patriots rose up against the puppet Slovakian Government. In default of more modern types becoming available, owing to large parts of the Air Force remaining loyal to the regime, the B.534s were nonetheless pressed into service. Based at Tri Duby (now Sliač) airfield in Central Slovakia, white S-12 was one of four B.534s which, alongside an initial complement of a couple of Letov S.328s and Emils, made up the full complement of the Combined Air Squadron. From comparison of the box art with that on Scalemates, I would say that this was probably a 1980s boxing. The state of the decals would certainly seem to support this! The moulding had quite a lot of flash on it too and in a couple of cases I had to make a call as to whether an aperture had been flashed-over, or part of the moulding had failed. I'm not sure in all cases I got that right! I loved the Slovak National Uprising markings; unfortunately the decals were very fragile and a bit yellowed. I decided to tolerate the latter if i could sort out the former. It took two coats of Hu49 varnish, but I managed it! This was my first foray into rigging (and stretched sprue more generally), but I wanted to give you all something to look at, so I thought I would give it a go. I have skimped slightly, but I think the overall effect is there. It was also my first foray into the use of vacform parts (in the form of the cockpit transparency, the kit one being missing). Overall, I think it went reasonably well, although my painting could certainly be better, and the positioning of some of the struts leaves something to be desired. But I enjoyed the build! Thanks for looking. * A IV I believe
