
Brigbeale
-
Posts
1,770 -
Joined
-
Last visited
-
Days Won
3
Content Type
Events
Profiles
Forums
Media Demo
Everything posted by Brigbeale
-
Time was spent tonight sanding back the filler on the upper wing to fuselage joints and re-scribing the panel lines. I also deepened the upper air brake panel lines in preparation for the painting and masking later on. Other panel lines were tidied up using some saw blades from Temu. They’re really meant to be in a holder, but they work just as well (if not better) in my hand. The sonar bouy panel had its corners sanded to match the fuselage as they poked up slightly when the panel was fitted flush. Some Vallejo plastic putty was applied around the canopy to fill a couple of gaps, especially round the base on the starboard side. I think the IP is the culprit there as the canopy seemed to fit nicely without it. The canopy still fits well enough though. I took a quick look at whether to fit the undercarriage now or leave them until later. I opted for the latter in case they get knocked off when the fuselage gets masked, painted and unmasked. Attention then turned to the armament. I built up the the 4 x Mk46 torpedoes and also the two Harpoon missiles (although I may fit the fuel tanks instead). I also made a start on the engines by hand painting the exhausts and fan blades with Mr Color Burnt Iron. Curious as to why Airfix say not to glue the centre shaft for the fore and aft fan blades, I cut the parts from the sprues to dry assemble one engine. The compressor blades can be turned with a painted object (cocktail stick), but, although it’s a nice trick, it’s not going to be noticeable - maybe if a pair of small motors were fitted, but otherwise………….. Other than that, the engines seem to be able to fit together quite well, but the forward cowlings will need to be either sanded smooth or re-scribed (which will be tricky to pull off). I could have a go on one inboard half and if it doesn’t turn out right, I could just refill the lines and sand them smooth.
-
Thanks @paul-muc for your contribution. I plan to add the tinting after I’ve painted the rest of the airframe. I’ve looked at various photos of the Viking and I do not see triangular windows in any of them. I can only find pictures showing the canopy as below. I have already planned to block the fuel probe hole off for painting.
-
I masked up the canopy tonight and added simple seat belts made from more masking tape. I left them in the natural tape colour so they’d stand out more once the canopy is on and painted. I also opened up the hole for the refuelling probe in the cockpit bulkhead. The main wings were sanded to level them with the fuselage as they still were slightly out of line and extended the lines from the wings across the fuselage. I re-scribed the lines for the radome as well. The canopy was fitted and wing to fuselage joints were filled over with a thin line of filler as there are none present on the real aircraft (according to various kit colour call-outs of the Viking). They will be sanded smooth later on and the panel lines reinstated in the filler.
-
The cable ties were cut free the next morning to see if they’d pulled the fuselage together correctly - which they did. The seam held together and all is good on that front. The seams were sanded to get an idea of how much filler would be needed. There was a large sprue gate on top of the fuselage in front of the tail fin which needed filing down (left by the previous owner). I decided the seams weren’t deep enough to warrant actual filler so I just thinned my Mr Surfacer and applied it around the seams. I also had to do the curved lines that I re-scribed under the radar cover. I realised that they would be straight lines. That was given a couple of days to cure (and I was otherwise engaged anyway) and tonight, I sanded the grey Mr Surfacer on the seams. It didn’t take long to get back to plastic and it revealed that there wasn’t really that much on the fuselage, but the leading edge of the tail fin revealed a definite grey line. The main wings and stabiliser leading edges were also filled just in case. These also revealed a grey line, so it was good job that I added the Mr Surfacer to them. I added the sonar bouy panel to fill the gap underneath, but first I did a check on the arrestor hook to see if I could fit it afterwards as the instructions seem to suggest that it should be fitted prior to the sonar bouy panel. It it fitted by slightly squeezing the sides in and locating two pins in their holes, so it can be fitted afterwards. It’s in the box for safe keeping. The maingear well/weapons bay ‘bulkheads’ were fitted which meant scraping the enamel paint away to get good adhesion. The main wings were cemented on. The starboard alignment slot needed a little tickle with a file to raise the wing to match the fuselage. The top joint seams are good but the ones underneath will need filling. The stabilisers were also fitted using an image to get the alignment right. It looks like a Viking now.
-
If needs must………
-
A thought popped into my mind earlier today which prompted me to read the instructions and clearly stated at the top is ‘if model is to stand on it’s undercarriage, place a suitable weight, such as plasticine, of 7 grams in the nose of the fuselage’. Oh well, we all have moments like that don’t we? No, it must be just me then! The kit’s previous owner had opened up the display stand slot. As I’m building it wheels down, it isn’t needed so I filled it with styrene card. The nose gear bay was fitted to the cockpit assembly and the black black paint was cleaned off the outer edges to allow the TET to bond the pieces. This assembly was then fitted into the starboard half of the fuselage once I’d scraped more enamel paint off the back of the bulkhead. More paint was scraped off the wheel/weapons bay panel and that was fitted as well. I thought I had an old fishing weight in my lead pot, but it’s disappeared (maybe in another model but I can’t remember which one). Rather than fitting small sections of lead sheet (off cuts from my stepson who’s a roofer so I have a good supply), I opted to find an old large nut from my shed. An M10 nut was found and it weighted in at just over 9 grams and it fits in nicely. Using white-tac, it was fitted in the nose. The MAD boom was fitted (I made a nick in the fuselage just above it to halt the flow of the TET and stop it getting on the boom. I also added a piece of styrene sheet above the tail hook opening (there’s a pin just above the opening which seems to be doing nothing so I fitted the card to that). Once I was happy that everything was where it should be, the fuselage was closed up and the tabs work a treat in levelling the fuselage halves. I spread the top a little and added copious amounts of TET to the tabs and clamped the fuselage shut again. The nose section, mid panel and tail were also cemented together but I left the fin for now. To close that gap at the bottom of the fin, I initially tried a pair of smooth pliers to squeeze the sides together but it needed a fair amount of pressure to hold it and for a long time to allow the TET to set. Tape wasn’t strong enough to hold it, so I opted for plastic ties. The first one as fitted, but I had to cut it off again as the section where the sonar bouy panel goes was also being squeezed in. I cut a piece of plastic tube to act as a spreader and re-tied it. That did the trick but a second one was needed slightly further forward.. I’d forgotten to re-scribe the rudder, so that was taken care of and slipped in between the fin halves and the fin seam was cemented. The fin now sits vertical. Returning to the nose, it was time to fit the IP, but I figured I could add some small individual net curtain weights into the centre of the M10 nut which was still visible. 6 went inside it each weighing 0.3 of a gram so an extra 1.8 grams was added (not counting the white tac). The top of the nut was sealed with more white tac and the IP was fitted which hides the nut. The wings were temporarily added to check the balance of the airframe in my triangular handle if my file. Success! The Viking will sit firmly in its nose wheel even when the MAD boom is extended.
-
I began tonight by painting the cockpit by hand as it was quite muggy weather wise and I didn’t want the airbrushes acting up. The pilots seats were initially painted black by the previous owner, so I just painted over the black using it as I base coat. Earlier today, I poured hot water over the starboard stabiliser halves to straighten them out followed with cold water to set the plastic. The same was done with the fuselage halves to correct the tail fin angle, but this (as I found tonight) had an effect on the fin root as a gap had opened up when the two fuselage halves were fitted together. A touch with a sanding stick may help. The stabilisers were cemented together, but one needs some attention to the elevator as the angled tip has a gap where the other one doesn’t. A bit of card should help out there. The lacking of alignment pins was making uniting the fuselage a bit of a pain, so I added 0.5mm strips to cross the centre seam to align the two halves. Another pair of strips was added to the panel between the nose wheel opening and the weapons bay. The fuselage halves were re-united again to check the tabs weren’t interfering with each other and the cockpit was tried again for fitment. The canopy looks good to the naked eye but under the camera, it looks like it needs a polish and a dunk in floor polish to bring back the clarity. I dry fitted the wings to the fuselage to see how it all looks so far. The Viking was balanced on two paint pots and it would appear that some nose-weight will be needed as it’s slightly tail heavy, but I’ll investigate that further tomorrow. It won’t be an problem adding some weight anyway. And I’ve had a couple of arrivals. The MH-53 is new and the HH60 is off eBay ‘as new’, bags opened but complete.
-
Thanks @TeaWeasel. I’ve started using a Dymo tape equivalent from Temu. It certainly makes a difference and it easier than trying to hold a flexible straight edge in one spot while scribing. Even though I’ve got about 80 built models under my belt, I am still learning better ways of doing things. Thanks Colin. I remember wanting one of these when I was (a lot) younger, but was never in a position to buy one. There’s a certain charm about these older kits and with a bit of work, they can build up to a decent looking model.
-
Other events have taken priority over continuing work on the Viking over the past few days, but tonight, I did get back to the bench. The re-scribing is all but done with just the radome/radar cover to do. I think I’d prefer to re-scribe that once the two fuselage halves are together, filled and sanded. I did manage a small amount of time during the week though, and in that session I cemented the two main wings together. They fitted together very well (given their age) and were left clamped to allow the TET to fully dry. When I removed the clamps, I found that the starboard wing had an upward curve to it on the outer end. I can only assume that the kit had been stored in a very warm loft and the parts have warped, so I will need a good session with boiling water and a flat bar to straighten things out. Tonight, I cut the stabilisers and elevators from the sprues to re-scribe them. The upper and lower halves for one side are also warped so they will be added to the parts for remedial work. Again, apart from the warpage, they fit together well. I also cut the already painted cockpit sections from the sprue to check the fit in the fuselage. The previous owner had painted the wrong side of the rear cockpit bulkhead so at least I only have to remove paint from the edges to get a good bind against the fuselage halves. I’ll just repaint the cockpit a lighter grey. The cockpit floor and bulkhead were cemented together and left to dry for a bit so I could trial the fitment in the fuselage. Once they were dry enough, the cockpit was placed into its location tabs - all good there so the instrument panel was placed in as well. I’ll fit it once the cockpit and fuselage are cemented in to close the small gap at the front. (The instructions say to assemble the cockpit fully before inserting it between the fuselage halves). The canopy fits beautifully so no remedial work will be needed there. The weapons/wheel bay assembly was trial fitted as well. This part steadies up the whole fuselage, but it again, has been painted by the previous owner so will need repainting as well.
- 16 replies
-
- 11
-

-
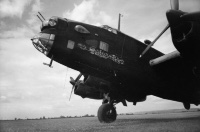
With the third of my many F-14 Tomcats in the cabinet and other life’s issues out of the way, it’s time to re-visit the work bench (once I’d cleared the detritus which accumulates when the bench isn’t in use). I was going to do a Hasegawa FA-18 Hornet (the prototype version) but the raised panel lines will need some tougher tape to be re-scribed. an order was made up on Temu and they’ve just arrived, but I already decided to build this Airfix S-3A Viking. I’ve had it for a while now (bought off eBay as a started kit). I’m pretty certain that all the parts are there and in a good useable condition. I did consider a Hasegawa one, but this kit gives a weapons bay as standard (which I will display opened and loaded). The first thing to do is get rid of the raised panel lines (the FA-18 has twice as many and they’re hard to see clearly as it’s white plastic). As you can see I the photos, this is also a white plastic kit but the raised lines are more prominent than the Hornet’s lines. The kit decals were quite yellowed, so they spent the week taped to the windows for the sun to clear them up. So, last night I started to rescribe the kit. Remembering the Airfix F-14 when I went to rescribe that white plastic, I feared the worst, but this kit seems easier to re-scribe (similar to the F-15 Eagle). Work progressed well on the upper and lower halves of the starboard wing with just a couple of slips until I got back in the swing of things with the tools. They will get refilled later on in the build. With that wing done (and the time shortened as it was just too hot to continue and my patience was wearing thin), I thought I should try a trial fit to see it’s there wasn’t an obvious reason why the previous owner had given up. The wing to fuselage joints have bigger gaps than I would have liked, but it’s nothing I can’t sort out with some card, filler, sprue-goo and anything else which might come to hand. A look at the fitment from the front revealed that the tail-fin is cocked to starboard, so some remedial work will be needed there somehow. To me the way the wings are shaped off the fuselage remind me of a HP Victor, but on a smaller scale and without the air intakes. Looking forward to this one.
- 16 replies
-
- 18
-
-

-

Tomcats, Tomcats, Tomcats…. F-14 Adventures
Brigbeale replied to Brigbeale's topic in Work in Progress - Aircraft
The Tomcat had the stabilators fitted and the airframe received a couple of shades of shading/weathering. That was given a day to dry and then a coat of Galeria flat varnish was airbrushed on. Once that was undercarriage and the doors were fitted and supported in the stand to allow the TET to fully dry. The outer weapons pylons were fitted as well. The AIM-7 and AiM-9 missiles were painted and fitted as per a photo found on the internet, while the previously painted painted Phoenix missiles were attached to their pylons and tail hook was painted and fitted. Some small additions with the paint brush were done and the canopy unmasked. So that’s three completed now. What to do next??? And with the other two Tomcats -
An Older 1/72 Revell A-7A Corsair II
Brigbeale replied to Brigbeale's topic in Work in Progress - Aircraft
I like your thinking. I did think of something similar for my hawks, but the way things are in my house, I don’t have enough wall space😕 -
Tomcats, Tomcats, Tomcats…. F-14 Adventures
Brigbeale replied to Brigbeale's topic in Work in Progress - Aircraft
Decalling the Tomcat started tonight which I decided to do numerically. Some of the call-out decal numbers are wrong, so close attention had to be paid The diagram for the upper surfaces is incorrect as it’s mirrored to what it should be (it shows the insignia on the starboard wing where we all know it should be in the port wing). I also went against the port wing insignia being painted upside-down (back to front) and fitted as it should be. I’m aware that photos exist of this F-14 in flight showing the oddly painted insignia, but my inner self wouldn’t let me fit it that way. I’ve seen 163 with the insignia the right way up, so I’m having mine as the insignia being corrected. Also the 164’s on the flaps do not look right in the diagram, so I swapped the position to the opposite side for each decal. The decals themselves went in very well, but I ran out of time and had to stop at the ‘No Step/Push’ stencils for the stabilators (I also forgot to apply floor polish to them,so I will add a couple of coats before I finish the decalling tomorrow. I’m happy with the progress so far…. -
Tomcats, Tomcats, Tomcats…. F-14 Adventures
Brigbeale replied to Brigbeale's topic in Work in Progress - Aircraft
I masked up the aforementioned areas for the application of black paint using a 1mm strip of Tamiya tape for the demarcation line around the nose/cockpit area. 10mm tape was used to overlay the 1mm tape and also around the upper and lower fins. Once that was done, cheaper household tape was used to block off the surrounding exposed surfaces to keep black overspray off. I went to airbrush Humbrol Acrylic Black paint onto the appropriate areas, but then I changed my mind and used Mr Color H55 Midnight Blue. I’ve used it before and it’s is practically black. The areas were unmasked once the paint had dried off and it certainly looks sticking against the grey. A couple of minor touch ups were needed where the paint bled under the tape in two places and I also went round with the paint brush on the engines, recessed wing fold panels and navigation lights (painted aluminium to receive the red/green paints). -
Tomcats, Tomcats, Tomcats…. F-14 Adventures
Brigbeale replied to Brigbeale's topic in Work in Progress - Aircraft
I went to Model Railway Solutions (my local model shop) this morning and bought a fresh pot of H-308. When I got home, I gave the paint a good stir and watched as the colour lightened as the lighter colour pigments detached from the bottom of the jar. I gave the paint a quick test by applying some to the side of the under-nose pod. There’s quite a difference in shade, which confirms the previous coat came out too dark, so a repaint was in order. Tonight I applied the replacement coat of H-308 and also painted the fuel tanks which got left out last night due to paint shortage. It was quite warm tonight, so the paint didn’t take long to dry. This enabled me to mask where needed and paint H-307 onto the upper surfaces. Then came the time to remove the masking tape and thoughts of the Airfix de-masking catastrophe came flooding back. But, the tape came off cleanly leaving the previously applied paint and primer where it was. The primer was painted on by the previous owner of this particular Tomcat, so I had no idea what primer was used). Next up, is masking the nose/cockpit surround and spine, both fin/rudder assemblies and both ventral fins to paint them black. I’ll wait for the paints to dry fully before pushing my luck too far. -
Tomcats, Tomcats, Tomcats…. F-14 Adventures
Brigbeale replied to Brigbeale's topic in Work in Progress - Aircraft
Due to other events today, I didn’t get to my local model shop to get the paints I mentioned in the last post. I looked in the H-308 pot and thought that it would be enough and it was - just. It was already thinned for airbrushing, which led me to the wrong conclusion that I had plenty, thinking I could thin it to go further. Still I got together the parts that would need painting and proceeded to lightly airbrush the H-308 onto the undersides of the Tomcat. I managed a suitable finish showing off the pre-shading and painting the extra parts (stabilators, gear doors etc). Ive mislaid sprue E somewhere along the line which has one of the nose-gear door halves on it. I have the other one which still has the closed version on, which I could use if push comes to shove. I still need to paint the external fuel tanks though and I think I also need to add a little extra paint to the port side of the nose to ensure the demarcation line is met when the black cockpit surround and nose are painted along with the upper and lower fins. I’m also wondering if the H-308 looks a little too dark and needs lightening up a shade or two. I’ll see when the upper paint goes on. Tomcat no. 8 showed up today. It was listed as an Italeri F-14 but I unboxed it, I immediately recognised it as an Airfix F-14A. I could contact the seller but frankly, I can’t be bothered, and it’s still a Tomcat. The nose gear wheels were broken off so it looks a little like the Tomcat that Maverick and Brewster liberate in Top Gun Maverick - the scene where they take off from the very short taxi-way and catch the fuel storage railings ripping the nose-gear off. Pilot and Rio are on board. It needs work on the seams and the fins are loose. -
Tomcats, Tomcats, Tomcats…. F-14 Adventures
Brigbeale replied to Brigbeale's topic in Work in Progress - Aircraft
I’ve just had a quick look and found a Hasegawa call-out which shows two colours for the fuselage. H-308 for the lower/underside panels of the fuselage and H-307 for the upper main panels. Actual photos of 163 and 164 both confirm that the nose and main underside surfaces appear to be the same colour, so I’ll partly ignore the Revell call-out. -
Tomcats, Tomcats, Tomcats…. F-14 Adventures
Brigbeale replied to Brigbeale's topic in Work in Progress - Aircraft
The dried Mr Surfacer was sanded a the seams checked to make sure they were smoothed out. All was good on that front, so the panel lines were restored using the Tamiya Scriber II. Rather than set up the airbrush to refresh the pre-shading, I just used a brush to paint them back in and fill in some shading in the panels The fuel tanks were sanded to clean up the seams and it seemed familiar to me at I’d been here before. Reading back through my previous posts I found that when I purchased this F-14 and the IRIAF Tomcat, this one was already in primer (which is why I don’t remember priming it). I was correct that the ventral fin was broken off in transit. It did surprise me though, that that was over a year ago - where does time go??? In another one of the posts, I wrote that the fuel tanks were also warped and needed clamping to pull the ends together while the cement set. It’s slowly coming back to me. I made sure I had the correct colours of paint and according to the colour call-out, I do, I checked the state of the paints inside each pot and lined them up according to pot number to make sure the colours were correct. Wait a minute…….. The lighter shade for the bottom is called out as FS36375 (H308) which is fair enough. The nose section, which appears to be the mid grey colour is called out as FS36320 (H307). The darker upper main surfaces are called out as FS35237 (H-337). The paint in the pots look like the H307 is darker in shade than the H337, so I did a patch test on a piece of the same kit sprue. In the picture, there’s three tones of grey - left to right are H308, H337 and H307I put the sprue over the colour call-out and the latter two greys appear to match the image. I’m sure the printed call-out is exaggerated to highlight the different tones (which is why the underside H308 is completely different). I have a fresh pot of H-307 and that matches the already open pot. I will however get a fresh pot of H337 (and 308 as I’m getting low on that one) and compare them again tomorrow. If they match then I’ll probably just swap the two paints when I airbrush them on. I’ll also check images of the two F-14D’s painted in this scheme. -
Tomcats, Tomcats, Tomcats…. F-14 Adventures
Brigbeale replied to Brigbeale's topic in Work in Progress - Aircraft
With the A-7A/B built and in the cabinet, my eye was drawn back to one of the Tomcats which was in primer and pre-shaded, but I couldn’t actually remember where I actually got to with it. Looking at the built fuselage, it appeared (on the face of it) to be near enough ready for painting, but upon closer inspection, the nose section centre seam was quite visible as were the seam lines on the under nose pod and the side seams lines behind the swing wings where the upper and lower sections joined. more seam lines were visible on the tail section between the fin/rudder assemblies. A look at the parts showed some parts were painted (I vaguely remember painting the wheels and undercarriage legs but not priming the fuselage). The previous owner of one of these Tomcats had painted some parts on the sprue with a brush (external fuel tanks and ordnance racks). The other Revell Tomcat is painted up as an F-14B in the Black Aces livery. I think I used parts from both kits on that build, hence some painted parts not done by me. This evening, I re-commenced work in this Tomcat by sanding back the seams a bit to level them out a bit and sanding back one of the fixed glove vanes which was slightly protruding from the fuselage. I also had to fit the two forward Phoenix missile racks. Luckily the two rearmost location pin hols were just visible as they hadn’t been drilled out yet. I drilled them but couldn’t locate the exact whereabouts of the forward pins, so I simply snipped the forward ones off and used copious amounts of TET to fit the racks in position. One of the underside fins had been broken off in transit (as far a can remember), but it was present and re-cemented back on. I assembled the two external fuel tanks and missile pylons. The paint will be sanded smooth as the seams need to be dealt with anyway once the TET has fully dried. The kit Sidewinder and Sparrow/Skyflash missiles were cut from the sprue and a hole was drilled in the exhaust end to accept a cocktail stick for painting. The sidewinders have ejection pin marks on the rearmost fins which will need tidying up. Mr Surfacer was run over the seams to fill them in. Once it’s dry I can sand it back to a smooth finish. -
I bought this kit cheaply off eBay as it was started but abiandoned. It arrived in its box with the original instructions and decals. Scalemates suggest it’s from around 1968 which makes the moulding as old as me! The fuselage was built but slightly misaligned at the front and the main wing assembly was also built but the outer folding sections had been attached but later broken off. No paint had been applied anywhere, so that saved me a job. I took the fuselage apart to get at the air intake, cockpit and exhaust. The WIP is here I re-scribed the panel lines and replaced the pilot seat with an adapted spare from one of my Tomcats. The cockpit was also brightened up with some Edward photoetch (which was for the A-7E but I used it to add interest to the cockpit and nose gear. The re-build needed a few tweaks to get the fuselage back together but for an old second hand kit, it wasn’t too bad. The kit main gear had one strut missing and the main gear wheels were terrible, so I 3d printed replacements. I replaced the kit bombs with 3d printed M82 Snake Eye and smaller Mk 83 bombs sourced from Thingiverse. The decals are Esci aftermarket but as I applying them I found someone had goofed and printed two port side rudder decals. I had to take a photo of the extra one, reverse the image and print it on decal paper. A couple of attempts finally resulted in a usable replacement. With everything fitted and painted, the A-7 was given a coat of matt varnish. The decals are for an A-7B from VA-67 aboard USS Roosevelt, but the time period is not mentioned. I could not find a picture of the actual A-7B in this livery, but I did find the same aircraft in VA-15 livery. The last photo is of the A-7B accompanied by my early moulding F-14A Tomcat.
- 9 replies
-
- 43
-
-
-
An Older 1/72 Revell A-7A Corsair II
Brigbeale replied to Brigbeale's topic in Work in Progress - Aircraft
The story comes to an end on this A-7 Corsair II with the finishing touches being done. The Mk82 Snake Eye bombs were painted as per the previous post and it worked well. I opted for a an Olive Drab colour as that seemed to be the colour in a few online photos. I also 3d printed some Mk83 bombs to replace the kit ones for the outer ordnance rails (they’re tiny in comparison to the 82’s). They were also painted Olive Drab. The bombs were fitted to their racks using superglue and the racks were fitted to their locations under the wings (where else would they go??). Once they were all secure, the bomb fuses were painted as well as the refuelling probe tip. The tail hook was fitted (although it was too long for the hole provided so I just snipped about 1/2mm off the front end). Navigation lights were painted onto the wing tips. The two defensive Sidewinders were fitted to their rails and the tips painted silver in an attempt to replicate the clear nose. The other option would have been to paint them black. Once I was satisfied that everything was fitted and wasn’t going to fall off when I wasn’t looking, I gave the A-7 a coat of Galeria Matt Varnish, which further improved the look of the model as a whole. When that was dry, I removed the masking on the canopy and found some errant dust inside. I dare not try to get the canopy off to clean it out with the steps I had to take to get the canopy stuck on. This is another model which I’m very happy with. The RFI is here- 43 replies
-
- 11
-
-
An Older 1/72 Revell A-7A Corsair II
Brigbeale replied to Brigbeale's topic in Work in Progress - Aircraft
I had an attempt to re-create the starboard rudder flash, but when I went to apply it, it stretched one way and then another so I took it back off again. As I always print more than I need, I concluded that I hadn’t put enough varnish on, so more clear varnish was added to the extras. I applied the rudder flash first time this evening and it looks ok - not quite as vibrant as the other side but hey - ho. The panel lines received a wash yesterday and they are just enough to lift the look of the fuselage. I also painted the 3d printed wheel centres white along with the tips of the Mk82 Snake-eye bombs (in order to paint the casing tips yellow before the main colour goes on for the casing. The extendable fins will be painted an aluminium colour). I think I’ve found a way of easily masking off the top of the 12 Mk82’s by standing them nose first in a piece of cardboard box. I must remember to keep the air pressure down when I paint the green colour on. Tonight I painted the tyres with Mr Color H-77 Tyre Black and while they were drying, I used Mr Color H-327 Red to paint the inner edges of the wheel bay and doors. A couple of slips will need touching up with white but they also look ok. Once the tyres were dry, the 3d printed main gear wheels were superglued onto their axles while the kit original nose-gear wheels were fitted using TET. While the glues were setting on the wheels, the ordnance pylons were cleaned up and the racks fitted. The defensive Sidewinder racks were fitted to the fuselage and then the gear doors were superglued in position using the photo for their relative angles to each other. I fitted the fuel tanks to their pylons and let them cure for a while. Once they were semi-dry, I fitted them to the inner stations under each wing. I found Revell have made the locating slots and tabs longer on one wing than the other (the pylons them selves are the same length). I was able to adjust the pylons to vertical and move the fuel tanks so that they were fitted properly and not off to one side. The refuelling probe was next to be fitted, but that was broken in two. The business end was loose in the box when I bought the kit luckily. I fitted the probe end first and then the tube section. Using TET and tweezers the broken ends were coaxed back into position. I’ll paint them once the TET has fully cured tomorrow. The A-7 is beginning to defy its age kit wise and look like a later release kit. I’m very happy with the progress so far.- 43 replies
-
- 13
-
-
An Older 1/72 Revell A-7A Corsair II
Brigbeale replied to Brigbeale's topic in Work in Progress - Aircraft
The A-7 had the forward windscreen framing painted black and a blue stripe was added to the antenna area of the fin. I also gave the nose cone a second coat of white as I wasn’t happy with the coverage earlier and it had grey overspray on it anyway. While I had the white in the airbrush, I gave the parts on the sprues another coat where necessary. Earlier today, I designed a pair of replacement main gear wheels taking inspiration from the Aires set and using online photos to get the shape of the wheel. They’re printing in my Elegoo resin printer alone with some better looking Mk82 bombs (which I added slots to to copy the kit original ones so they should on the kit ordnance rails). Tonight, I set about decalling the A-7 using the USS Roosevelt decals. I started off with the port side as the images show only that side. The starboard side should be a mirror of the port side. Note I said ‘should’! The decals themselves performed flawlessly and only one split, but that was my fault for trying to adjust the position after Microsol had been applied, but it went back together very well. Happy with the port side, I went to apply the starboard side ones. Starting with the tail markings the VF, build number and OO went in with no issue. Now is where the ‘should’ comes in. A mistake was made during the printing and there’s no starboard rudder decal (red with white stars). There’s two port ones (look at the image if the decal sheet). I will have to photograph the rudder decal, reverse the image and print a correct decal for the starboard side. With that little wrankle noted, I carried on with the rest of the starboard side and they went on well but both air intake decals will need some painting in the gun recesses as the decals split in them (which I expected anyway). While I was doing the main gear wheels, I printed some decals for the upper starboard wing. Obviously AE would be present but what number. The aircraft number is 300, but the fin top has 00. Searching the internet for 154492, I found an image showing the A-7 with a different livery but from the same unit. The fin leading edge is painted blue but the top of the starboard wing is visible and it reads 00AE, so I took photos of the decal sheet and made my own ones matched to the size of the Kit original decal for that area. Looking a whole lot better now with decals on. -
An Older 1/72 Revell A-7A Corsair II
Brigbeale replied to Brigbeale's topic in Work in Progress - Aircraft
The A-7 was masked up over a couple of nights modelling. I would have got it done in one, but I found the colour call-out and it showed the fin tip being white, so that had to be painted (which I did by hand applying thin coats to build it up). That meant waiting for the paint to dry. So, tonight, I masked up the fin top and also the underside of the leading edges of the stabilators. Not 100% sure if this is correct, but it adds a little interest. Right, where’s my Mr Color H315 FS16440 Grey. Couldn’t find it. I know I had some because I painted the Airfix F-14A with it (you remember - the one with the primer that kept coming off in places when masking was removed). After nearly emptying the paint drawer looking for H-315, I found H325 which is FS26640. I remember now that H315 is Gloss and H-325 is Semi-Gloss. Good, I can carry on now. Cheaper masking tape was used to further mask off the lower fuselage but I did use Tamiya tape for under the wings as it sticks better. Hopefully, it leaves the paint where it is this time. The upper fuselage was airbrushed with a fairly even coat of H325 as well as the fuel tanks, defence Sidewinder rails, stabilators and the refuelling probe. I plan.a trip to Model Railway Solutions tomorrow to get some MIG Ammo panel line wash as I still have my gift card from Christmas, but I saw they had an Academy SR-71. Hmmm- decisions decisions…… Another Tomcat Arrived yesterday. This time a Hasegawa kit. So that makes 7 that I own now (2 built and painted as I want them, one Revell still in primer and pre-shading awaiting continuation, a Monogram one bought kinda mid build and some bits missing, another Revell special boxing of the previously mentioned kit with different decals, an Italeri one in Iranian colours (that’s going to be ‘returned’ to US markings and the most recent addition as new in its box but the decals are trashed). Can you guess I like F-14s. Anyway, tonight’s photos. The picture behind is purely for the placement of the stars and bars as there’s two sizes and it appears that the larger ones go on the fuselage. -
An Older 1/72 Revell A-7A Corsair II
Brigbeale replied to Brigbeale's topic in Work in Progress - Aircraft
Thanks. I agree with the philosophy that once some paint goes on, there’s a finish line on the horizon. Thanks Chris. Apart from a few stiffness aches, my back is more or less back to normal. When we last spoke about the Puma, I was determined to get one - I just didn’t realise it would take so long though. I’ve found some 3d printable parts to upgrade the kit a little.
