

Kevin Aris
-
Posts
760 -
Joined
-
Last visited
Content Type
Events
Profiles
Forums
Media Demo
Posts posted by Kevin Aris
-
-
10 hours ago, RossFMJ said:
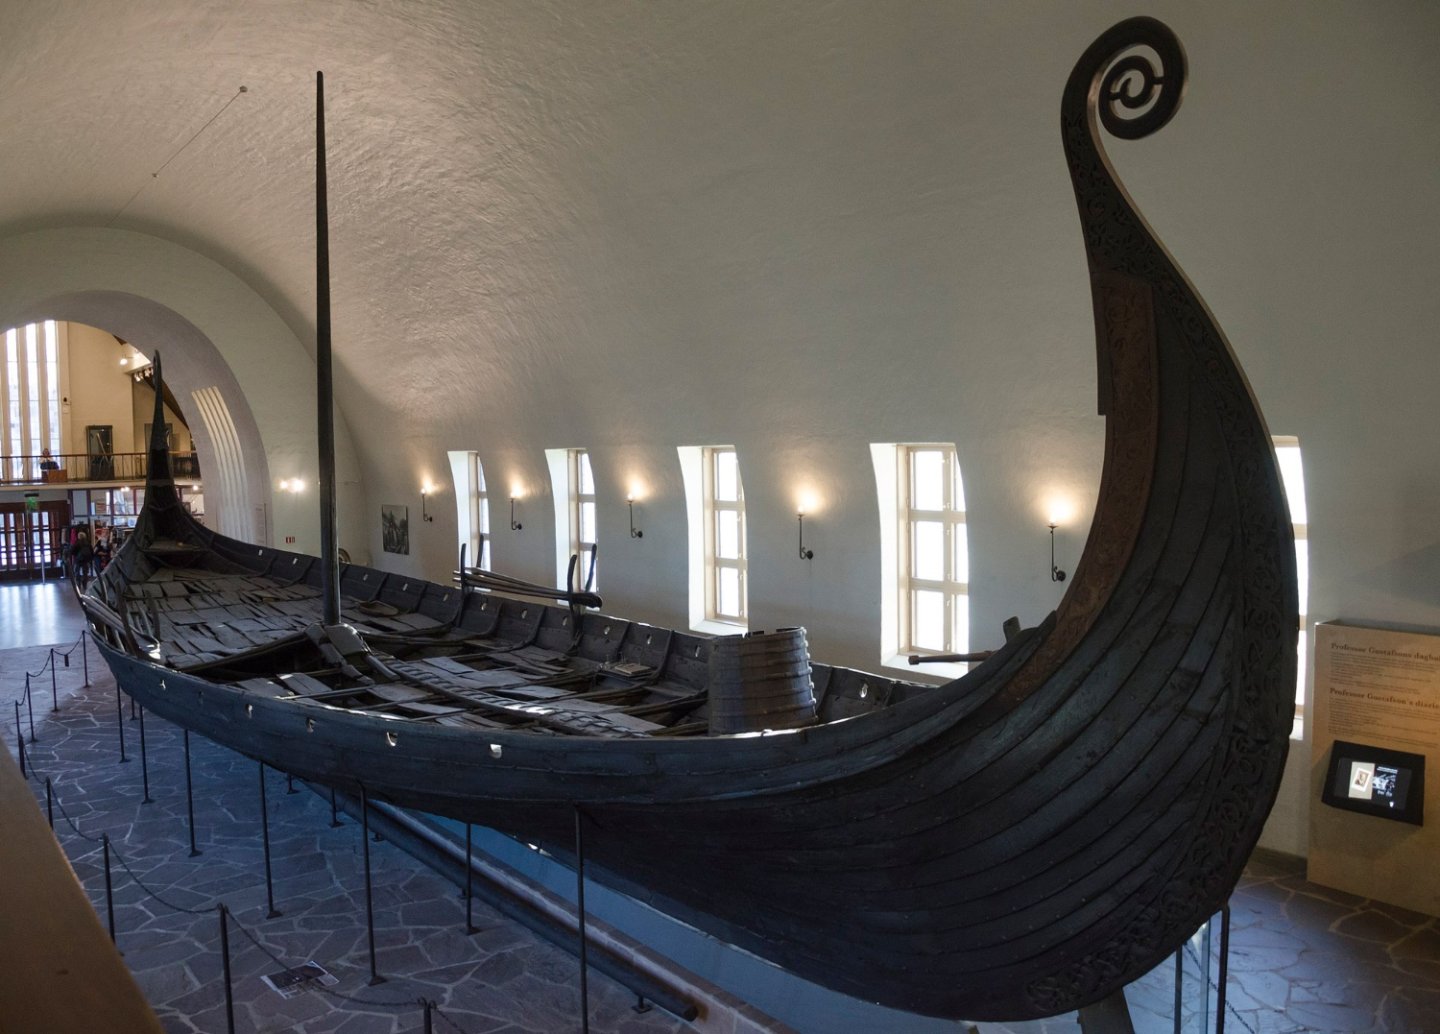
Having been blown away seeing the real thing, you are now severely tempting me to empty my savings book with your nice work so far!
i personally think that it is good value for money, the online tutorials are brilliant
-
 1
1
-
-
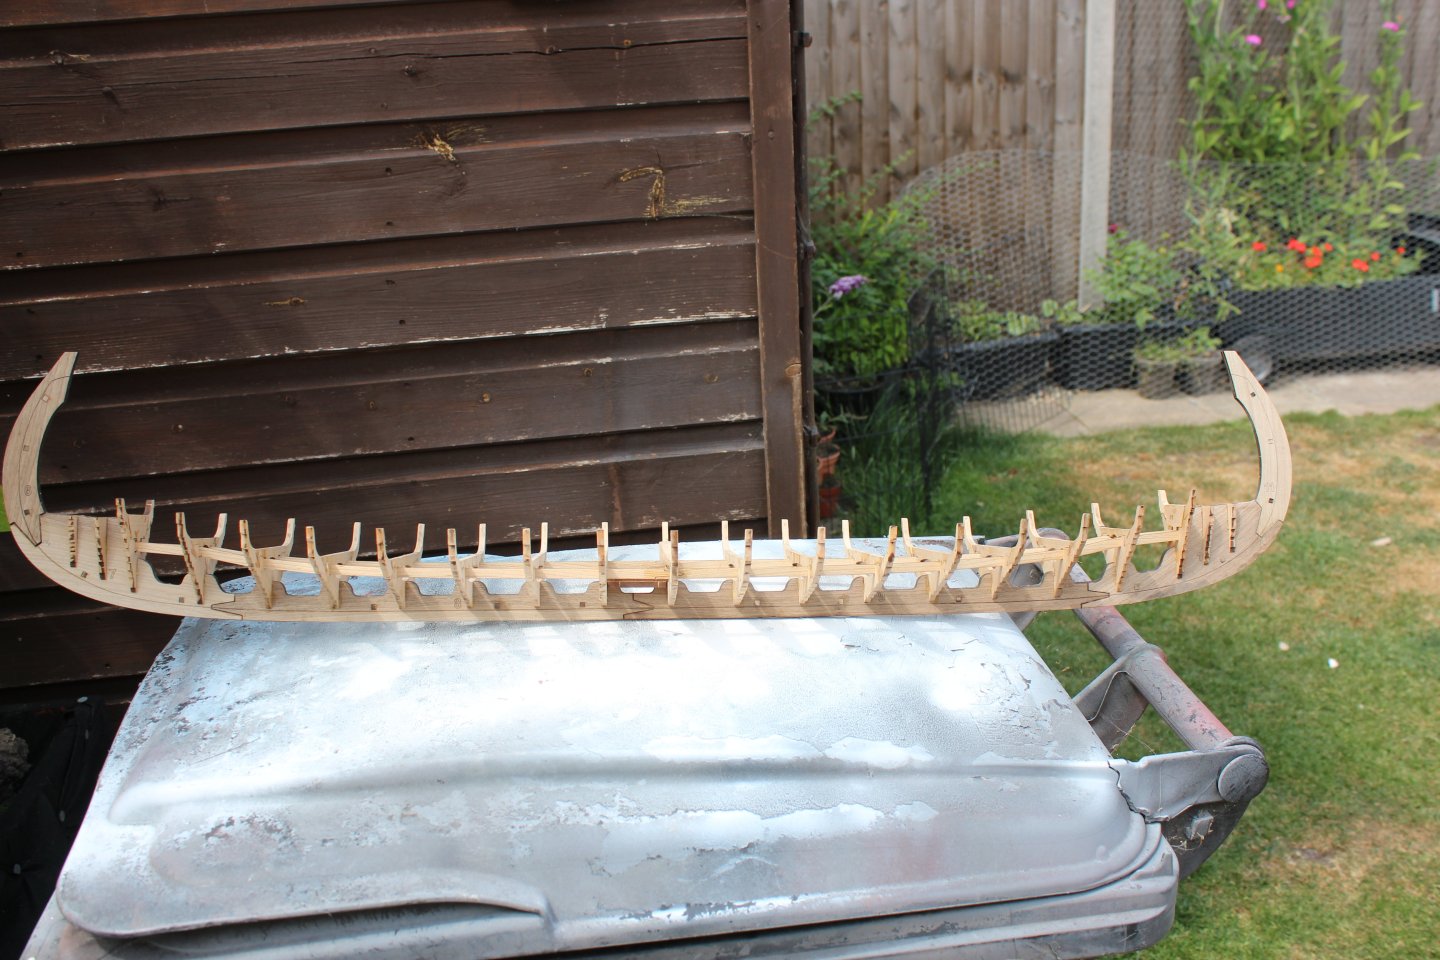
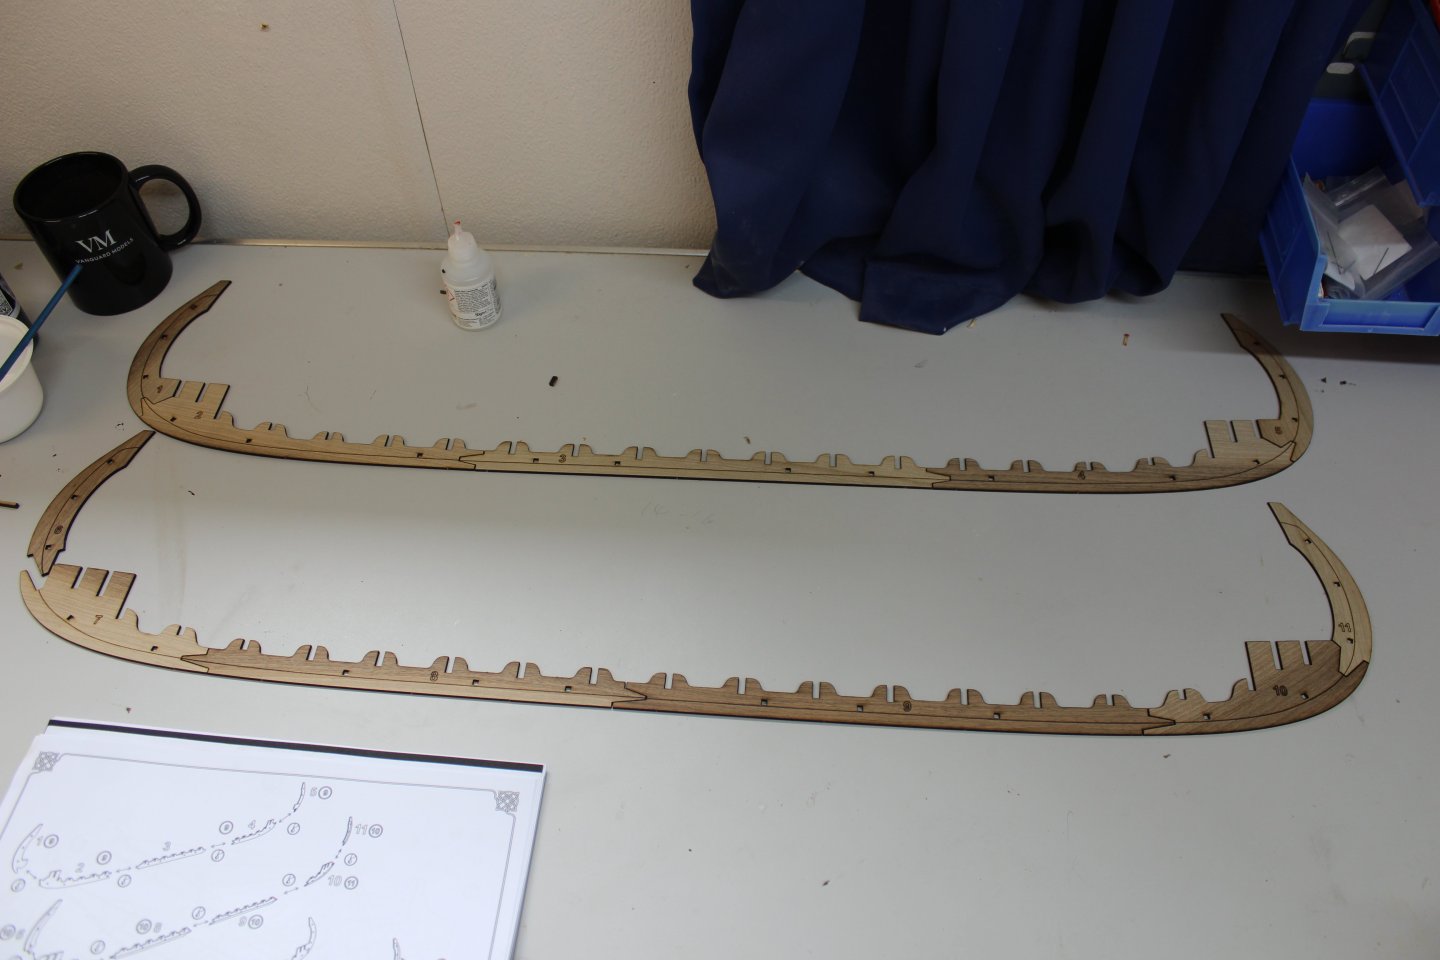
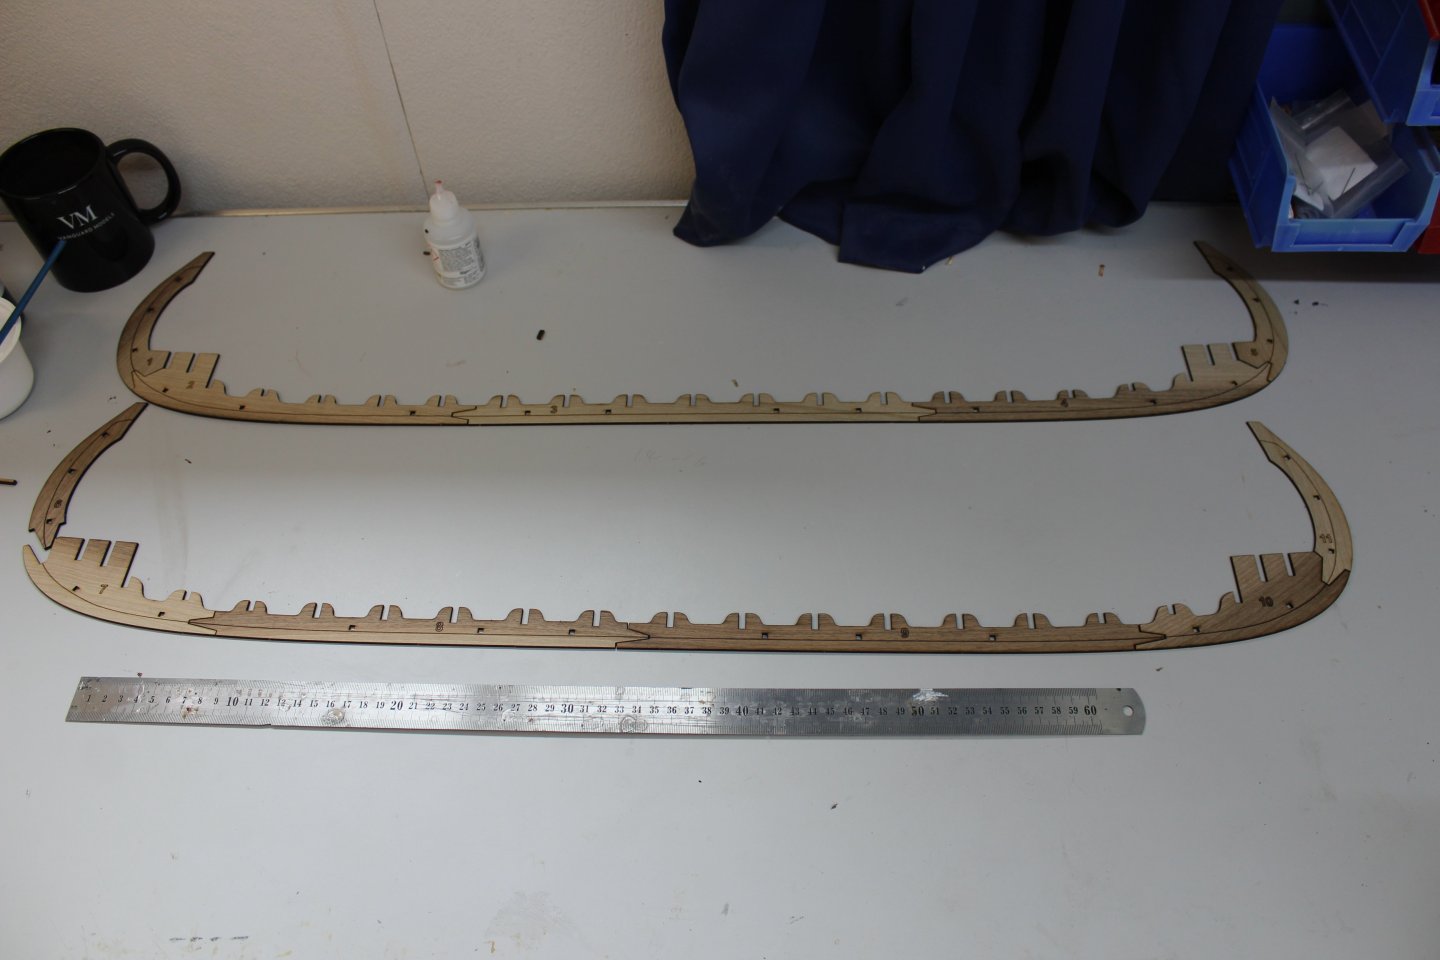
good morning everyone
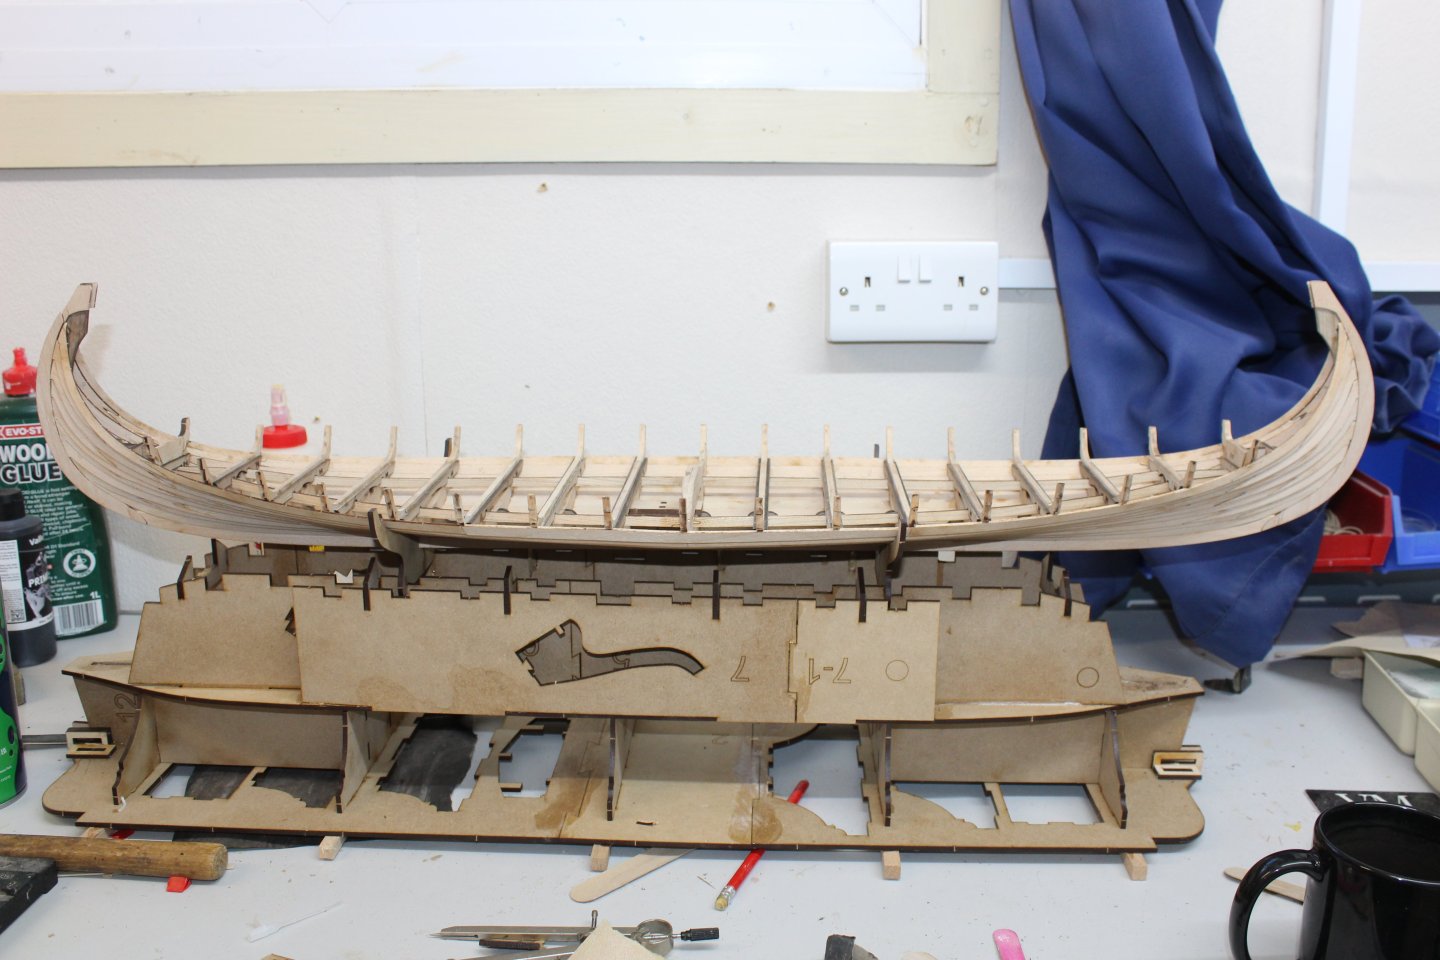
took the build upto deck level, which is the height of plank 9

the frame is adapted again to fit the new keel width.
Deck beams - Airbrushing
i would love to have bought the wood dye the Pavel Nikitin uses, but would cost a fortune to order and shipping (about £60), a set is available on one of the market sites, but at the same price, so i purchased a set of OCcre wood dyes, Walnut and Oak
-
 11
11
-
-
34 minutes ago, ArnoldAmbrose said:
G'day, I've been warned about these budget cruises. 🙂
Who cares? 😁
G'day @Kevin Aris, I'm in awe of those like you that build model ships in wood. I do mine in styrene and my shoddy workmanship can be hidden by copious quantities of filler and many sessions of sanding. From what I see, you don't have that option and so your work is true craftsmanship. 👍
Regards, Jeff.
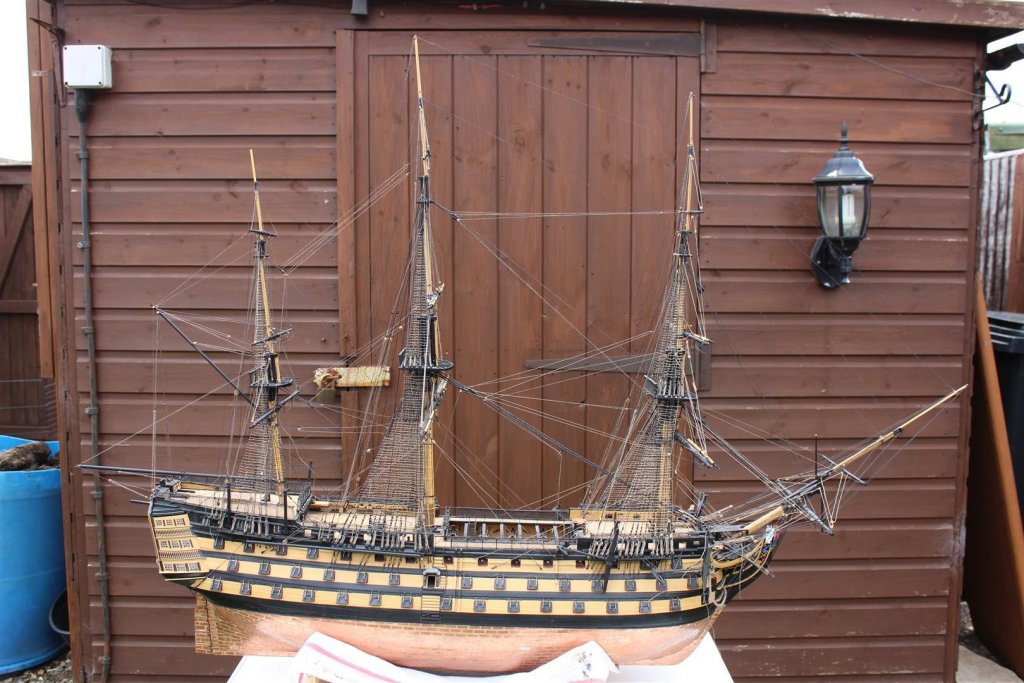
i certainly do require filler in some of my builds, esp some of the older kits, however they are getting better and better at the way they are designed, and i now tend to stick to some of the new modern companies,
a lot of filler was used on this build of the Victory
-
5
-
-
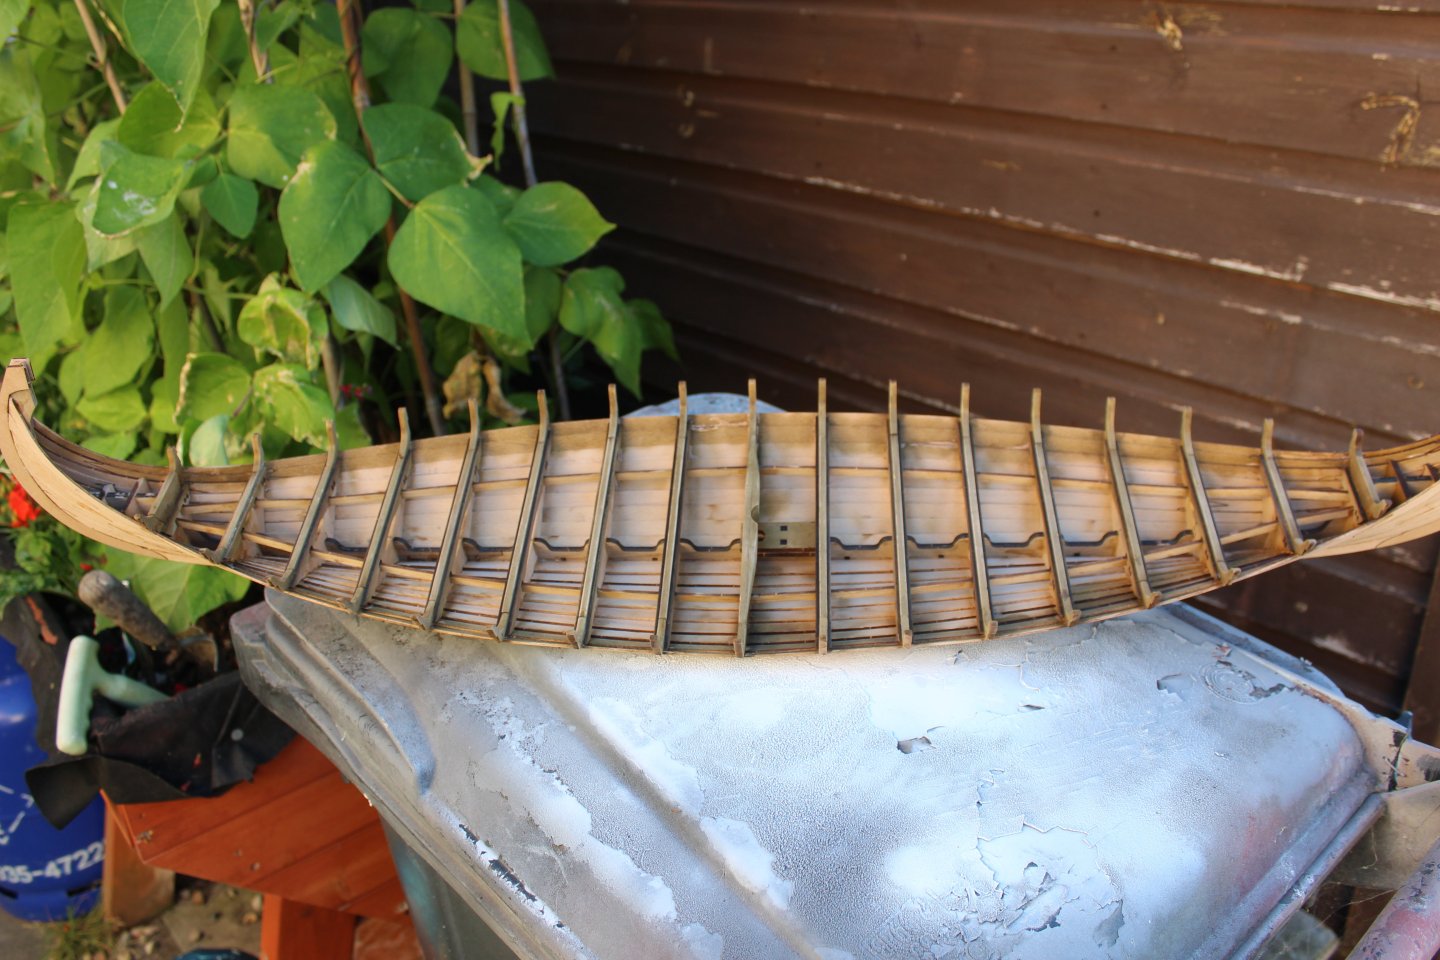
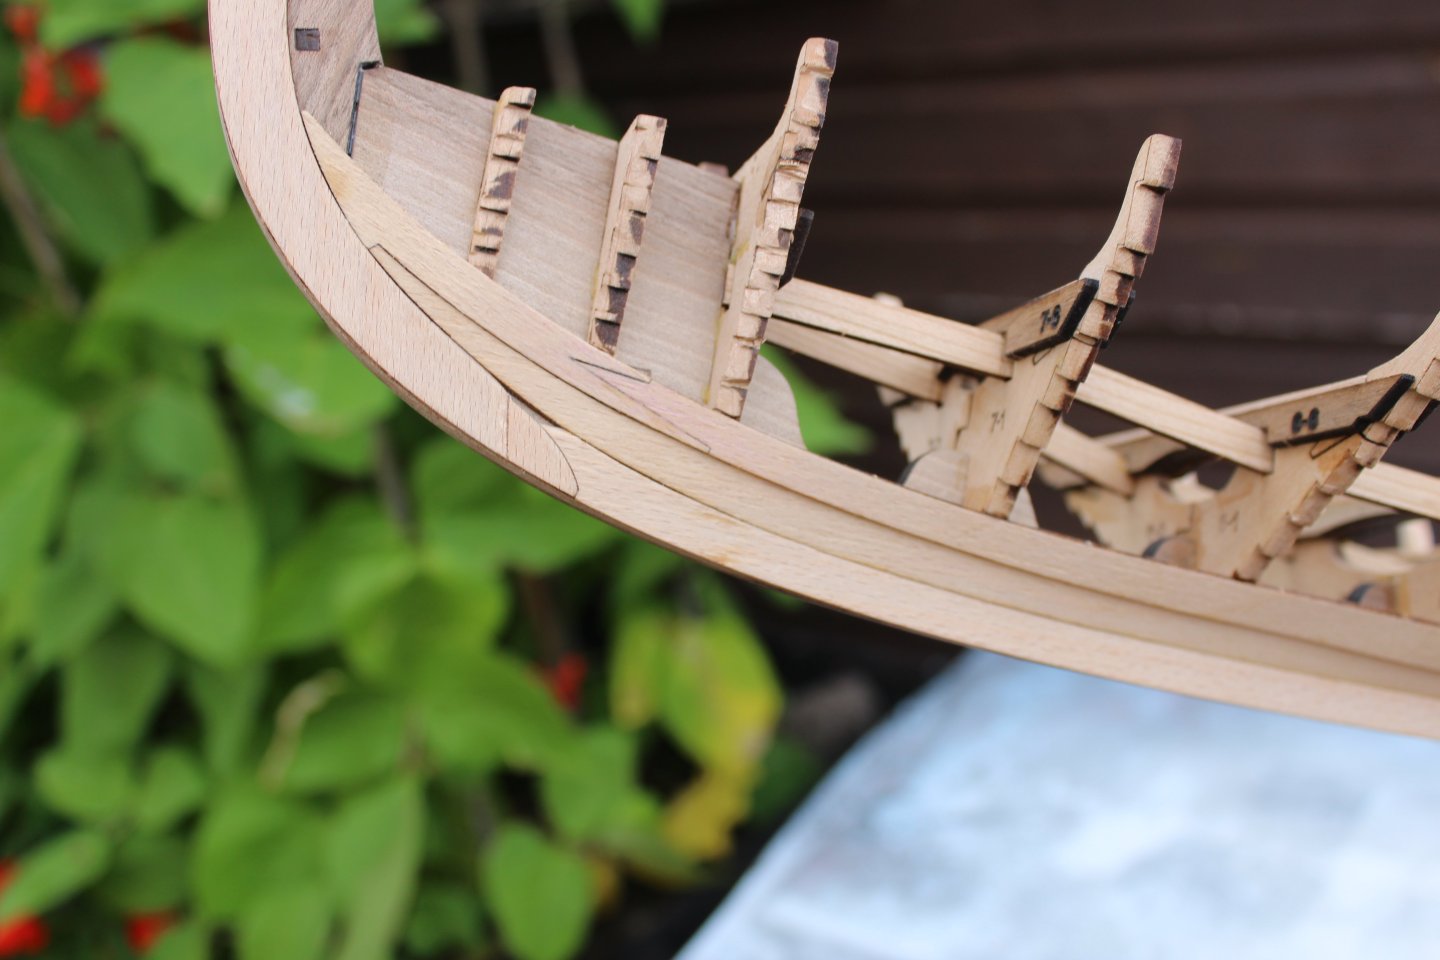
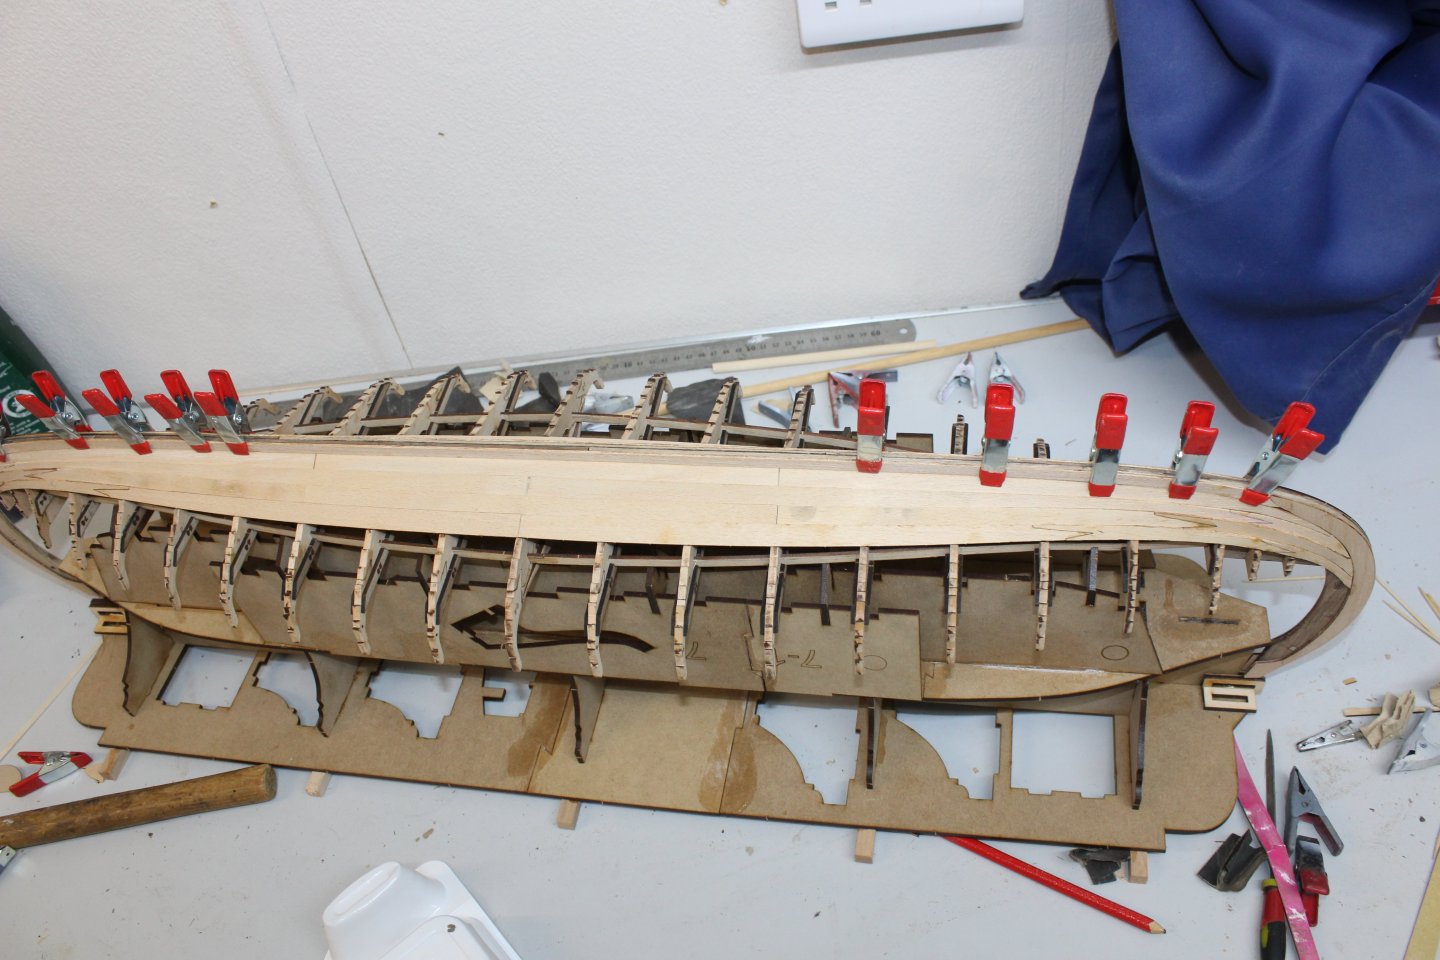
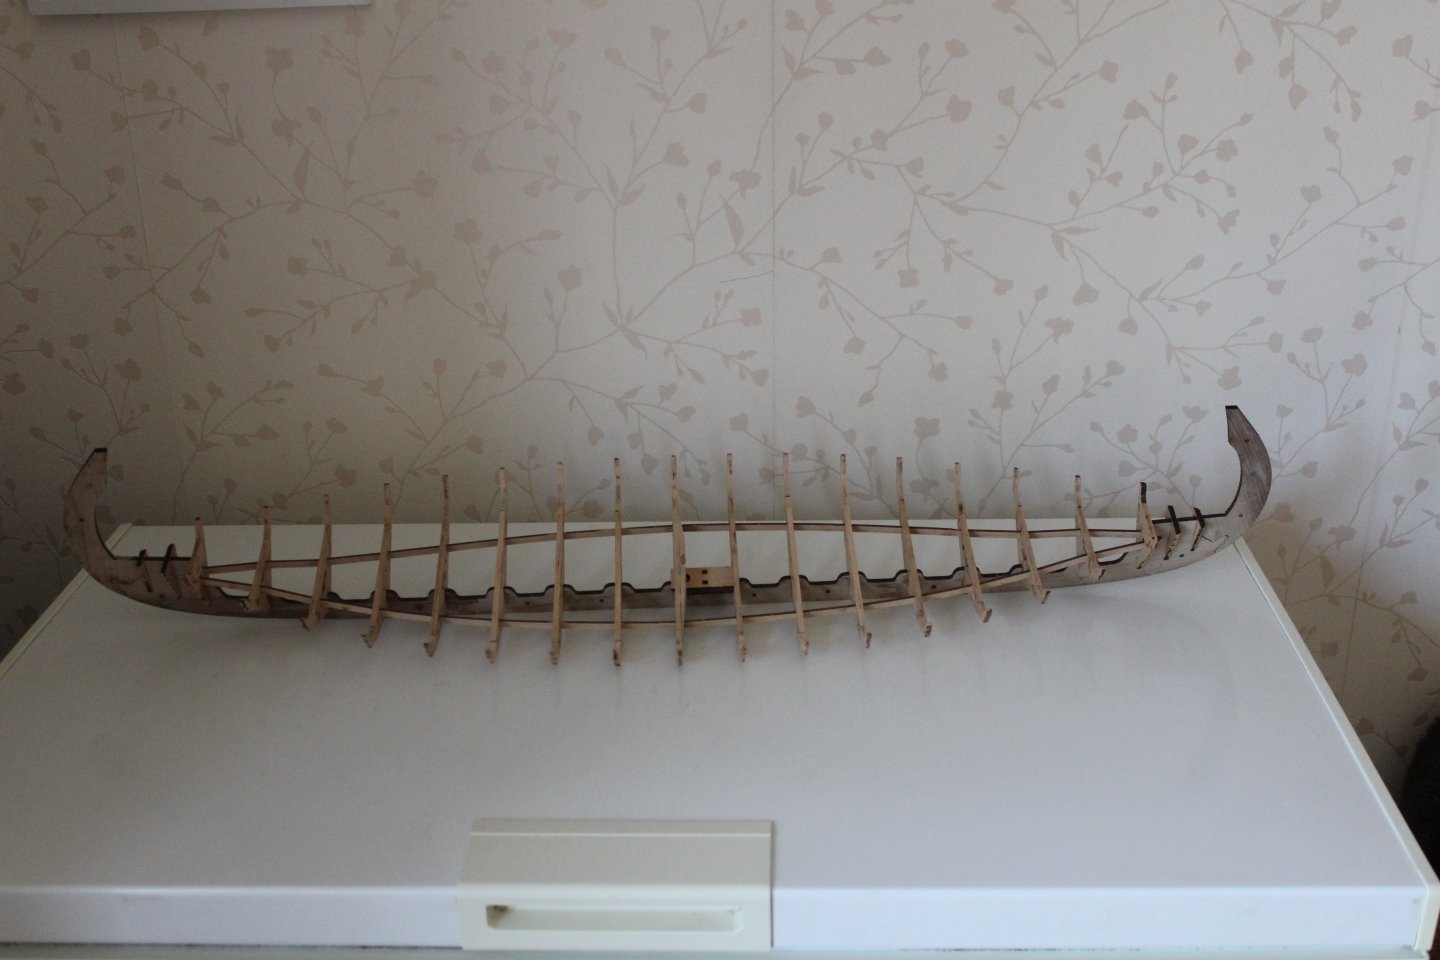
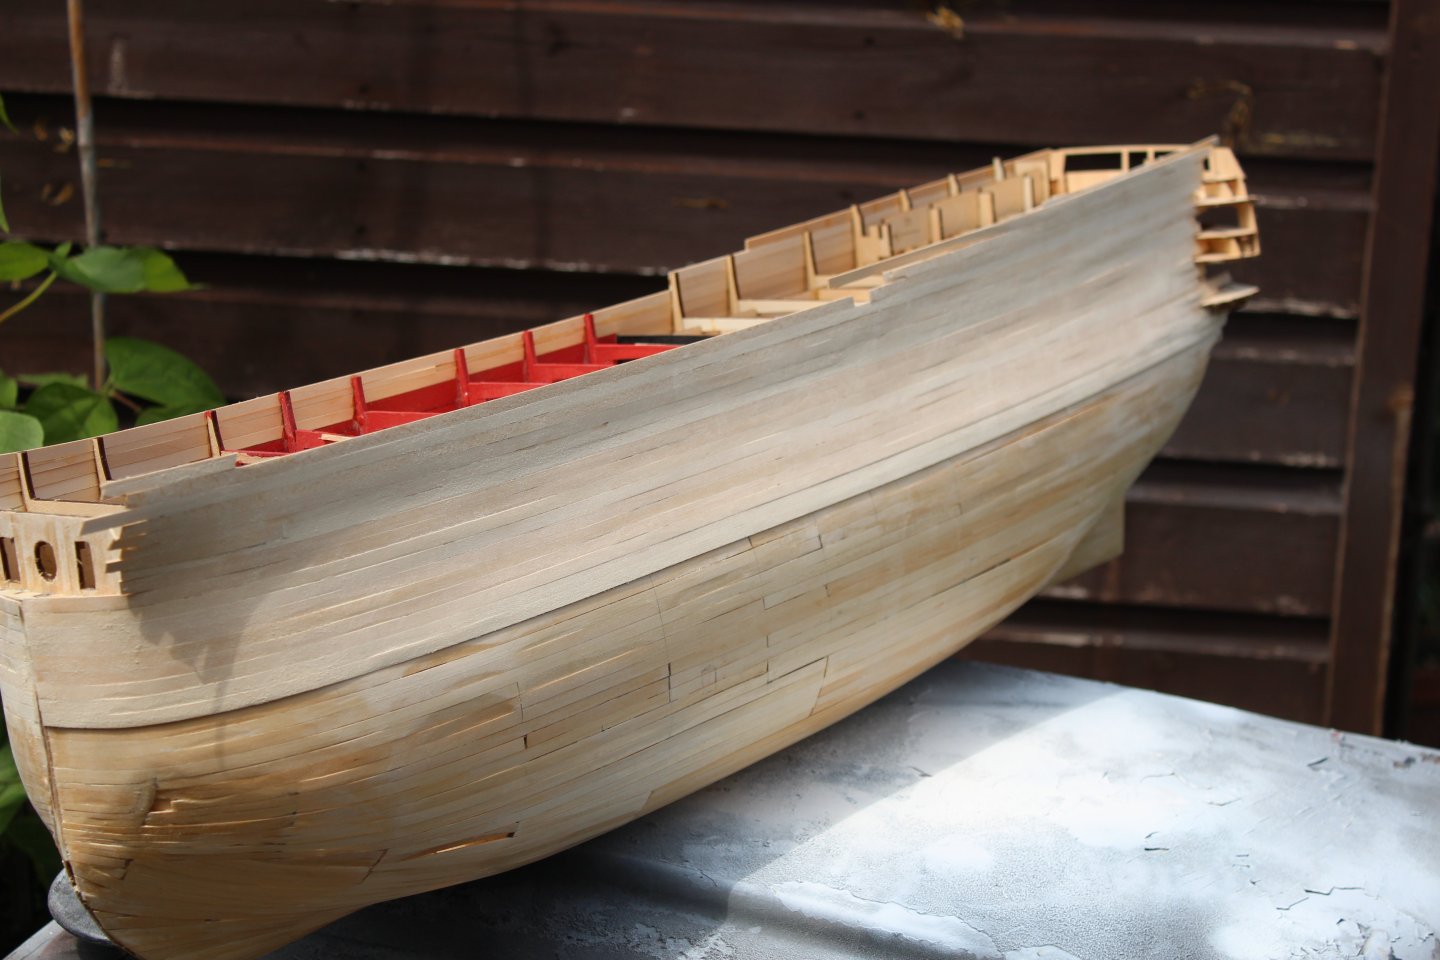
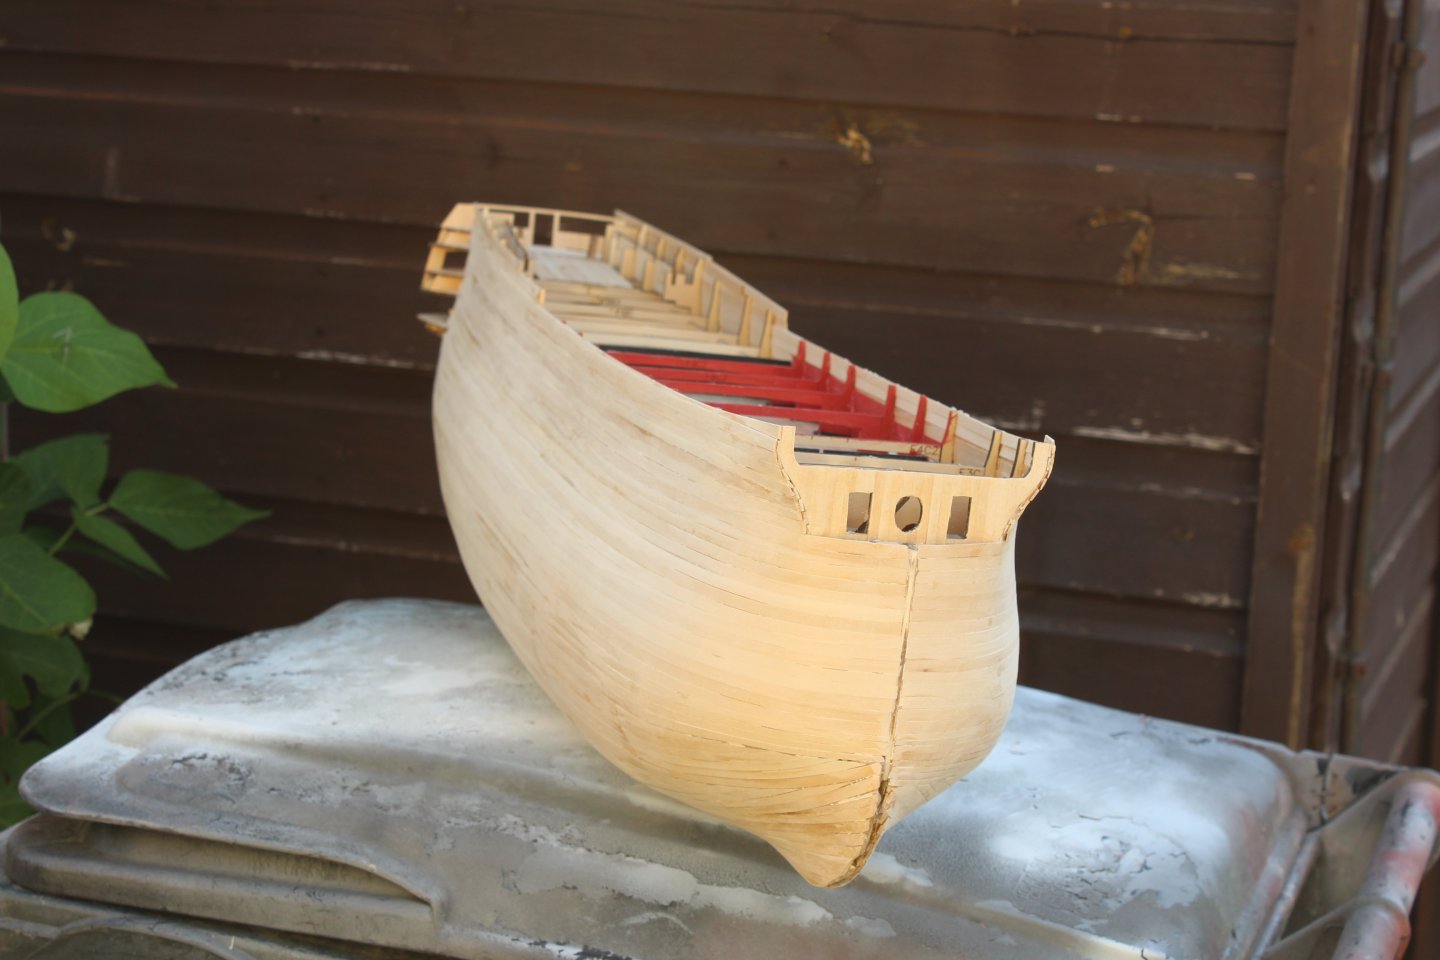
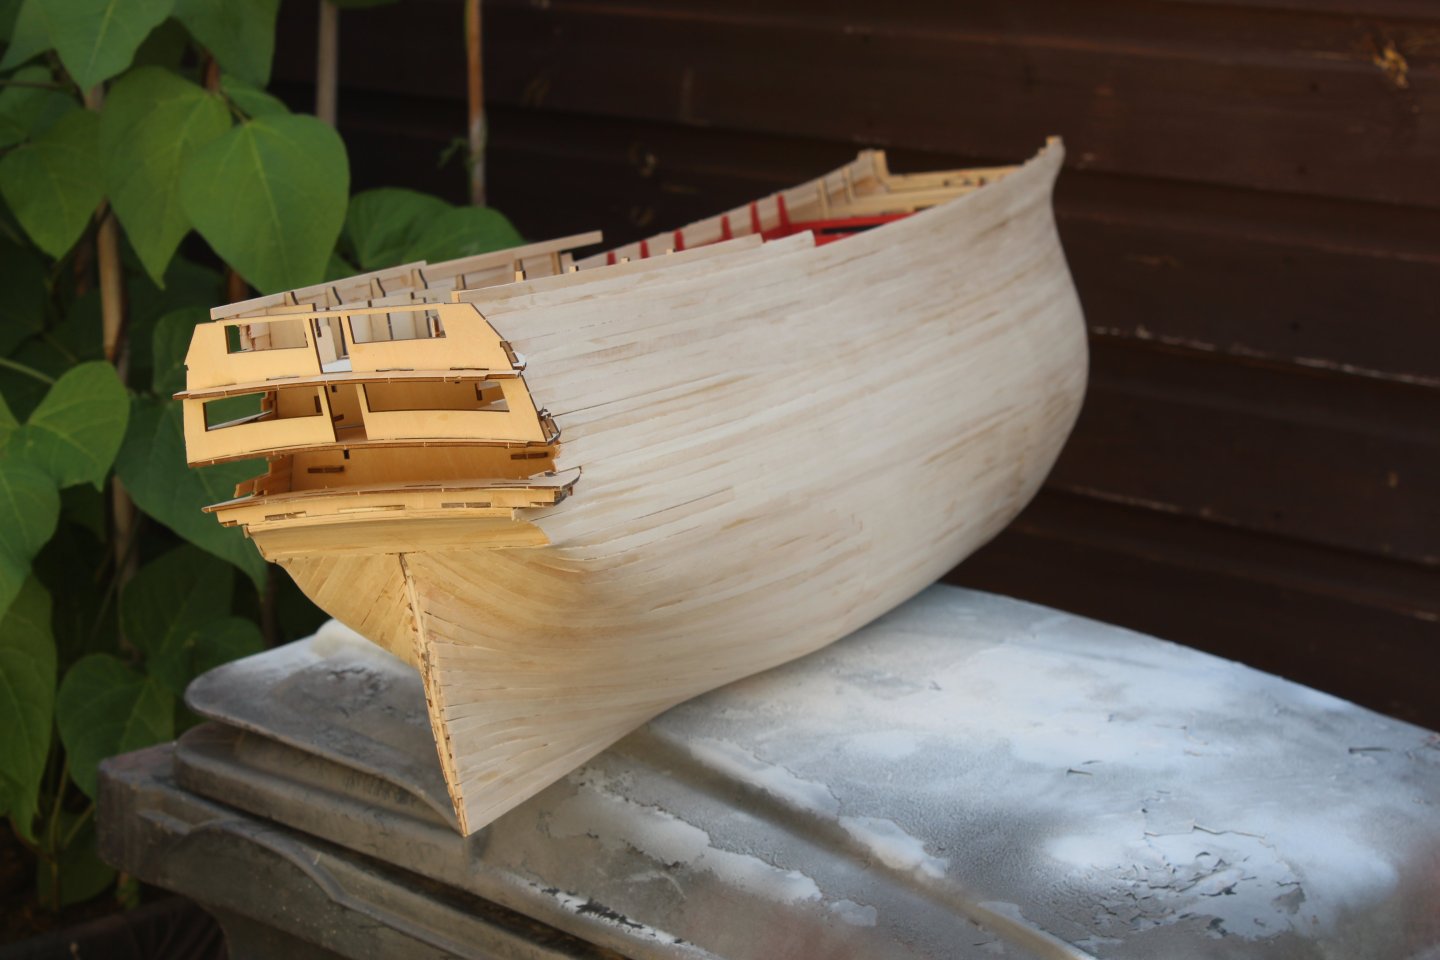
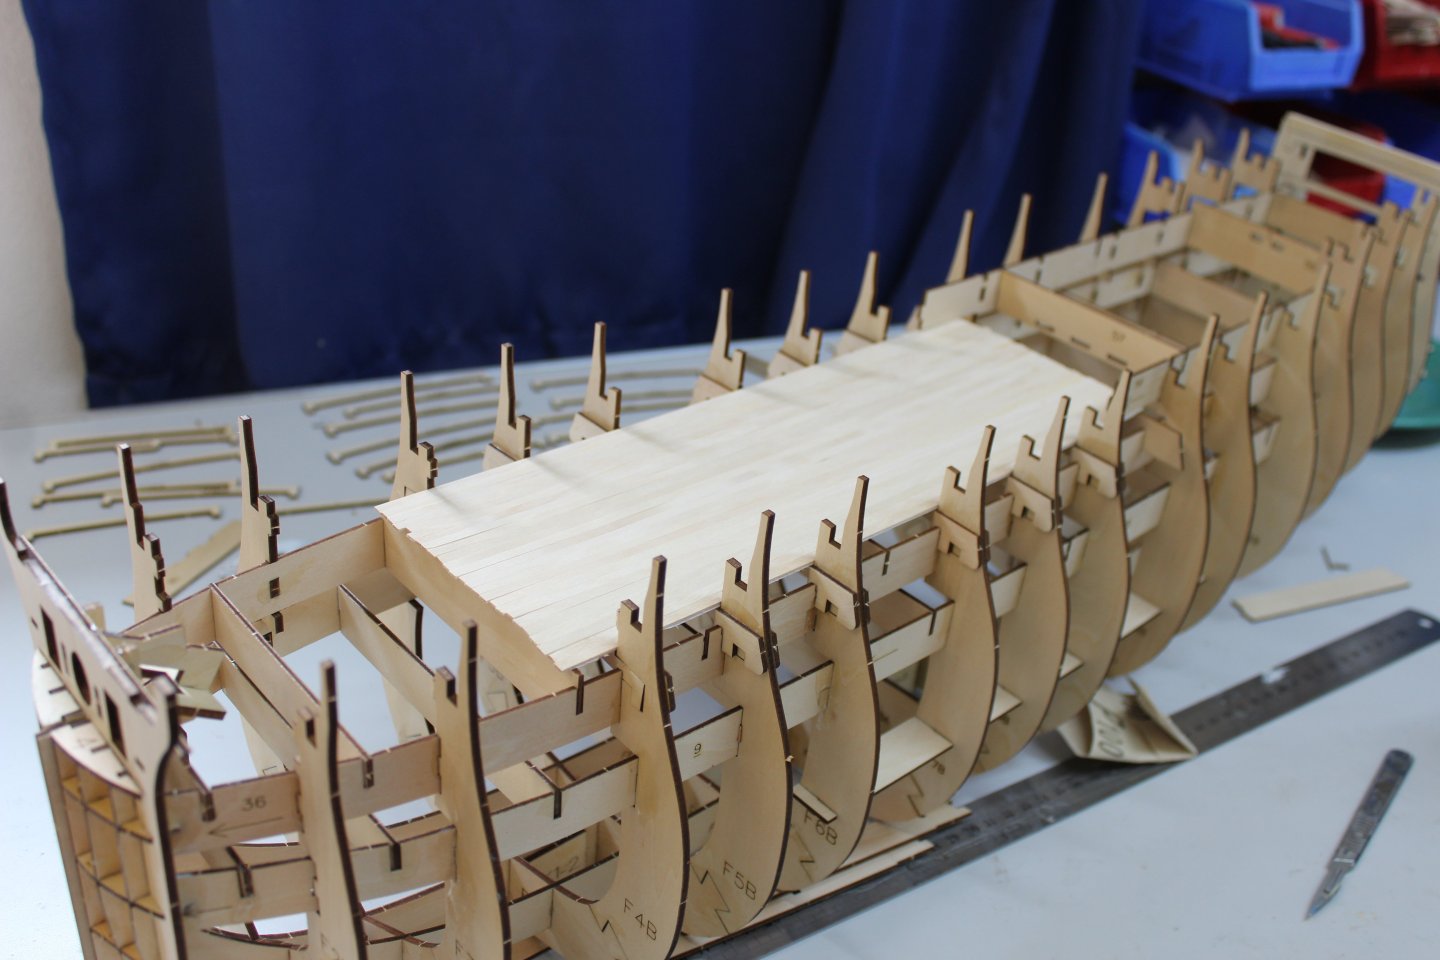
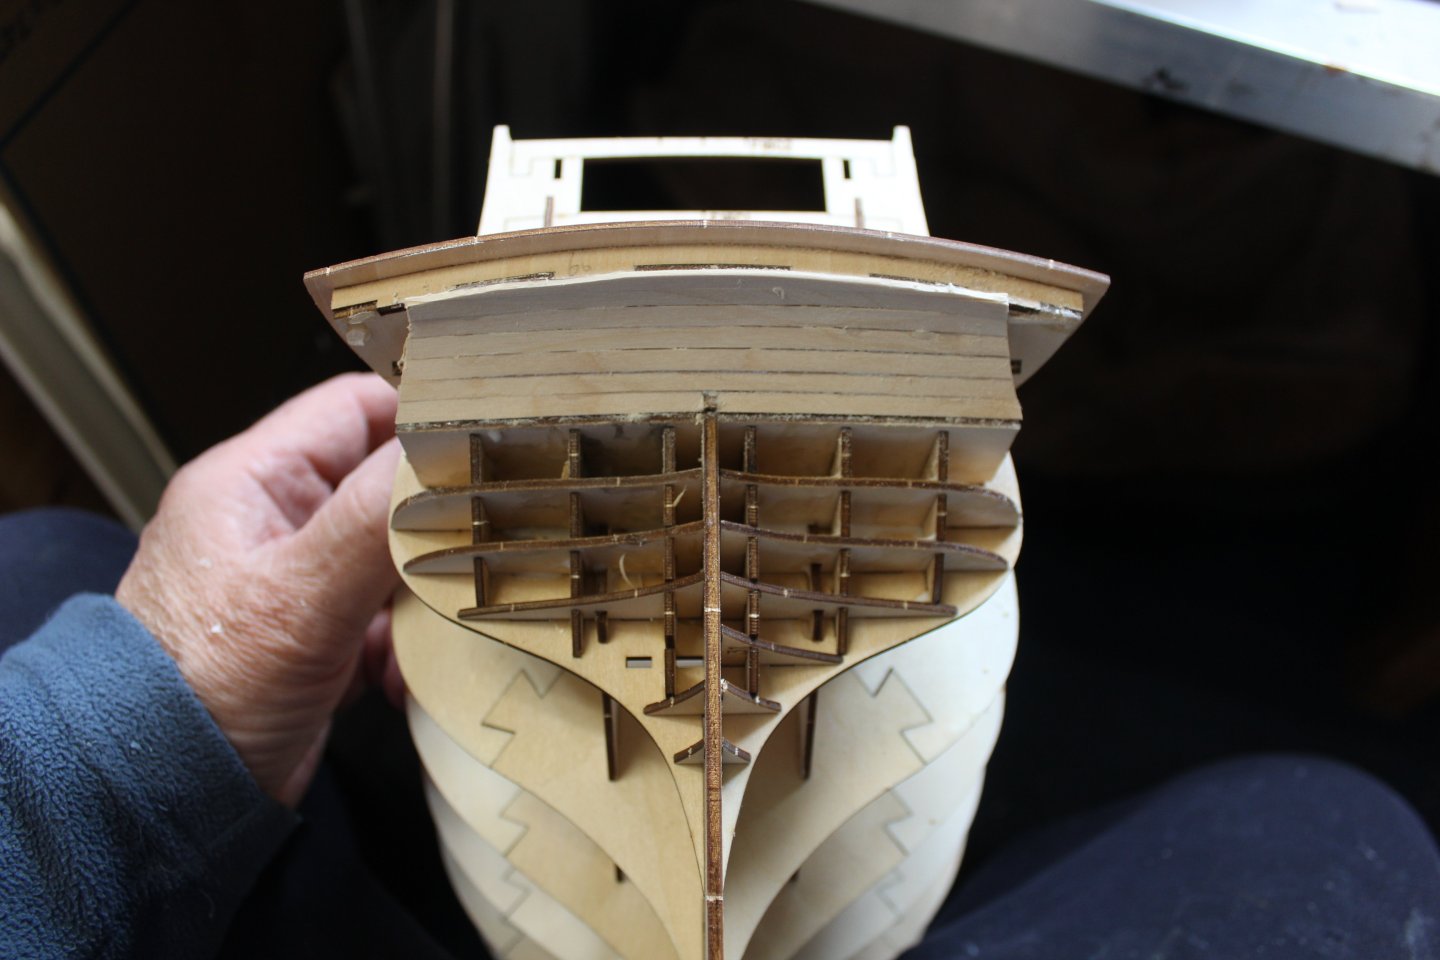
Good morning everyone
Thank you for comments and likes
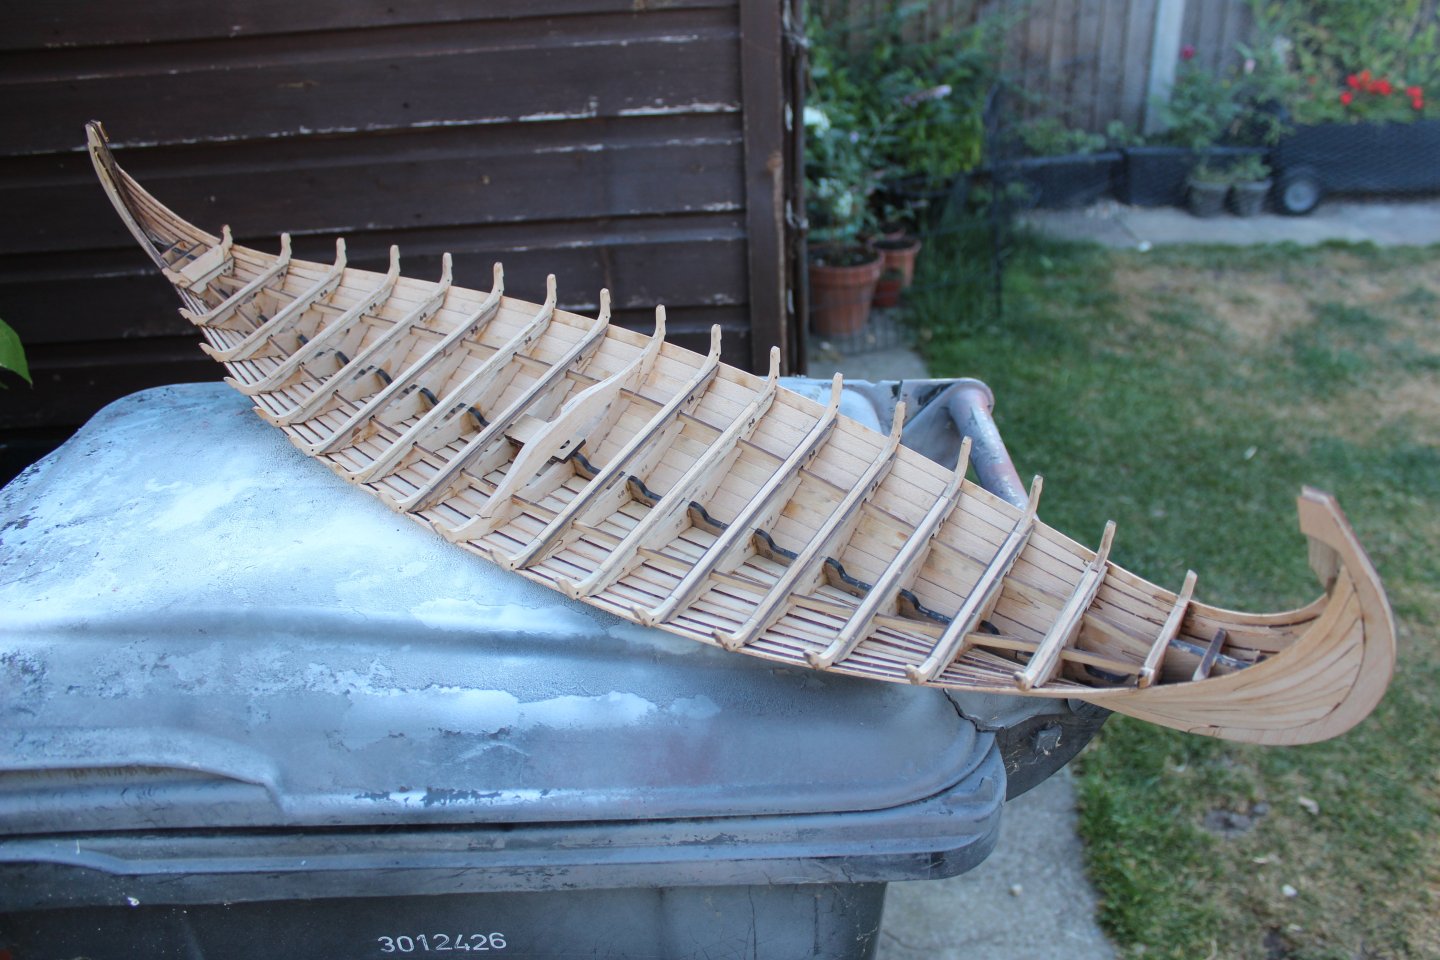
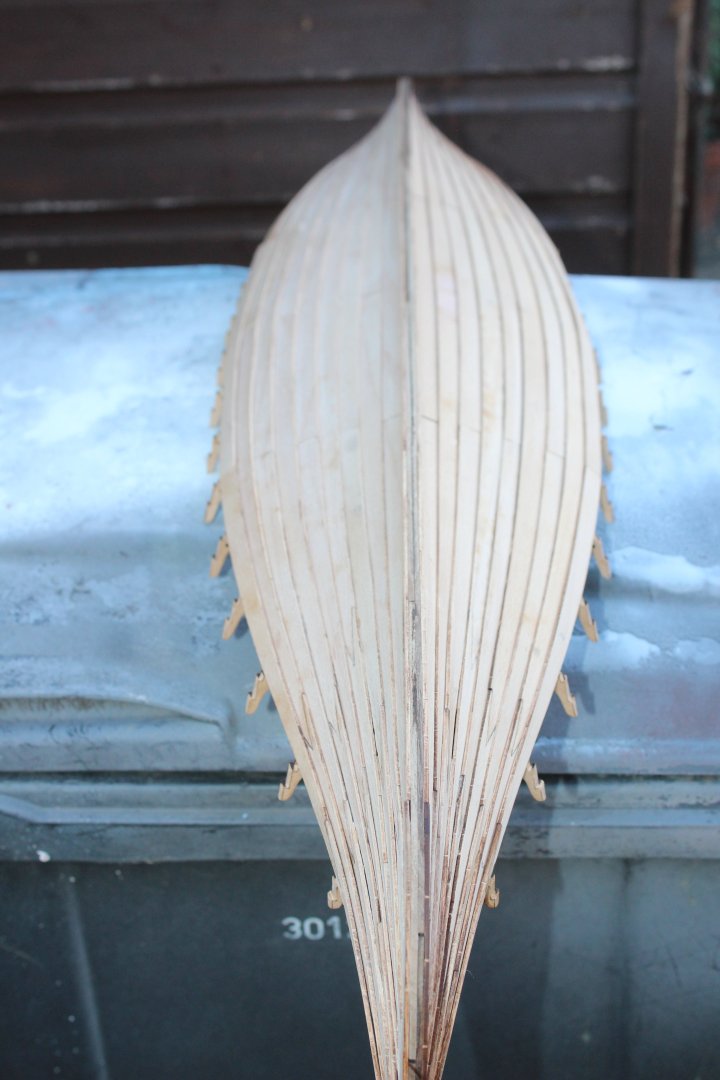
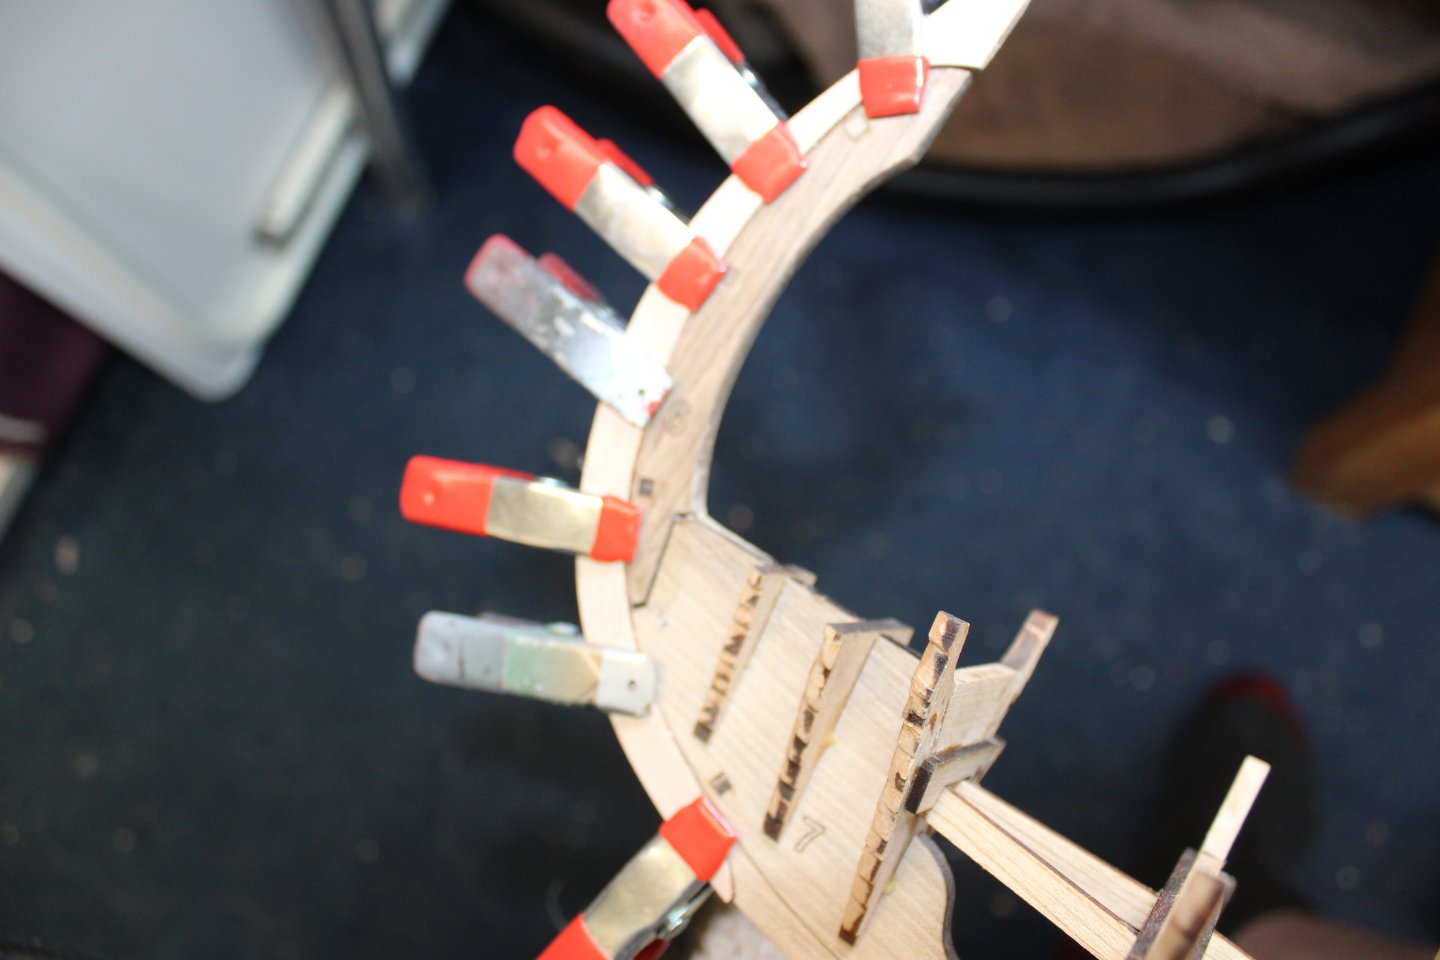
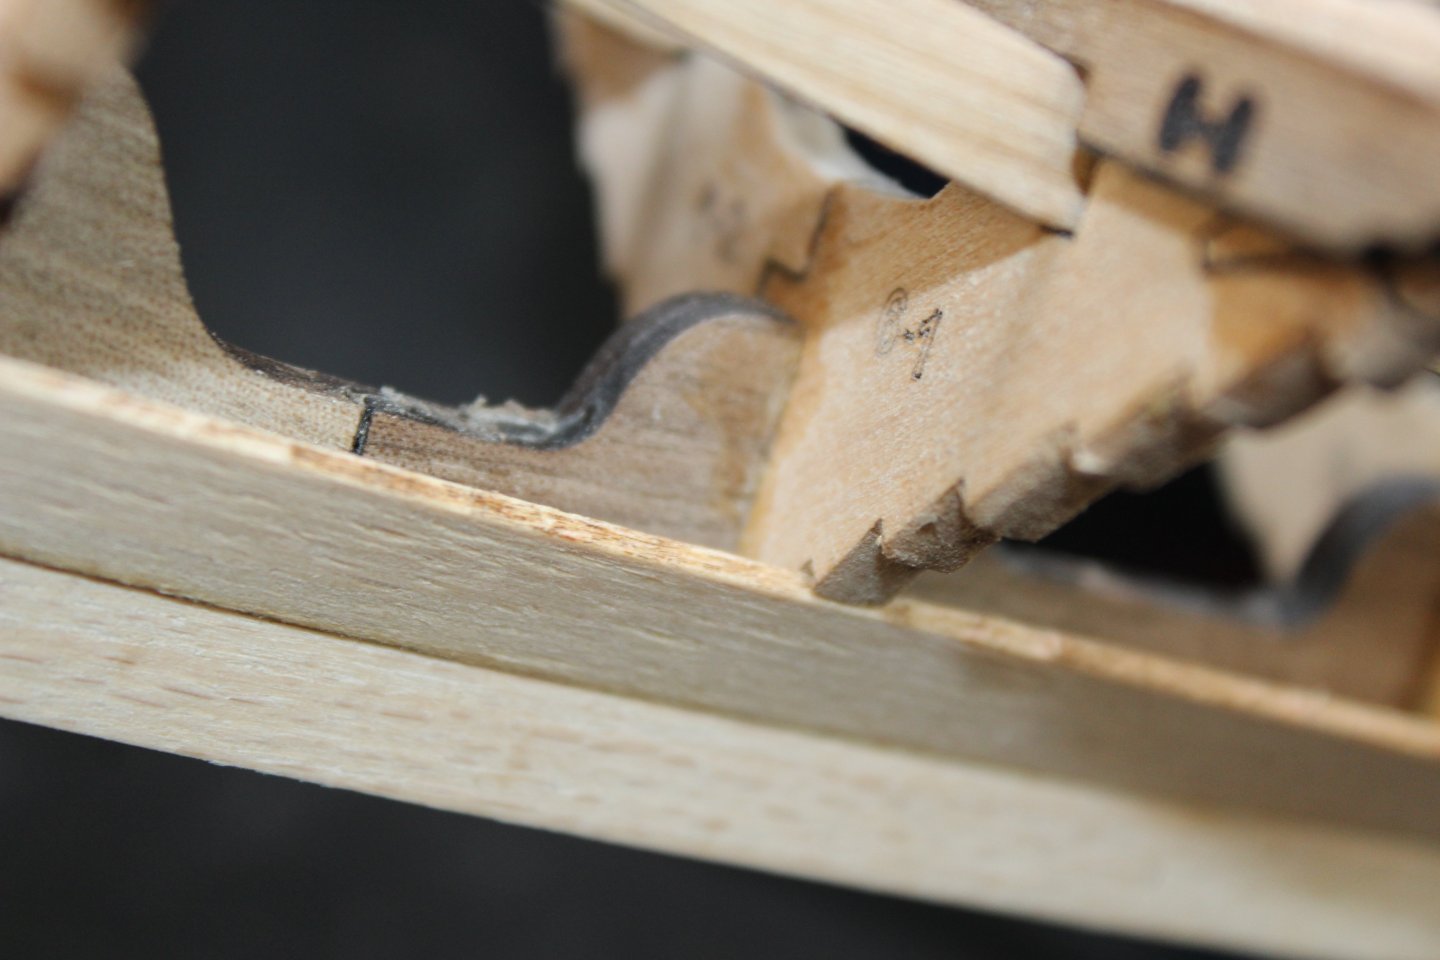
Day 8 Planking
Having never done a clinker build, i was expecting it to be far more difficult than it actually is.
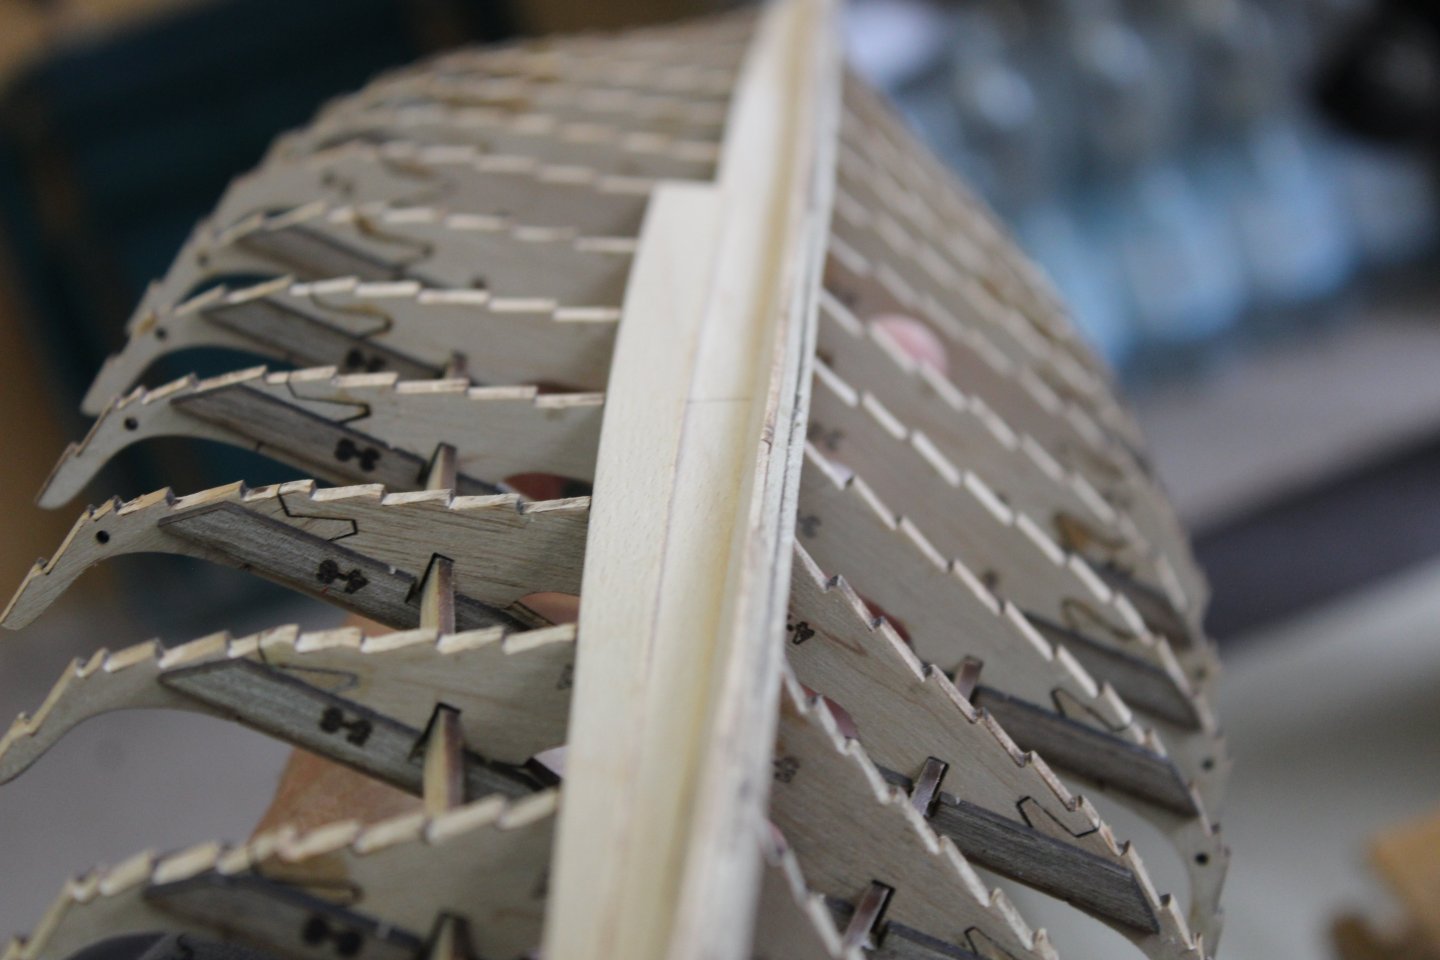
The boards are made up in two halves, sanded then lined up against the rebates on the frames, frame 8 (bow and stern) is not a problem, but does need adjusting each time a run goes in, numbers 9 and ten, don't do much other than force the wood in the right direction
Before starting a temp piece is put in, and removed at a later date, all the boards then butt up against this, it also extends along the keel
board row number 1
row 2, and so on
i am finding the boards very dry and brittle at times, especially around the kerf joints, the whole assu will be stained so will experiment on best way to fill, and ensure the stain will take to those repaired areas
-
5
-
-
1 hour ago, Arjan said:
I'm following this build with interest. Looks like this Vanguard kit is light years ahead of the old Billing Boats 1/25 Oseberg kit versions. Also the Vanguard kit is the first one I have ever seen showing the oarsmen's chests in the correct position for rowing.
In other respects such as the compass the Vanguard kit also seems to be historically correct. The attire of these oarswomen certainly isn't 🙂 :
Regards,
Arjan
good afternoon, the kit is from a company called Ships Of Pavel Nikitin, but Vanguard Models has imported a few to stock Pavel Nikitin store
-
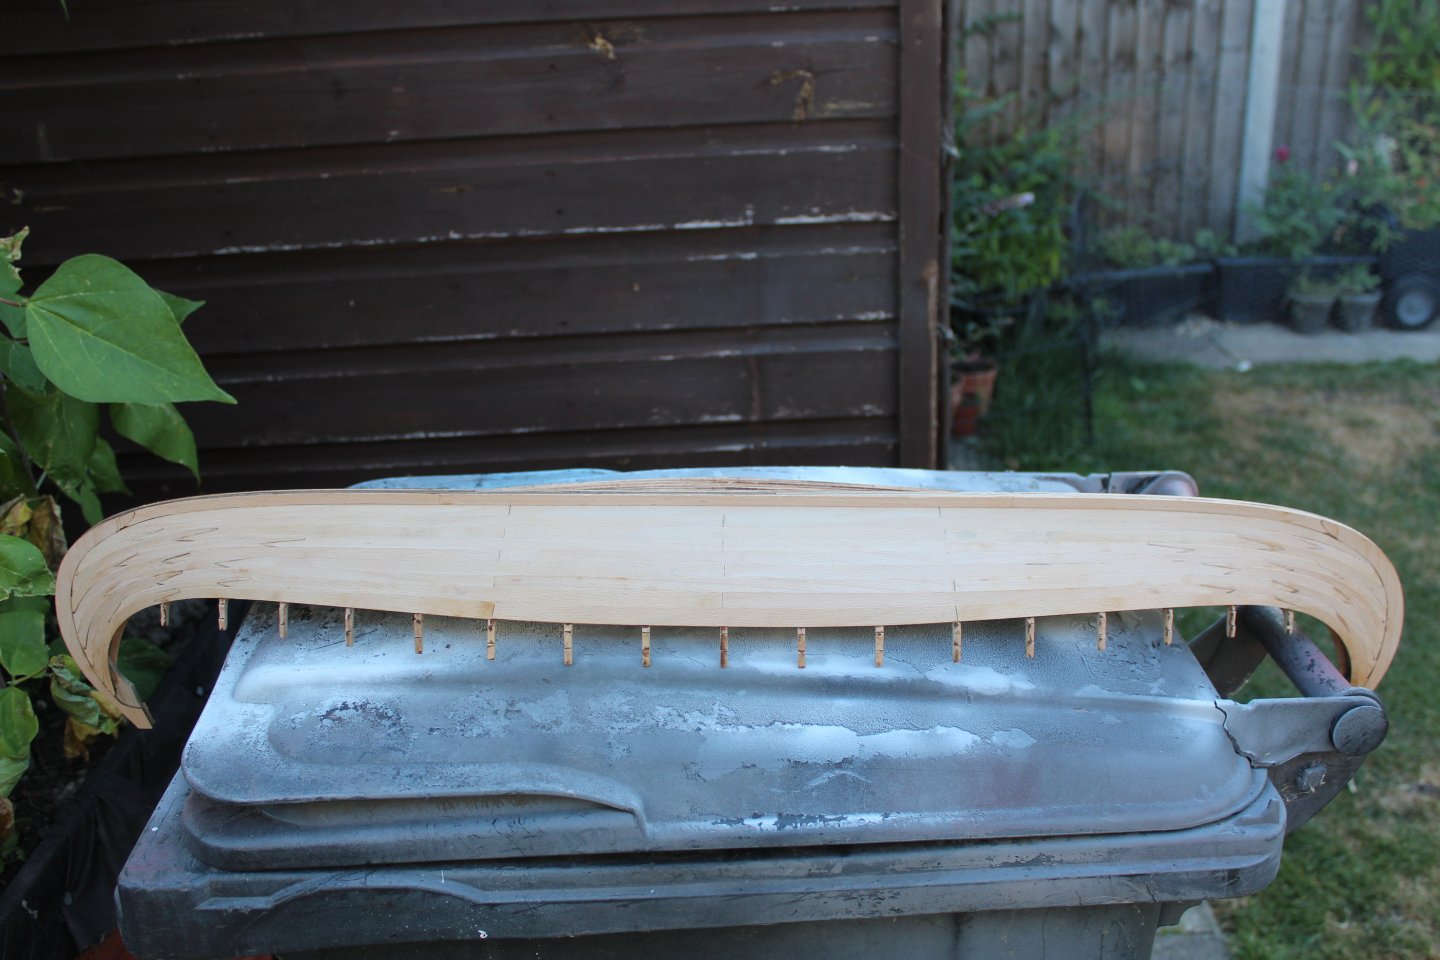
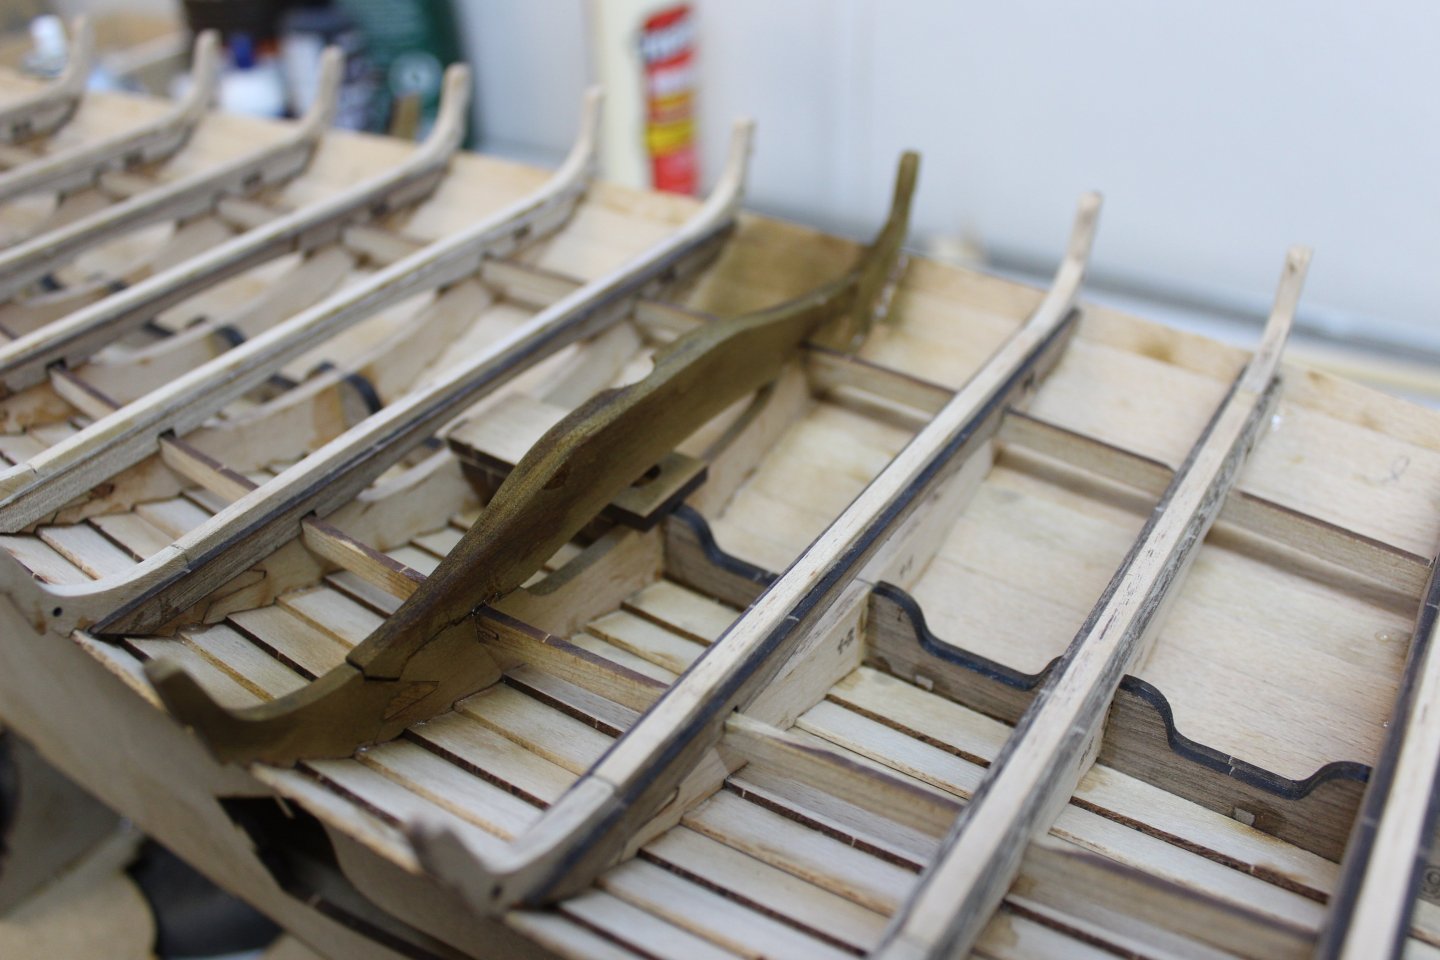
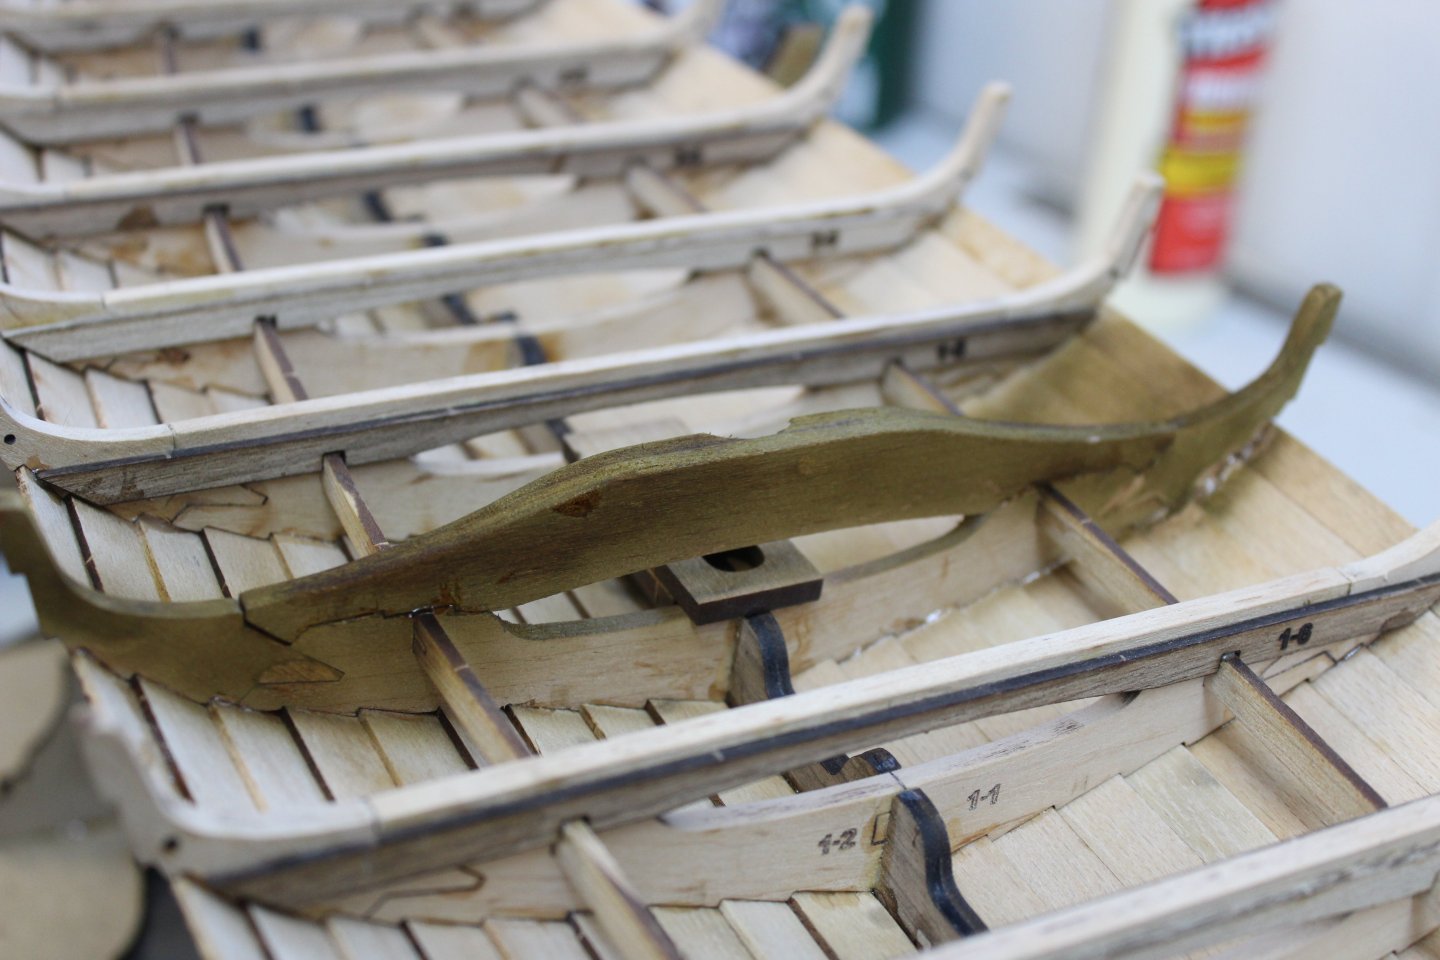
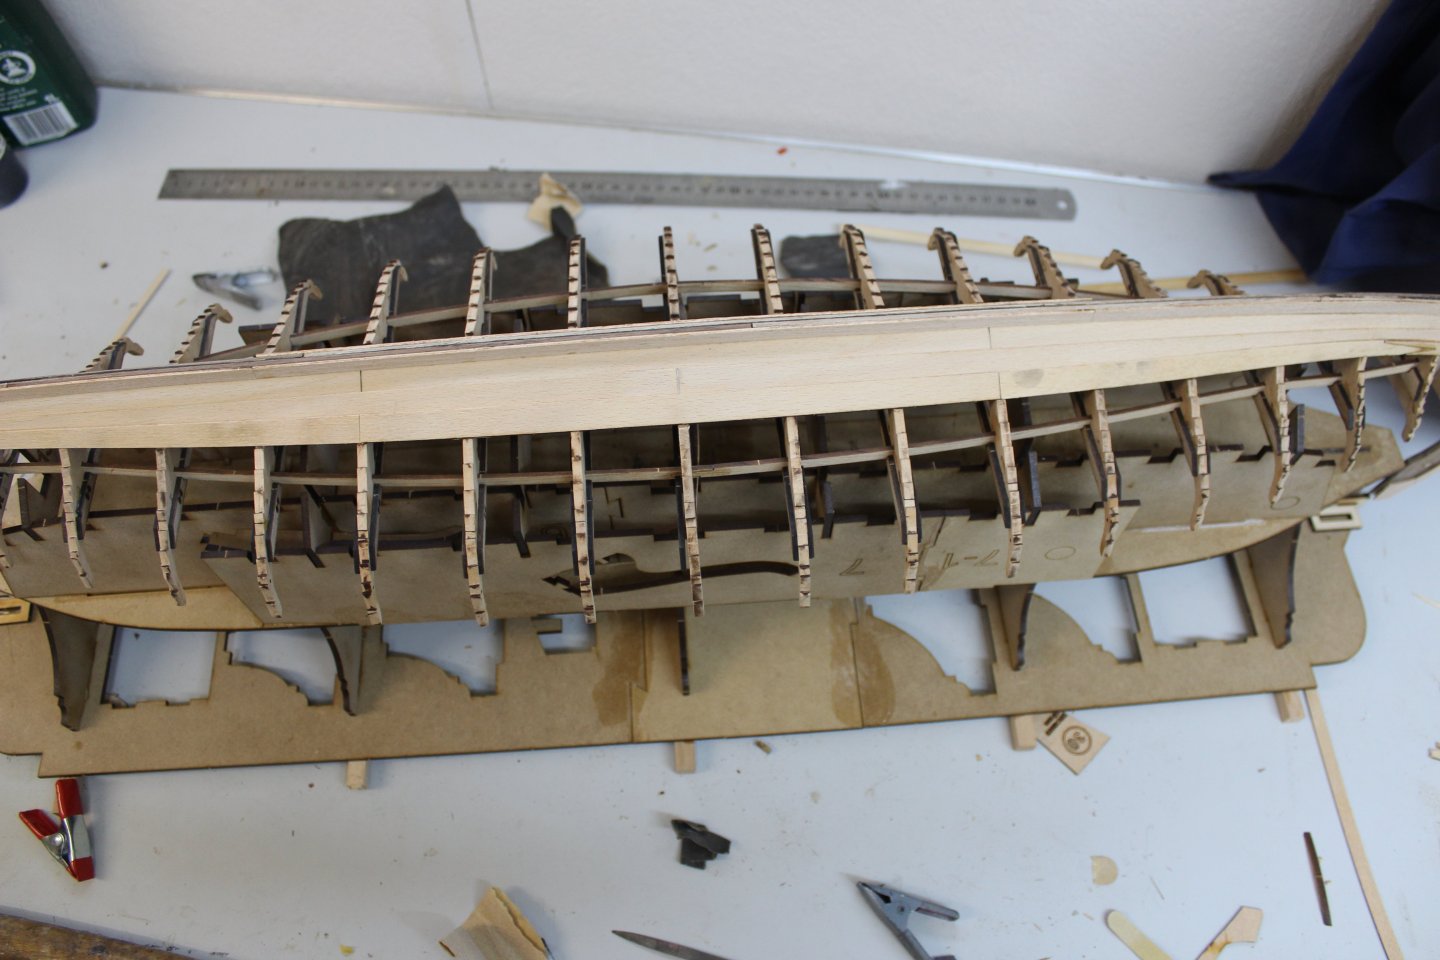
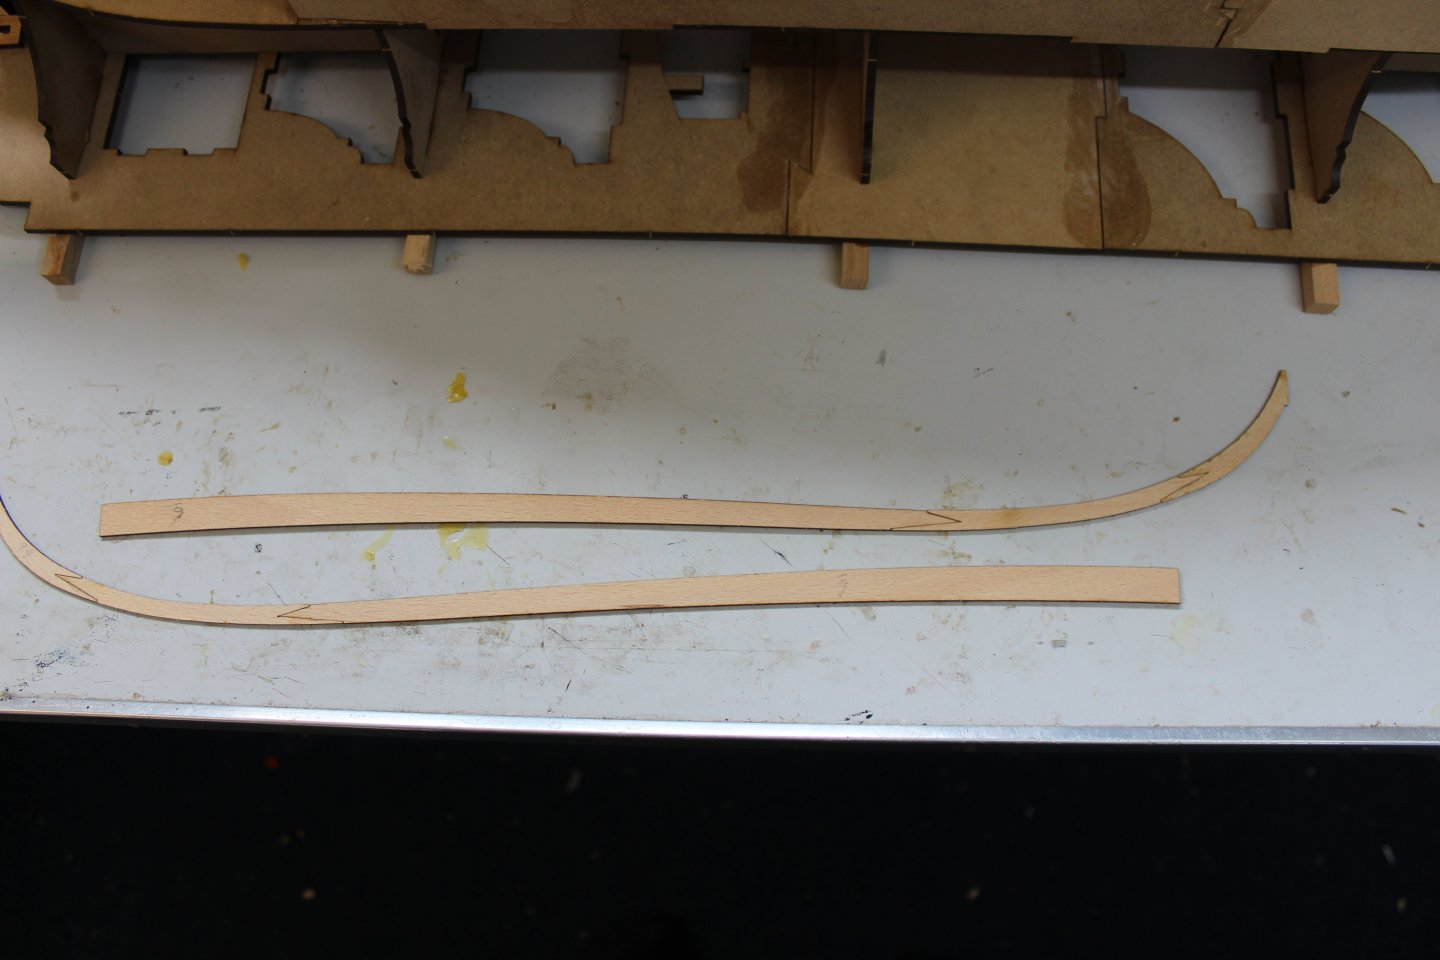
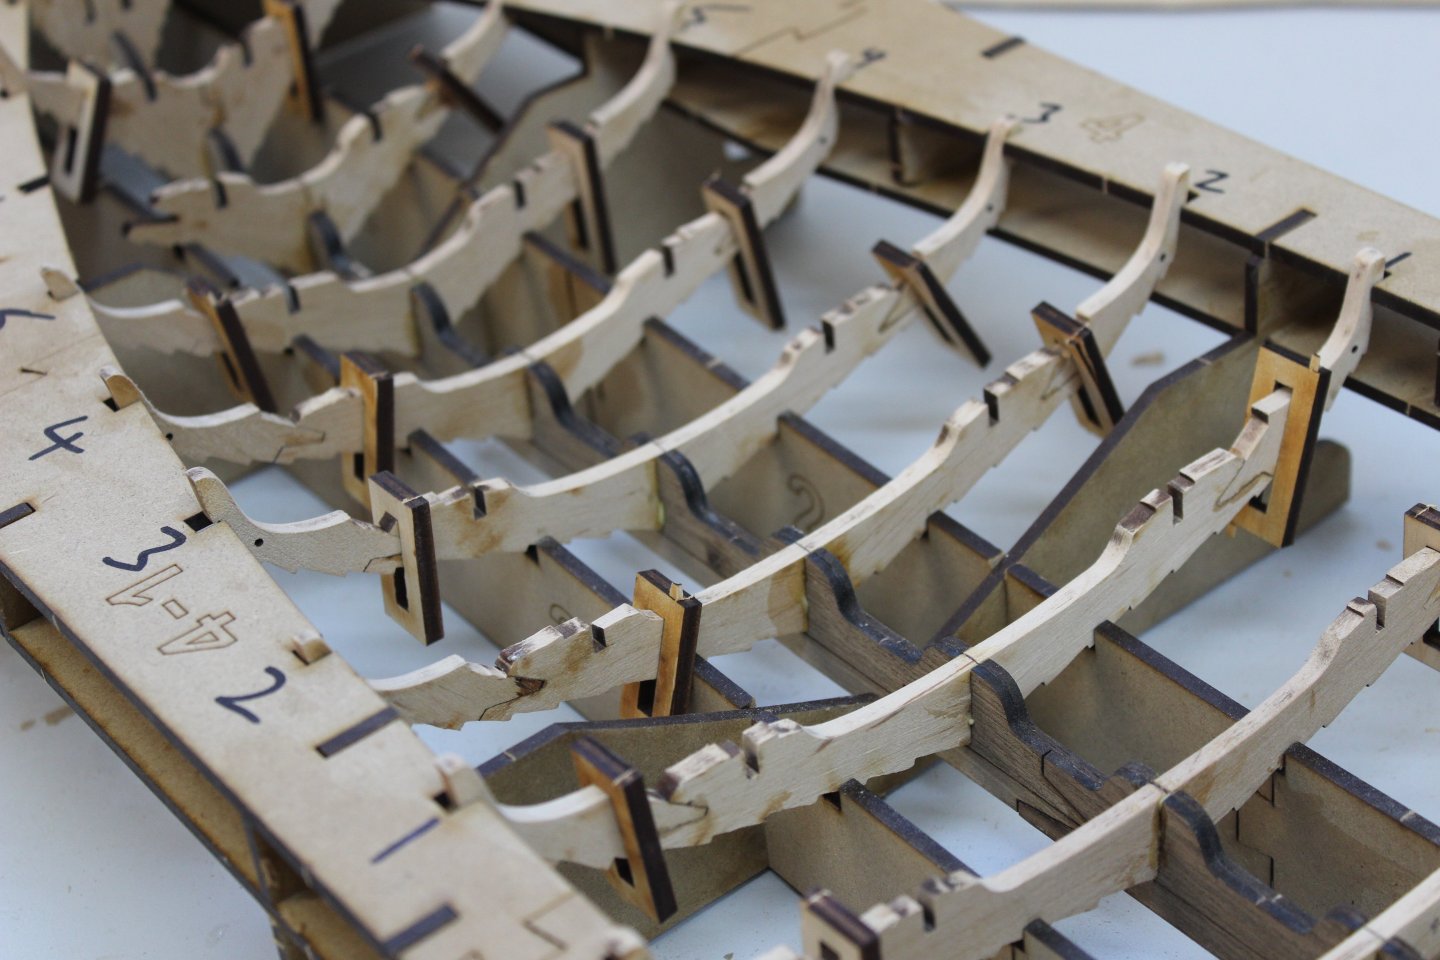
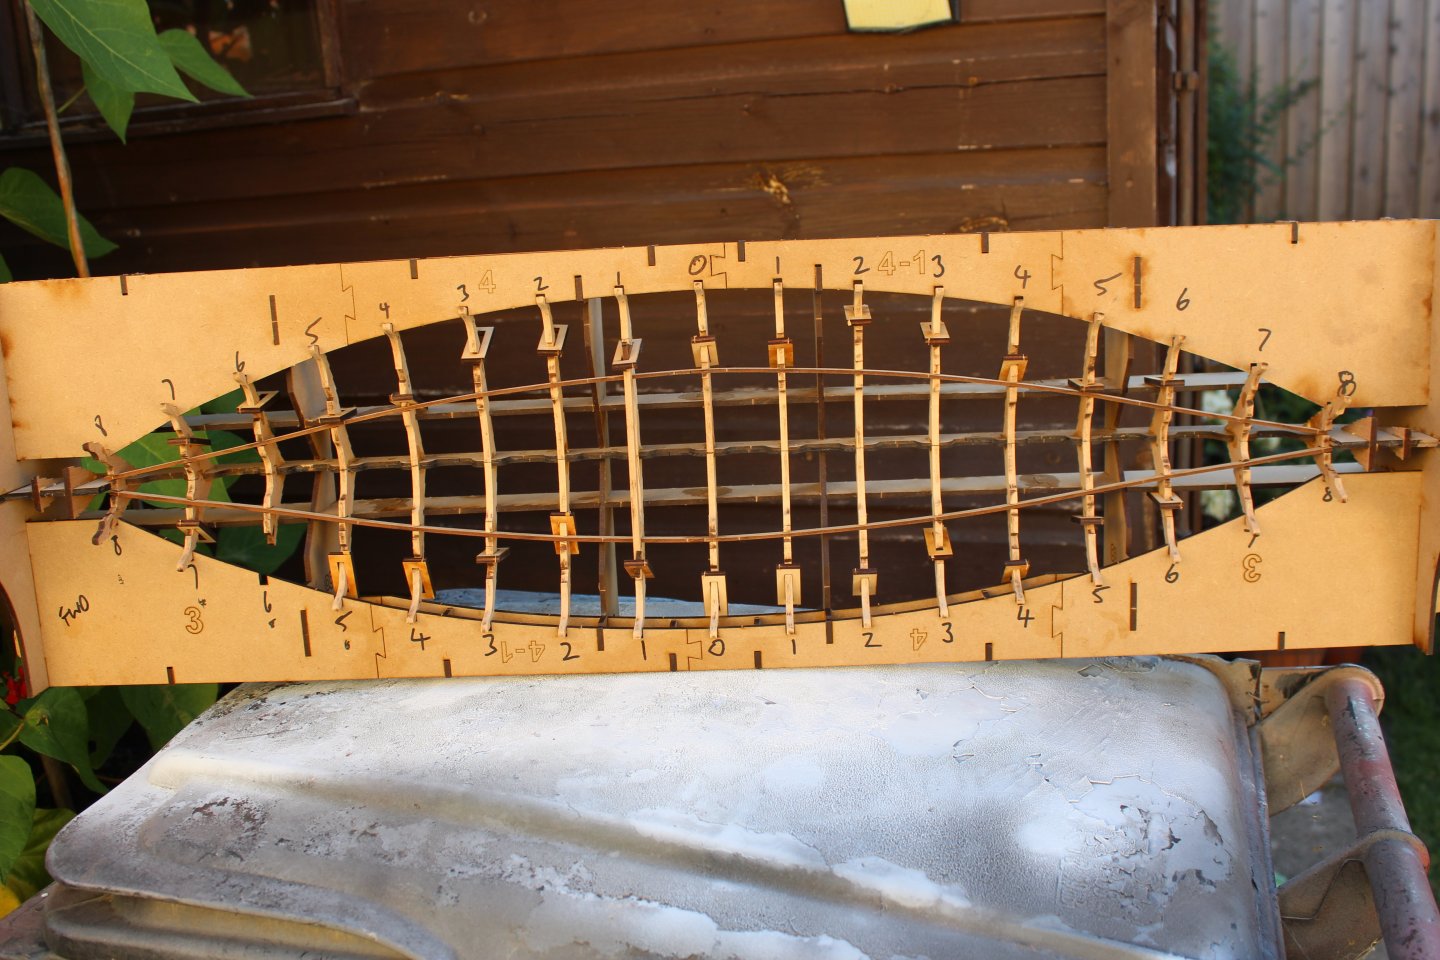
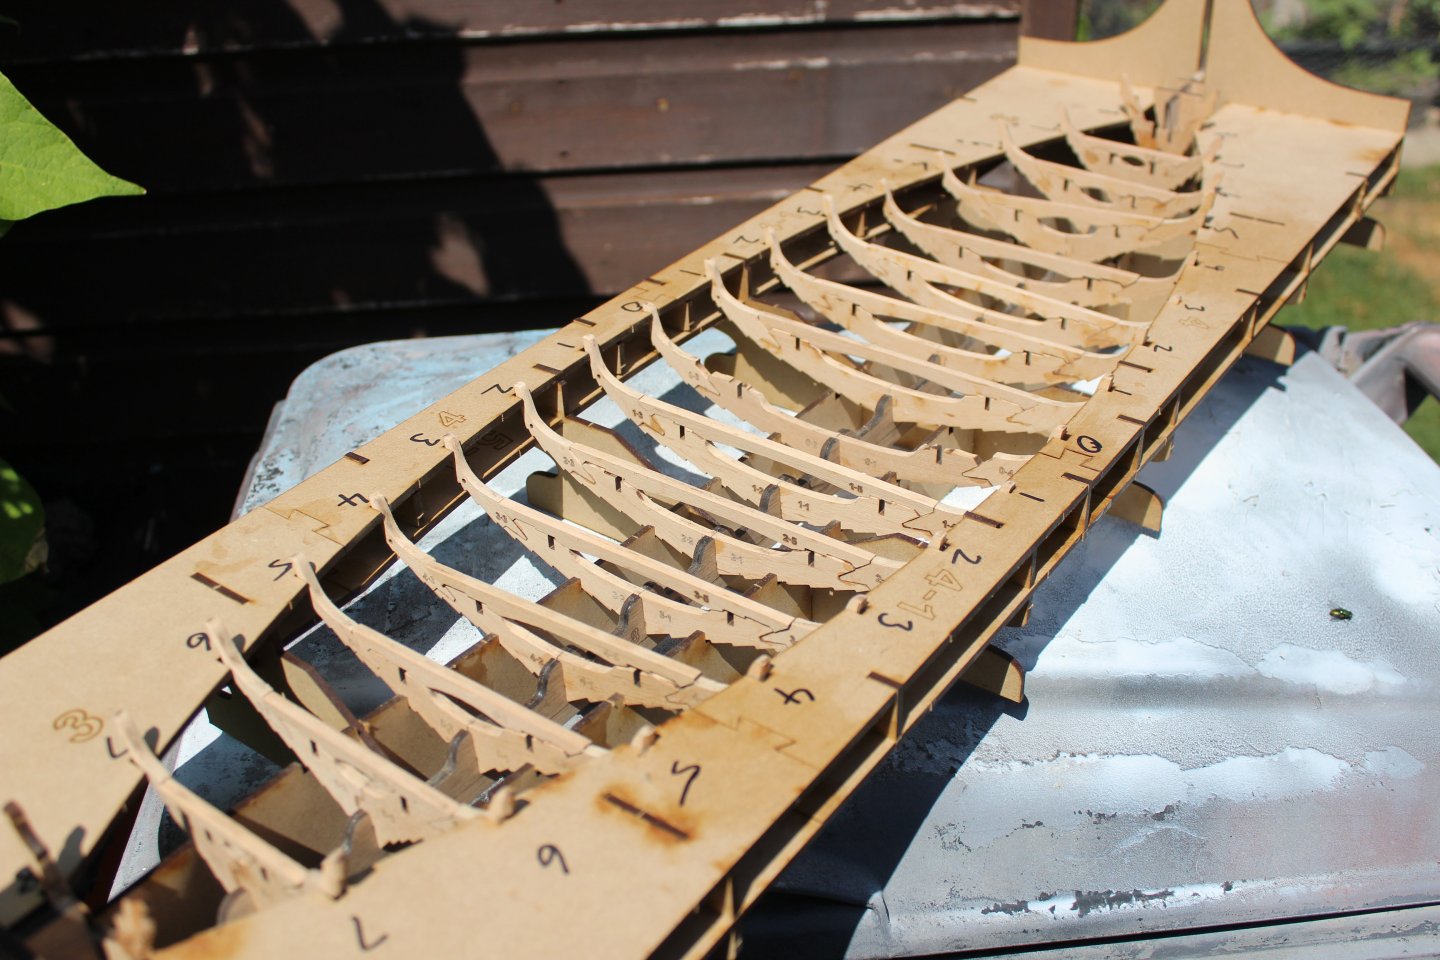
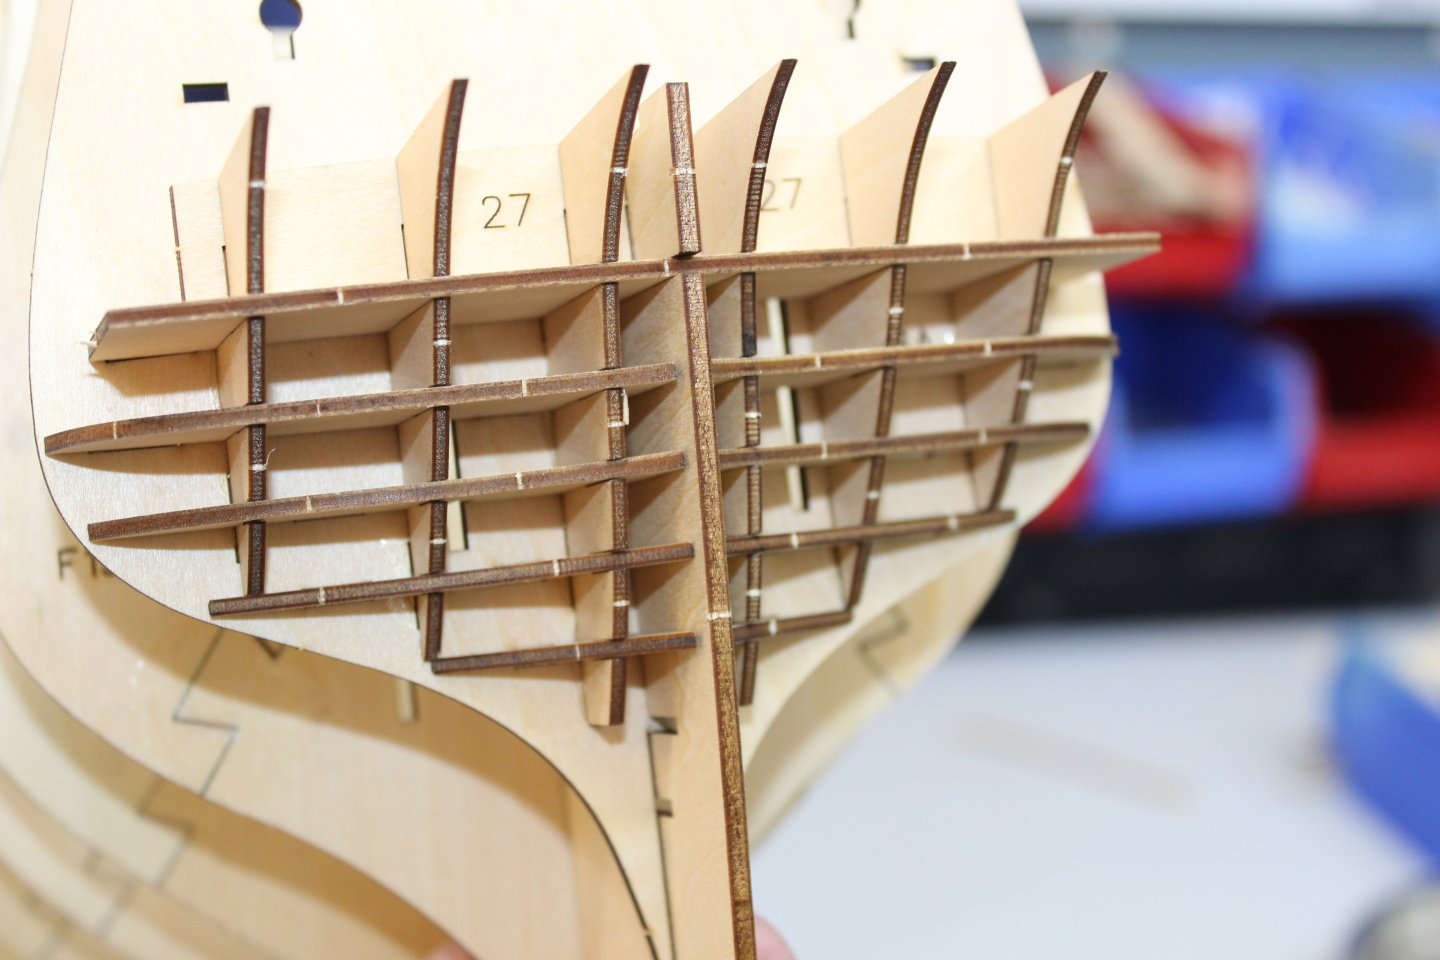
day 4
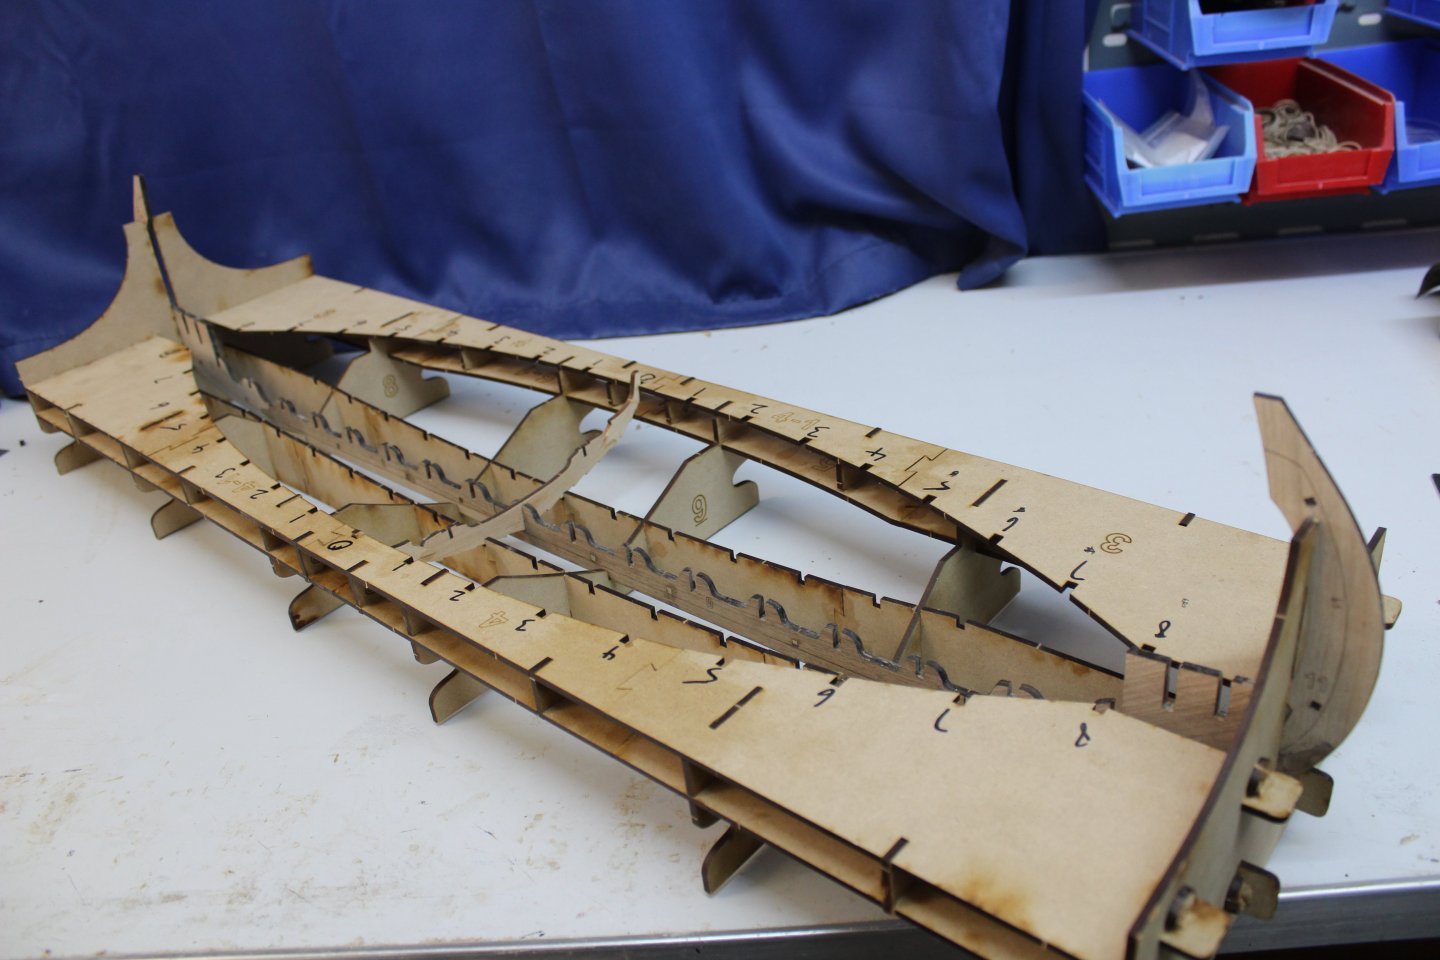
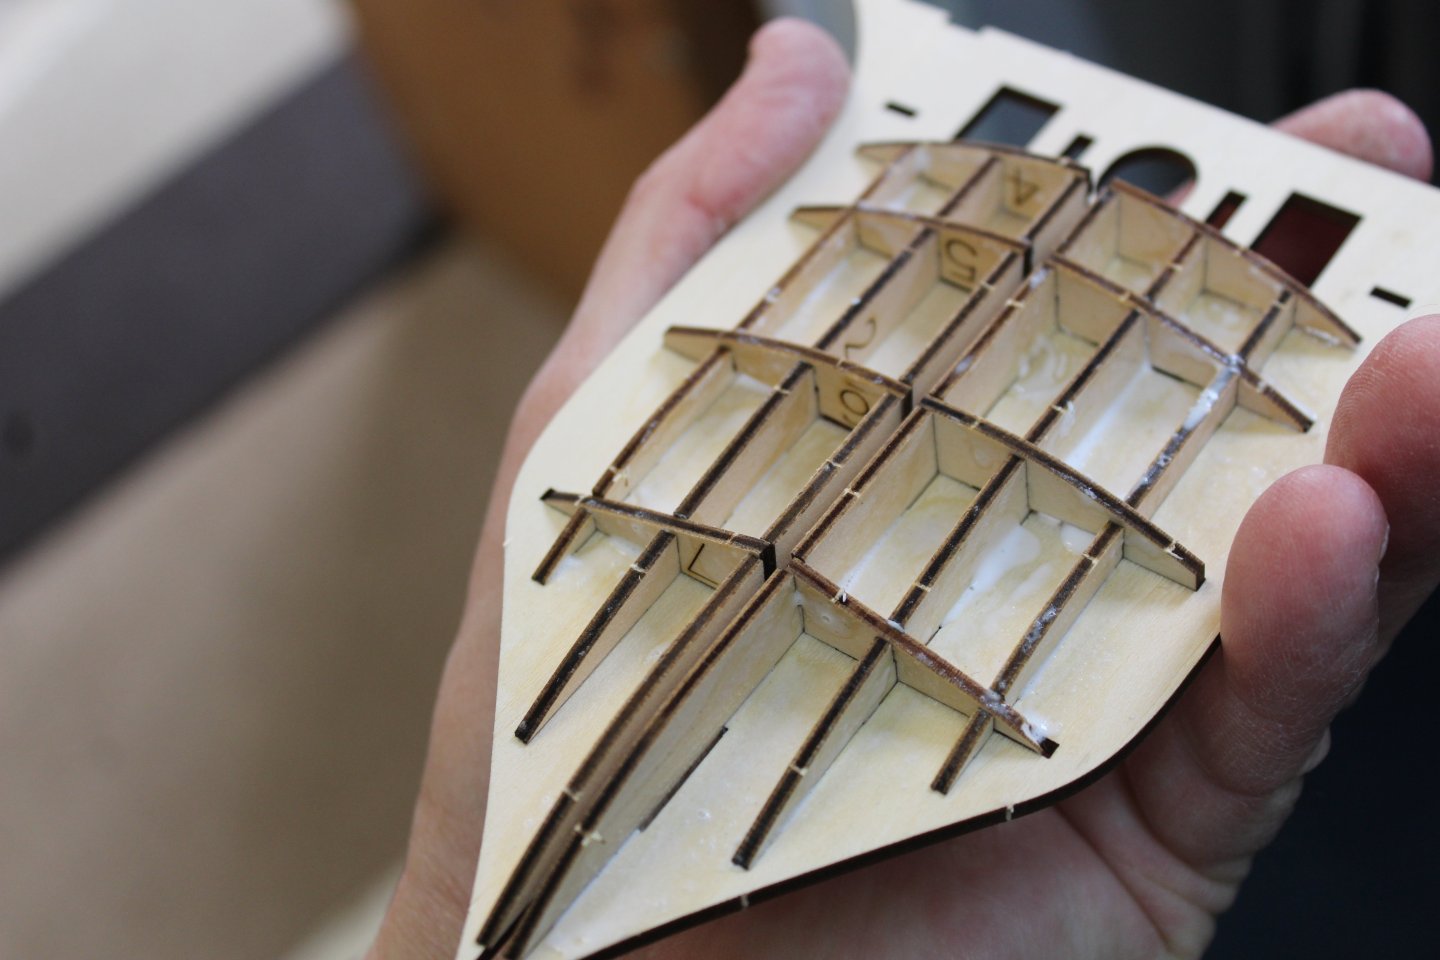
having been left overnight to set the keel and fitted frames are removed from the jig, only to be put back in with the cross member clamps
shaped stringers
in place
simple yet clever way of holding down the cross members whilst the glue sets
as i mentioned yesterday the way frame zero goes in dictated fwd at aft of the build, now is the time
Mast step
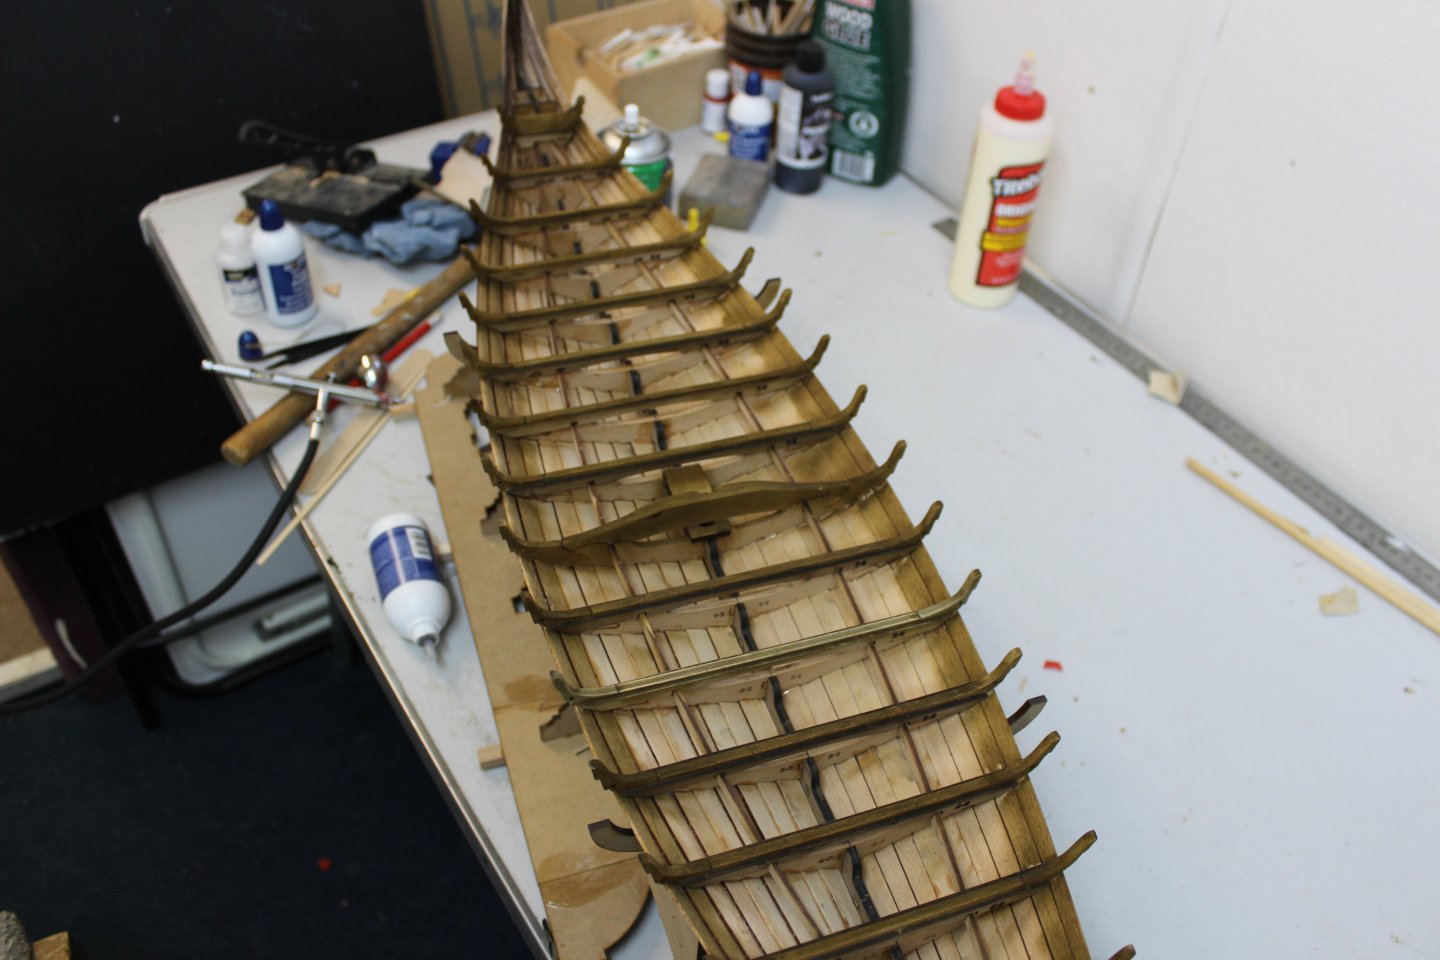
out for the dayanother rent a field session with the bois
and the whole assy removed from the jig
-
9
-
-
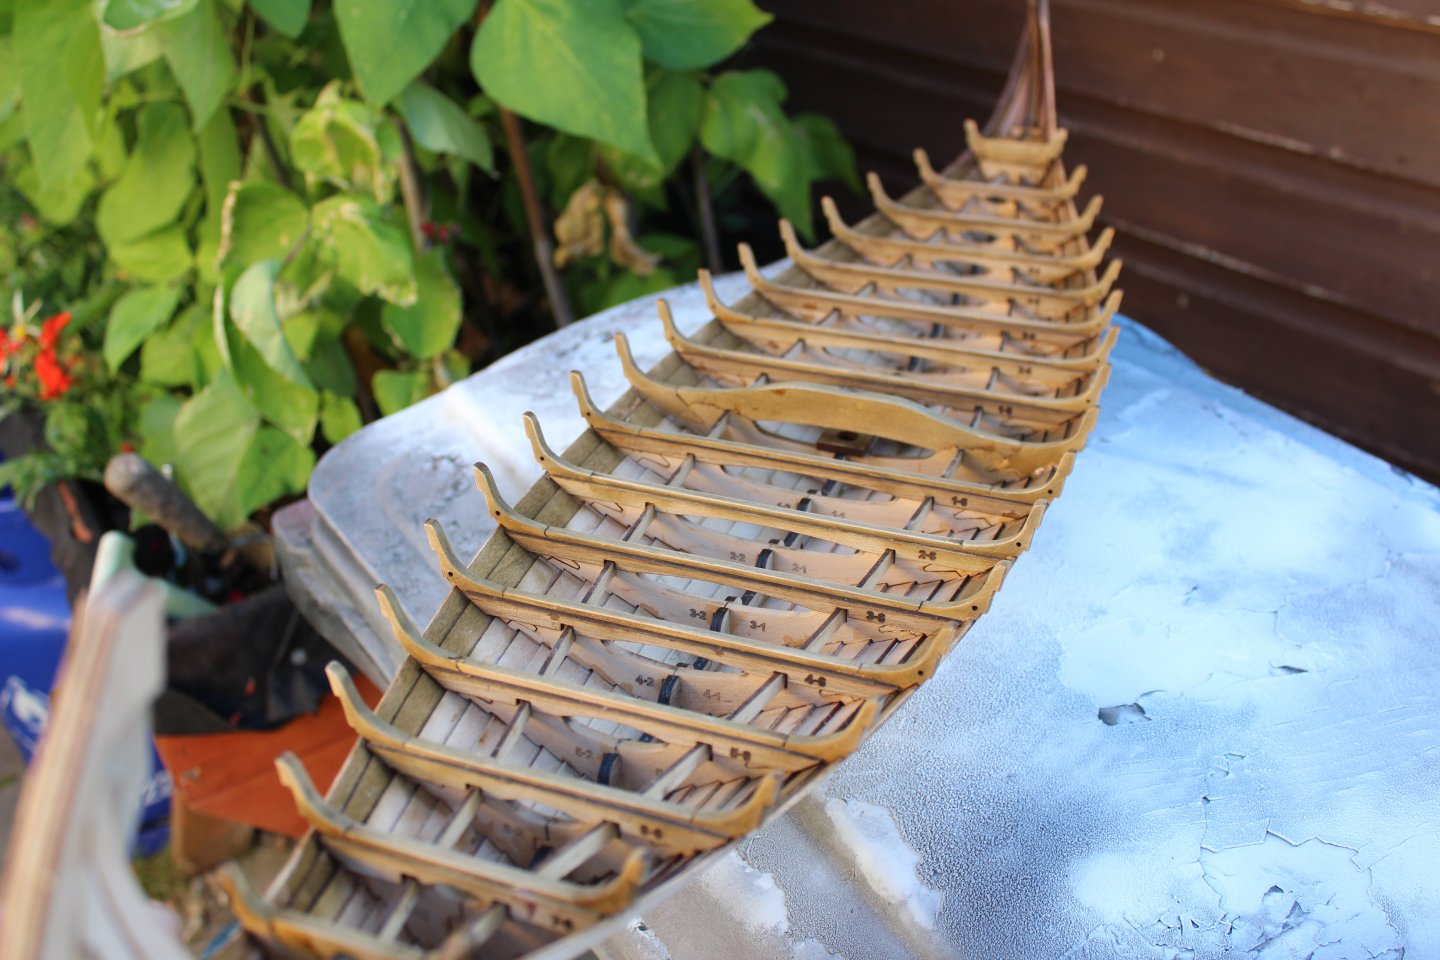
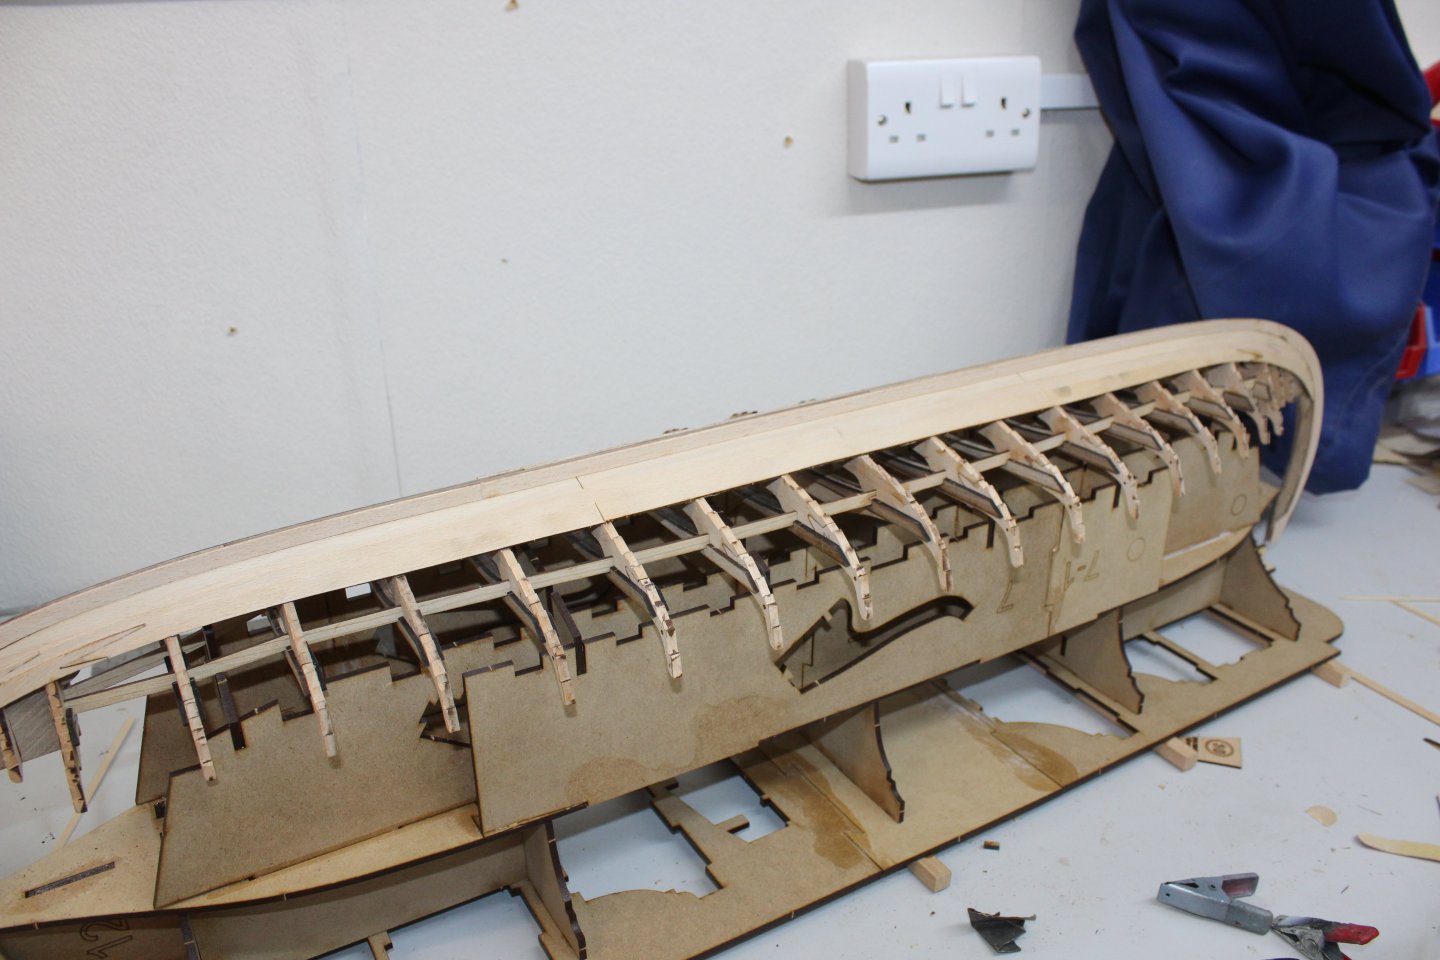
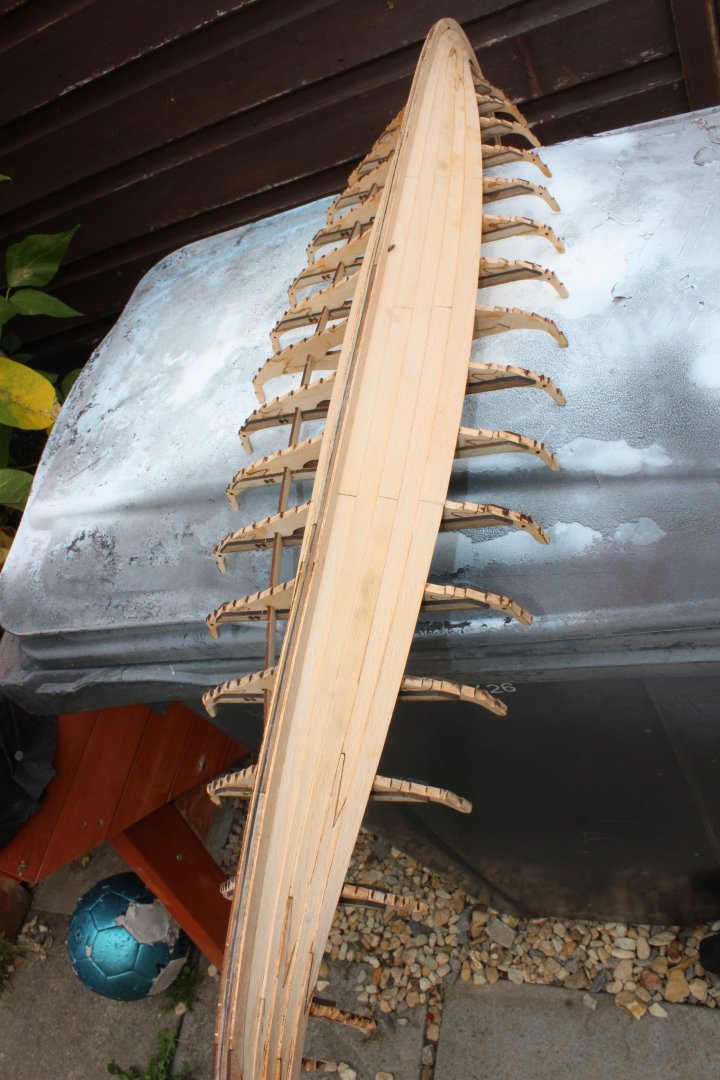
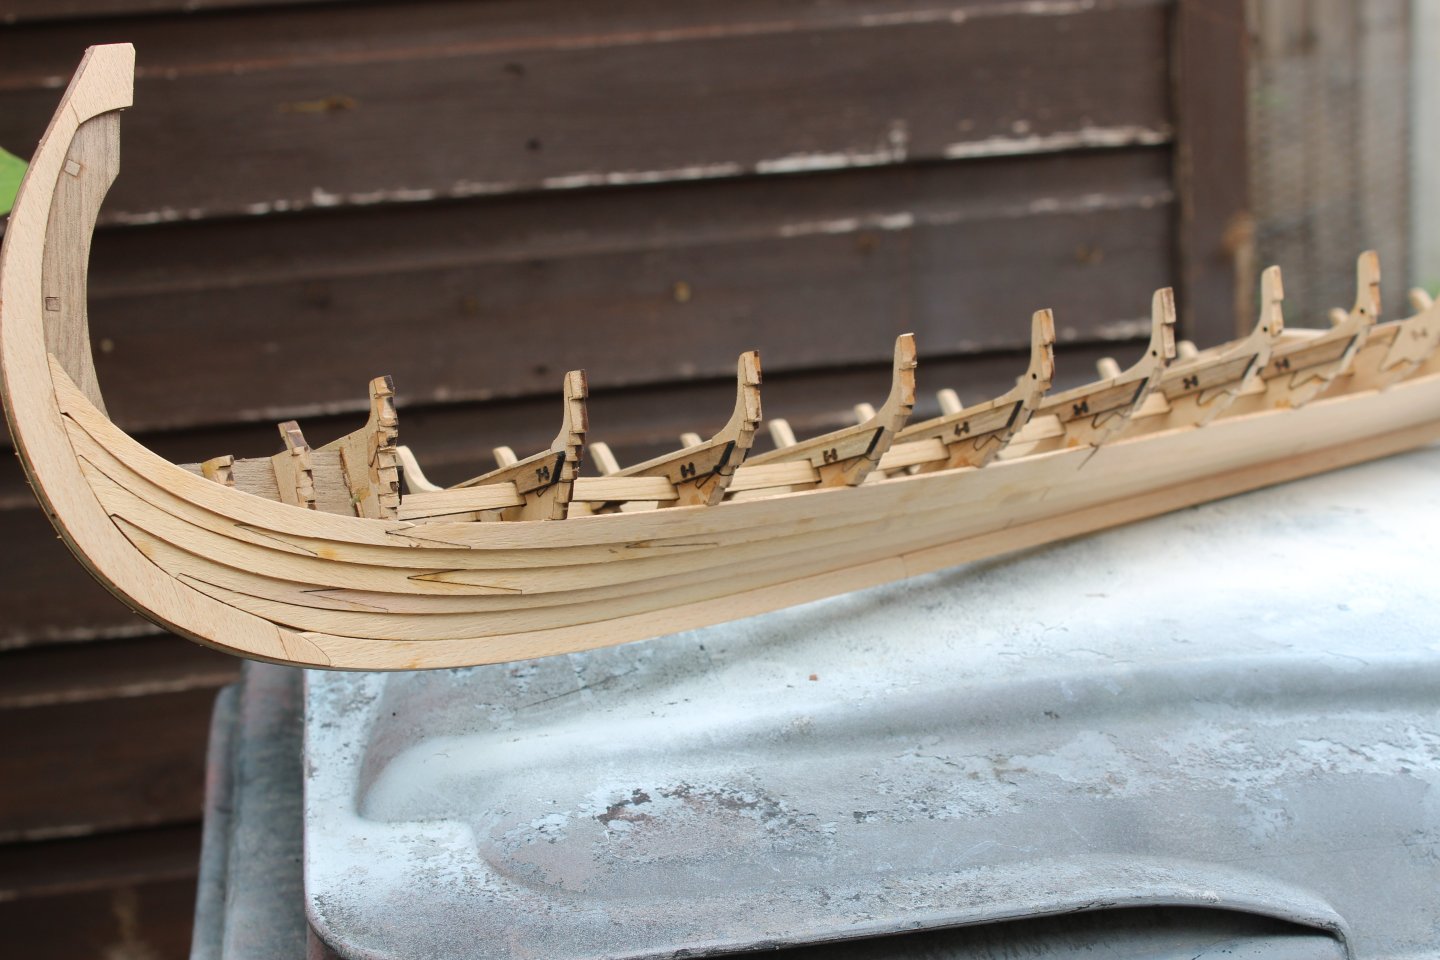
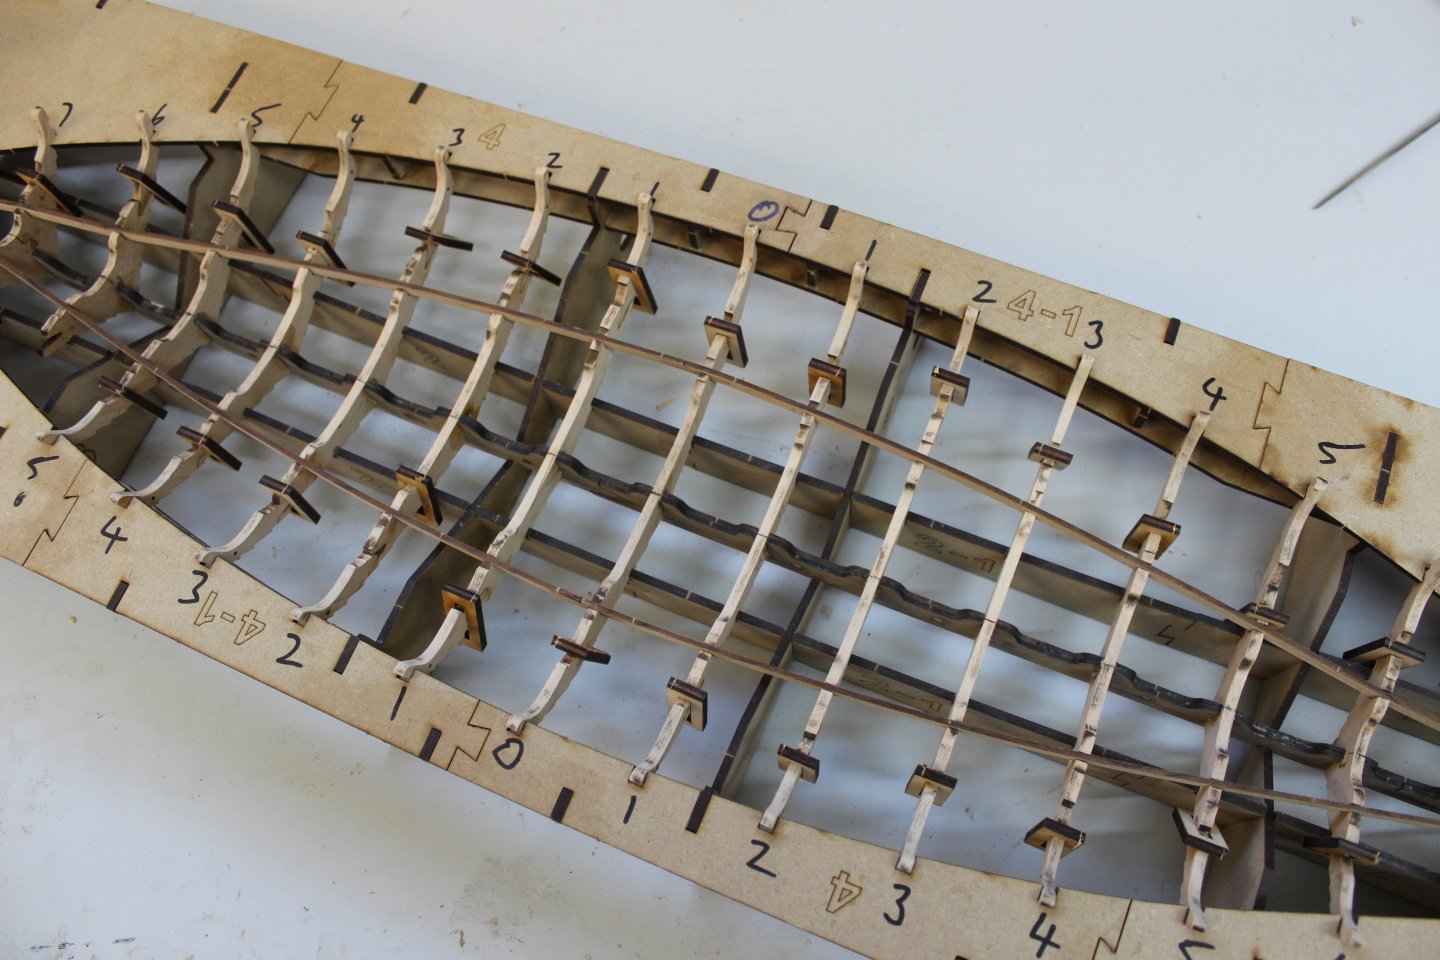
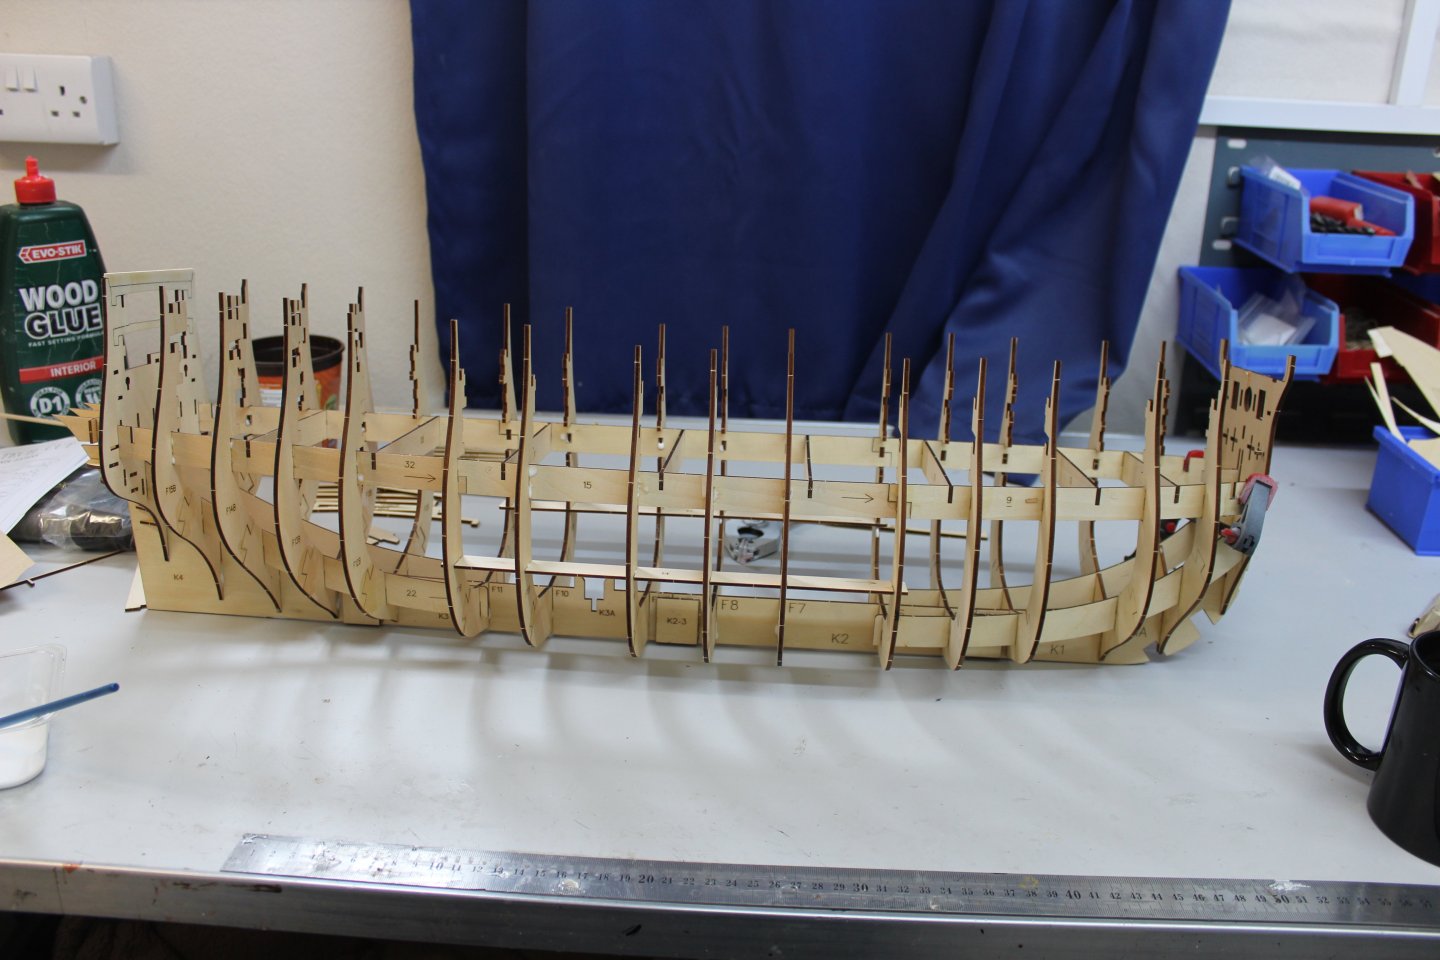
good evening everyone
im on day 5 now, so better bring you up to date
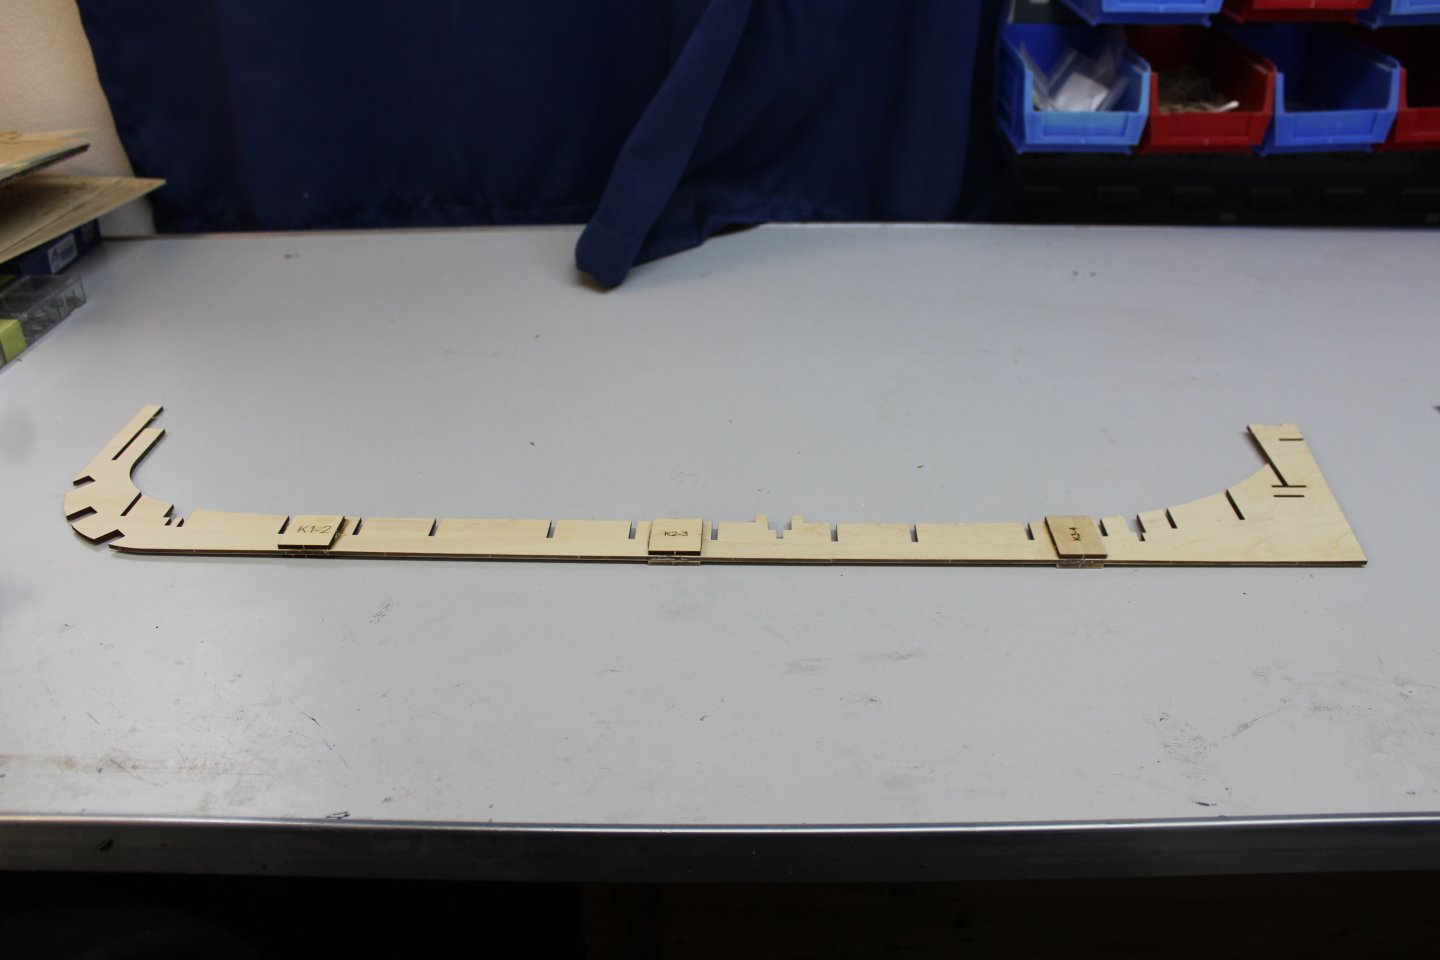
keel
no issues with making the 2 keel/centre pieces, these are offset sections to avoid weak sports, are glued together, allowed to set and then joined together, being held in the right place by 3mm inserts
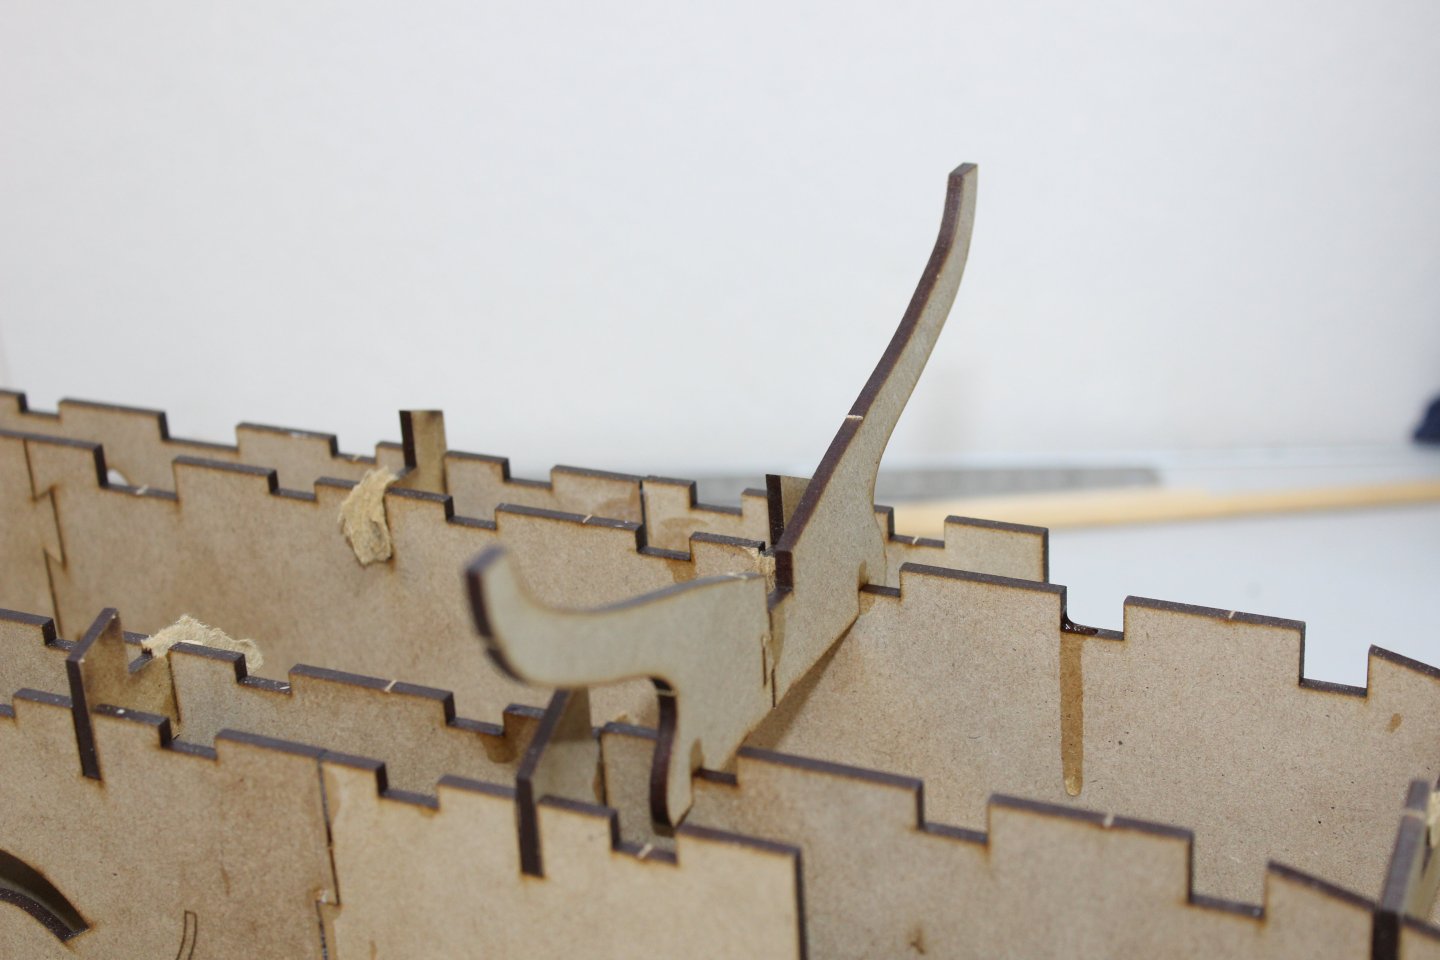
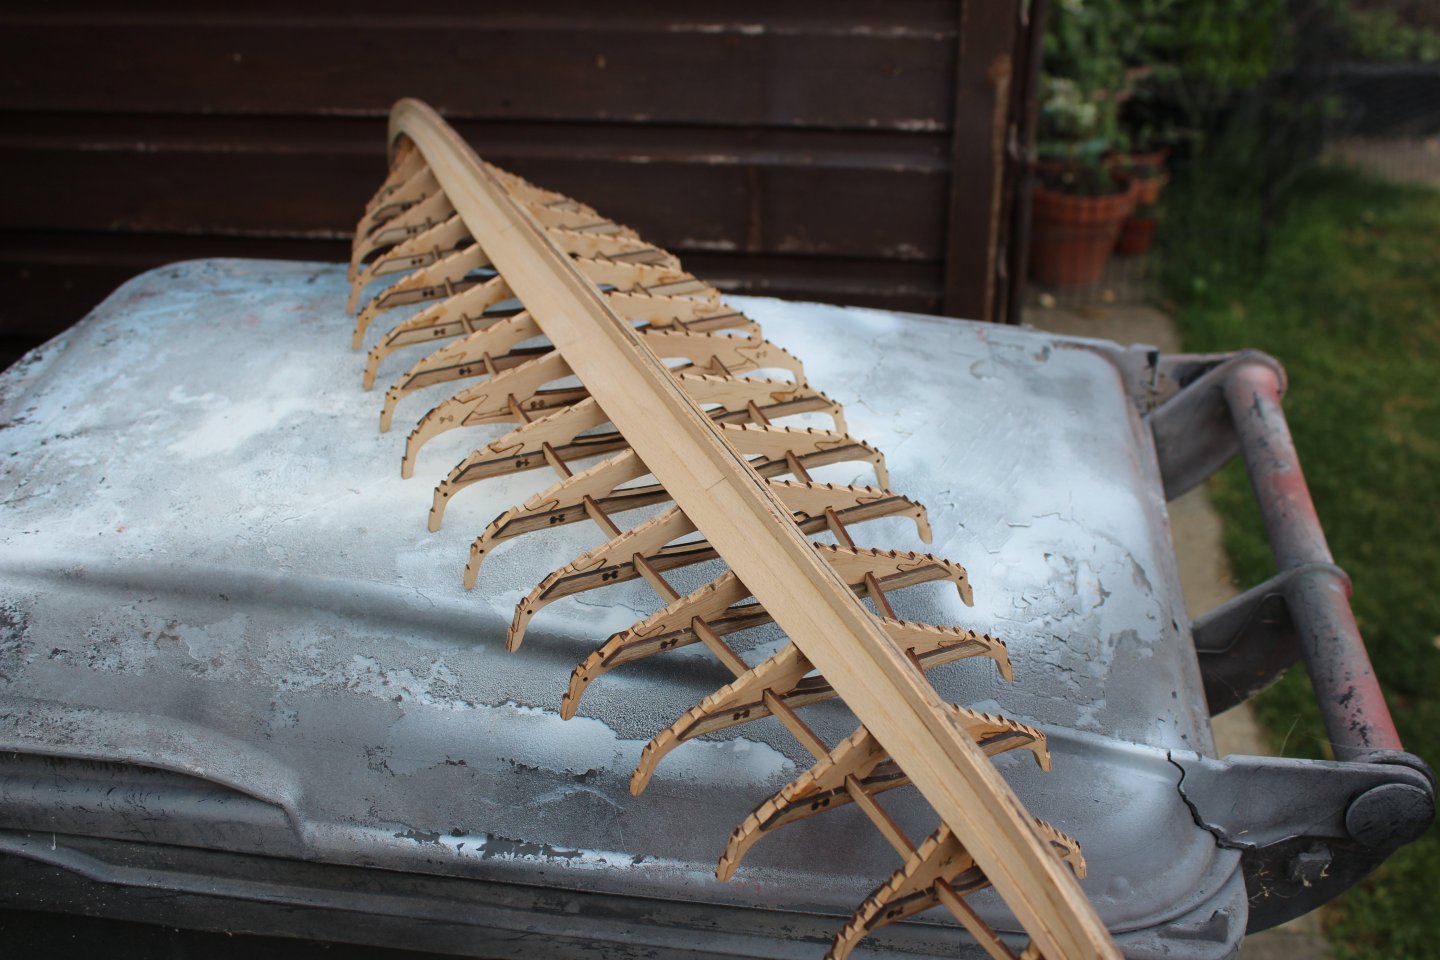
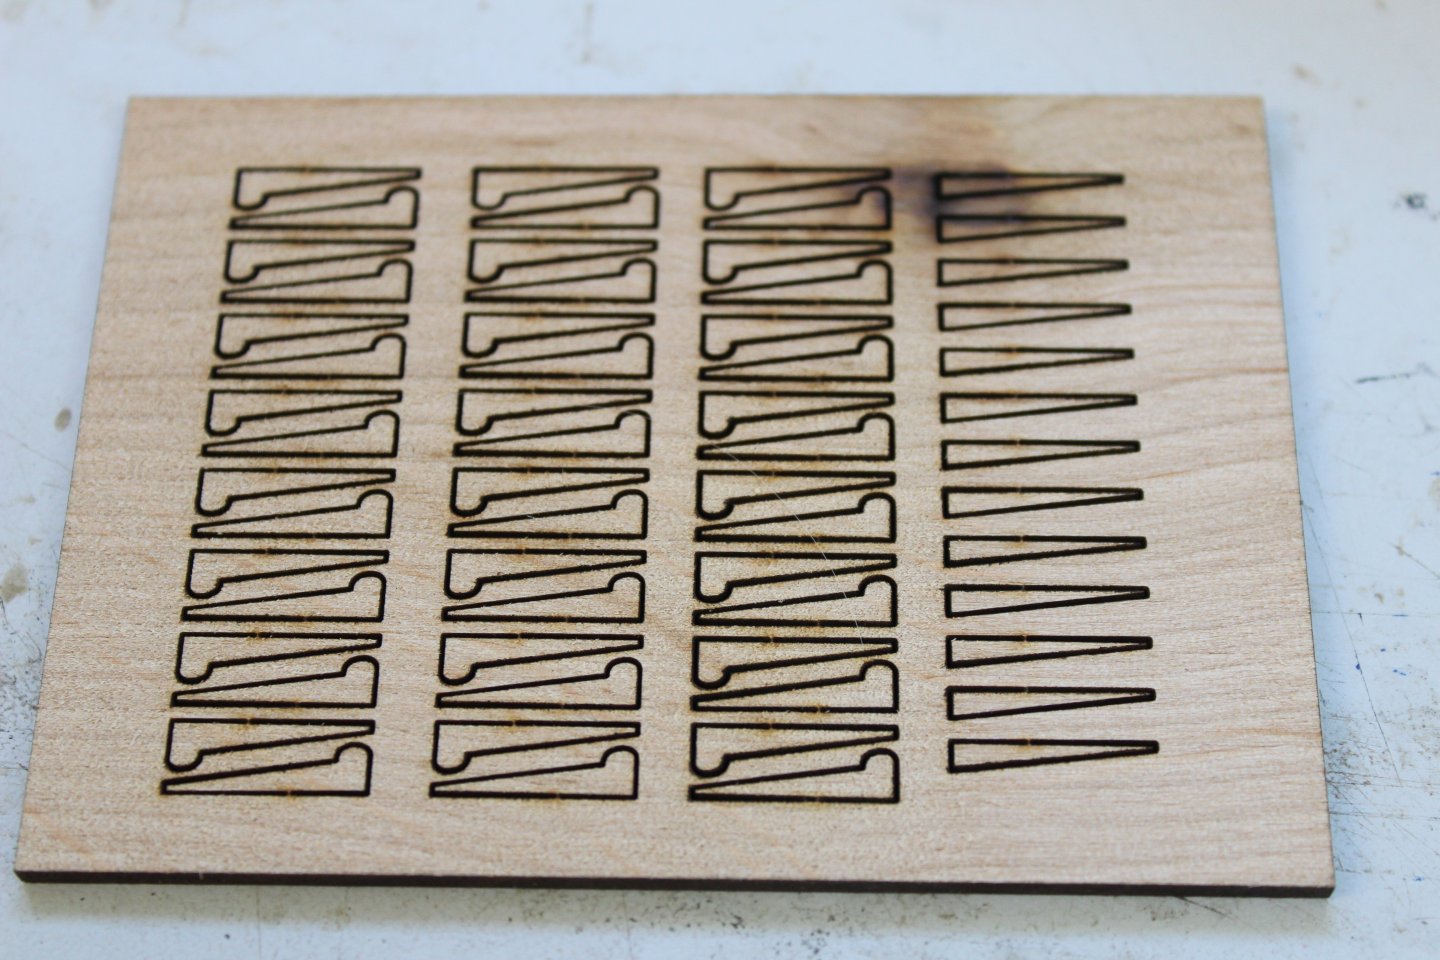
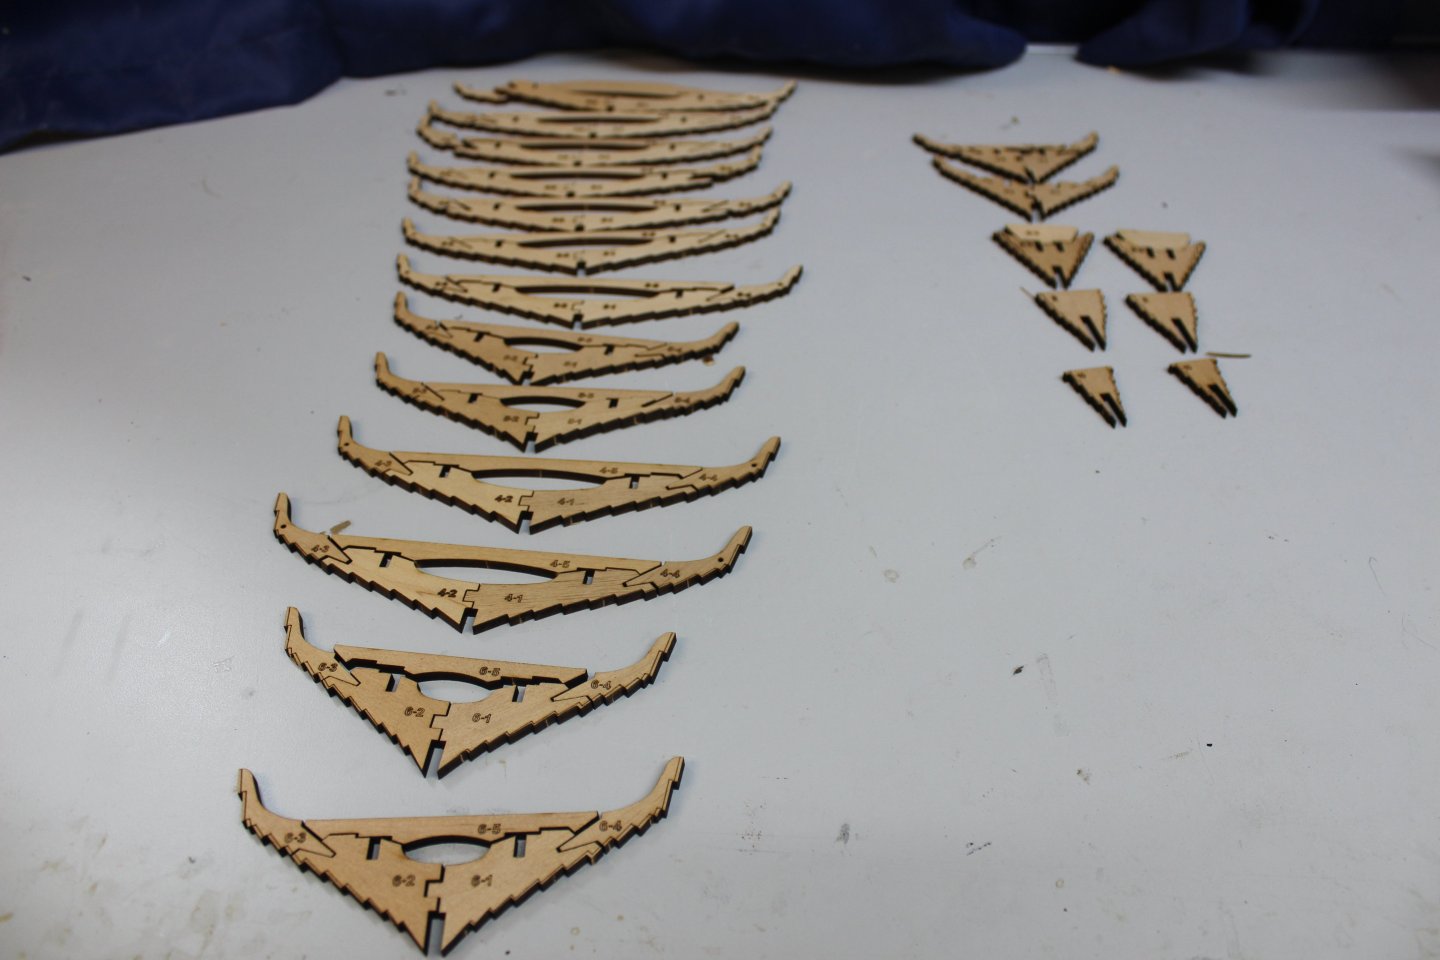
Frames
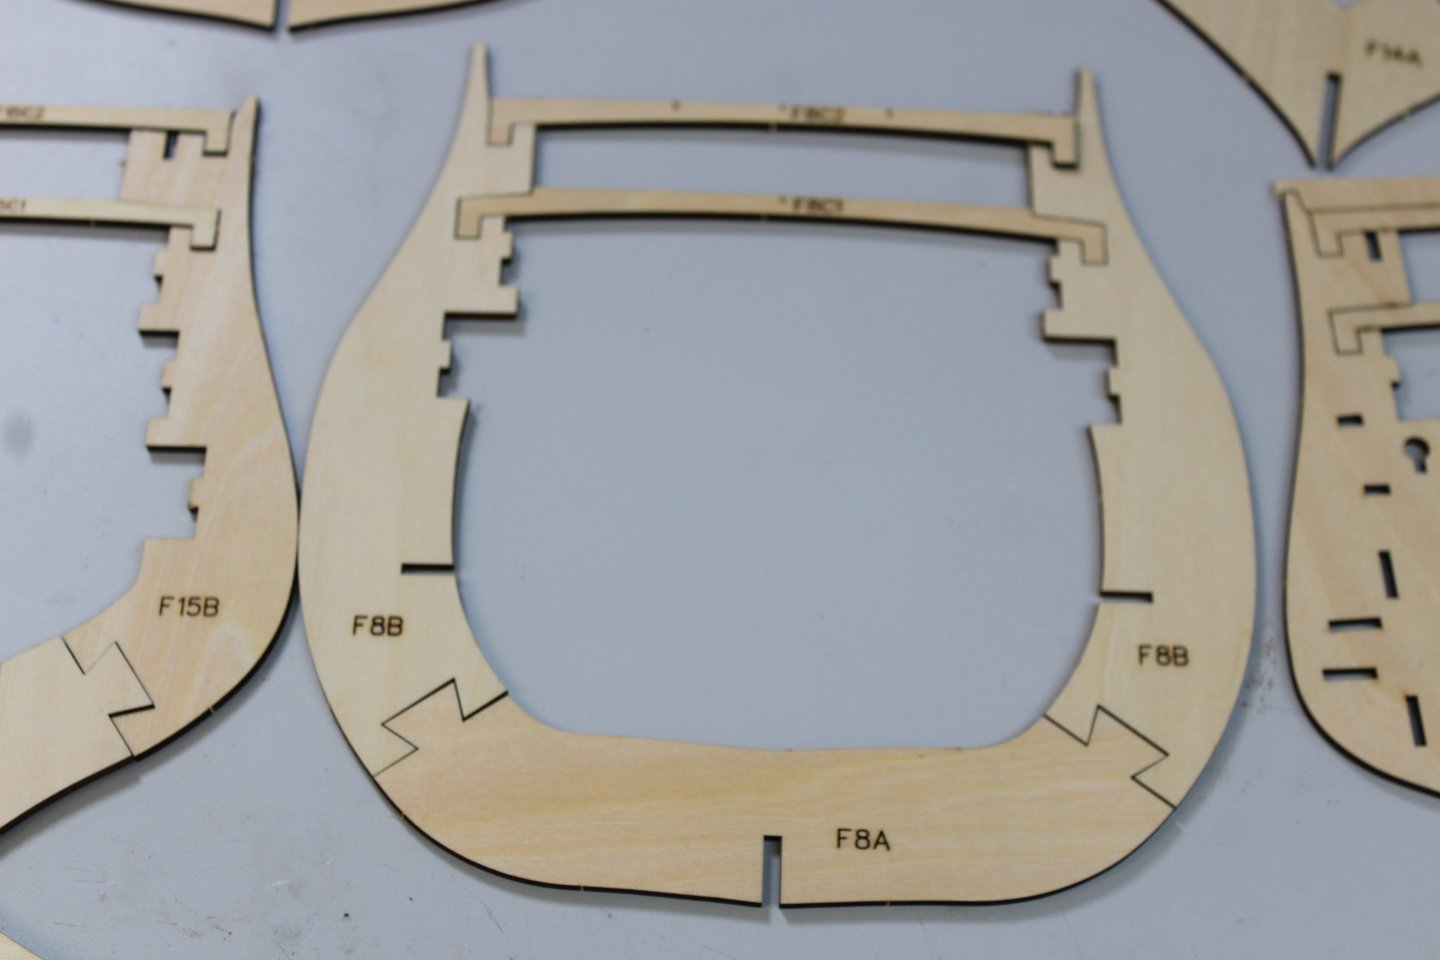
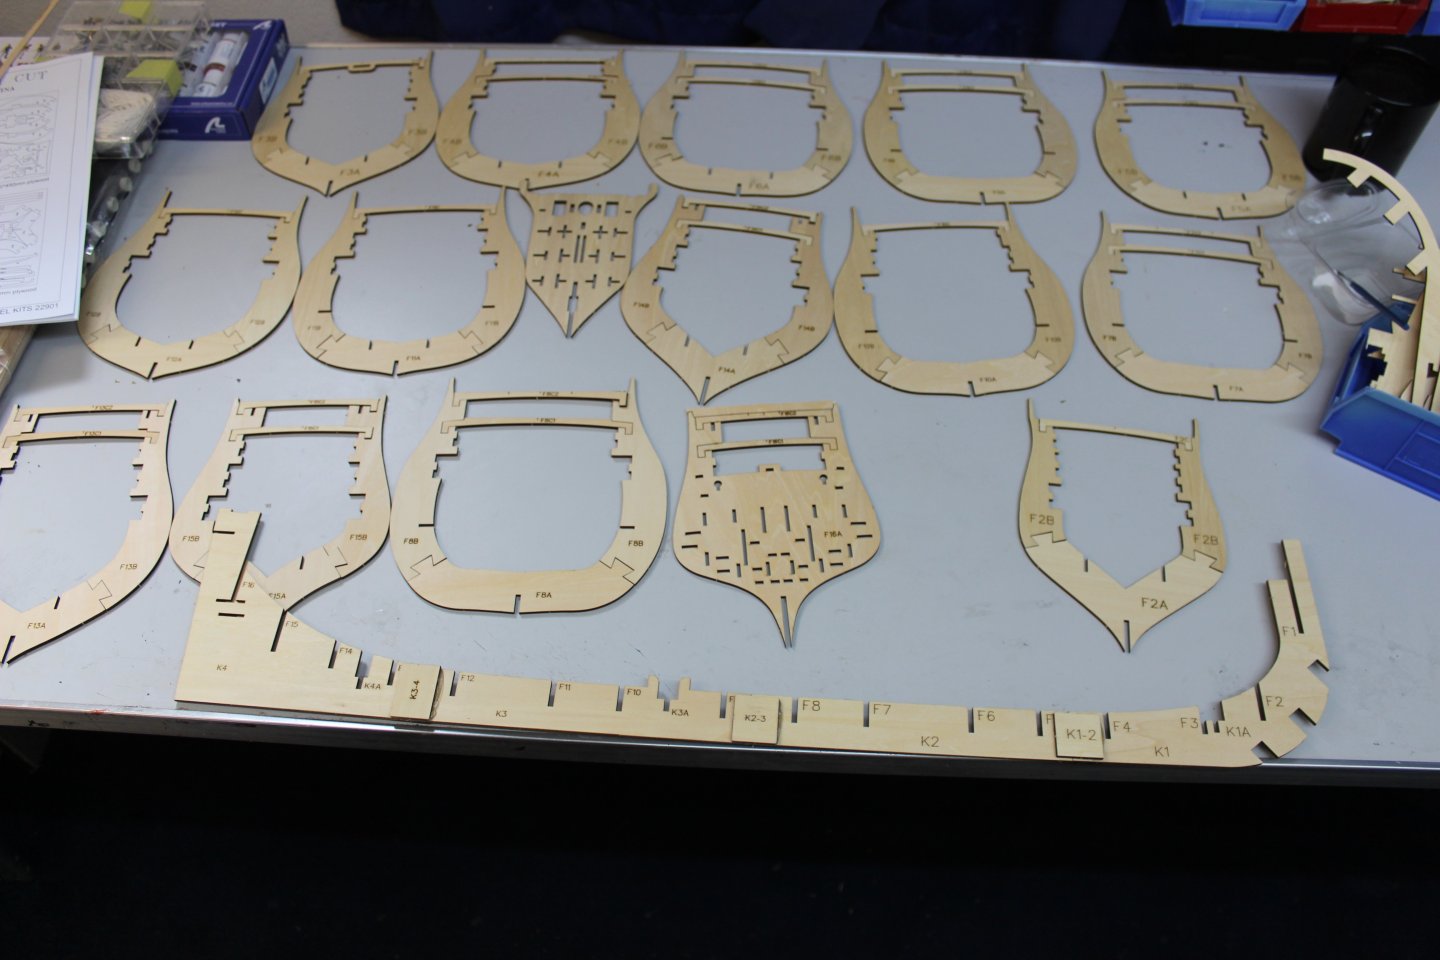
21 frames numbered from the middle - zero, up to number ten fwd and aft, most of these frames 0 to 7 are made up off 4 pieces, a 5 part is added later in the build when the frames are placed in the jig, frame zero has 2 extra parts to be added later, as this forms part of the mast support.
lasered markings denote the tapering areas, which does not take long to do, apart from frame 8 which was a pain to sort out, i dont have a photo at present, but as the planking is clinkered and a lot of tapering i found getting the filing quite awkward
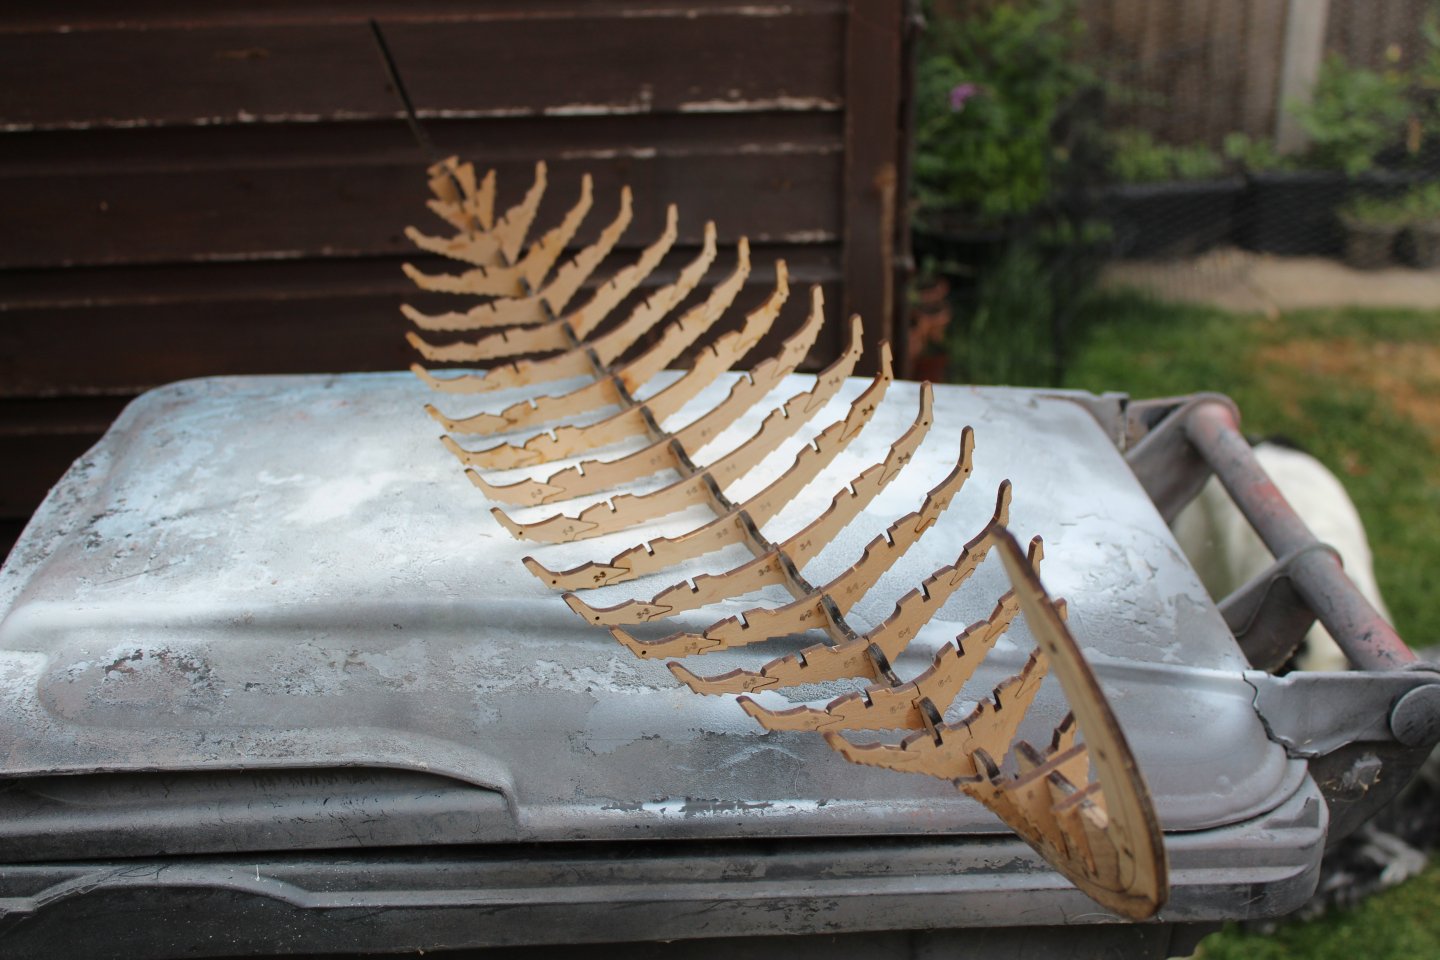
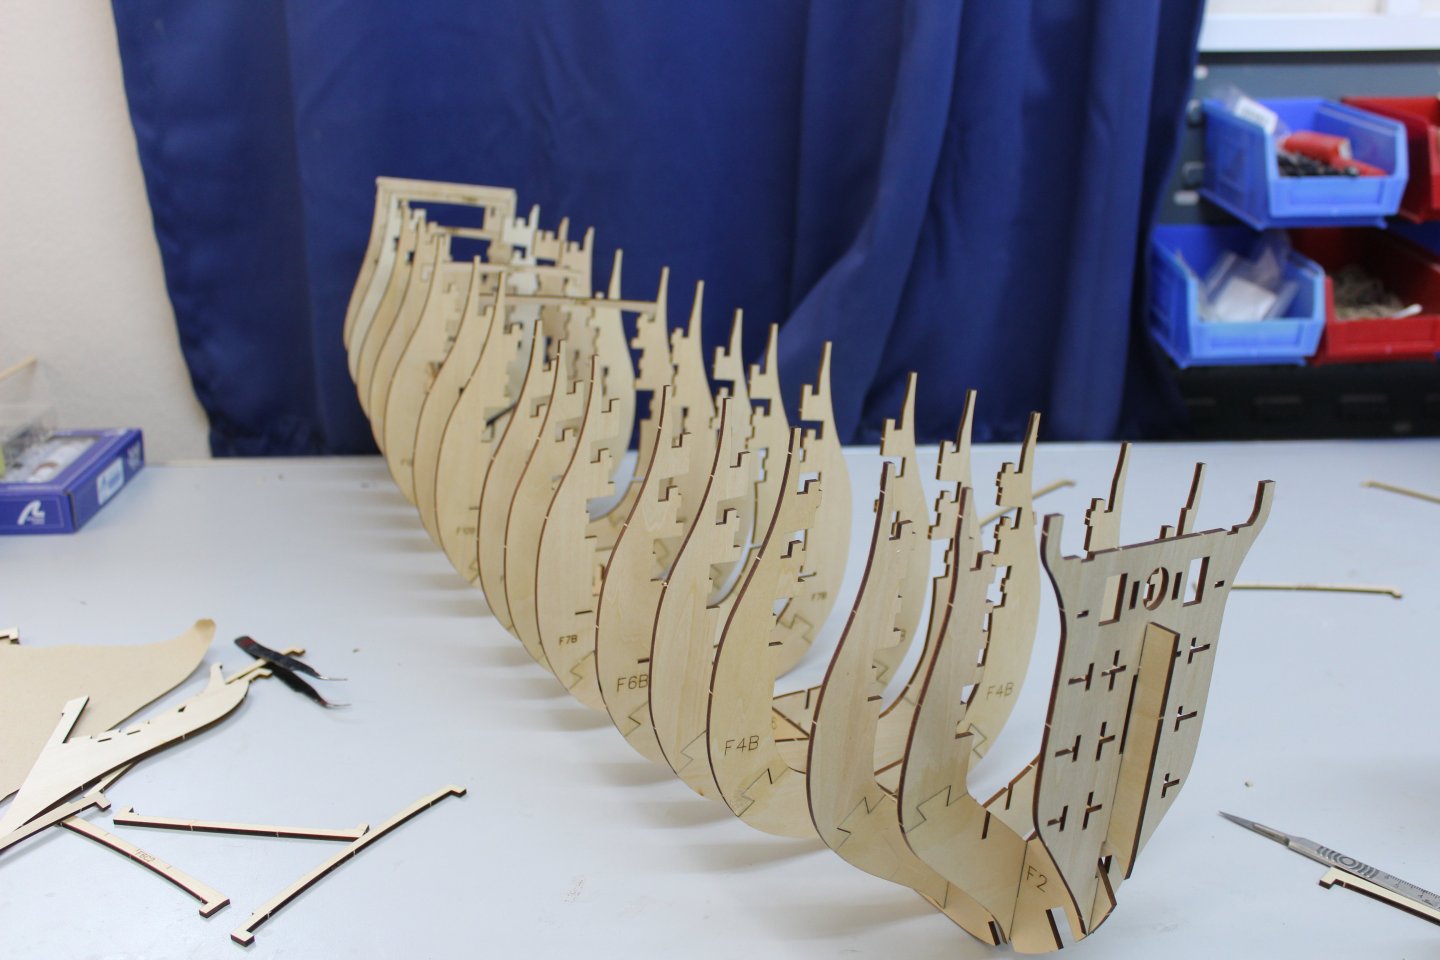
frames dry fitted
the keel was placed into the jig, although at this time there are is right or wrong way of doing this, i marked the jig with frame numbers and decided to write fwd on one end,
frames are cleaned up again, and glued onto the keel, the cross member 2-5 is not fixed at this time until the stringers are in place
some time later
-
4
-
-
Day 1 building jigs
made from mdf, the instructions are easy to follow, but, not all steps are covered, and some of the parts are different shapes to that shown, ideally, the best bet is to work alongside the excellent online video
Jig 2 is used after the keel and frames have been removed from jig 1 the hull is turned upside-down placed on top to allow hull planking
-
6
-
-
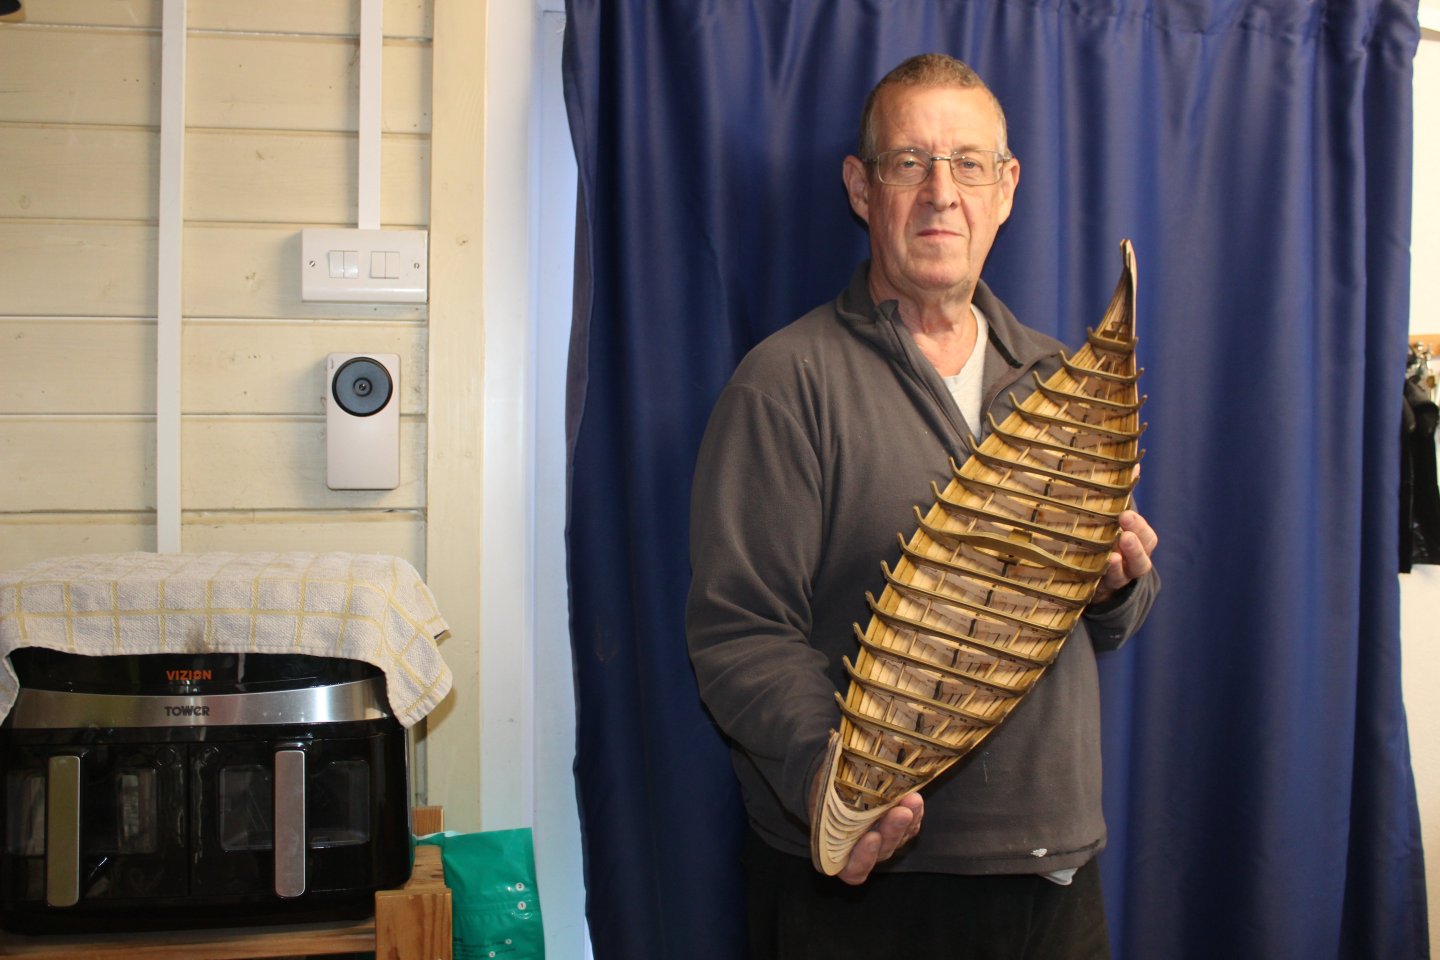
Good evening everyone
Having recently completed two large builds, Belle Poule and Indefatigable, and jumping straight in with the Santissima Trinidad, i wanted a quick build, just to reset myself, i wasnt even going to create a log, it was to be a build going on in the background, something i could play about with and if it went all wrong, no one would ever know, well what changed your mind, I hear everyone ask? well space, to do this the ST had to be put away, therefore for as long as this takes me, the other log has to wait.
i bought the kit from @chris watton at Vanguard Models a few weeks ago and started her 3 days ago, so far i am real impressed, very heavy box, most of the weight though is from the MDF which makes up the two slipways, i actually built both of these up on day one, so lets go on another of Kevin's messy and cluttered journey, as i tackle this project
-
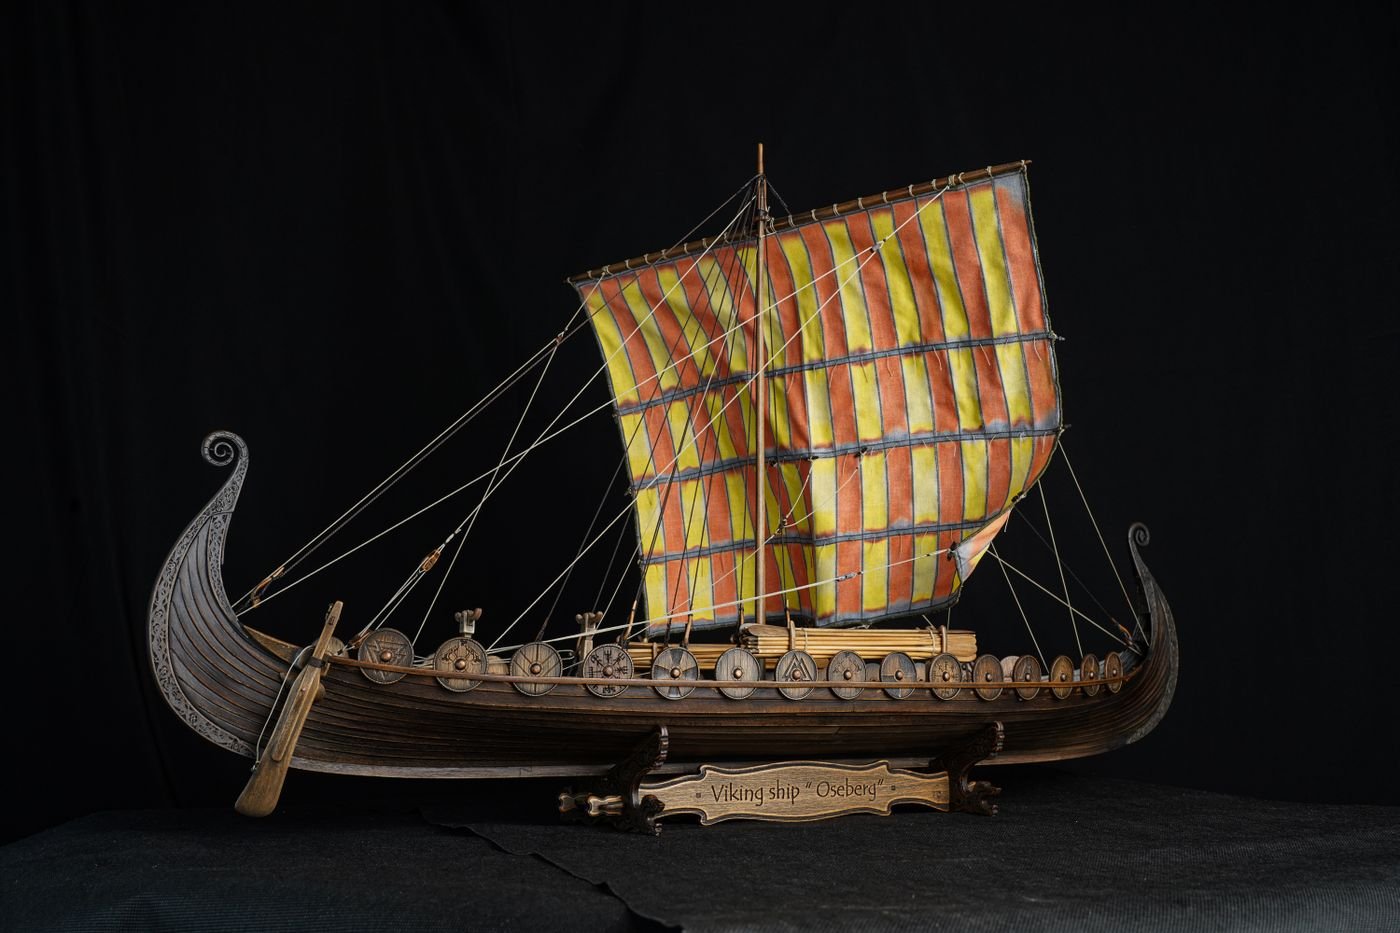
1:25 Drakkar ‘Oseberg’ V3
History
It is believed that the word “drakkar” originates from the Old Norse words “dreki” and “kar,” which mean “dragon” and “ship,” respectively. The warship acquired this name because the head of a dragon or another mythical creature (like Jormungandr) usually adorned the ship’s bow. The shape of the ship was also long and narrow, resembling a sea serpent. The Vikings constructed drakkars out of pine, oak, or ash wood. They used a special technique for splitting trees along the grain. They then watered the planks and held them above a fire to make them more flexible. The shipbuilders put the parts of the ship together with iron rivets and nails and bound them with cords and ropes. After that, they tarred the whole structure and caulked it by plugging holes and gaps and making the seams watertight. The sail was rectangular or square. It was made of sheep’s wool and covered with grease so that it didn’t get drenched. If there wasn’t a fair wind, the Vikings used oars – 20 to 35 pairs of them.In the Viking age, few ships could compete with a drakkar in terms of sheer speed, but drakkars were also very nimble. Thanks to the drakkar’s shallow draft, the Northmen could easily sail along rivers and fjords. They could land in places that were very difficult to access and attack their enemies unexpectedly. These warships were also barely visible between the waves because of their low sides. This helped the Vikings catch their enemies unawares, even in the open sea. Drakkars were created for more than just war, however. They were solid and capacious, so the Vikings sometimes used them for trade and to transport goods, but more often these ships were used for sailing long distances. How far did the Vikings travel? They reached the shores of Iceland, Greenland, and North America, to name but a few destinations.
copied from the kit review by @James H
the full review can be found here
1:25 Drakkar ‘Oseberg’ V3 - Ships of Pavel Nikitin - REVIEWS: Model kits - Model Ship World™
-
6
-
-
now that is very nice indeed
-
1
-
-
good morning everyone
thank you for comments and likes
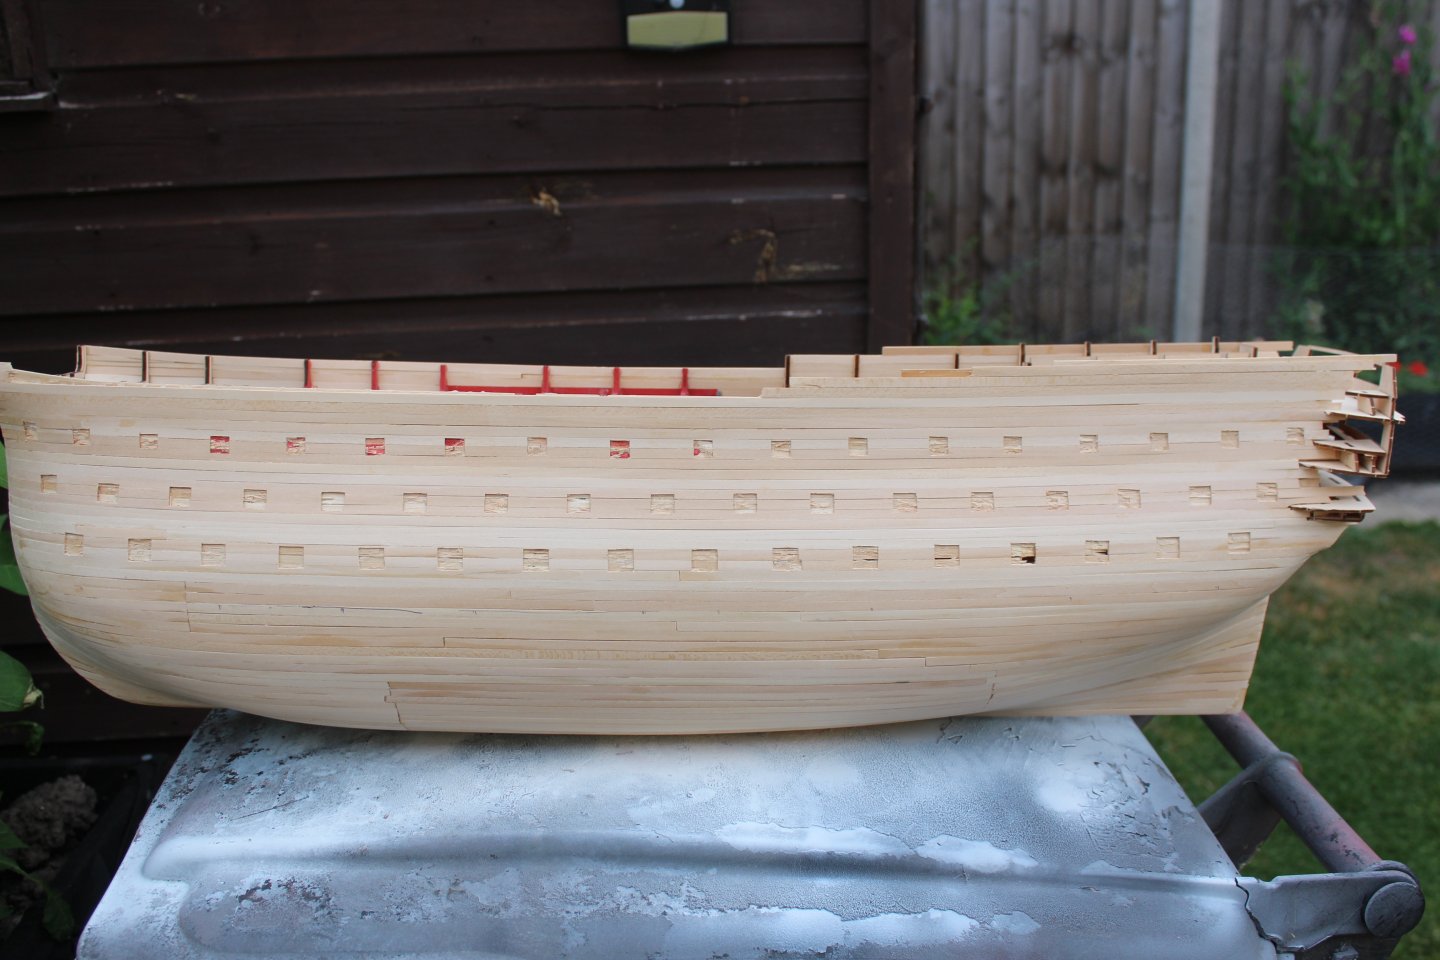
Wednesday day 22
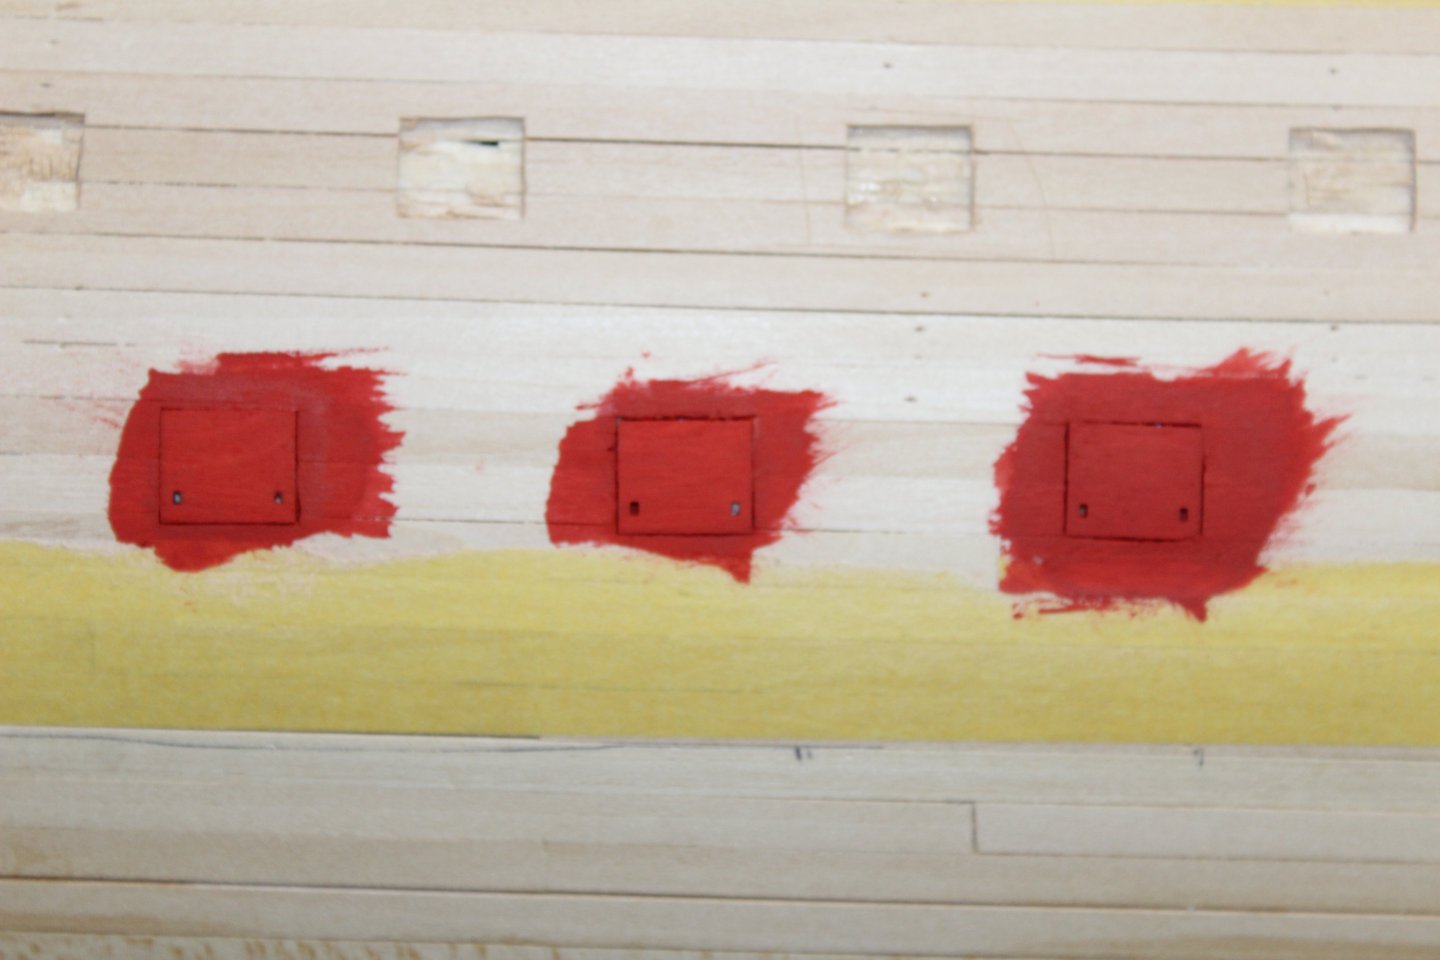
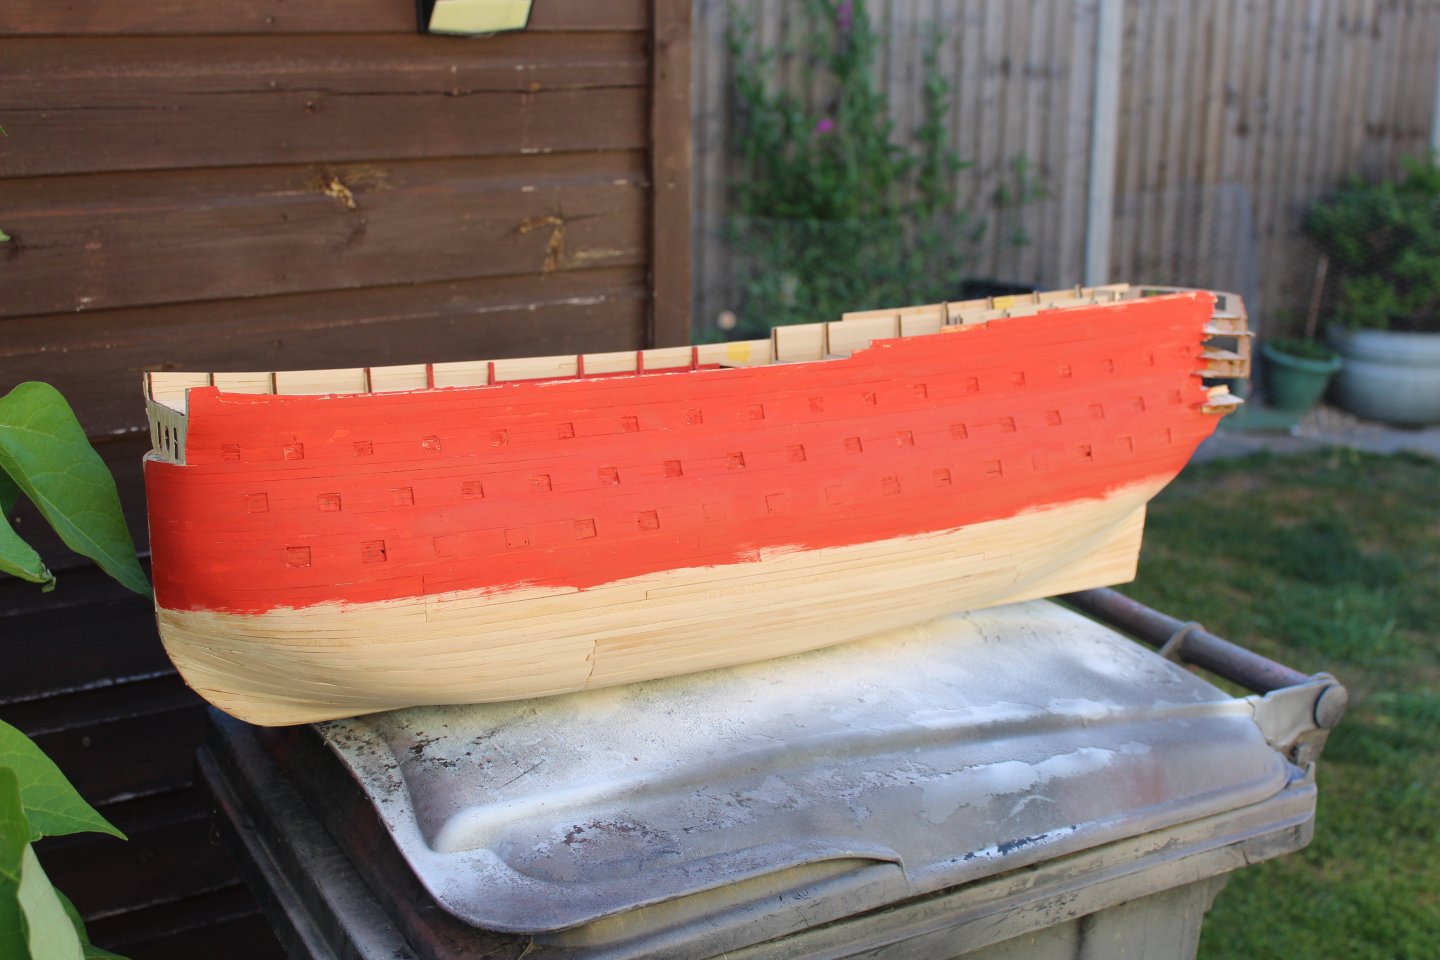
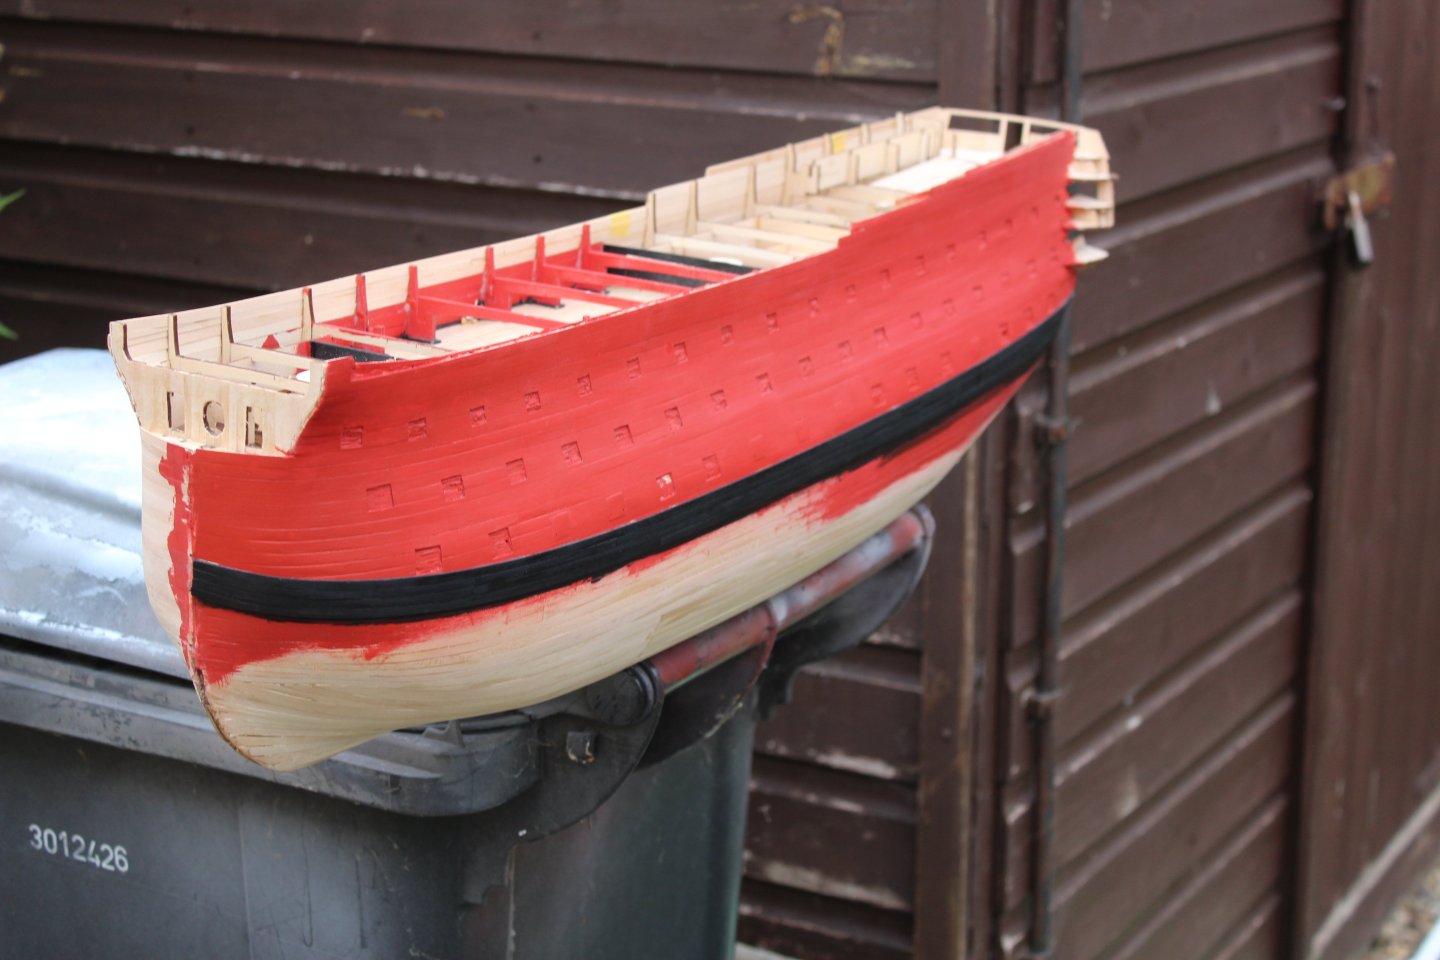
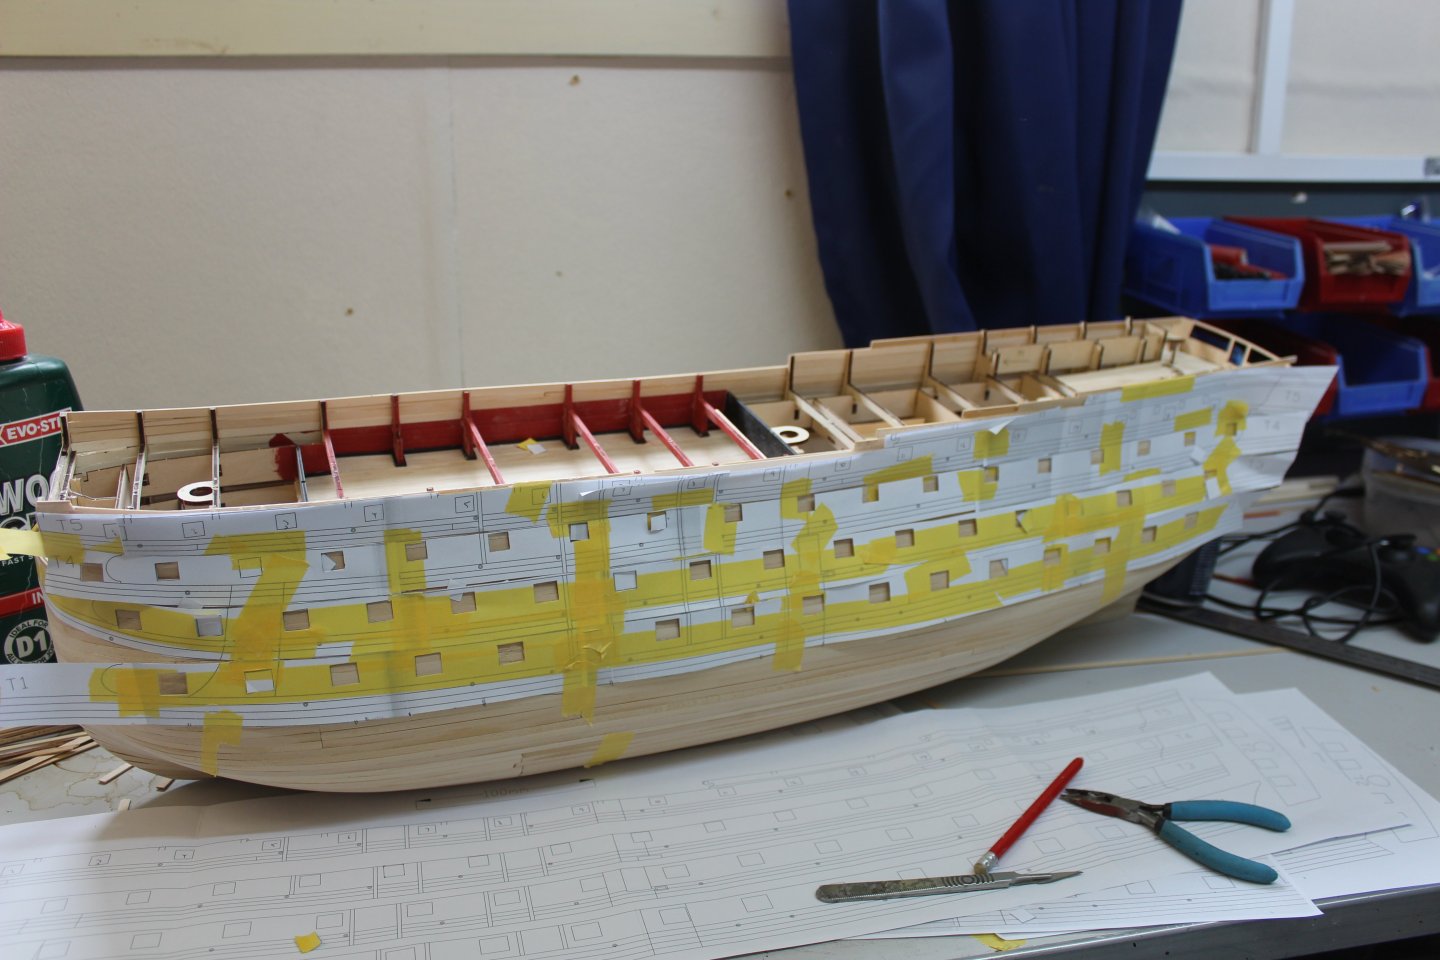
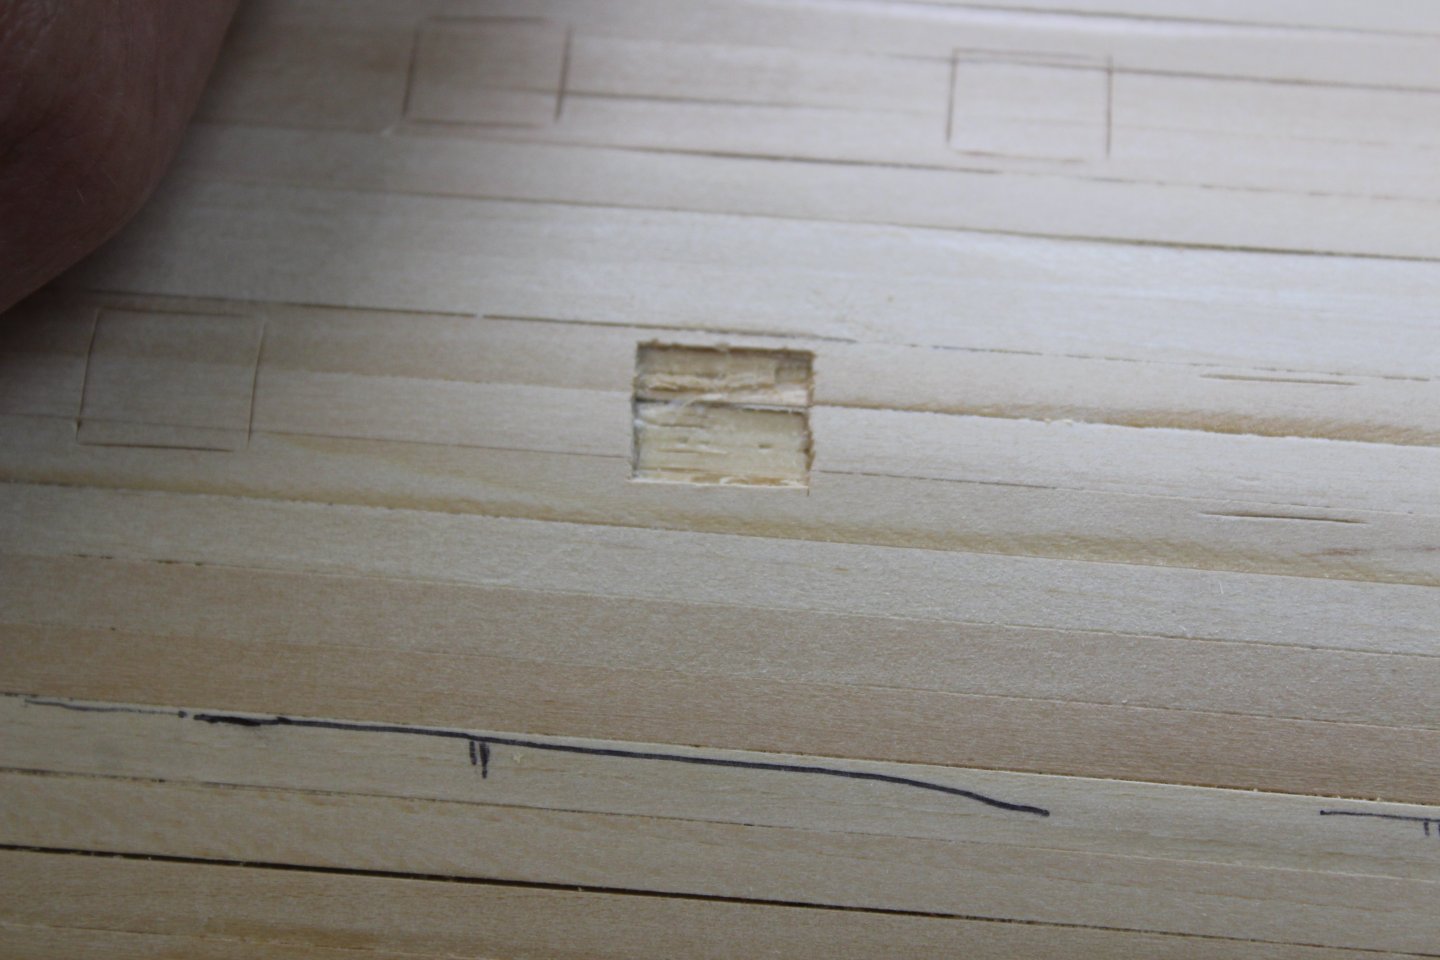
having marked out where the gunports go, a lot of them have been rebated to accept the lids in the shut/closed position, i quickly realised these lids are going to have to be put on at a later date, because i was finding that the sanding of the hull was hiding them. Not regretting doing them like this, but i can understand people questioning my logic behind it, (lol i dont want all guns run out, when under full sail).
lots of paint added, and i am still sanding areas that refuse to look good, lower wale added to just give me the warm fuzzy feeling that i have most things in the right place
this idea does not work for me, putting the lids on and then finishing the hull, as the gaps fill up and they become invisible
-
Good evening everyone, thank you for comments and likes
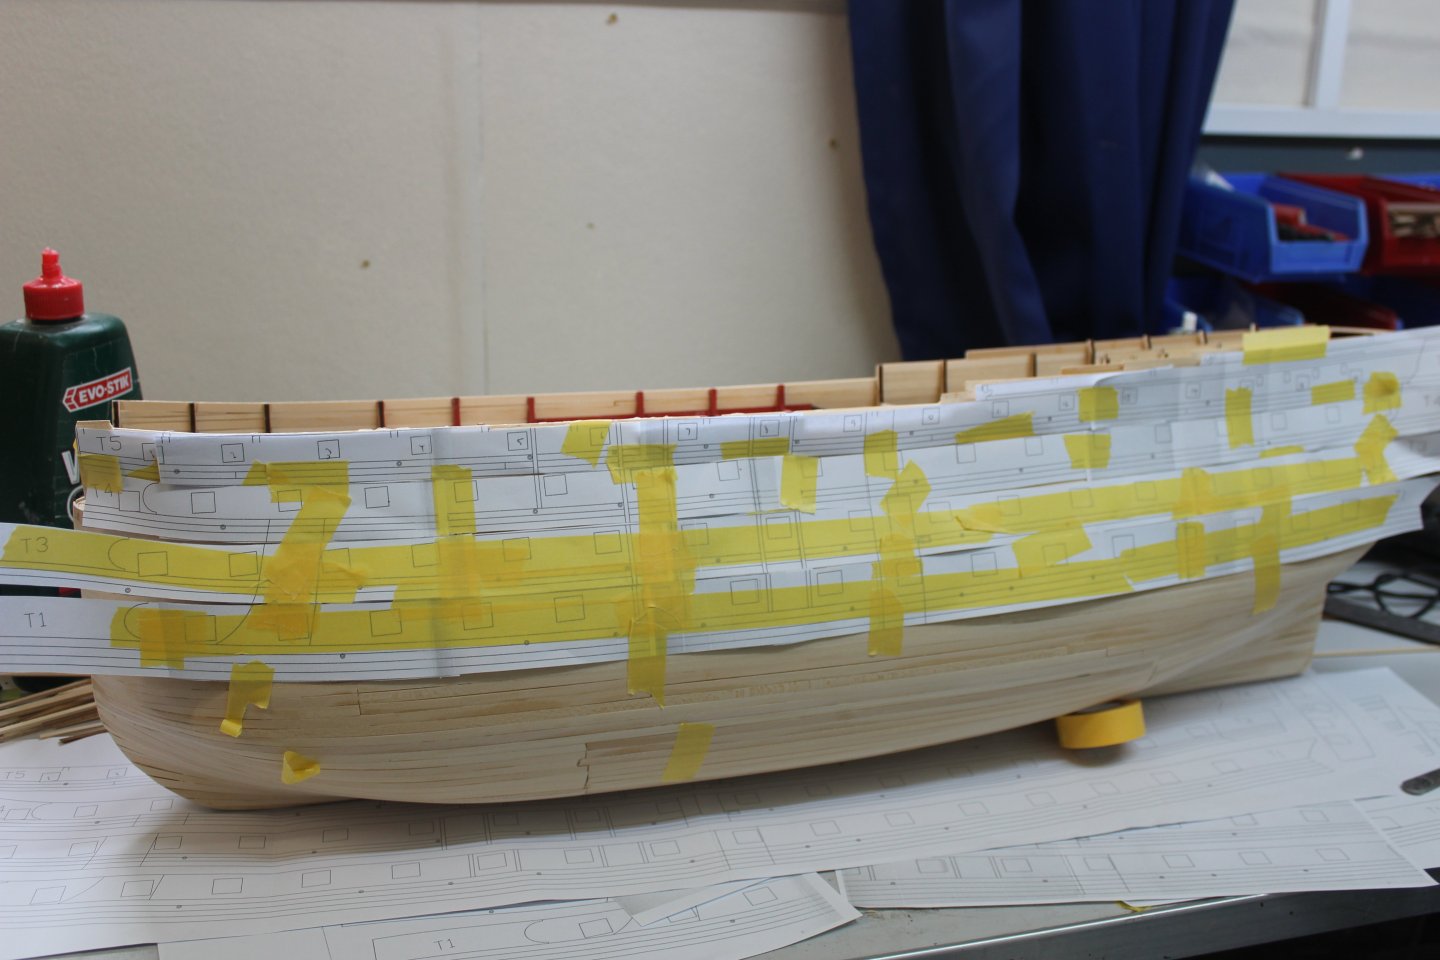
day 19- a recipe for disaster
but so far avoided- hinged gunports
Come on AL there has to be a better way for a gunport template
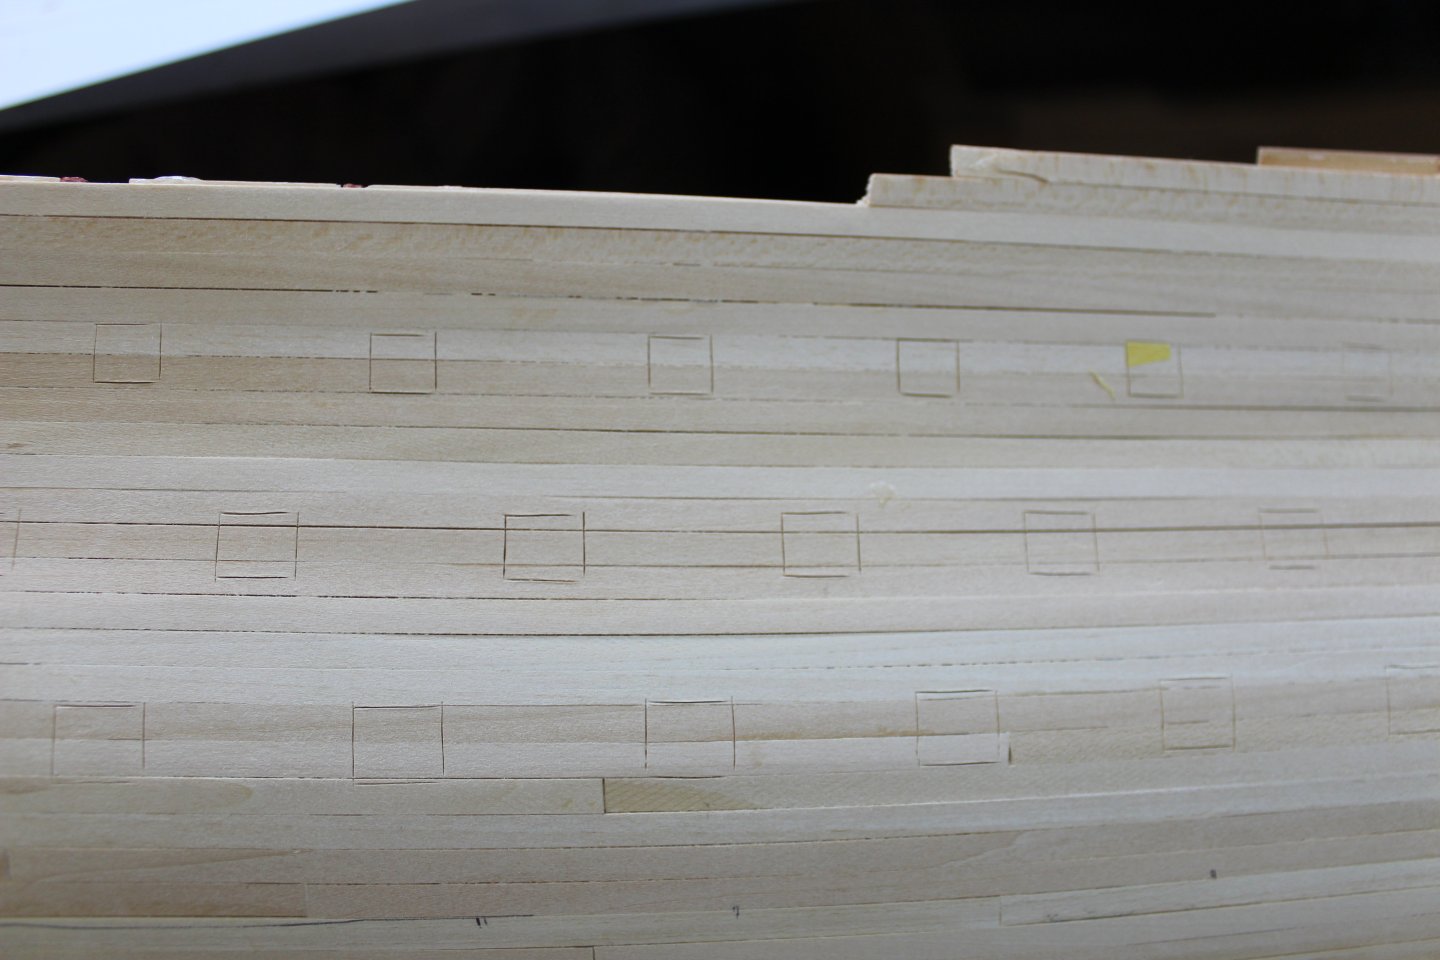
I copied the template onto printer paper, cut them out and built them up on the original template,
took a lot of messing around to hopefully have them in the right place
as non of these are going to be open, i just had to remove the top planking, this side has now been roughly removed, and require some tidying up to get the lids to fit
free flood ports still to be marked out
-
7
-
-
2 hours ago, Faraway said:
This I will watch with great interest.
Jon
yr very welcome
-
1
-
-
1 hour ago, Alan P said:
This is something different and rather special for these waters! Following with great curiosity, looks like a beautiful project.
i normally tend to go for English vessel, but now im going to try and get 3 of the main players at Trafalgar at around the same scale, Victory at 1/72 was finished a few years ago
-
2
-
 2
2
-
-
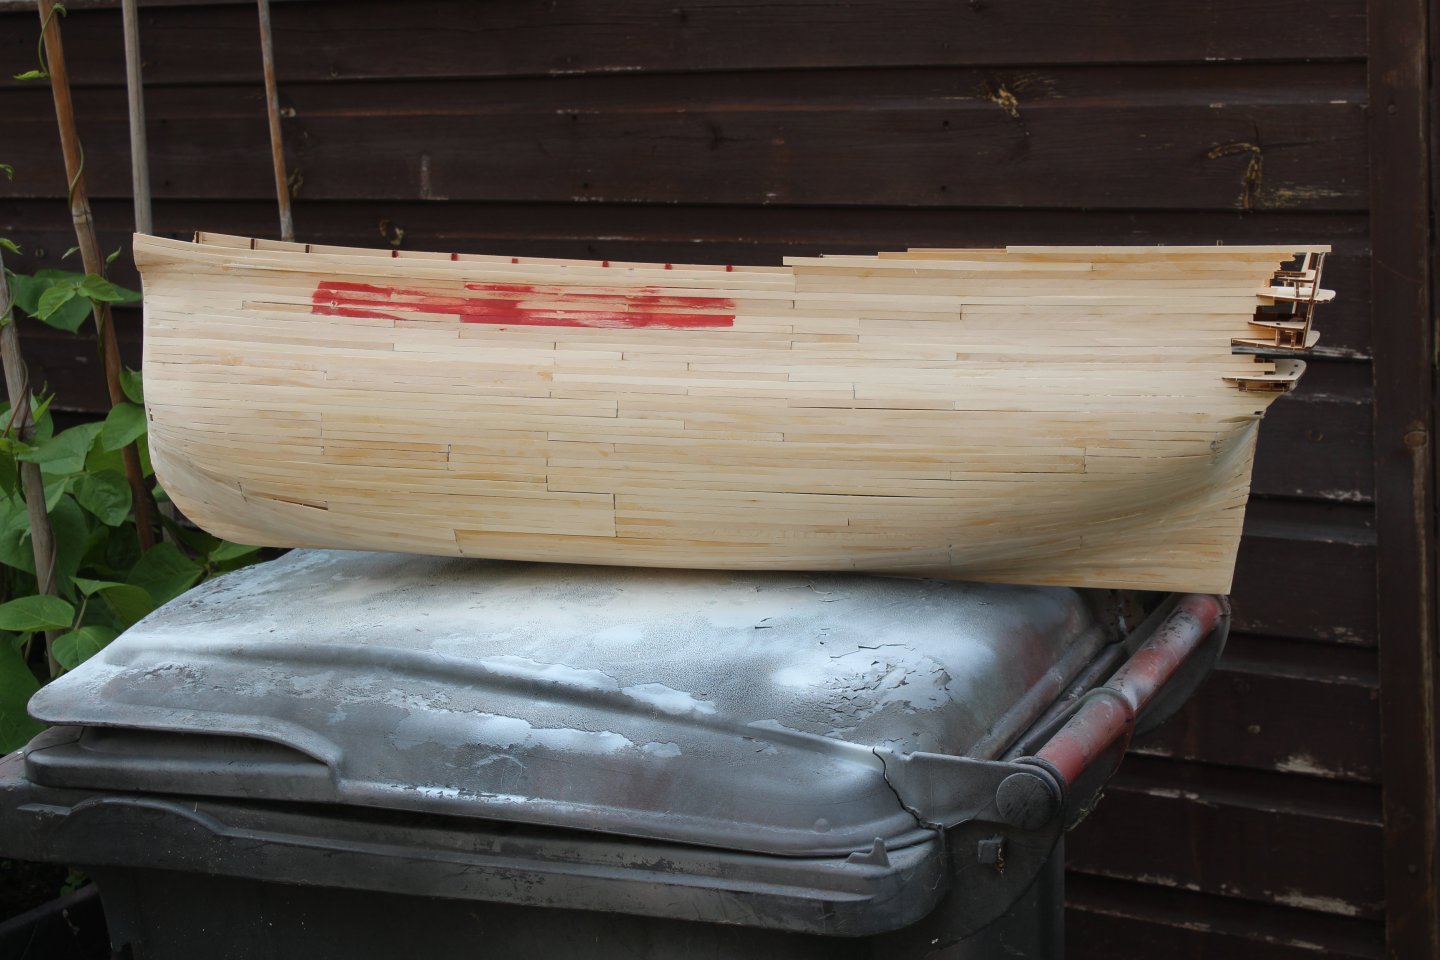
day 10
planking, the kit provides 2x5x300mm strip wood for planking, But i didnt want to do that, so i ordered 200 1x5x1000mm lime from Cornwall Model Boats
day 14
started 2nd planking
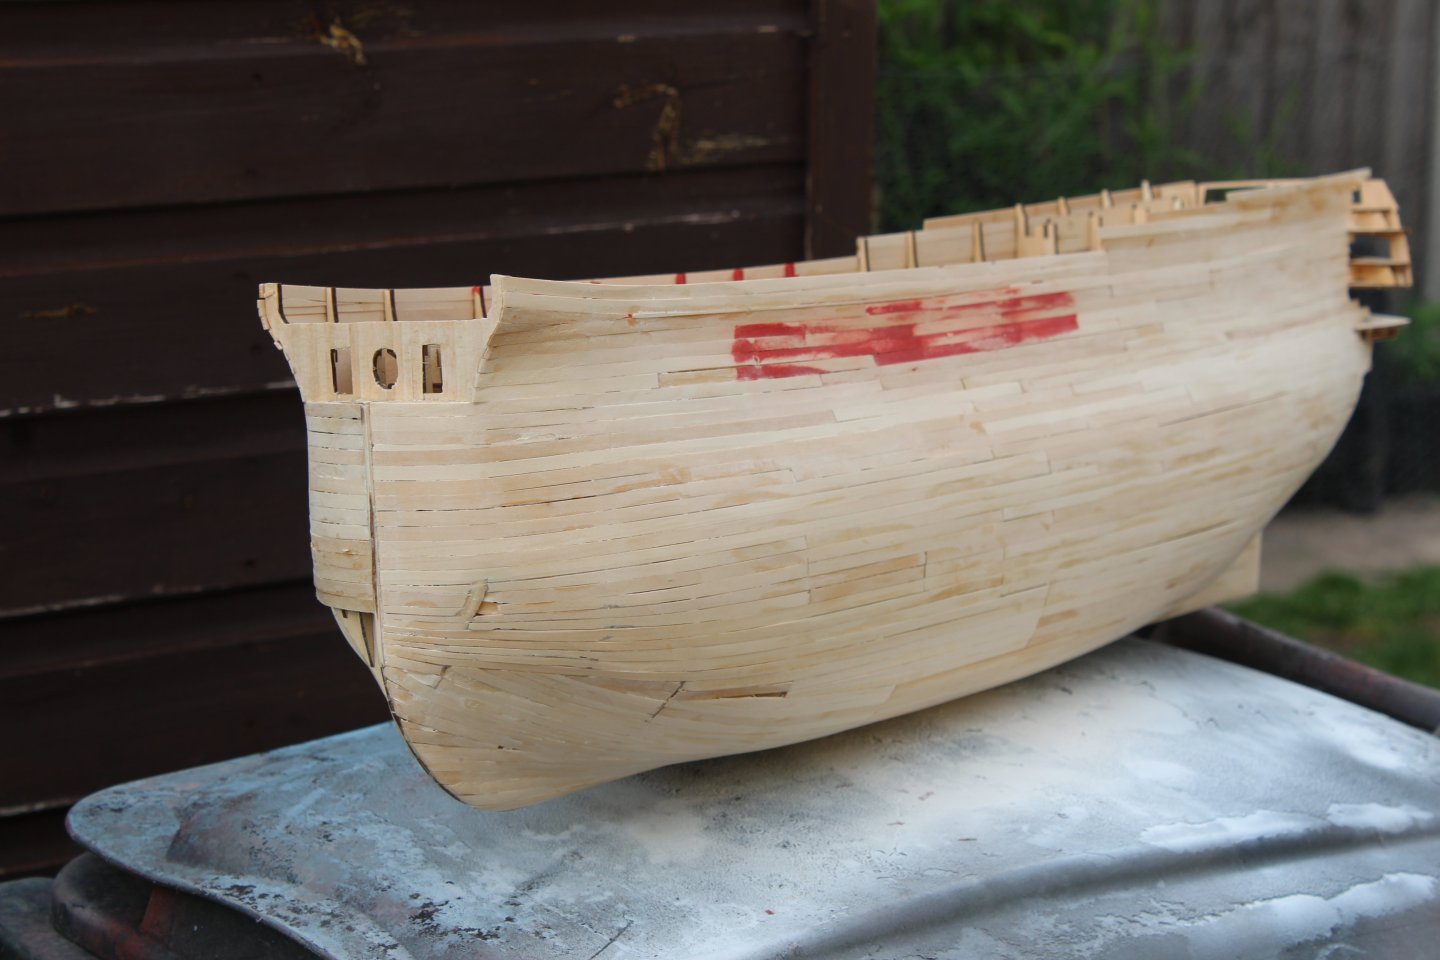
day 18 - thats today
2nd planking complete, some tidy up work required on bow and stern, and then re-sand
-
8
-
-
i am presently on day 18, so you have not missed much, would be nice to complete her within the year
frames have to be made up
day 4
day 6
-
4
-
-
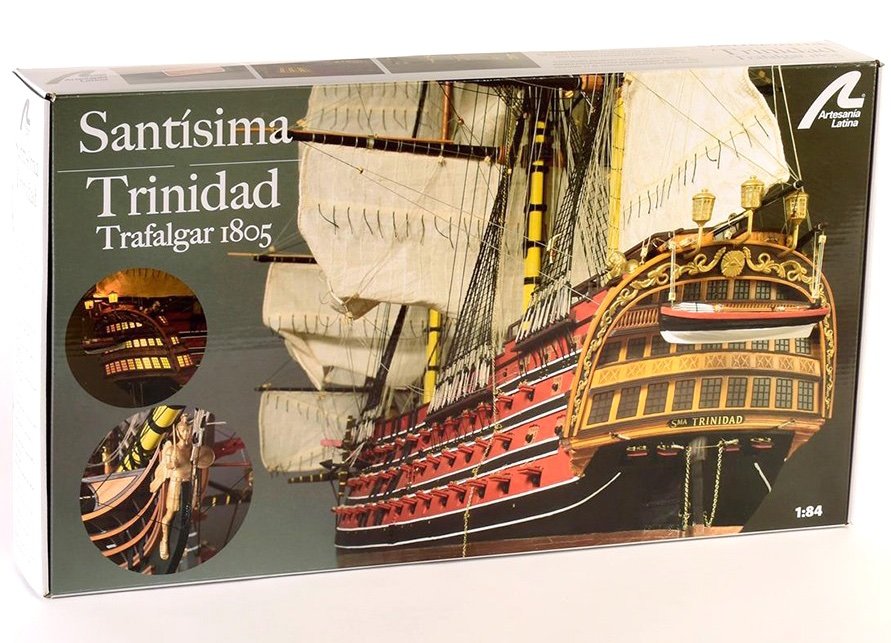
there is a kit review at this link, i did not do the review, but this is that very kit
-
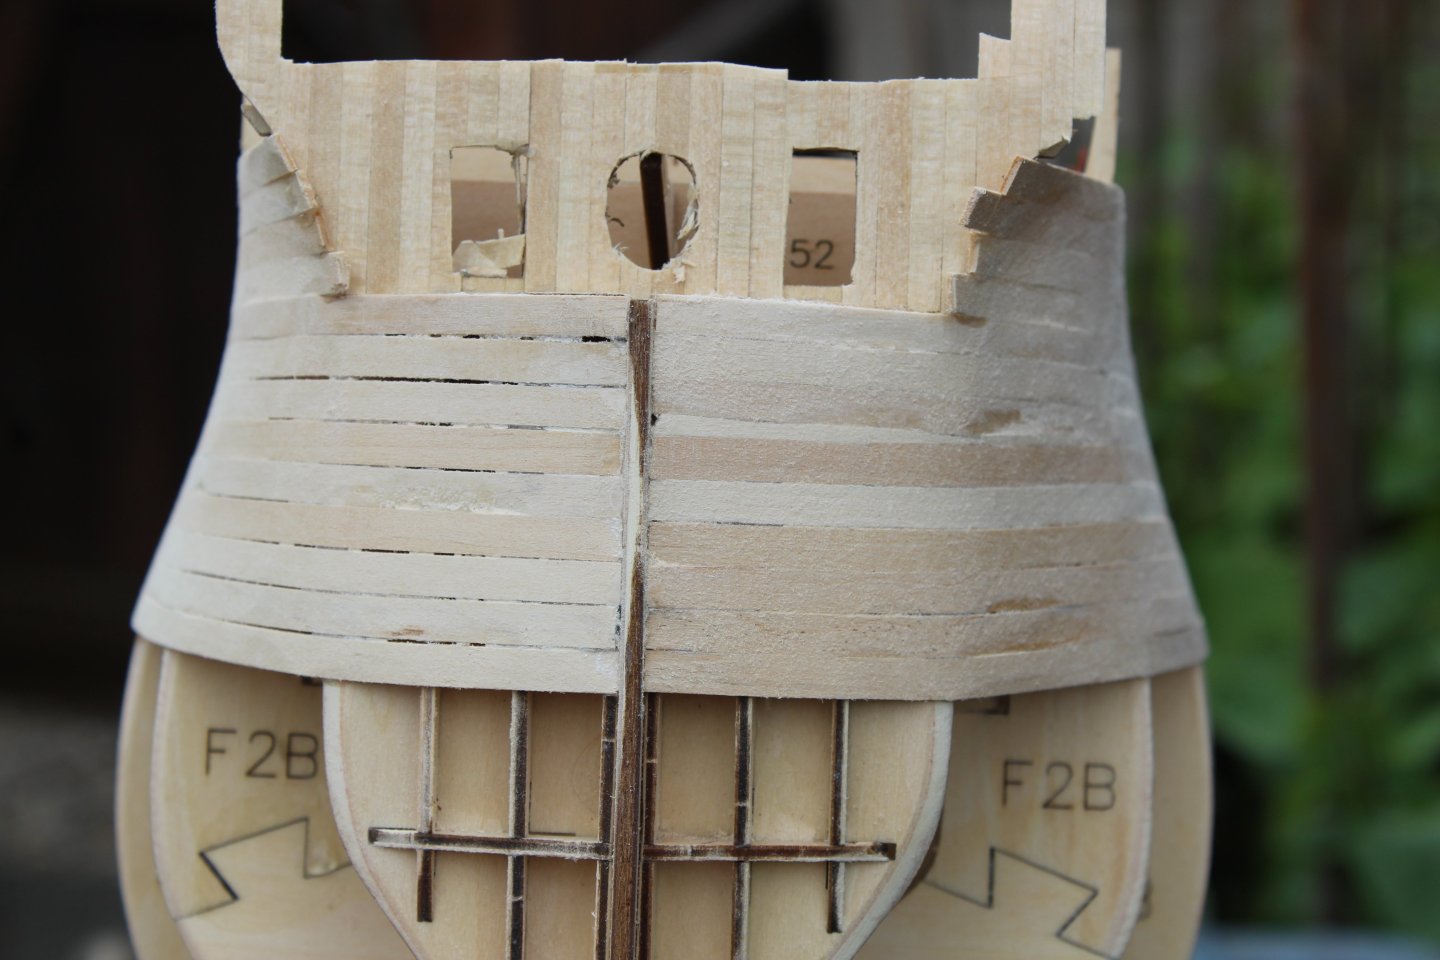
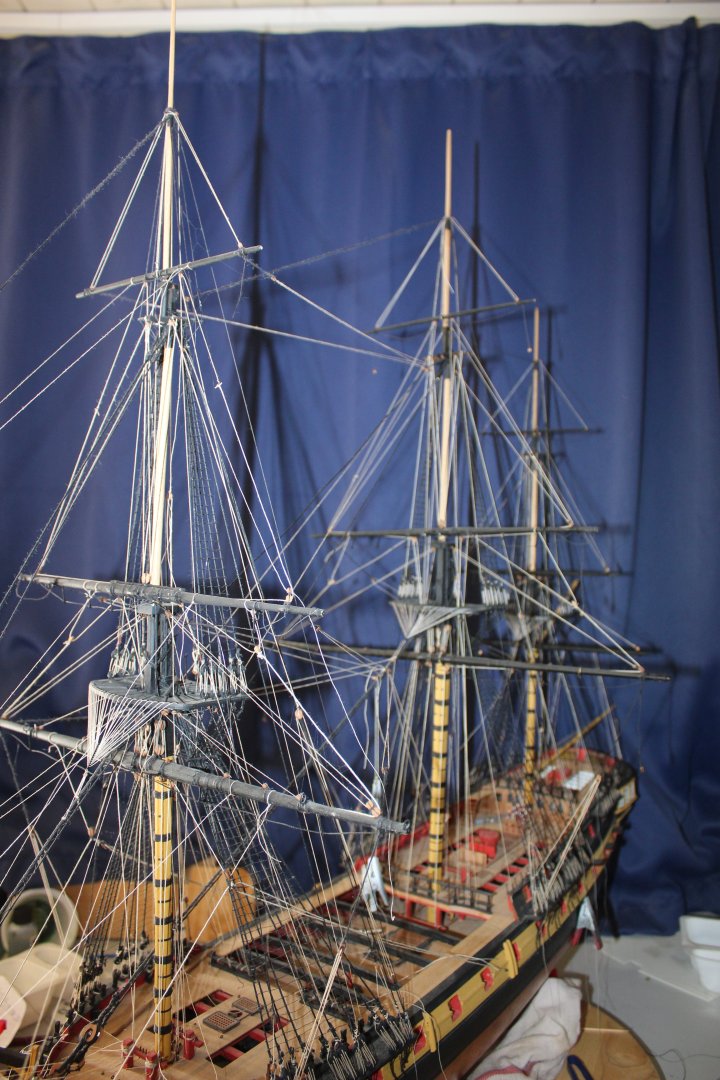
1:84 Santisima Trinidad – Trafalgar 1805
The Santisima Trinidad (full name: Nuestra Señora de la Santísima Trinidad), was a Spanish first-rate ship of the line with 112 guns. This was increased in 1795–96 to 130 guns by closing in the spar deck between the quarterdeck and forecastle, and to 136 guns around 1802 (plus 4 small guns on the poop), thus creating what was in effect a continuous fourth gundeck although the extra guns added were actually relatively small. She was the heaviest-armed ship in the world when rebuilt and bore the most guns of any ship of the line outfitted in the Age of Sail. She was built at Havana, Cuba, to a design by Irish naval architect Matthew Mullan (domiciled in Spain under the name Mateo Mullán), originally intended as a ship of 112 guns. He died on 25 November 1767, and the construction of the ship was continued by his son, Ignacio Mullán. and the ship was launched in March 1769 and completed in August 1769 as a 116-gun three-decker. She was considerably larger than her British contemporary Victory and somewhat bigger than the French Bretagne.
Commanded by Francisco Javier Uriarte and the flagship of Rear Admiral Baltasar Hidalgo de Cisneros, she took part in the Battle of Trafalgar on October 21, 1805, as part of the combined Franco-Spanish fleet. Due to her great bulk, her helm was unresponsive in the light winds on the day, contributing to her ineffective service in the combined fleet's cause. Her great size and position immediately ahead of the fleet flagship Bucentaure made her a target for the British fleet, and she came under concentrated attack by several ships. She lost her mast and eventually surrendered to the Neptune; a 98-gun second rate commanded by Captain Thomas Fremantle. She was taken in tow by the 98-gun second rate Prince but was eventually scuttled by her British captors northwest of Cádiz.
-
3
-
-
good evening everyone
first of all apologies to everyone, 2024 was a absolute pants year, one i am quite happily only wish on my worst friends/enemies and ex wifes
2025 has been ok so far, apart from the wife who has been quite poorly, but getting better
the bois are now young adults, aged 13 months and 22 months
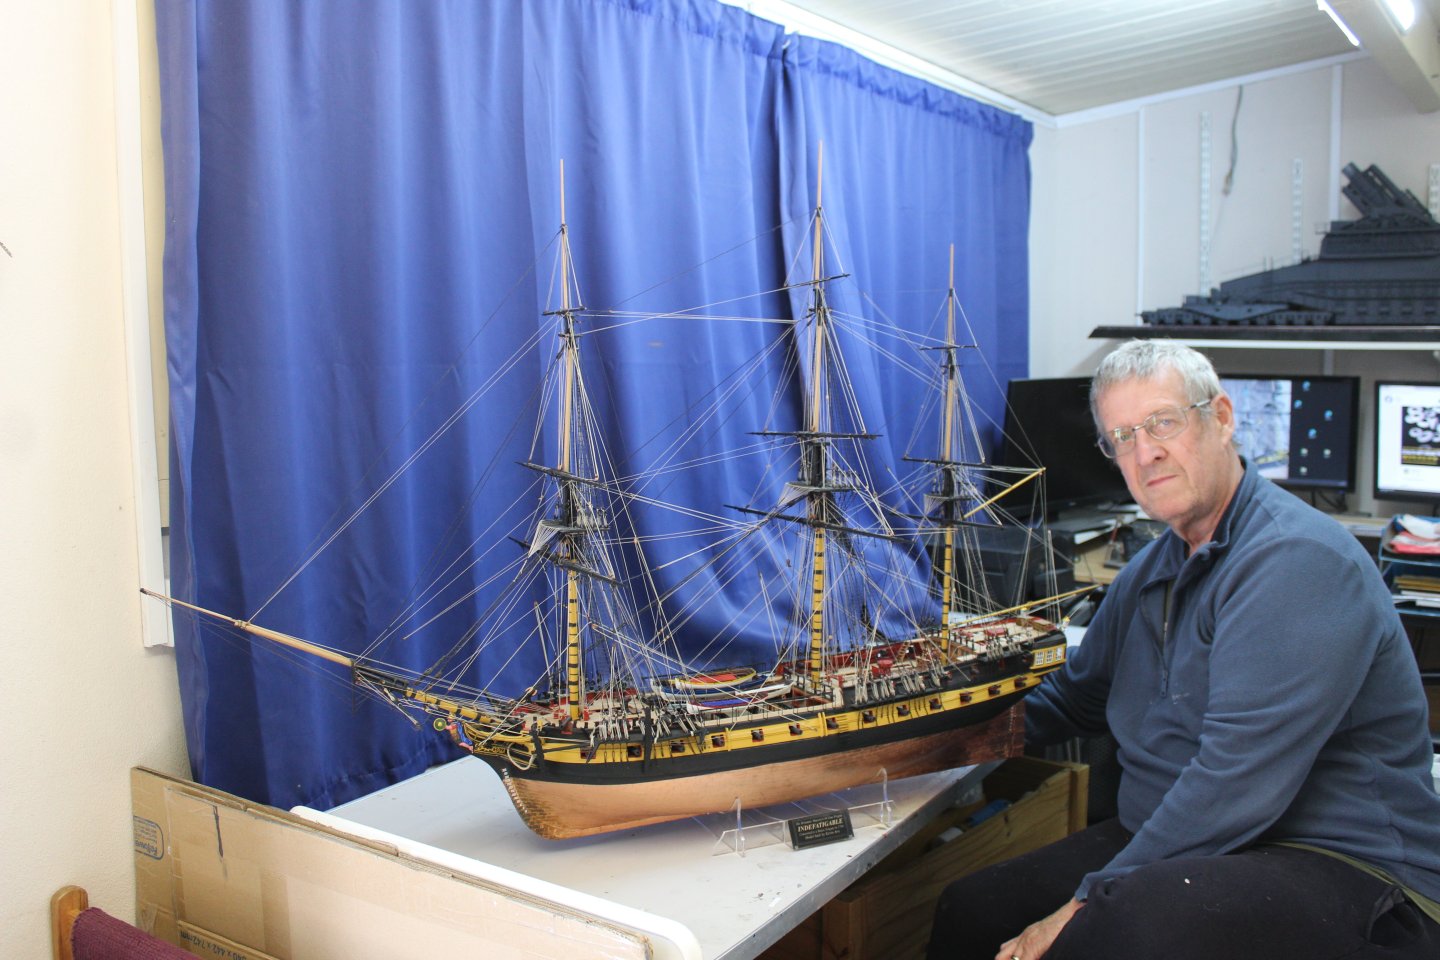
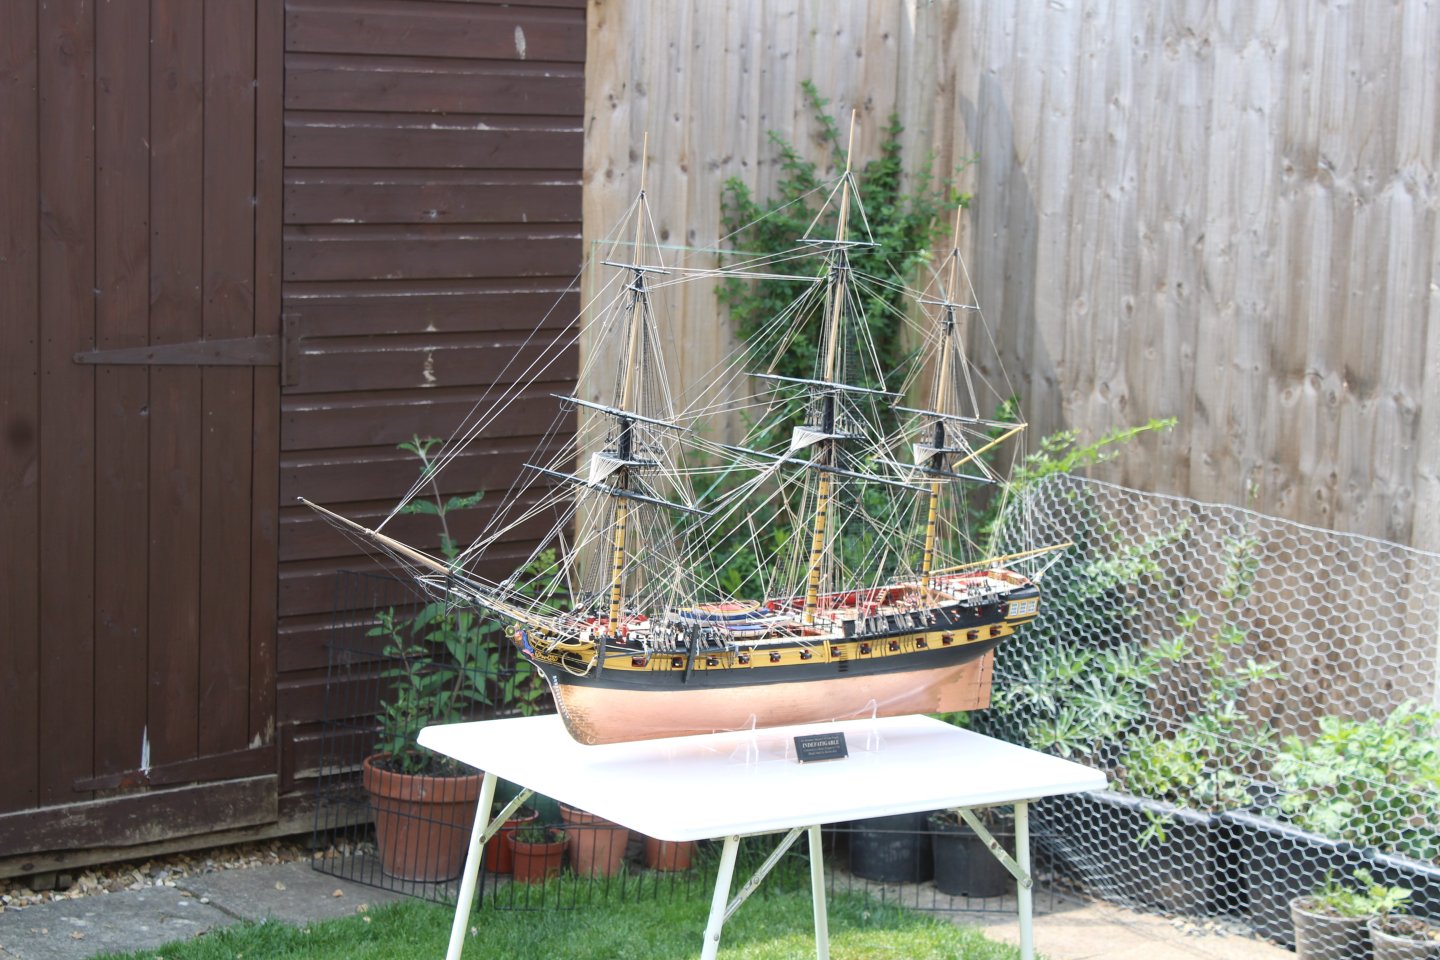
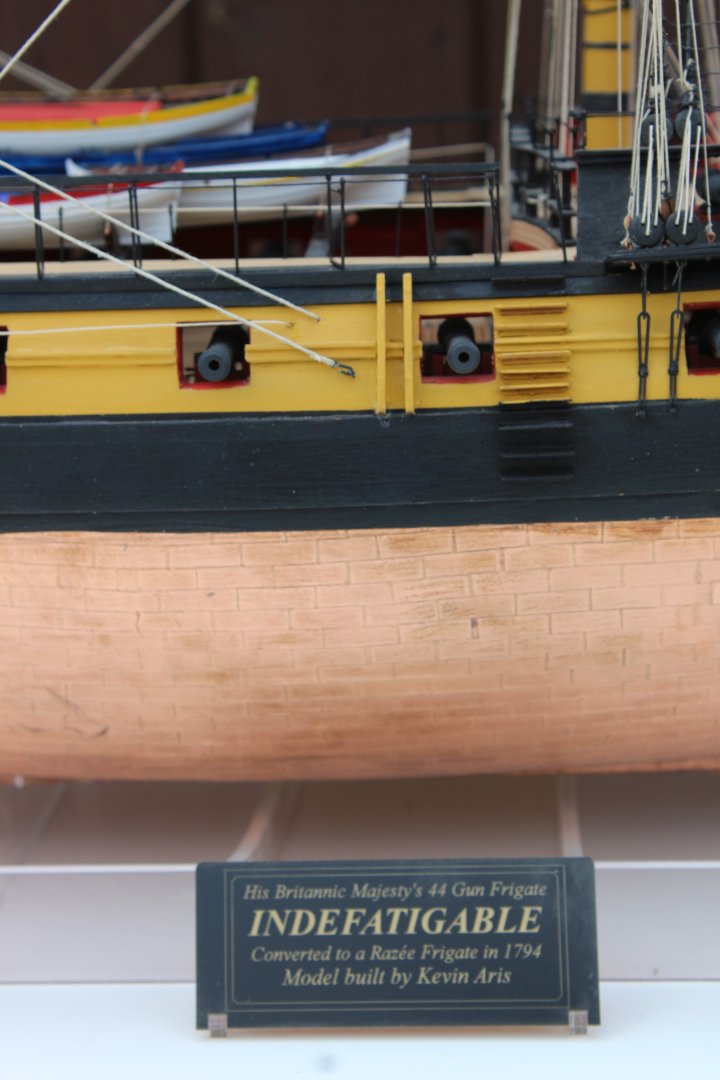
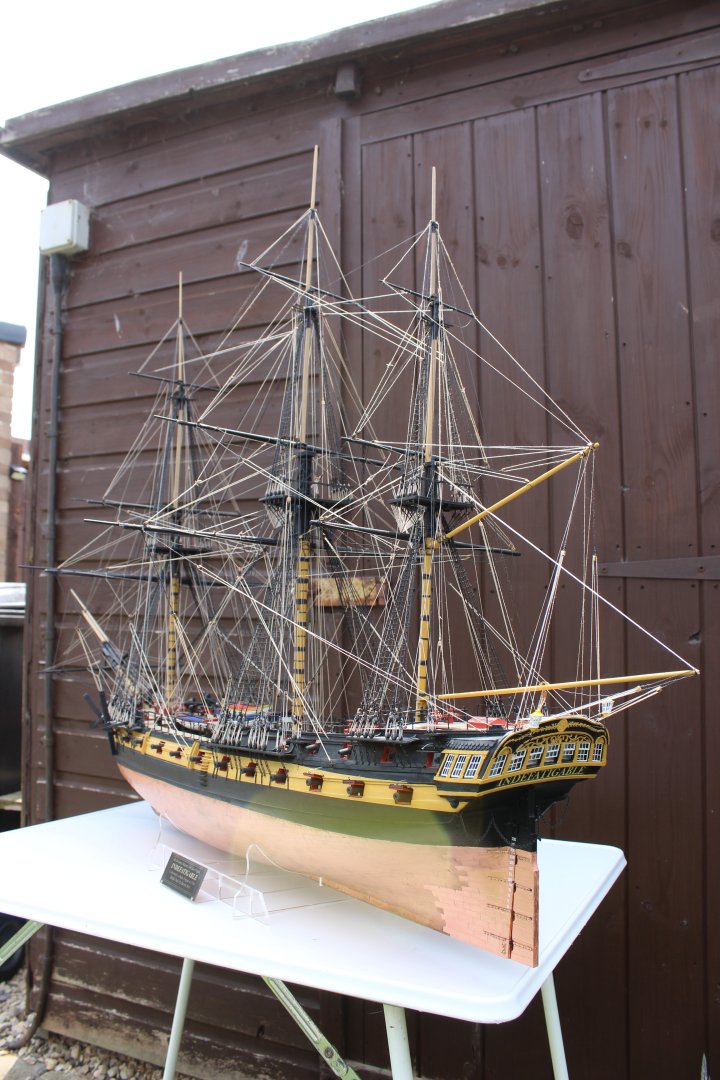
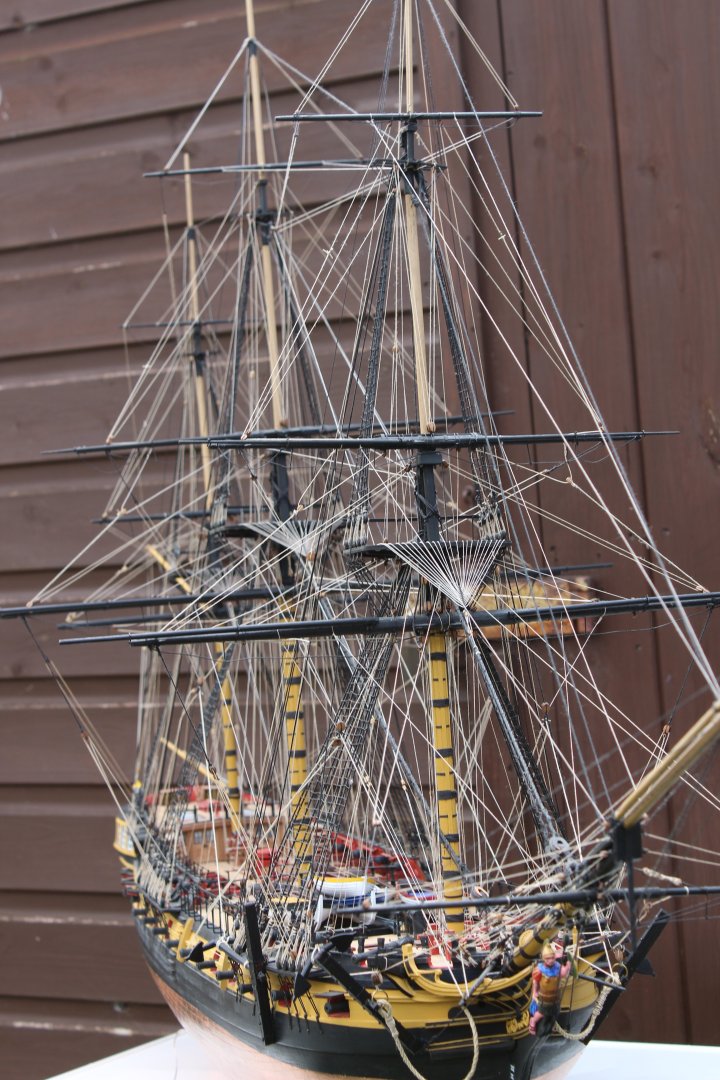
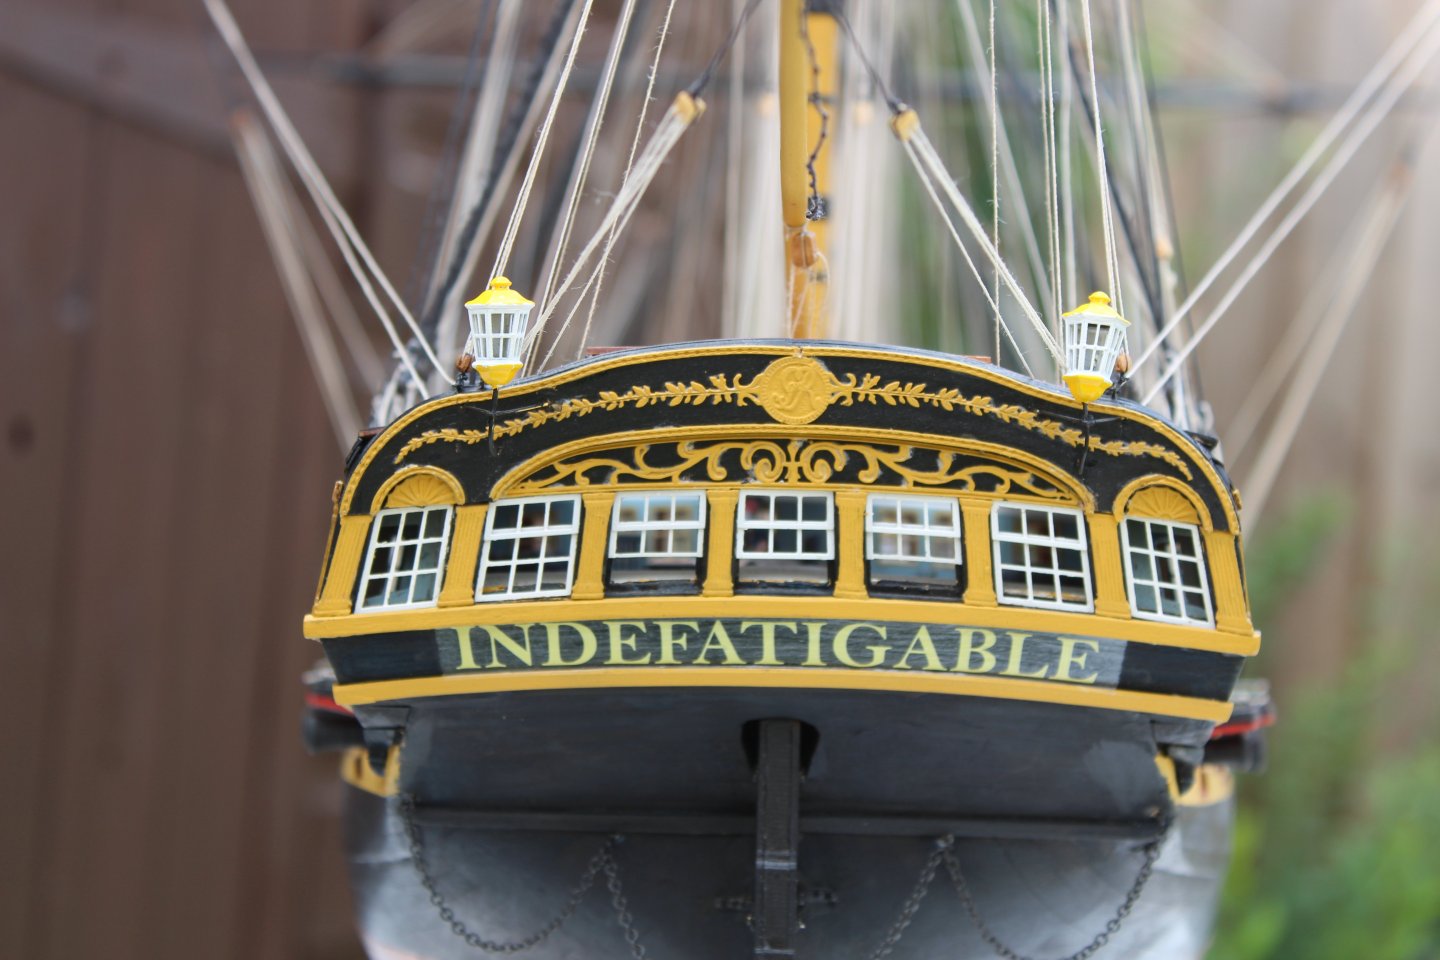
but the Indefatigable has been completed
Kit Vanguard Models
Scale 1/64
Paints AK Acrylic with a hairy stick
had the kit 825 days, but on the table 442, - not worked on every day though
the bois Odin and Apollo
i have started a new build two weeks ago, if anyone interested i will do a weekly, or better updates
-
4
-
2
-
-
7 minutes ago, Steve D said:
 Respect, I hate knots....
Cheers
Steve
never realised that i dont have a build log on here
-
 2
2
-
-
1 hour ago, Steve D said:
That's a great looking in-progress model Kevin, you should definitely complete it. I know about abandoned projects, I have that T shirt. Still, I can see all the work you've put in so far and I would love to see it completed.
Was there any particular reason? perhaps something I can help with? Let me know if there is.
Cheers
Steve
she is still to be completed, but im a spoilt kid, and move on to the next project i fancy, however period ships and rigging are my favourites, this is taking my available time at present HMS Indefatigable
-
6
-
1
-
-
Fantastic work, makes me want to go back and complete my 1/72 version
-
4
-
-
9 hours ago, psdavidson said:
Darn! I missed it all

😁Only Joking
-
 1
1
-


.thumb.JPG.935c9222e2180c1e67965b3b7e957dd3.JPG)
.thumb.JPG.5674a50ed432fce1aa8011bc33de271e.JPG)
.thumb.JPG.35996741196de5641c9228c452faf85d.JPG)


Oseberg Viking Ship (v3) by Kevin - Pavel Nikitin - 1/25 - started June 2025
in Work in Progress - Maritime
Posted
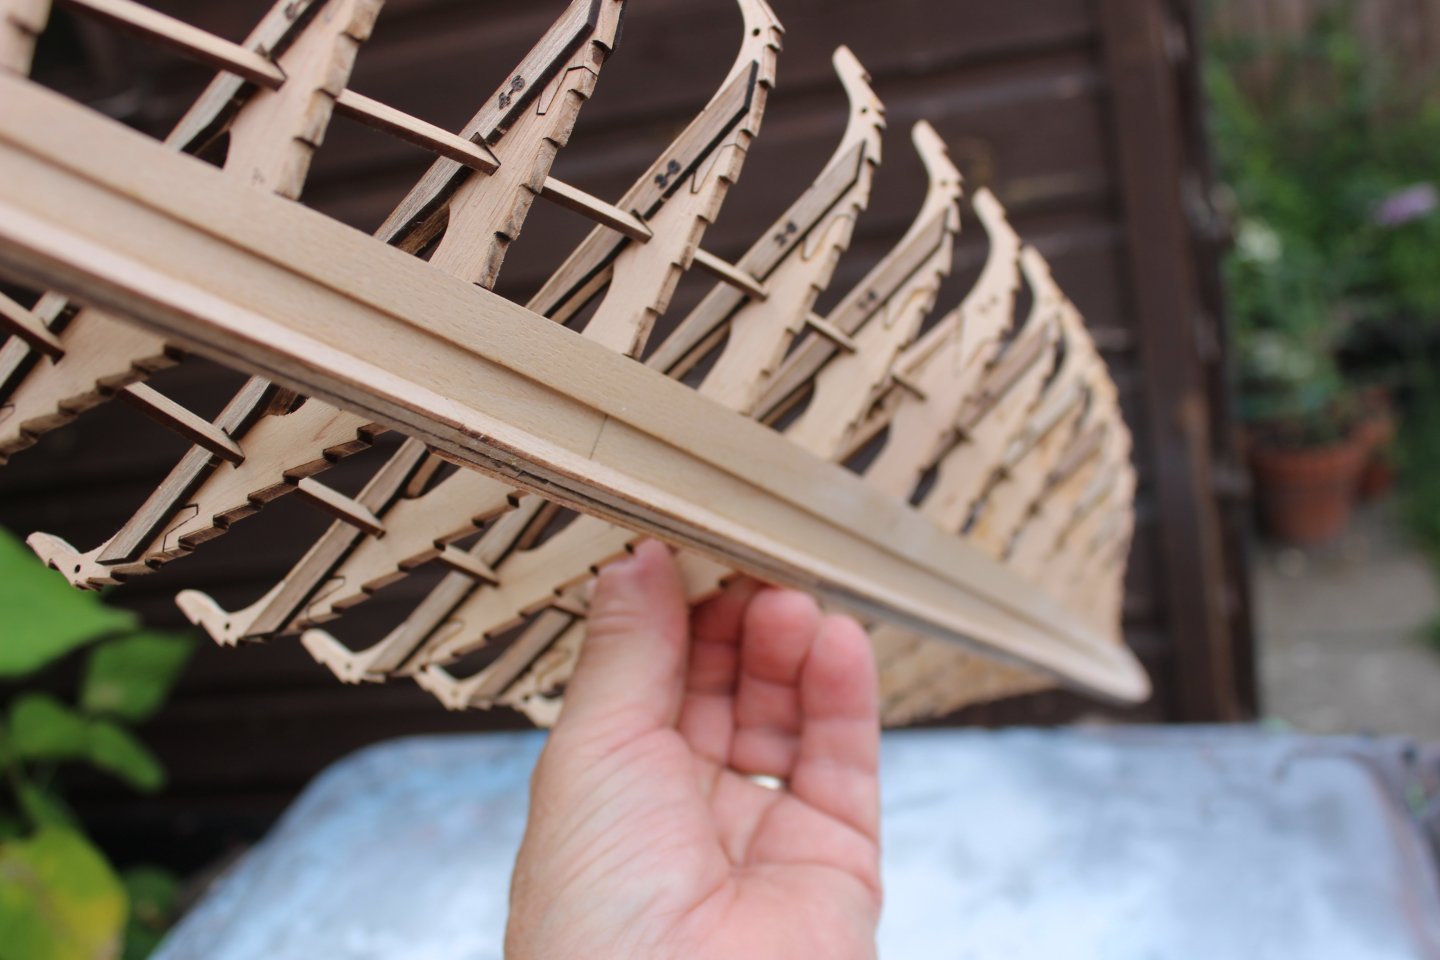
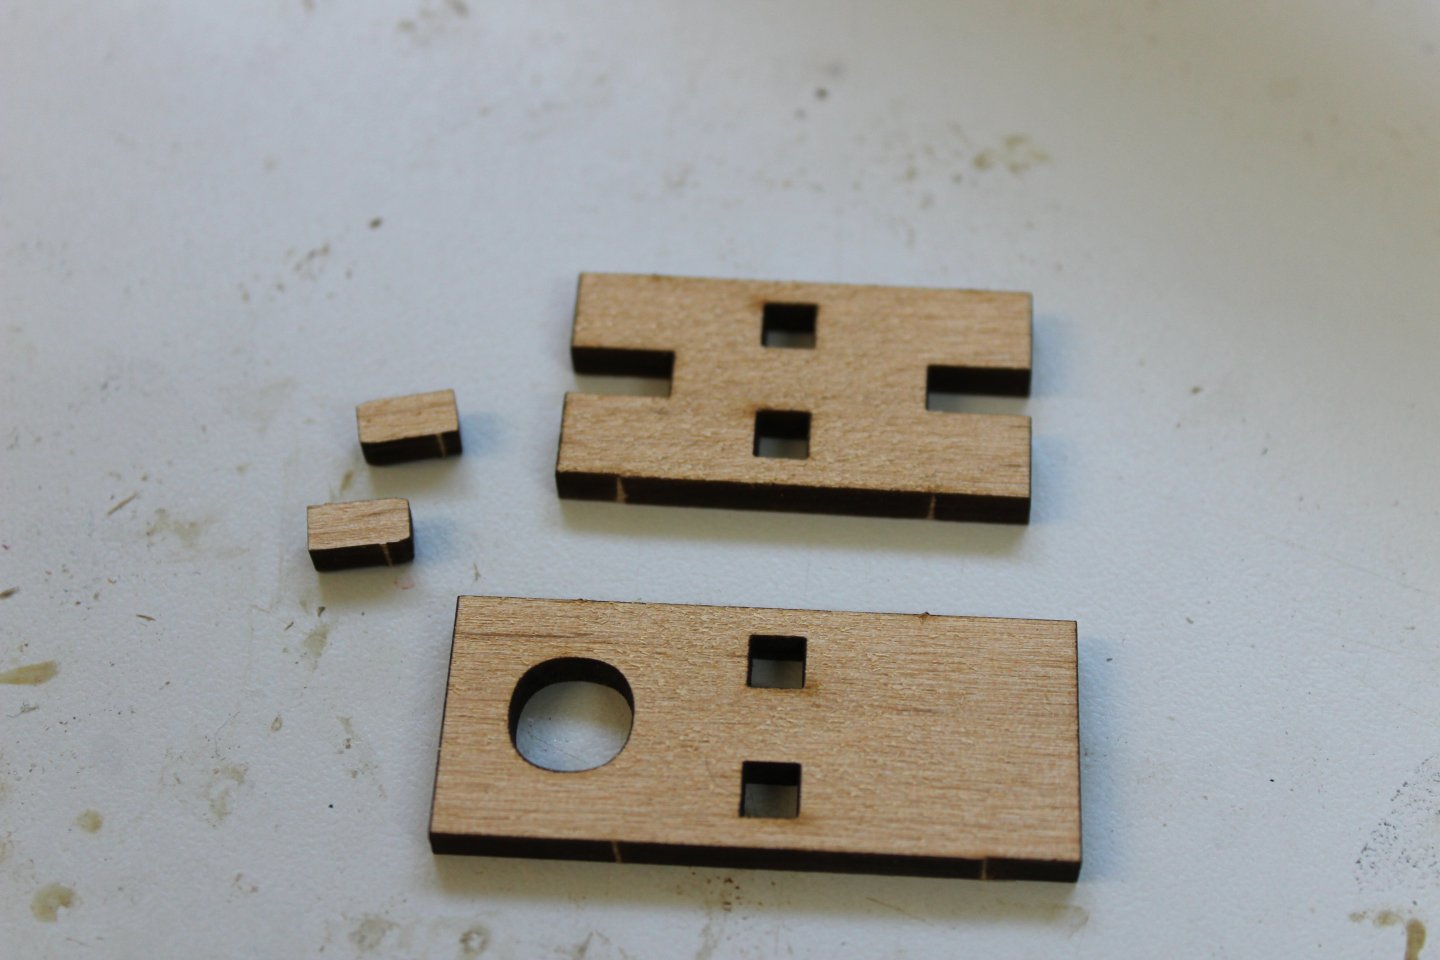
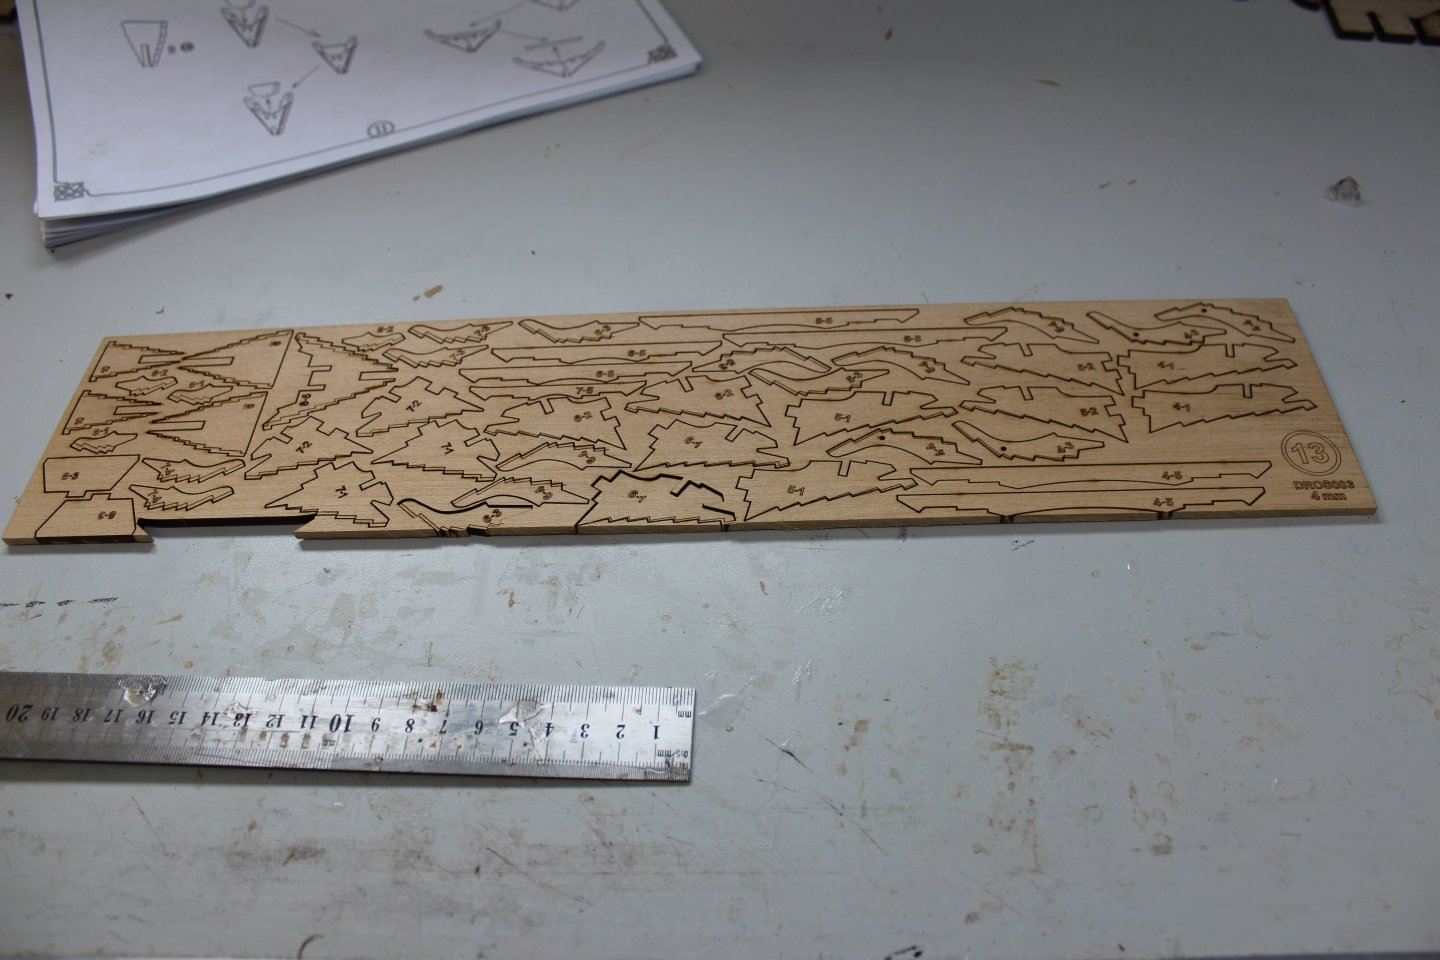
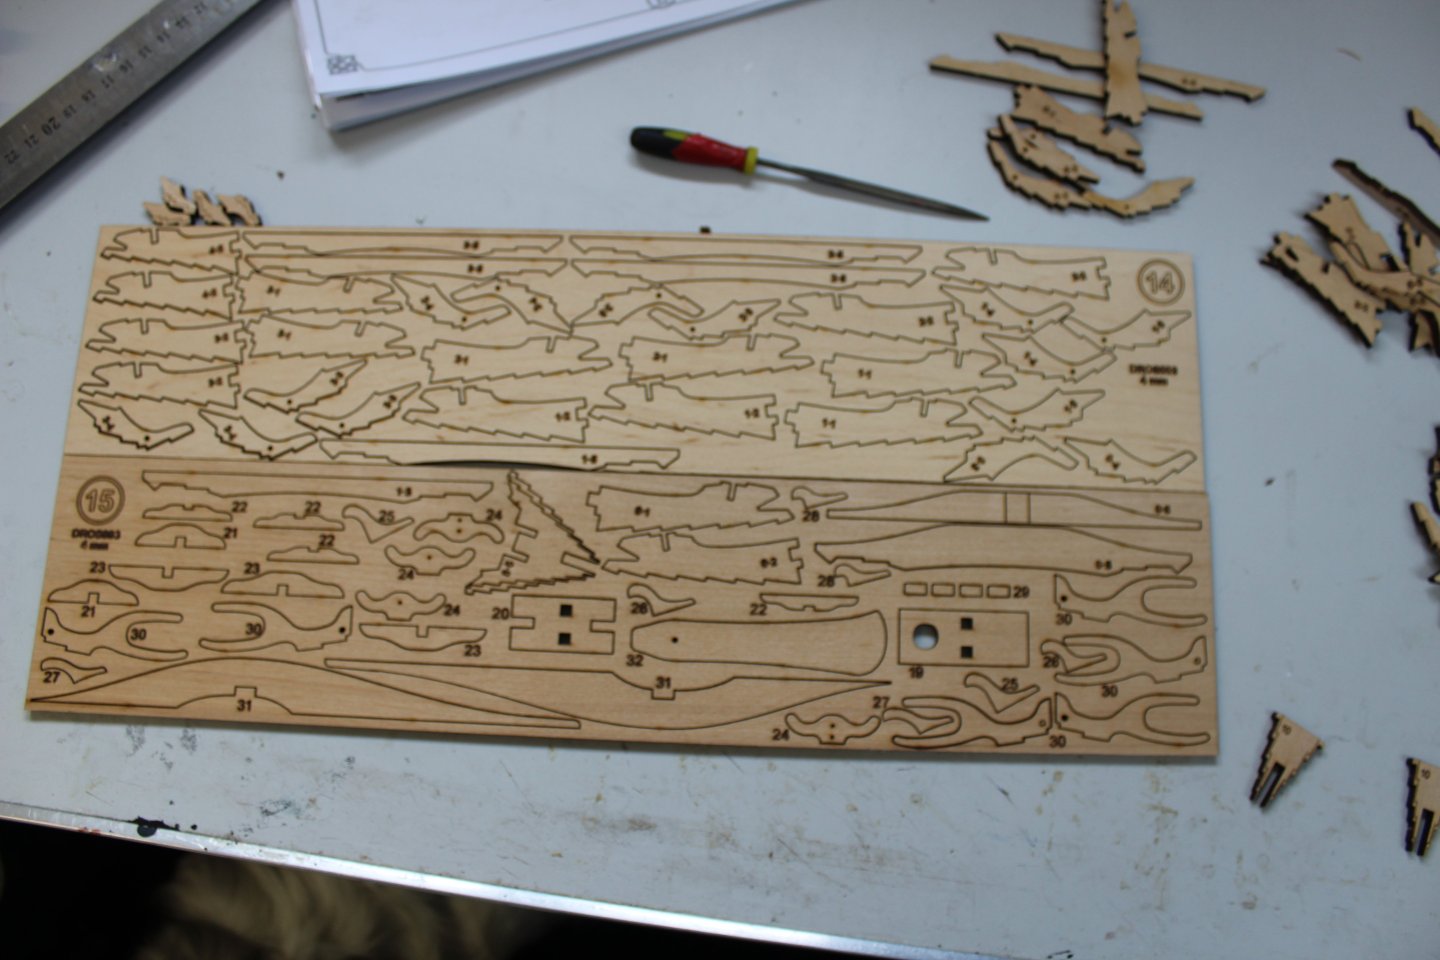
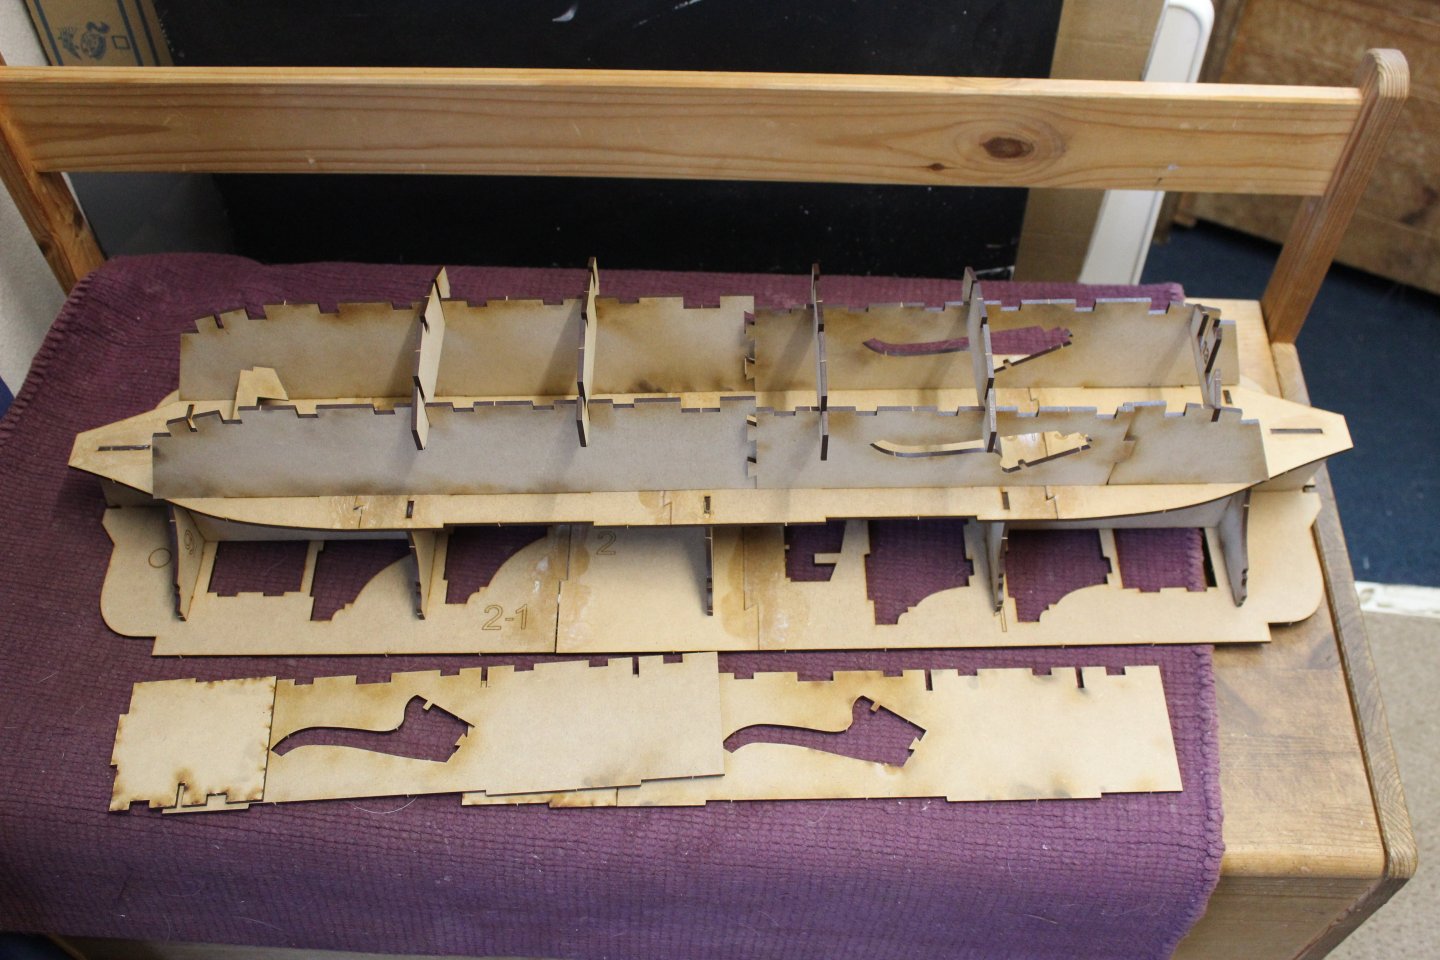
Good evening everyone, thank you for comments and likes
deck plates- not finished yet
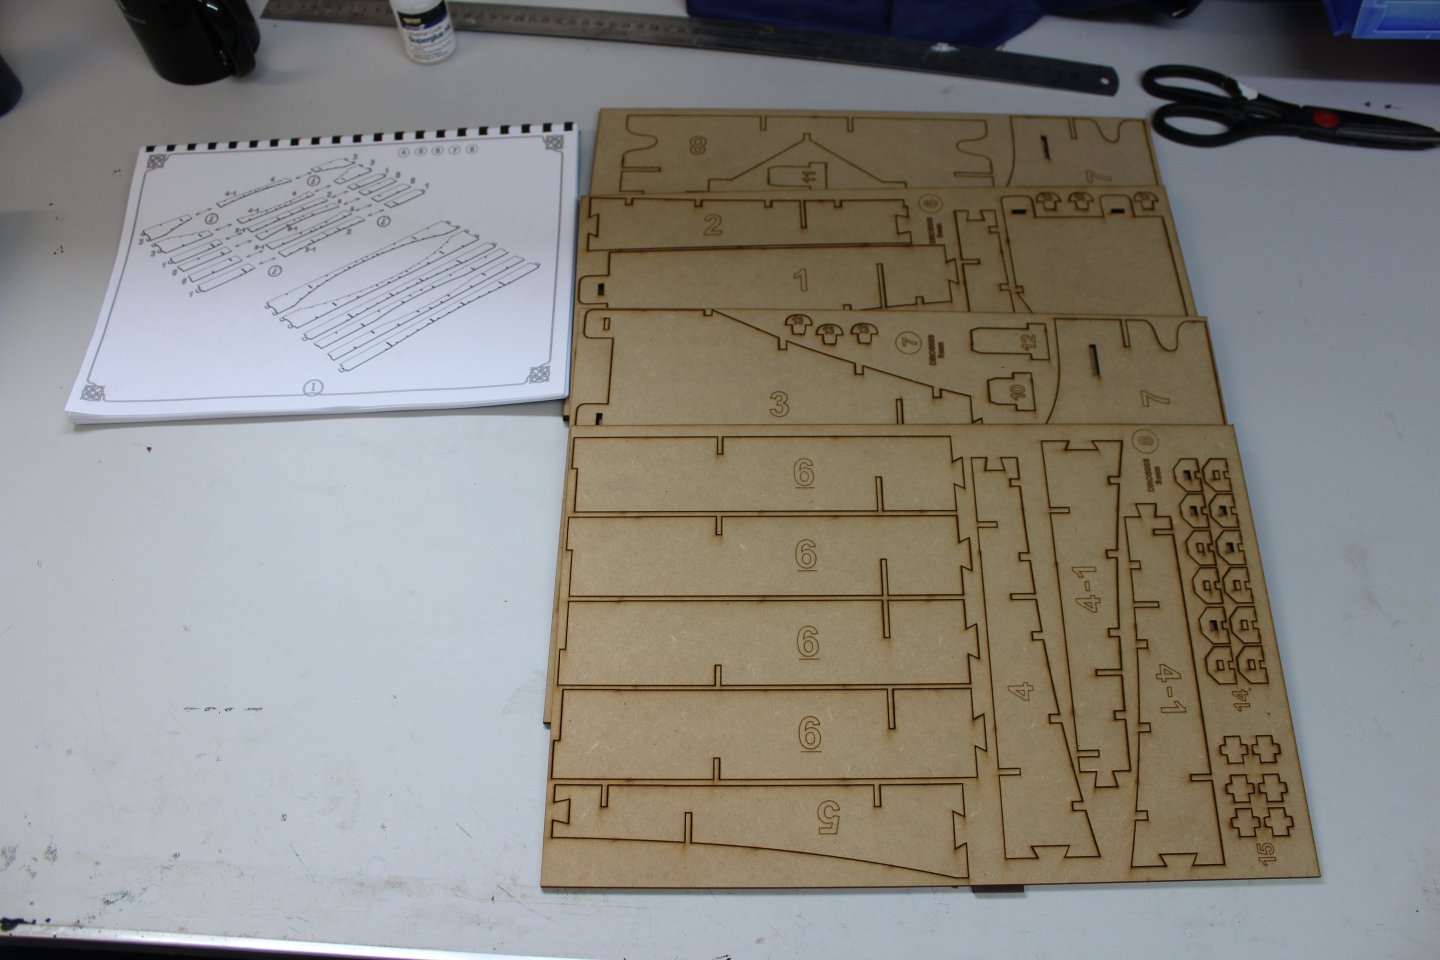
two sheets of plates have to be removed, separated and sanded,
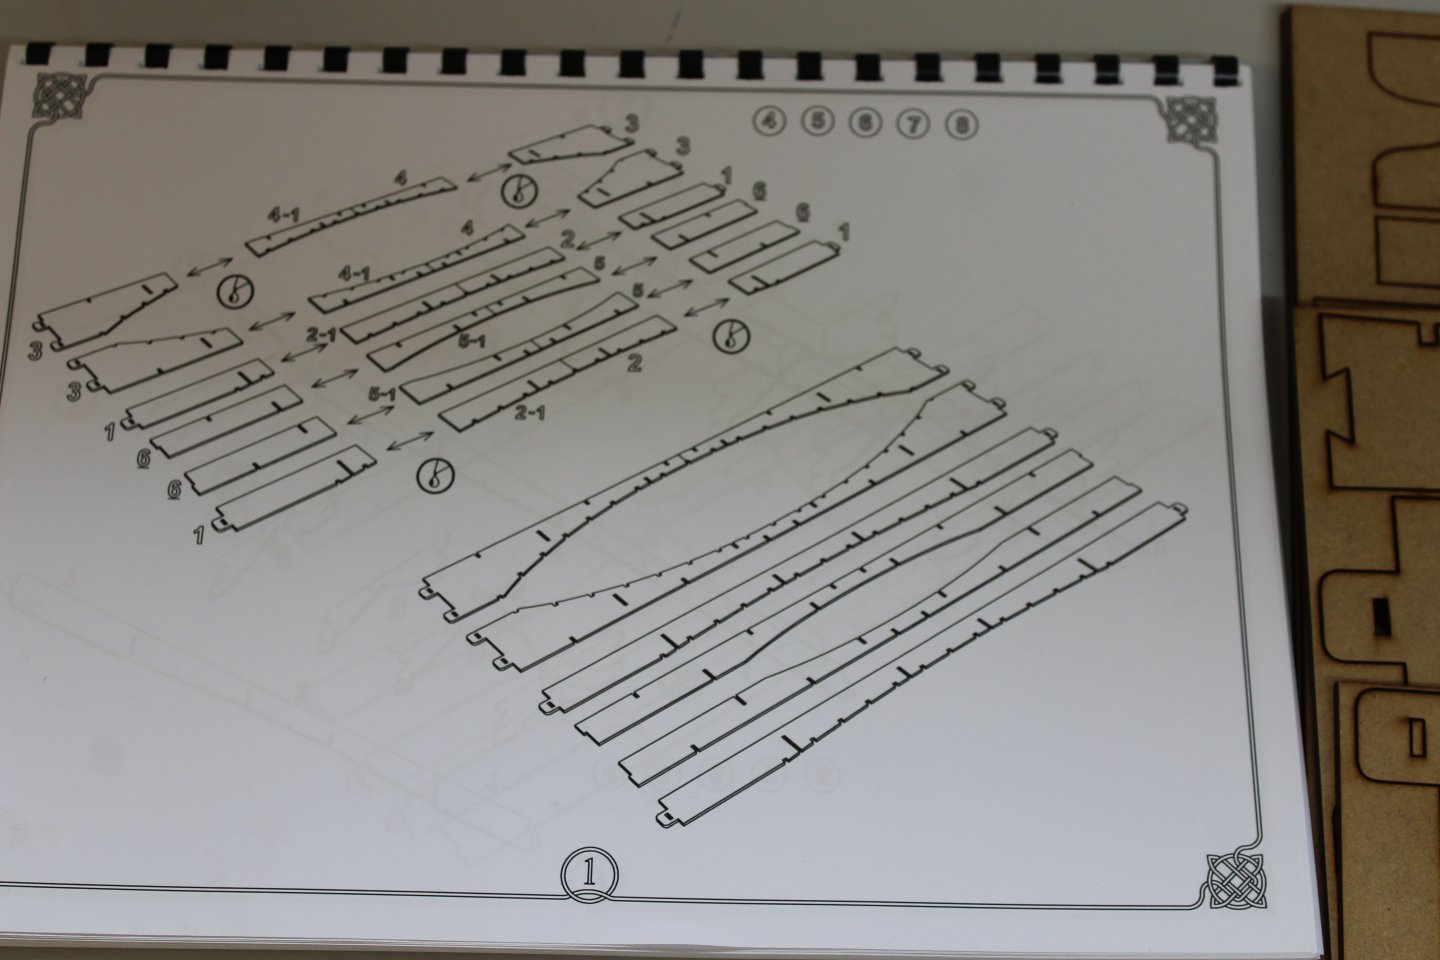
i numbered each piece of mine prior to removal, as i was bound to mix them, the instruction don't show much, other than where they go, but great online tutorial
then sprayed all the edges with walnut, sanded them with 3500 grit pad, repeated, then sprayed over with Oak and sanded again
Been 34 deg in the mancave, too warm for me, so im slightly behind, where i would like to be, not a race, im pleased with the way it is turning out, But wood glue, is a real bug bare, even with just using a cocktail stick to apply. So before she is completed, i will remove some of the worst offenders and open them to reveal the hold
no plates are glued down at this stage