


Kahunaminor
-
Posts
1,215 -
Joined
-
Last visited
Content Type
Events
Profiles
Forums
Media Demo
Posts posted by Kahunaminor
-
-
Bloody brilliant Ray. Sat engrossed and read the lot. Certainly inspirational for my build and a nice tie in for an Aussie bird.
Many thanks!
-
 4
4
-
 1
1
-
-
On 5/30/2022 at 3:47 PM, Fred piket said:
Mike, I think you've done a cracking job. Paint finish and weathering is on spot! I don't think it's an ugly duckling, it's just odd with a different opinion how to set your wings..
Can you tell me if there's a specific reason for the white tail? Just deco or is there a practical reason?
It was stipulated as a theatre marking in Pacific theatre aircraft. Lifted from another site aircraft.net I think:
White Theatre Markings
Trigger-happy pilots and gunners in the air and on the ground in the New Guinea war zone were too often firing first, then checking the identity of their targets. Mistakes were occurring. The USAAF decided upon the application of distinctive white markings to all friendly single-engined fighter aircraft, effective from September 1943. To be painted White were wing leading edges and the whole of the tail assembly. Spinners were frequently painted white also. This measure affected considerable numbers of RAAF and USAAF 5th AF Aircraft (RNZAF P-40s too- Evan). In due course, white-tailed aircraft were to be seen in Australia as it was desirable to have aircraft given these markings prior to moving to the New Guinea war zone, and retired aircraft would return with them. Until May 1944, the RAAF also stipulated that the white fins of it’s aircraft should continue to carry the blue portion of the fin stripe. In August 1944 the USAAF decided that the white markings need no longer be applied to uncamouflaged (i.e. bare metal finish) aircraft, and the RAAF followed suit in September. Then this change was overtaken by the decision in December of that year to no longer require the white markings at all. However, it should be understood that abandonment of the white New Guinea theatre marking was not a requirement to remove it, and many aircraft would continue to wear their white paint until the end of hostilities.-
1
-
1
-
-
Derek,
Thank you for commencing this build and providing such detailed explanations. It will greatly assist this of us that also have this in the stash for “one day”!
Regards,
Kent
-
1
-
-
Thanks Paul,
I had a squizz and commented there. Appreciate you taking one for the team.
Regards,
Kent
-
For a slap together job it looks pretty good Paul. Thanks for clarifying the interplane strut and dihedral issues. You have taken one for the team!
Regards,
Kent
-
Paul
Just got back to this. I appreciate the research undertaken and the findings. It will assist me in my build forthcoming.
Regards,
Kent
-
On 6/6/2021 at 8:22 AM, Paul Thompson said:
Kent, I don't know of any easy way to tell without actually trying the build. It was a while back and I didn't take note even though I did it twice (which was dumb because I still have a few in the stash I fully intend to build) so can't tell you which strut should have been which number. The approach which I hope will sort it easily as I go next time will be to jig the thing up and attach the interplane struts first. It should then be obvious which centre section strut goes where. Tell you what though, I'll bump one up the to-do list and this time make a note and pass it on. I'm just finishing up a Roden DH4, then it'll make a nice change of pace. Give me a week or two to get to the appropriate stage.
Regards, Paul.
Paul,
I gratefully await your observations and thanks for amending your to do list!
Regards,
Kent
-
On 2/10/2021 at 9:04 AM, Paul Thompson said:
The Camel has one build problem and that is that the centre section struts are mislabelled, at least in two of the boxings I've built. Otherwise it all fits well, as do the struts once you sort them out (it helps to have a Windsock Datafile to hand). Personally, I find the treatment of the ribs much more problematic, because it;s far too heavy handed. Hopefully bettered in the new kit, because Eduard can do a great job sometimes. The F2b is a difficult beast because of it's odd geometry, let alone the rigging. Eduard's approach makes it as painless as possible (I've built over 20 F2bs in various scales by various manufacturers, and I still breath a sigh of relief when everything is aligned properly.).
Paul.
Hi Paul,
I have an original edition Profipack Camel and was interested in the mislabelling issue (I assume my kit will be suspect). Is there a tell? Also could you explain the mislabelling and provide corrections please? It will be my second WWI build after an Albatross D.v.
Regards,
Kent
-
5 minutes ago, pacificmustang said:
Great progress kent
This is looking good, sorry I missed you on our little video link up the other day
Work, as you can imagine has been busy.
Bruce
Thanks matey,
Yes, I cannot imagine. Stay safe and catch you on a later iso chat!
Regards,
-
1
-
-
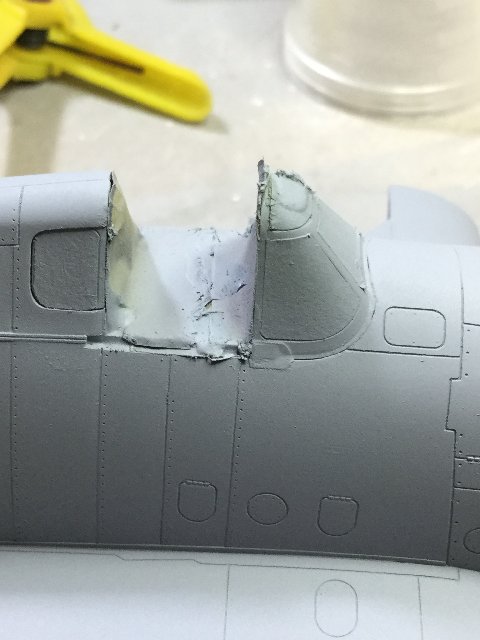
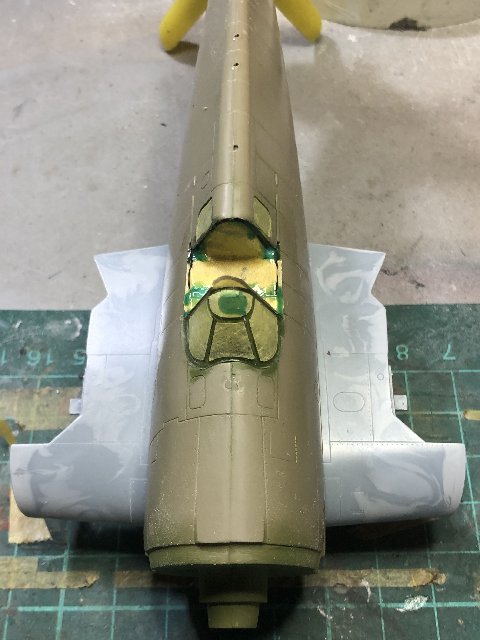
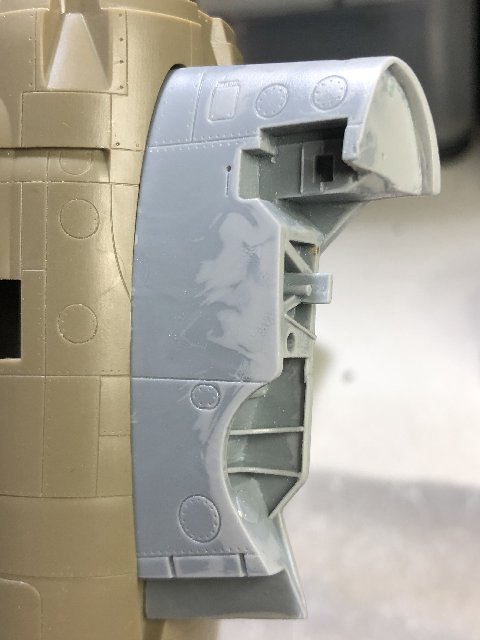
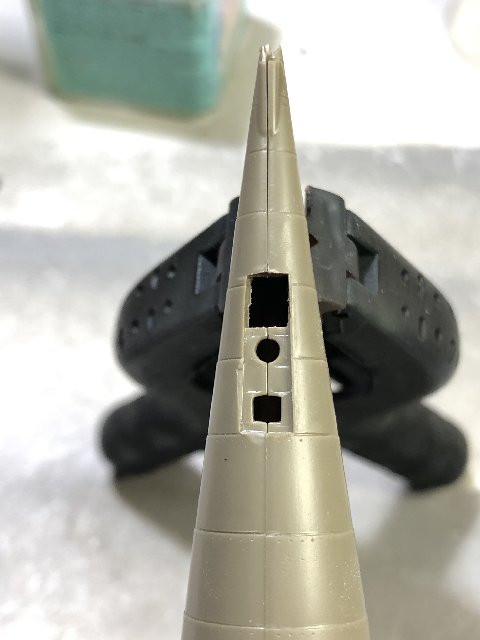
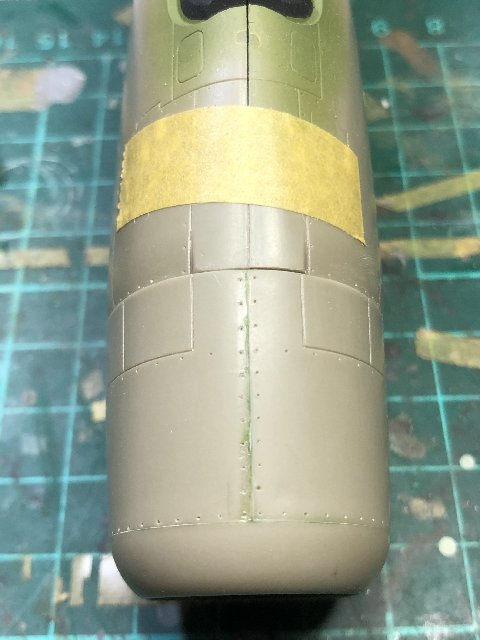
Primer coat...the great revealer! Shows the great detail on the resin parts and some do overs on the assembly front. Good news on the fuselage to wing joins, not so much on the front windscreen, spine and belly. Some obvious (to me) flat spots on the underside. The spine needs addressing at each lap joint and the very fine seam to be reinstated on both top and bottom as per my references. Some PPP for the windscreen and rear windows (although that might not happen as the sliding section should effectively hide those) and a small blemish just forward of the windscreen. Good point is the forward fuselage is nice and smooth:

Regards,
-
1
-
-
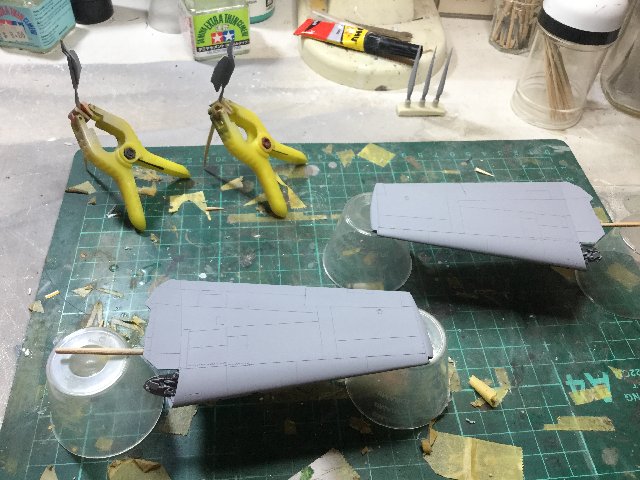
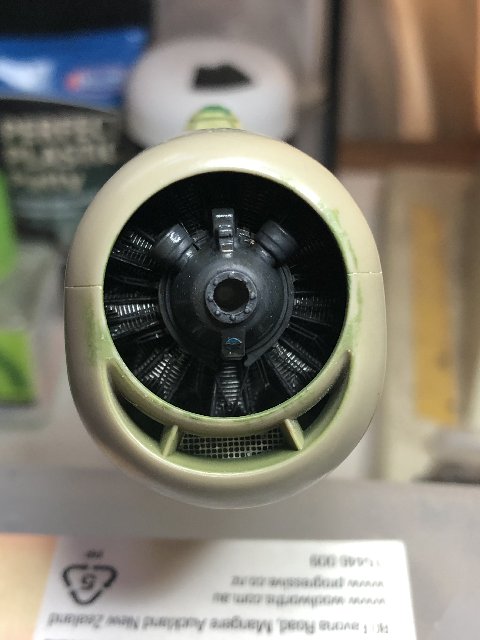
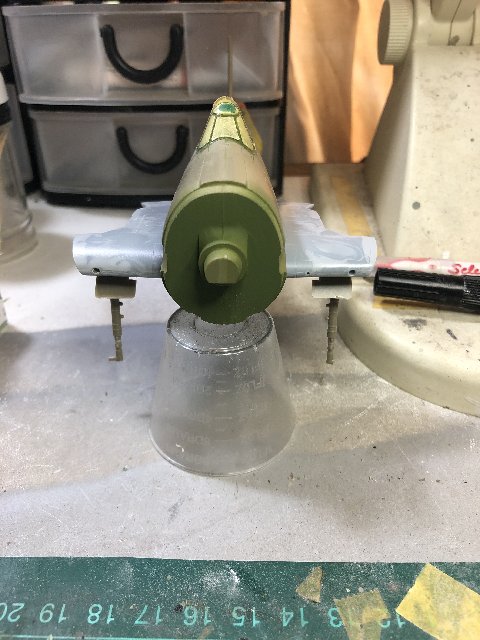
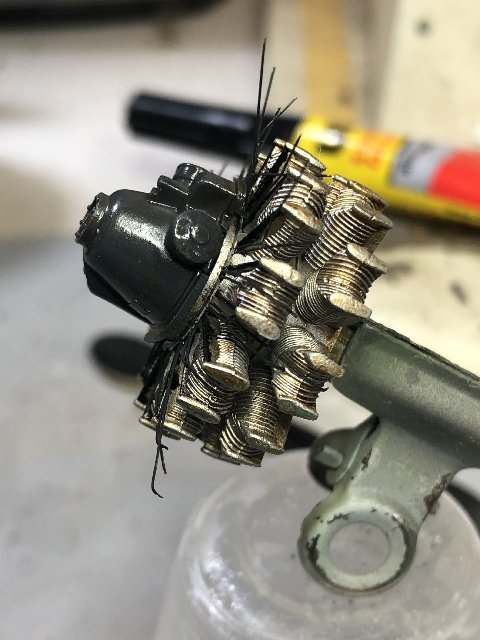
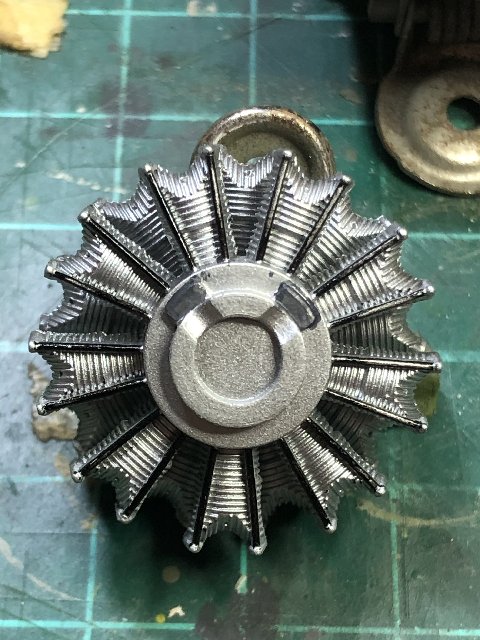
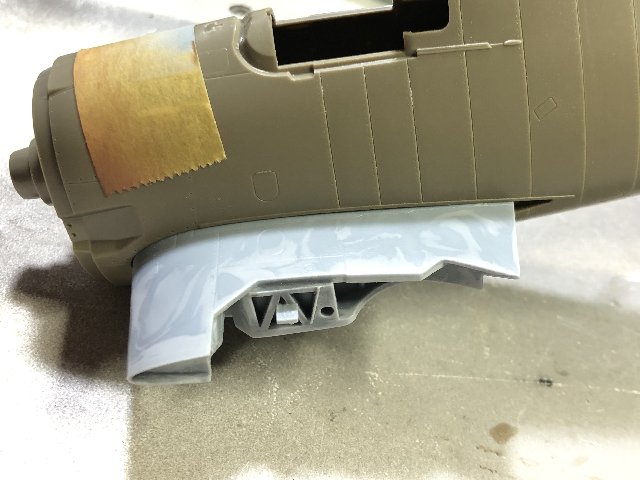
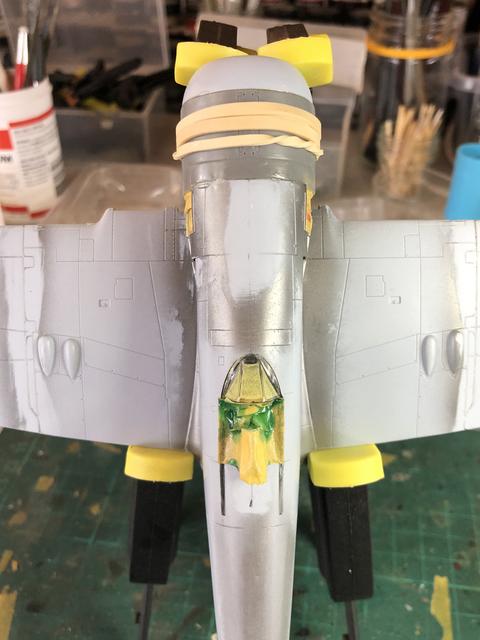
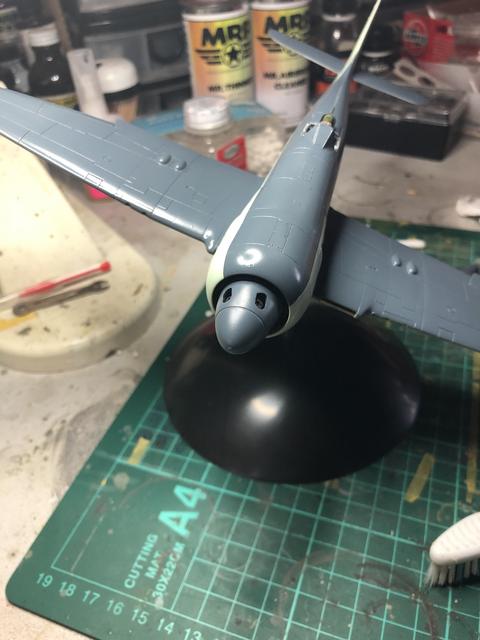
F6F-3 progress. The inner wing assemblies have been permanently attached with two part epoxy. Perfect plastic putty on the wing root seams and a couple of other small blemishes. The white and black dots on the spine are 1mm punched discs to replace the light mounts which I sanded off. I have fashioned a sprue holding device for primer and painting by drilling through the engine hub. This will be cut off flush when the engine is mounted. Next step is priming with AK Grey primer and micro filler:
Regards,
-
Welcome back,
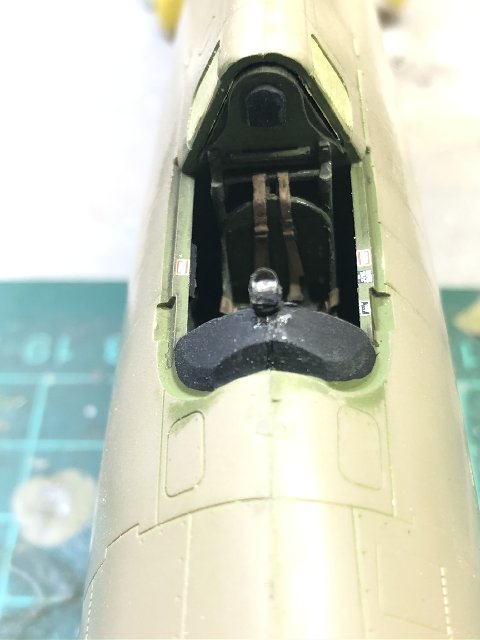
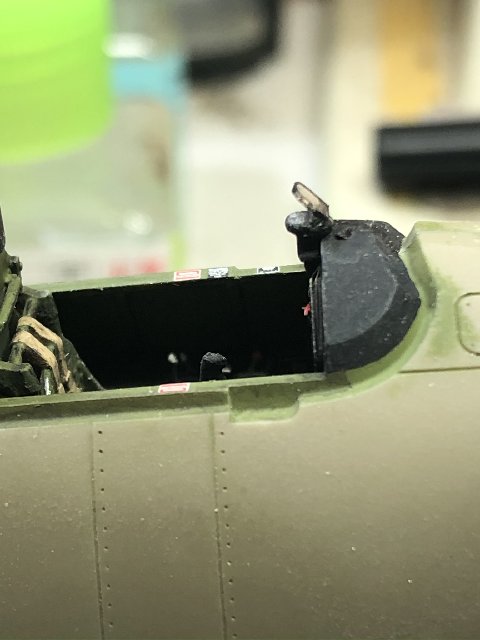
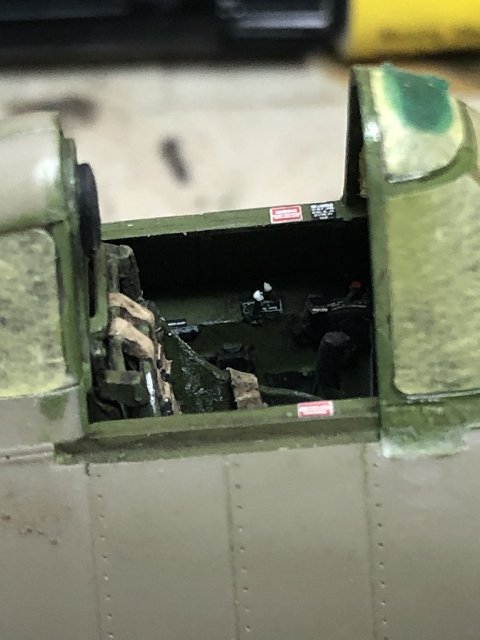
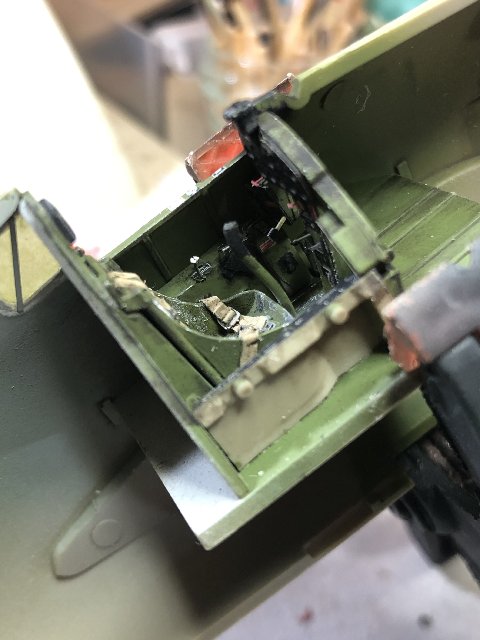
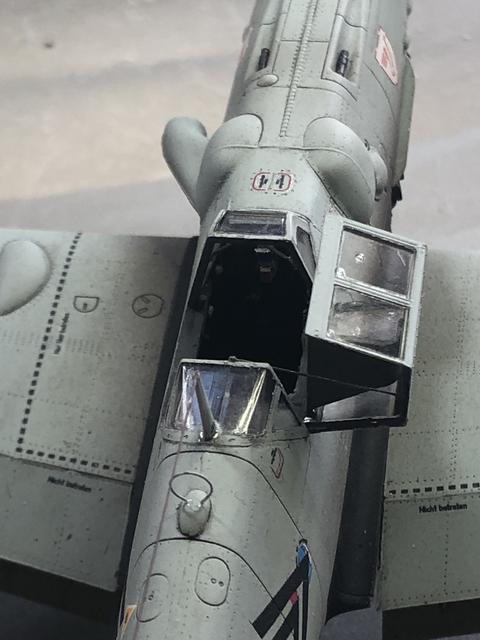
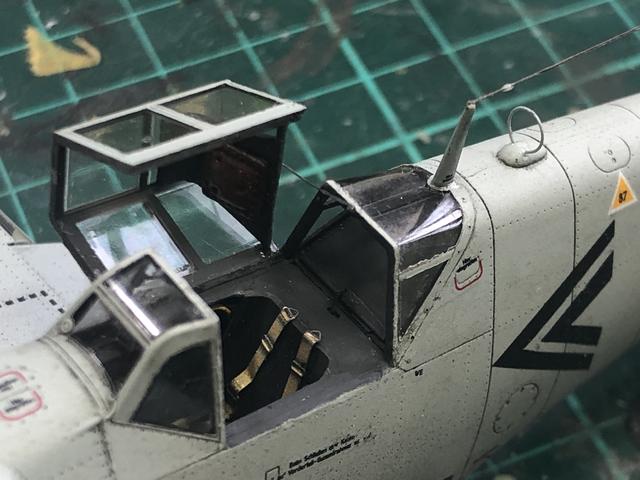
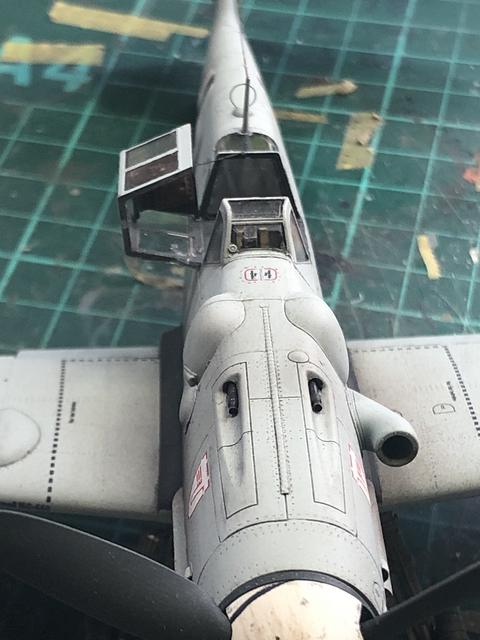
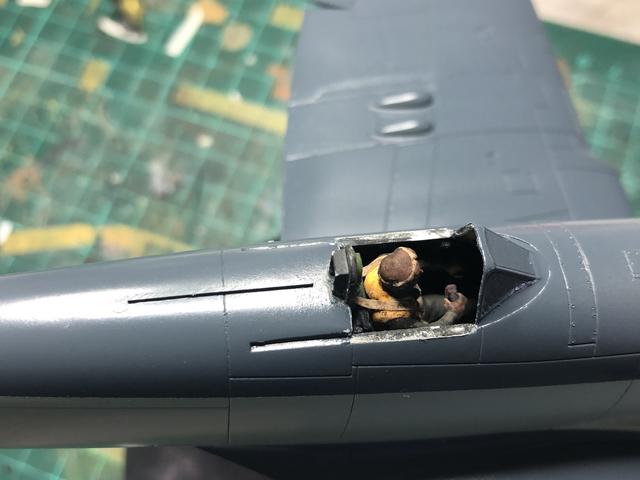
Working on the cockpit. Gunsight glass added and canopies masked inside and out. The kit doesn’t have a mirror so I found some PE mirrors and used my Molotow pen for the first time. The wiring harness is now in place:
The fuselage is joined and ready for cleanup. I have affixed the front windscreen with its rear view mirror. The windscreen piece was a tad wide at the rear edges so I removed some material from the inside and blended it in. My plan now is to seal the cockpit with tape to keep the dust etcetera out. The engine wiring has been completed and another wash of AK Neutral Grey applied. It will get a Matt finish later on. Test fitting it and the cowling show a fairly good fit and look. The engine will go aside now until final construction. The cowling will also be left unfixed so I can paint the scheme in full remove it and add the exhausts prior to fixing it for good:
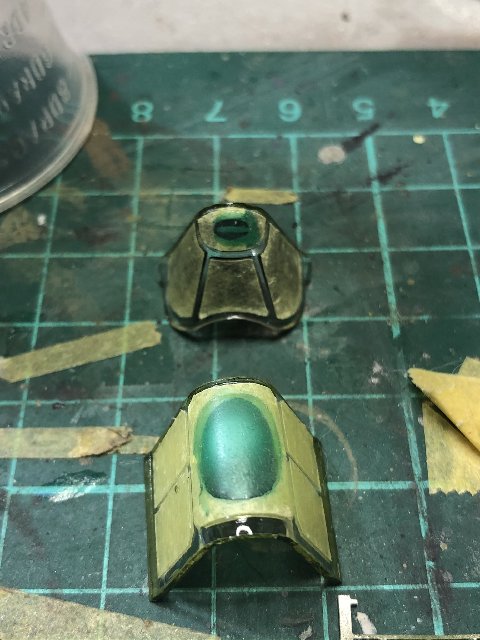
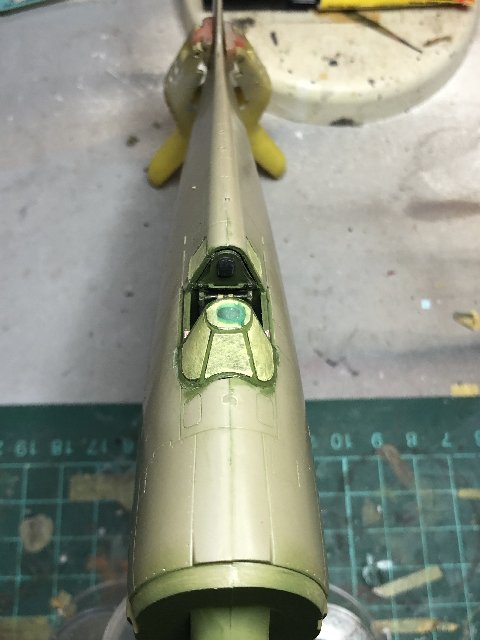
The cockpit has now been sealed with tape masks and masking liquid. I used the extra canopy pieces to trace the shapes fore and aft and got a fair shaped mask. Then fit and sealed. The resin inner wing sections are both free from their casting blocks. I then fitted the kit MLG components to the wing inners. The wings are dry fit into place:
Thanks for looking,
Regards,
-
2
-
-
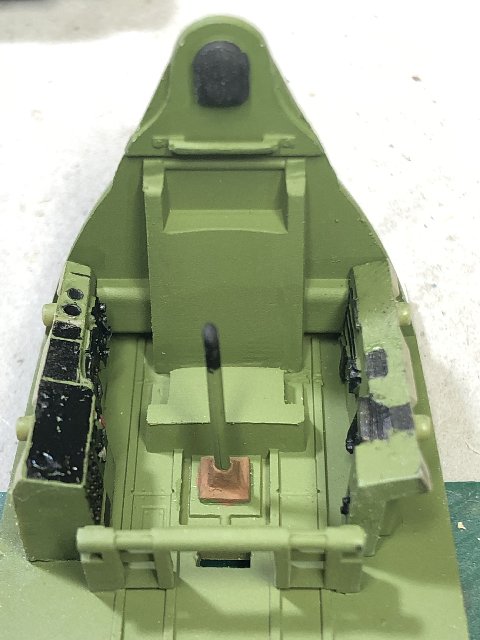
So progress on the cockpit saw the PE levers attached and a couple of extras added from scrap PE with Acrylic paint built up for handles:
Then a Dullcote protective coat and when that was dry, some chipping and highlights with water colour pencils. The cockpit was then attached to the port side and held for a while with a clamp to ensure correct position:
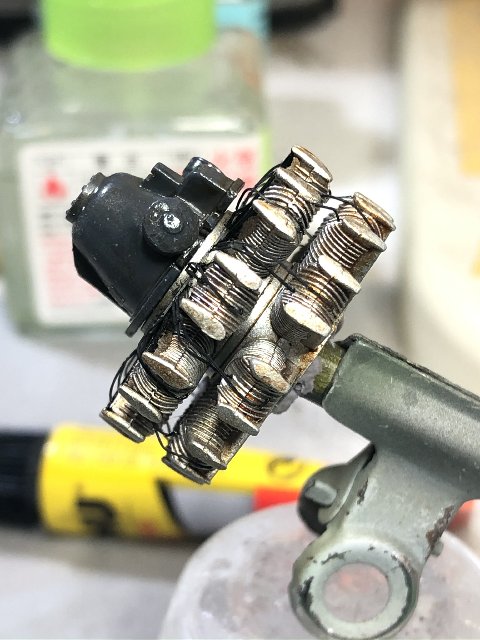
The engine got fully assembled its PE cabling commenced:
Next step is to close the fuselage and then continue with the engine.
-
6
-
-
Welcome back,
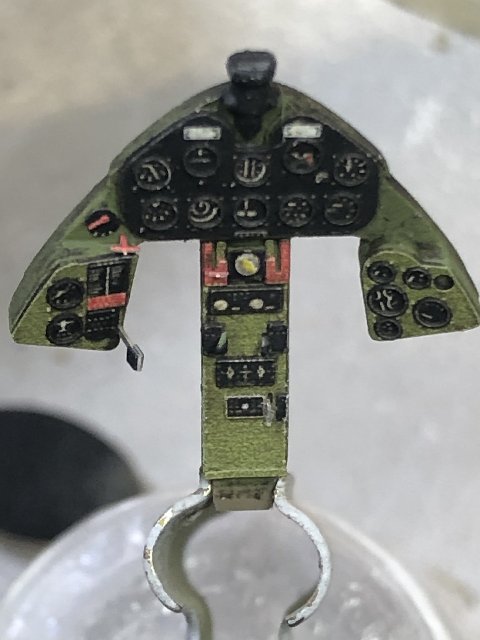
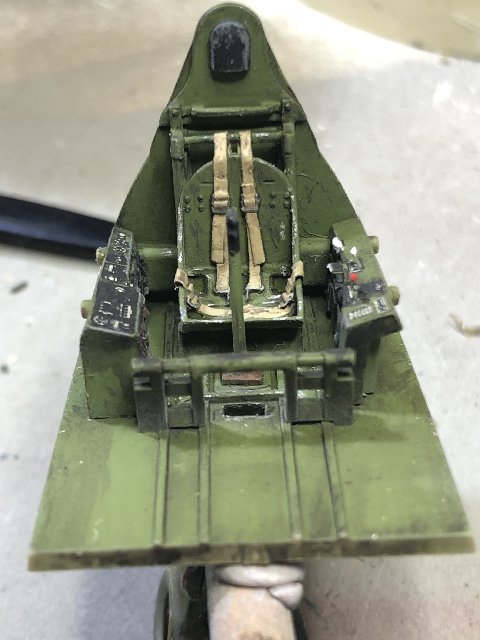
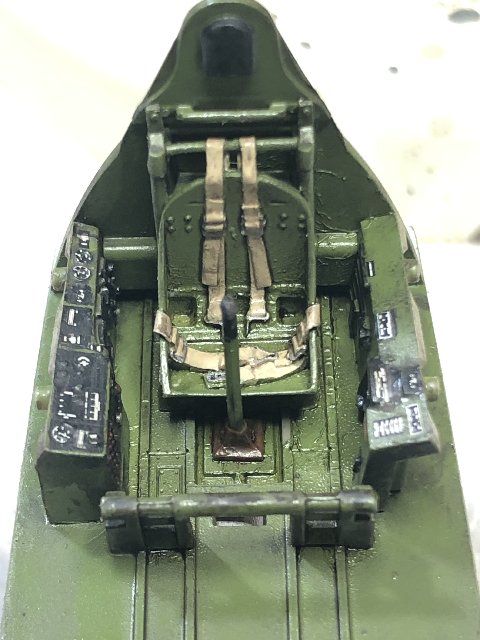
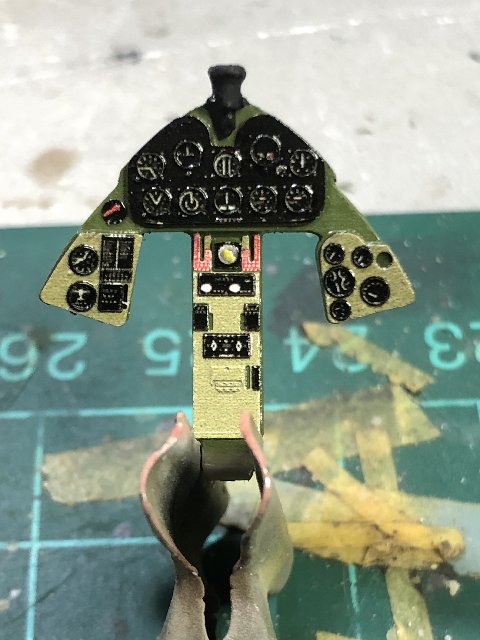
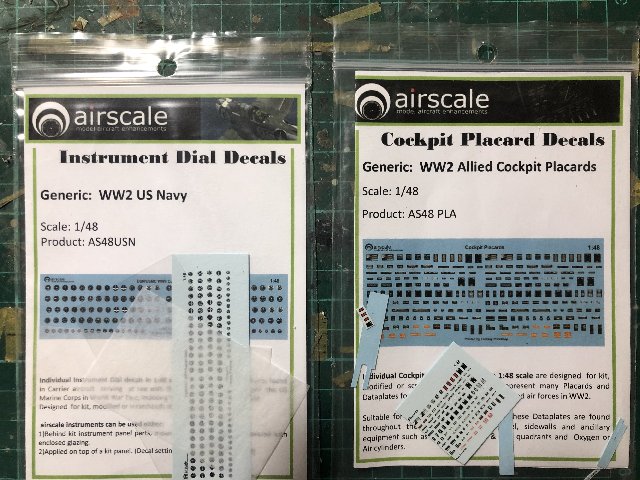
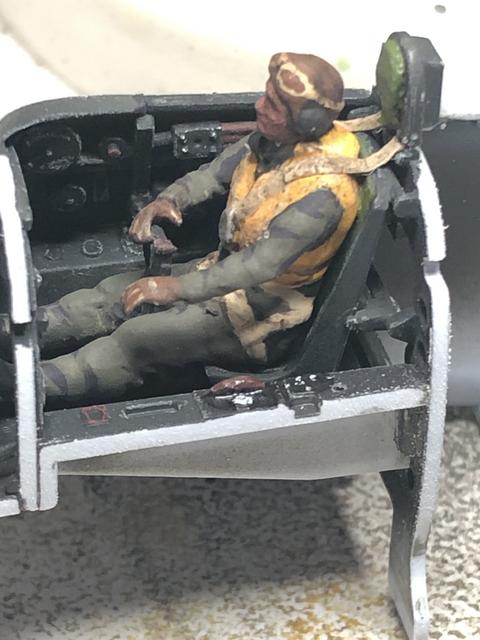
Work on the office this day. Airscale WWII USN instruments and Allied cockpit placards to dress up the office. AK Dark Brown for green vehicles enamel wash for and the Ultracast seat was CA’d into place. Still some more PE handles and levers to go:
Regards,
-
6
-
-
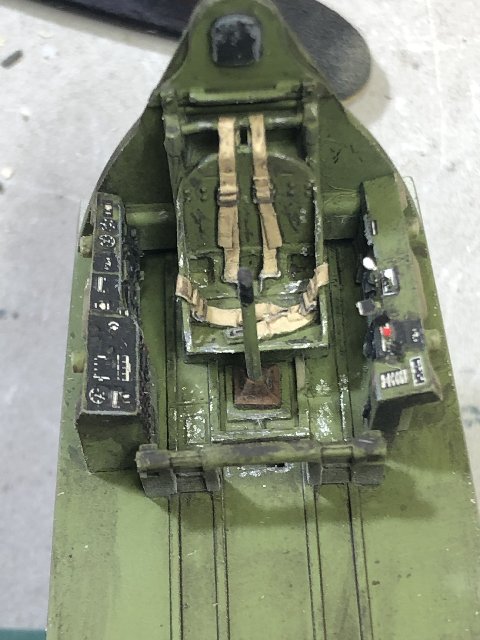
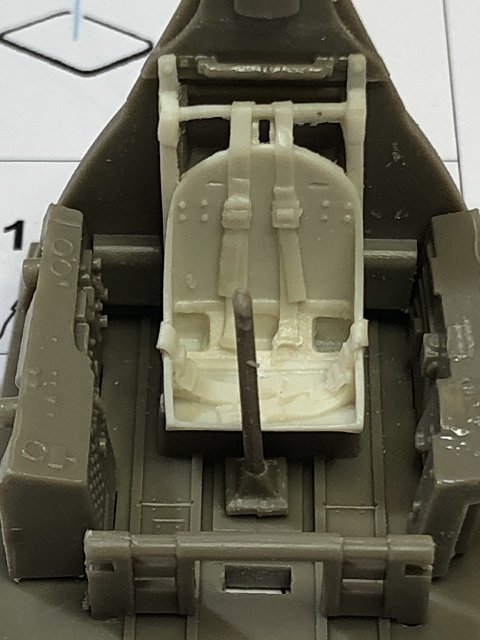
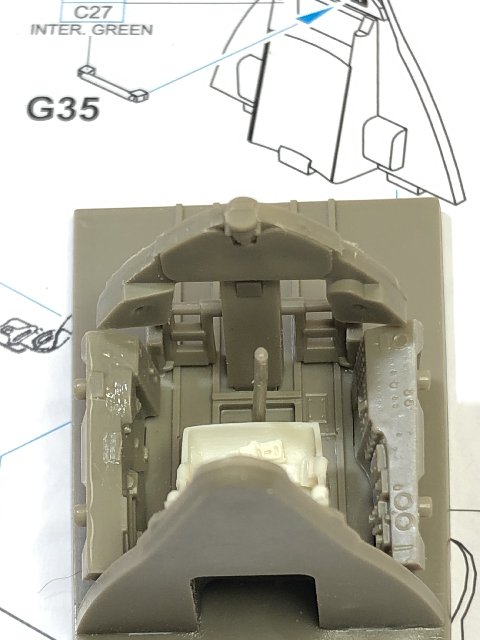
So progress marches slowly forward. In the cockpit, I have assembled and painted the main components. Making room for the Ultracast seat in the cockpit tub meant removing some plastic from the kit seat attachments. This is the original 2009 issue of this kit and does not include any decals or PE for the side consoles so they were drawn by hand with a Uni ink pen:
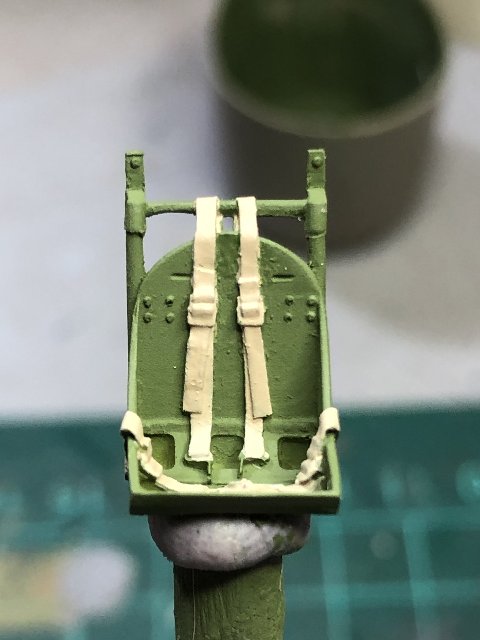
The Ultracast seat was painted up and detailed with acrylics:
The IP had its PE attached:
The engine has been assembled and painted and awaits final assembly:
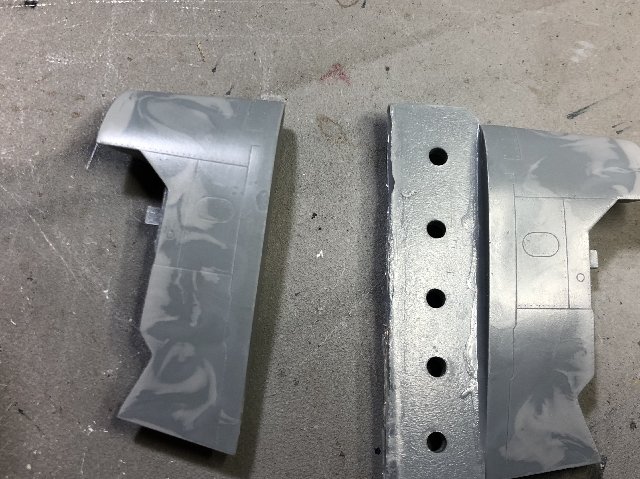
The port resin wing inner has been cut from its casting block and test fitted. I also test fit the MLG components into their positions. A bit rough at the moment but I am encouraged by the fit so far:
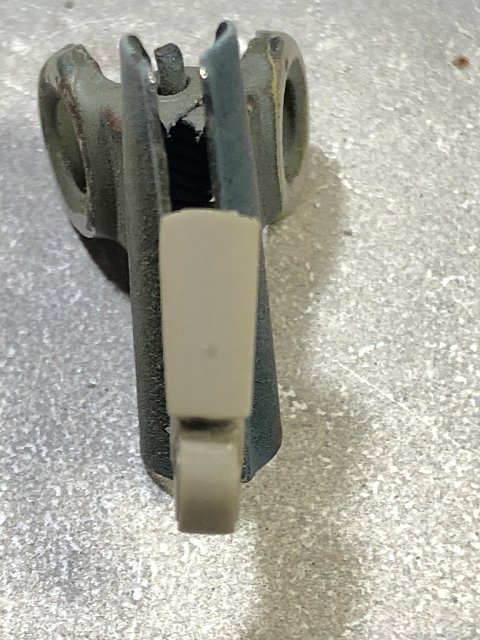
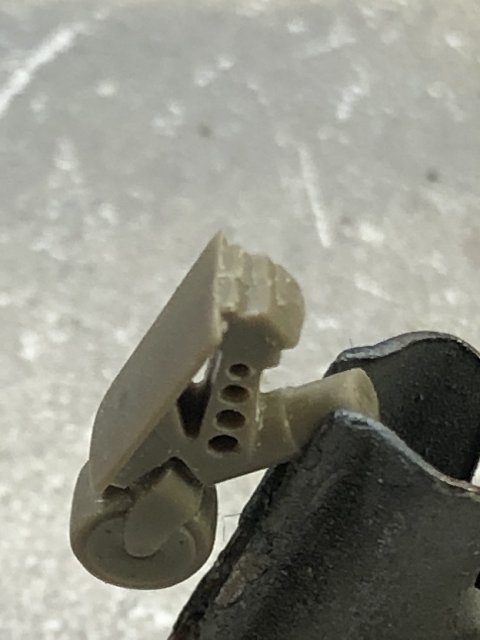
The tail wheel had a hole cut out to better reflect reality and the tail wheel assembly trimmed so it could be fit after joining the fuselage:
Finally, the fuselage to cowling was sanded to allow a better fit as it kept popping the seams on the cowling assembly. The cowling also had a styrene rod attached to strengthen the seam:
The whole lot has been gloss coated in preparation for the decals, Airscale sets for the cockpit to busy it up then some washes:
Regards,
-
5
-
-
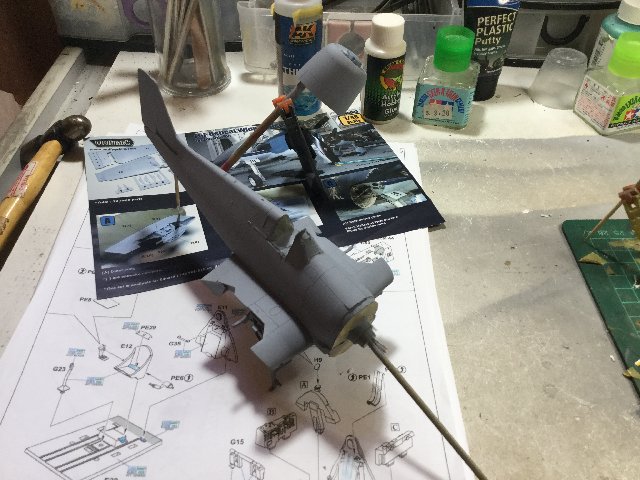
In an attempt to break the deadlock on my bench I have started what in theory is a straight forward build, with a little twist. Eduard’s Hellcats are lauded as relatively simple to build with a good result. I intended to build with minimal AM, Ultracast prop and seat, to just have something on the go as everything else on the bench just doesn’t interest me and I wanted to do something quick and not Axis themed to redress the disparity ratios in the display cabinet:
I started in the cockpit area and assembled and dry fit the main components. The kit seat back and base was reduced so the Ultracast seat fits a little better:
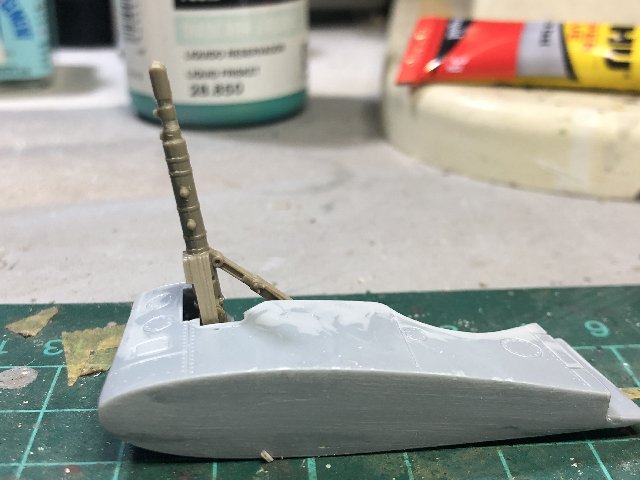
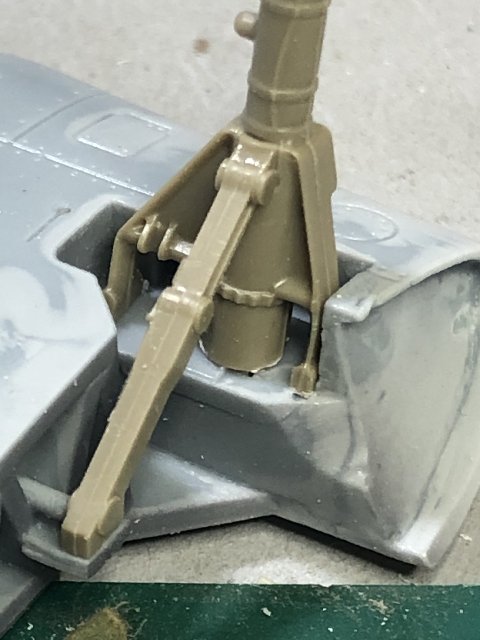
I then turned my attention to the engine and the front and rear cylinder banks were joined. The Ultracast prop has an integral shaft, so the front of the kit shaft was removed. It will be drilled out at a later date. This allowed the magnetos to sit properly in the crankcase. Small holes were made in the cylinders to accept the PE wiring harness at a later date:
So there it stood, almost but not quite. It was looking too simple so I added the wing fold kit from Wolfpack just to add some spice. A beautiful set that replaces the entire wings sections with resin:
Keep tuned and thanks for looking!
-
11
-
-
Ultracast has them in stock:
https://www.ultracast.ca/Master-AM48028-German-Radar-FuG-218-NEPTUN-p/mam48028.htm
trusted source, quick and efficient and some other goodies if you want. I buy from them a lot and ship to Australia w/o issue.
regards,
-
1
-
-
Has it really been that long....May!
I finally got around to adding the final touches to the build. It took me literally about an hour to finish. I will take some better shots for RFI:
Regards and thanks for your patience!
-
3
-
-
Very nice build Dale.
-
1
-
-
1 hour ago, Grey Beema said:
That is one good looking Sea Fury. Very nice smooth paint finish. Bit of light weathering now and it's done.
You've got me thinking now - should I do a wheels up version? I don't really like the prop blur propellor blade so I wonder how easy it would be to motorise?
I am also not convinced by the propblur but nothing ventured, nothing gained.
I motorised an Eduard Bf109 (follow the large font link in my signature block if tour want a look) and it was surprisingly easy. Micro motors are readily available and the Sea Fury kit would lend itself easily to installation methinks as there is plenty of room under the cockpit tub. Well worth investigating it.
Regards,
-
Many thanks,
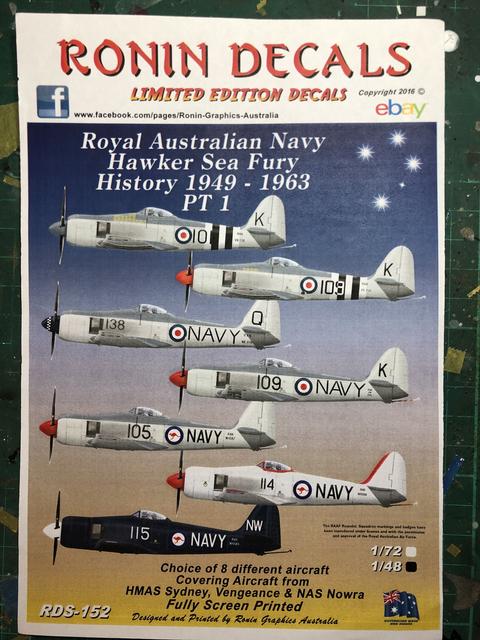
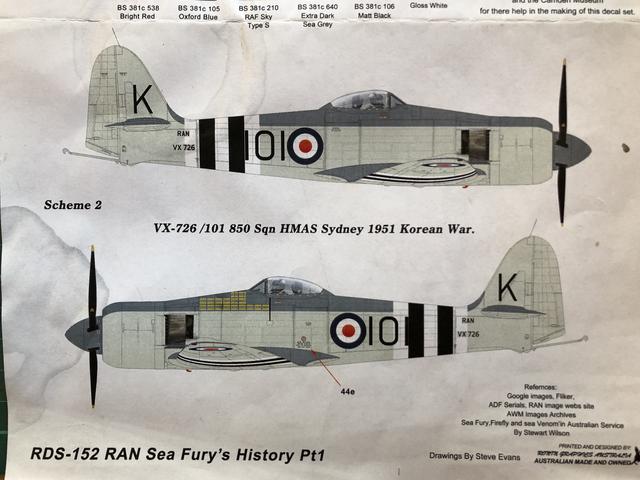
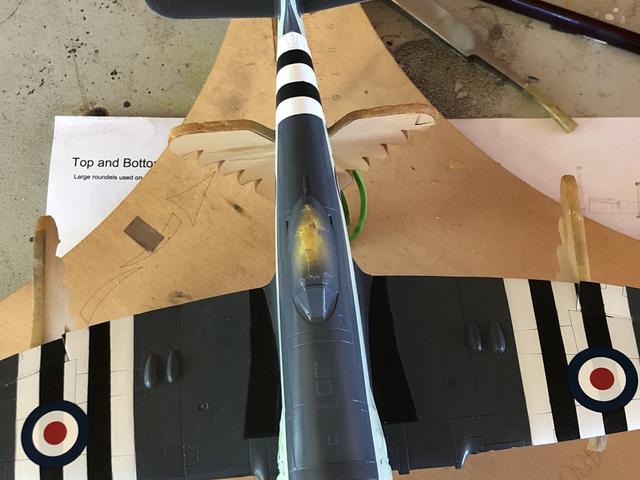
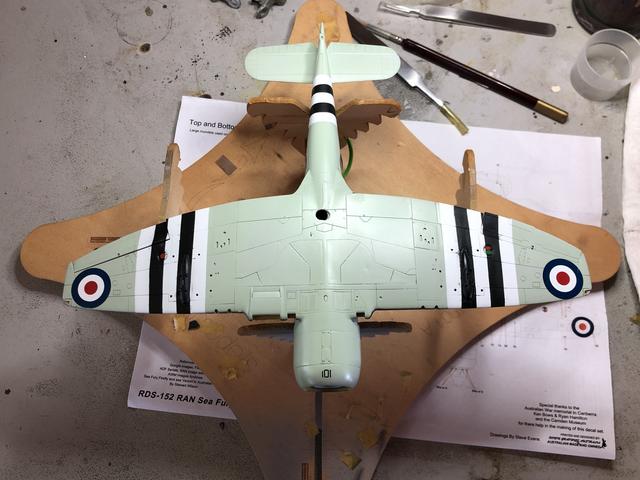
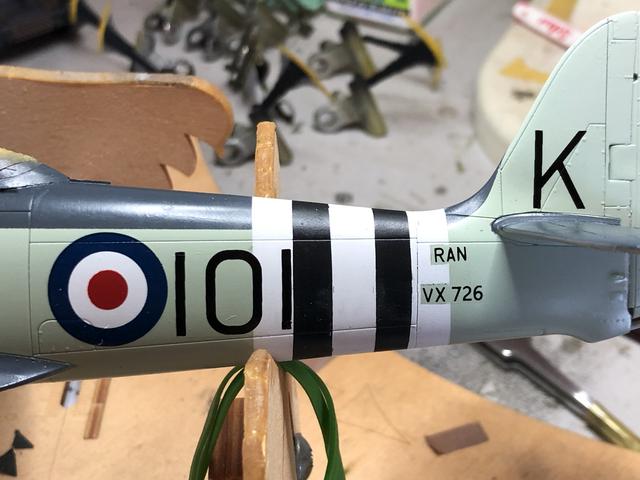
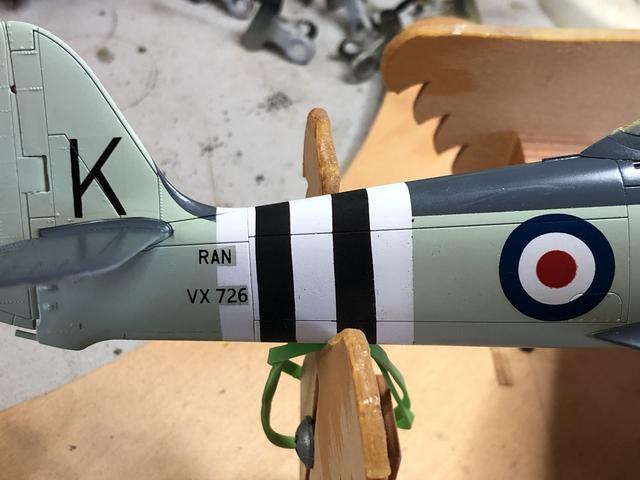
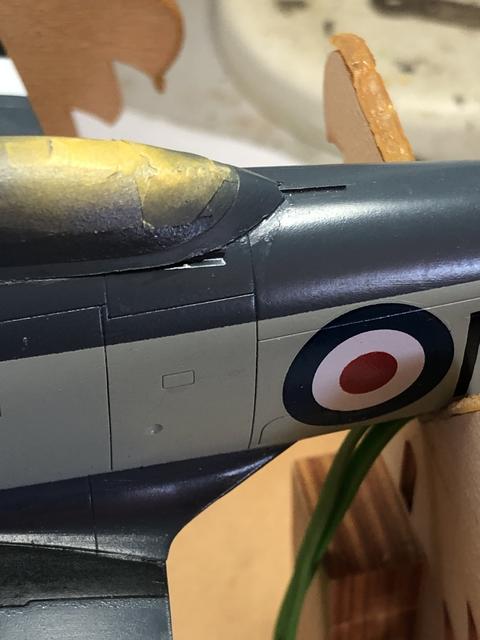
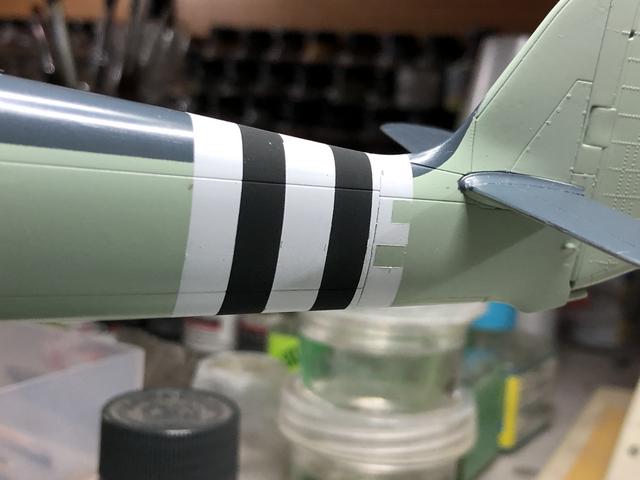
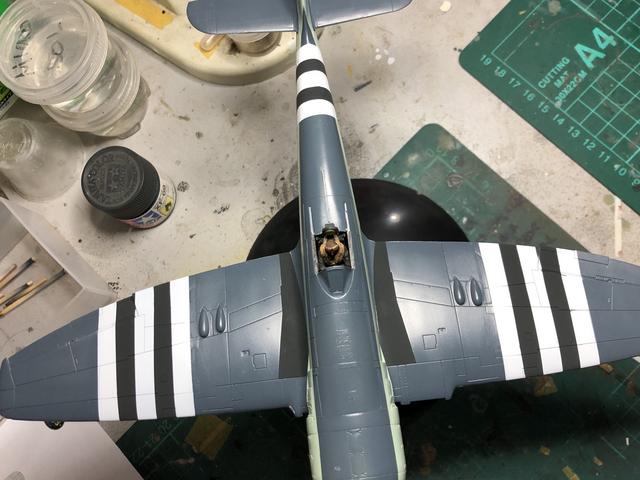
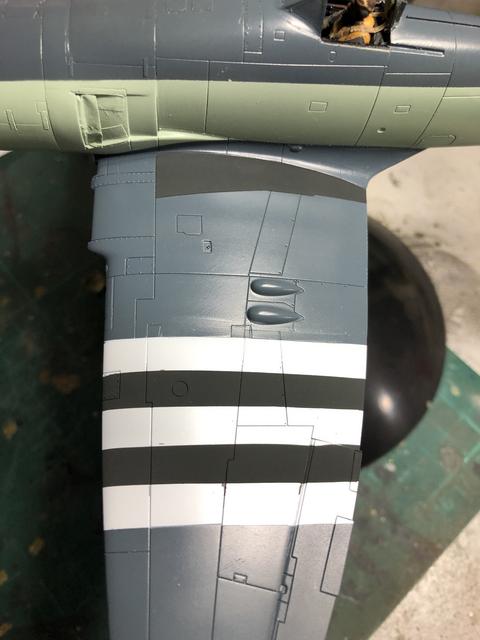
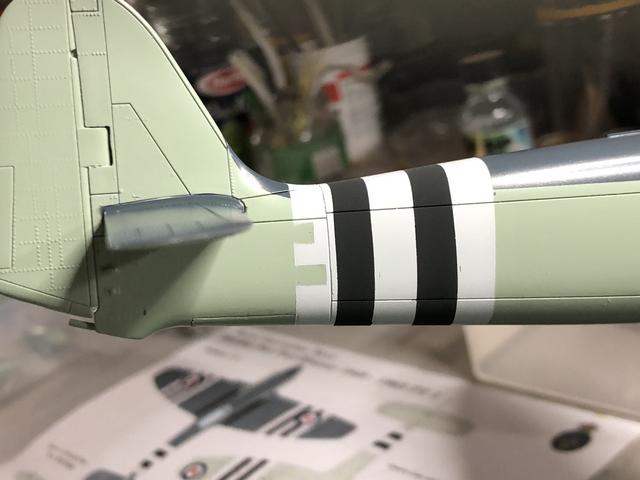
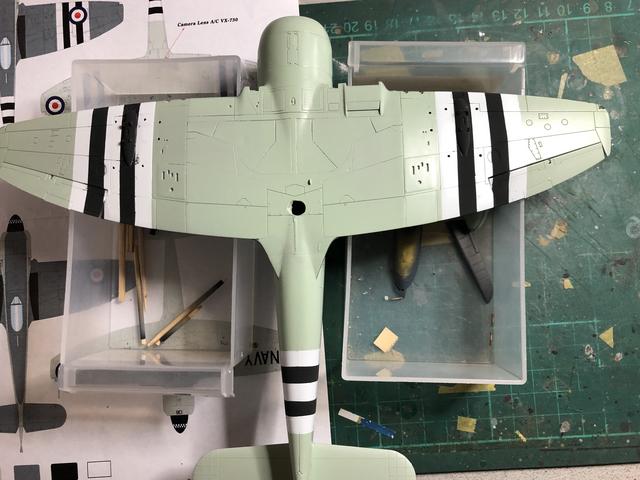
Decalling has commenced. I am using the Ronin Decals RDS-152 set and the scheme is “101”:
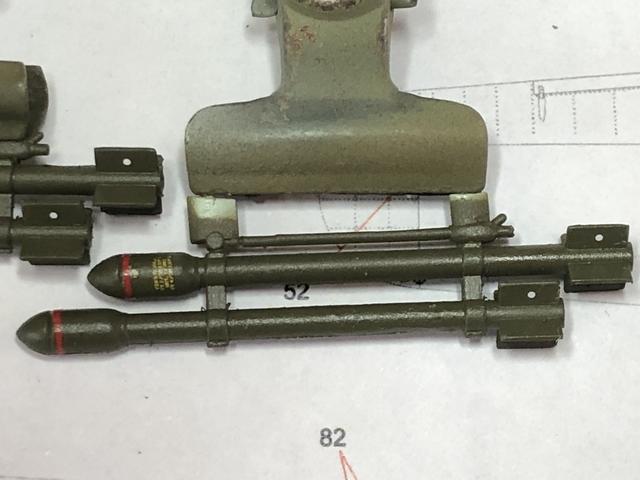
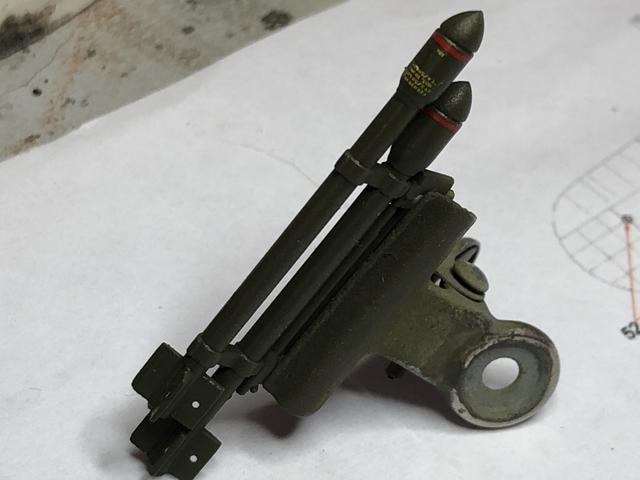
The decals are really thin and conform well to a gloss surface, however, I had a disaster with one of the “101” fuselage markings and lost it. Operator error all the way (read the decal instructions and avoid setting solutions - water is fine) and my cry for help was answered so the main markings should be complete by the weekend. My only gripe is the opacity is such that the invasion stripes show through the wing upper decals. A lesson for young modellers there. The rocket markings are the kit decals. I will reapply MRP Sky to the mountings before a gloss coat seal:
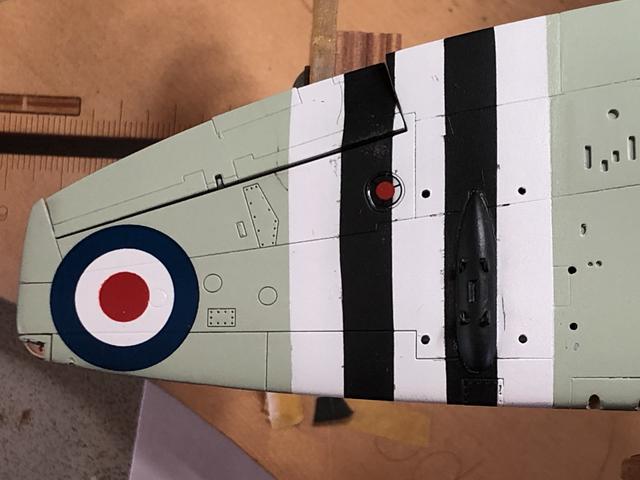
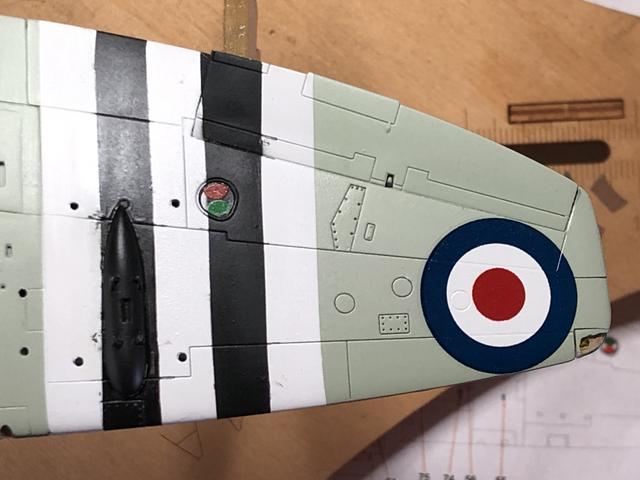
I fixed a small blemish just behind the canopy. Not sure if I have done enough:
The more astute of you may have noticed the underwing lights should have had “Hawker Yellow” inners and not invasion stripe. Well done but it is on the underside so it stays.
Regards
-
1
-
-
Thanks guys,
Here is the state of play:

Many thanks,
-
4
-
-
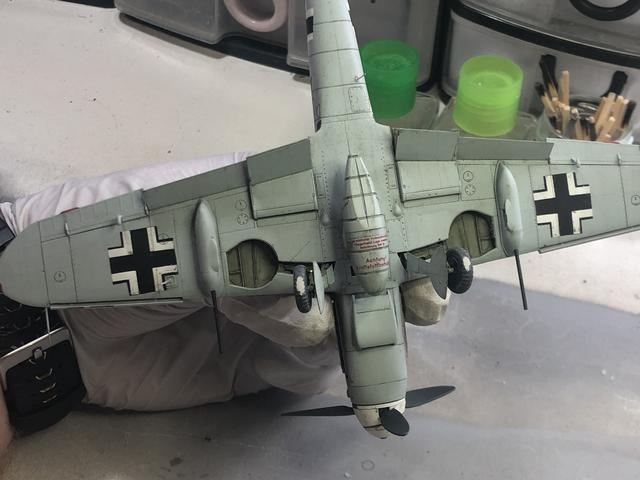
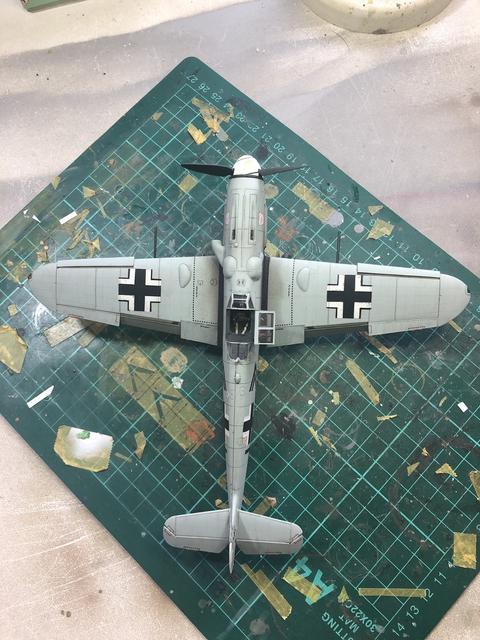
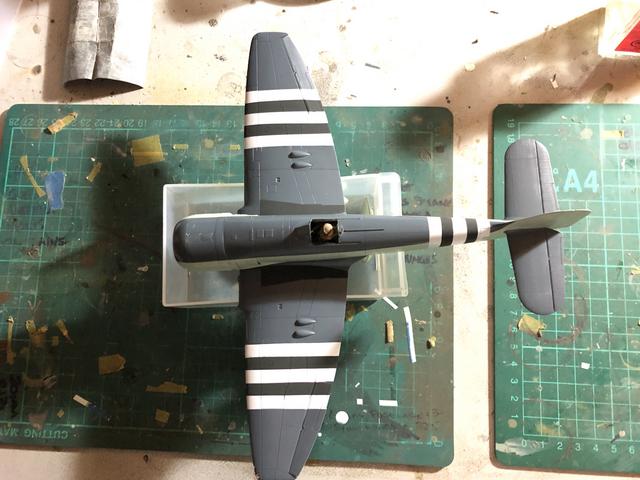
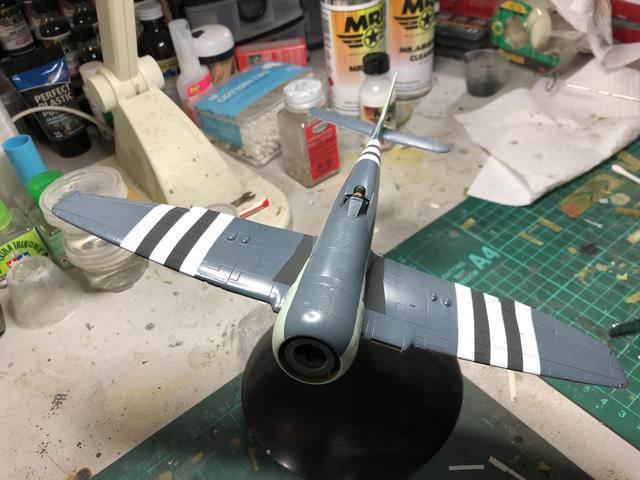
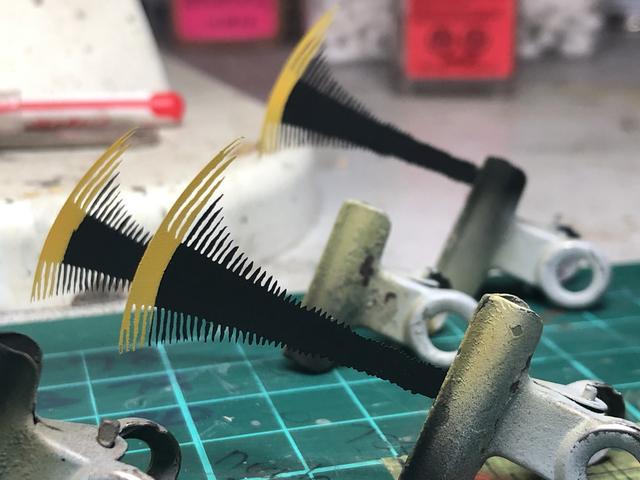
Here are a couple of in progress shots of my 1/48 Sea Fury for the 2019 Airfix Cup at the NSW Scale Model show on 18/19 May 2019 at the Illawarra Sports Stadium. It is posed in flight with an Aerocraft cowling and a set of Propblur blades:
I used MRP paints (Sky and EDSG) for the first time and happy with the result. The pilot is from the spares box (Airfix Hurricane ?) and the gunsight from an Eduard Spitfire Mk. IX kit.
Regards
-
5
-
-
Noice....real noice. Well done Steve.
Thanks for all your advisory work for those of us building this kit as well. It is appreciated.
Regards,
-
1
-


1/48 Arma Hobby Hurricane Mk IIC - Sgt. B. Bawden 87 Squadron RAF - Aug-Sep 1942 *** COMPLETE ***
in Work in Progress - Aircraft
Posted
Yes thank you but “recent” is a subjective usage!