


The Creative Explorer
-
Posts
47 -
Joined
-
Last visited
Content Type
Events
Profiles
Forums
Media Demo
Posts posted by The Creative Explorer
-
-
Everybody has those kits in their stash 'for later on, when I can do justice to that kit'. I have a couple of them and kept saving them for later. But very recently I lost a modelling friend to that awful 'C'-disease, he basically kept modelling till the last and he could enjoy it a little bit. But passing around 50 isn't what we all want or expect.
But it does make you realise how unexpected life can be and how vulnerable it is.So, I decided to put projects aside and grab one of the kits that I've been saving for later, since later could already be now. It is in my opinion one of the best kits ever made and the guys at Tamiya went crazy on it. It has a full alluminium body and lots and lots of details. Even straight out of the box, it will make a very handsome model.
My plans are to stick close to the manual, the car in itself is almost as good as it gets and so does the kit. But there is also room for improvement and detailling, which I will be doing. Albeit, I won't go crazy on it; it has to be a fun build as well.

I am taking small steps and where I usually sand every part of the kit, I take this in sections, to give more attention to detail and make it less to be a assembly-line feel to it.
Here I am taking on the frame, most of the ejector pin marks will be hidden after assembly, but some will be visible and some might, and therefore have to be gone.I initially planned to make a new driveshaft, but after cleaning it up, I think it will look pretty good with just some details.
The fueltank was awful though, it needed a lot of sanding and filler
I painted the frame in a gun-metal color, I think it will look nice when it comes together.
http://www.firerods.nl/wp-content/uploads/2018/05/jpe005.jpg/Hard to see, but I clearcoated it also.
The front coilovers where sprayed in chromesilver, then I masked them and painted the screws/rings with molotow chrome markers, When it is fully cured, I will ad a color to make it look anodised.
http://www.firerods.nl/wp-content/uploads/2018/05/jpe008.jpg/The first parts installed! This is the steering box (duh)
And the rear spring holders
Together with some more aluminium detail:
This is the result so far, even though with so few parts, it is already starting to look like something.
Very early in the assembly process, some of the body panels have to be assembled. They are factory painted and look pretty good, it might lack a little in luster, but it can be used straight out of the box.
But... So much neon yellow hurts my eye, so I have to respray the body panels, but I want it still to be a JPE, therefore I will keep a couple of those neon yellow details.The steps that are being made, are small and timeconsuming, but I guess also part of the fun. Normally, I would've had the body in the paintbooth by now and started painting, but I am taking some extra steps and being a bit more cautious I guess.
Because I also don't like the 5 spoke wheels that comes with the JPE, I designed and printed a Watanabe-like wheel, rather than a Minilite. I am not completely satisfied with the design, so I have to make some adjustments and print a master for casting. The wheel will be a 2-piece; easier for printing/casting, but also for painting.
But most of the time went to prepping the body parts, even though the Tamiya paintjob is not bad at all, there are some mishaps to be dealing with, like seam lines on the plastic parts.
And some paint boo-boo's on some other parts
Today I started working on finalising the prepwork and started to laydown the masking for the paint-design, I also noticed another little plastic defect that I took care off
And this will be the final design for the paintjob, I had different idea's yesterday, but came up with this tonight and I like it. Hopefully I will be able to start laying down some paint tomorrow.
I managed to lay down the BRG and it went on pretty nice. I took the Bentley Speed 8 Le Mans BRG, since I love that hue. It is my favourite BRG.
And the best part is to unwrap all that masking tape, to see how it turned out and I love it! It looks even better than I hoped for and I am glad I made the last minute decission not to make the front part of the nosecone yellow, but just striped it.
Something that has been bothering me are the coilovers, they don't look good. In the back are the stock parts and in the front are the stock parts painted and partly chromed.
Even though it doesn't even look too terrible, I don't like it, since it is a very visible piece. I have been on this for over a week and tried several ways to make something nice of it, but it was failure after failure.But I am on to something now, I will be using different materials to get to my endgoal. I printed a few spring nuts and I ordered some aluminium rods, that I will die cut? with a very fine thread. The Die Cut has been ordered and may take a little while until it gets here, since it is a special order.
But I made a prototype with a regular bolt and normal thread tapped into the nut. I did it rough and quick, hence it is crooked. But the concept worked and if everything works out a little bit, I will have a working coilover on the Caterham.
Having not much time laying around, progress is slow. I did order tools and material to work on the coilovers and I worked on sanding some parts.
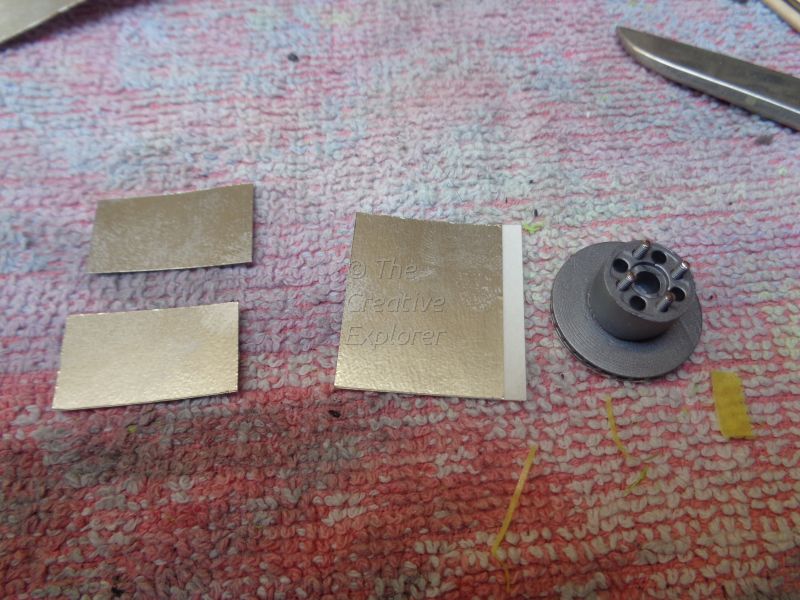
I also managed to work on the discbrakes, they are detailled, but they lack the proper finish. Personally, I don't like the PE sets that much, as they do not reflect discbrakes enough (to me). I had an idea for a while and tried that, and it worked like a charm, really. I think it captures the look of a discbrake perfectly.
-
 5
5
-
-
Nice build, there is nice level of detail in this kit. I can see where you might had some difficulties like you mentioned, but you put down an nice project in such a short notice.
-
You get your pension at 50? that is a nice, nice deal! hahaha.
But it is very brave that you took the chance and started your own shop. I hope it will work out for you really well and you will not sufficate in the administration. I know what a killer that can be, i had my own business for a few years and boy I hated that administrative part.
-
This kit is going to be re-issued, so not really worth high prices anymore. And I got 3 of them already in order
-
Nice one!
I've build the Fujimi Enthusiast 911 Targa once, and it is a great kit. If you don't mind, I can post a pic of it.
Too bad you had to hurry in the end, it does miss the last details to make it absolutely great.!
-
I don't think it is a problem to post them tonight.
I don't know when they will 'judge' the models and when they will announce, but imho just post ;-) better late then never
-
you are lucky! I go to bed at 1am and need to get out 6am, every single day even in the weekend.
Do you run the store full-time?
You can hold to my order a little longer, if i do win something i will use it on your store and i need some more bits and pieces. So lets combine with my next order, since i dont have a big budget at the moment
-
happy birthday steve!
I wish the store many more orders, i will be contributing to that too haha!
-
One more day!!!!!
Everybody; shift in top gear
!!!!!!!!! -
Nice work so far Dan!
Are you going to add some wiring/plumbing?
-
Aww, I am very sorry to hear that, it was making such a nice progress.
But please keep us updated, I am very interested in the pictures.
-
-
-
Hi all, well these are the final pictures and hereby enter my model for judging. I've started making photo's in my spray-booth, but at a sudden point, there was a little bit of sun and I used it for as much as I can. It didn't take long, since the sun disappeared after 10 minutes, never to be seen again.... haha.
Well, I hope you like my model. I mostcertainly had a great time building, knowing I am able to build fast and efficient. But more importantly, I build something without screwing it up...( I always manage to do that...)
-
Just want to encourage everybody in the last leg of the competition. Just 5 more days to go, shift a gear higher and go for it!
-
Lovely colour, did you cleared it yet?
-
Thanks guys, i am quite pleased with it a little myself. I am always picking on my own build, and I still can point out too many things I don't like. But I am quite happy. For once everything went almost as it should.
Plus I did a small airbrush project on this car, of which I didn't talk about it yet.
It has to do with the exhausts, they had to be matte white. When painted, it would not look good, but where I am now, I don't have a spraybooth, nor a good airbrush.
But I still wanted to do it, so I could finish the car. (I thought the deadline was the 2nd) and so I decided to give it a go. I had my compressor with my per accident and an old most simple Revell Airbrush. I got some Revell Aqua, mixed it with tap-water and added a drop of dishwater-detergent. I started to spray and it was terrible. It was water with a colour, and it acted like that too.
I let it dry and mixed again, this time 2:1 paint-water ratio, and it worked. It was still a little too thin, but it was ok and it did the job.
Of which I am most happy, since I always had problems with airbrushing.
Like mentioned in a topic before, I am going to buy a new airbrush, but this time a good one. Although I can not afford a Iawata, I will go for a Evolution. And I am so looking forward to experiment on paintjobs.....I can't wait.
This car has been sprayed with MoTip (dupli) spraycans, which I use most of the time actually.
-
Since the last pictures will take a little longer, I will post some more pictures, just for fun ;-)
I hope you will enjoy, and when you got a question/comment, please share.
-
Not the most usual choice of color for the elfer, but it sure does look nice on it.
What airbrush do you use? I am in the race for a Evolution-airbrush in time, I used one of those on a airbrush-course a couple of weeks ago, and I was quite pleased with it.
I hope you manage to get this one done before the 2nd, I would love to see how it turns out with clear on it and finished!
-
Thanks guys!
I am also quite happy I was able to build a kit within 4 weeks. I never would've thought I could do so, but then again; I really need to see and find out why I don't build efficient hahaha.
And the kit is finished, every part is in place and I see not where I can improve it at the moment. Maybe I will find something, ( errr...I already notice two parts I forgot to put on hahaha ) But I will not post anymore pictures, this way i can keep it to a little more suprise to show the end-result.
I will do that next weekend, than I get my DSLR-camera and make some decent shots. Until then.... just wait....haha.
But I had lots of fun building in this challenge with all of you guys, I am honoured.
Steve, have a great birthday and thanks for the idea and invitation of this build.!
-
I love it, you are doing a nice job! Maybe it is a quite dumb question, but why is the front of the cockpit also having gauges/detailling?
But what is it with the last pictures, it looks like they have a waterpaint effect on it, are they made by cell-phone? It doesn't do justice to the model. ( Or I am I too blunt? )
-
-
-
Its all happening I may ask the admin if we can extend the group build for a week as occurences stopped me short at the beginning
Hey, that's no fun! We've been busting our behinds off and now we can have all the time....hmmm! haha. No honestly, I would suggest to try and go for it Steve, try to build it before the 2nd, I am quie surprised how far I've come so far. I do notice that when the pressure is on, there is more efficiency in the builds.
Oh, and I try to upload some photo's today.
Shiloh, naah, I got too many other projects that now are completely neglected because of this build ;-) Maybe later
Keefr: Thanks but you are too kind. I'd rather have the bonnet to close, since that would be more realistic. But I've tried and can not find a proper way to make it shut, so it will be build open.


Caterham Super Seven JPE (Tamiya 1/12)
in Work In Progress - Vehicles
Posted
Thank you guys for the support and reactions.
This week I got another confirmation about the our limited time. A close (modelling)-friend passed away suddenly, when his heart decided to stop, being 47 years old. I spoke to him just a couple of days ago and now we have to get ready for a memorial service for him on wednesday. It is just so freaking fragile. So this week I barely worked on any models and decided to spend some good time with my young kids (3 & 7). I've been working overtime since January, working 50+ ours a week and don't get to spend much time with them.
Upcoming week will be a weird week, but after that I hope to start working on the Caterham again.
My coilovers are not working out the way I want, so I thought of a new way of making them on the Lathe. Instead of making them individually, I will make then in a row and hope it will work out better that way.
And next to the coilovers, I need to work on the paintwork in order to continue, everything has to be clearcoated. And has to be perfect. The weather is very good for that, so I hope to work on it and finish it before I head for Czech on vacation.