

Scarlet
-
Posts
1,236 -
Joined
-
Last visited
Content Type
Events
Profiles
Forums
Media Demo
Posts posted by Scarlet
-
-
A couple from Thursday. Shame they did'nt come a bit lower.

-
It was very cold! Spent three days up there. Tuesday started off in sunshine then a blizzard arrived. Thursday was very windy with poor light. Friday was sunshine and 22 aircraft passed my lens.
One of the other guys had a text saying the German Tornado's had gone through the lakes in the morning - you can imagine the swearing that followed! Then at 3pm they paid us a visit. Perfect end to a great (if a bit chilly) week. -
All taken in the Mach Loop last Friday.
-
The RAF Hawks use the CBLS100, these pods are shorter than the CBLS200 that are suplyed in the Hasegawa set.
Flightpath do the CBLS-100's in 1/48.
-
Only just started mine. Check the mating surfaces of things like the wings and fuselage, there are some mold break lines on the inner surfaces towards the wingtip that could hamper the fit if left in place... nip out the corners with a scalpel where the upper fuselage insert joins the fuselage halves to make the fit a little tighter... err... thats about it, so far.
I usually build with the canopy open so I've added the Neomega pit...it fits with some persuasion (ie. a dremel
). Trim the console edges especially around the rear end of the pilots tub, thin the back wall of the rear tub, trim the upper inner sections of the front IP, trim back the very forward corners of the front floor pan, remove the lower sections of ribbing on the kit walls and remove the locating tabs on the rear IP and on the kit walls that locate the rear IP hood.Trim everything then?
-
No F6's were painted in the green colour scheme although a couple of T5's were painted up one in green and the other in Grey when the camoflage scheme was being evaluated. Now back to the Trumpy jet pipes.........
-
I remember seeing one picture showing someone actually sliding their hand up into the join from below! It was a long time ago but I don't remember where. I think generally it's a very tight fit, but as ever with planes from the days when they were built by hand it could vary. I've gone for a tight fit but certainly won't be filling it. I think it's also a case when modelling that a little over-accentuation can make a point well. Like panel line washes and, well, panel lines in general!
Never seen that in my 4 years at Binbrook. It's true that the inboard leading edge is a seperate piece as is all the leading edge down to the nav light on the wing tip, but it is a tight fit with a rubber seal against the fuselage. There is a slight step down to the seal but only about 6-10mm. Definatly not enough room to get your hand in, unless you've got hands the size of Barbie - which would have been useful working on Lightnings!
There is access panels underneath, that was probably where the hand was going.
-
Hello mate
newbie myself.Love looking at dioramas like this, always spend ages looking at the ones at the Telford show. Anymore photo's of it?
-
The kit jet pipes look very poor next to your modded ones. Impressive work, simple but very effective.
P.S. 4 gun fit = no missiles.
-
The Swiss... if that's where K-Swiss trainers are made
Bugger, you beat me to that one!
-
Why mould the rudder seperatly? The rudder on the Hawk is not a powered flying control and has a sprung centering unit (pig of a job to change) keeping it centered unless the rudder pedals are moved.
-
I've twice spoken to the same rep (can't remember his name, but he was on the T.V. programme about the Dr Who release!) from Airfix/Hornby and asked about the Lightnings, on both occasions he said they will be re-released. Anyone know any different?
-
Xtradecal and Model Alliance both have Tornado F3 decal sheets in their ranges.
-
The lower edges of the ventral strakes should be brown, or a version of it. They were made of a type of fibre glass (maybe paxolin?) and varied from almost beige to quite dark brown depending on how they had weathered. They could appear almost translucent in bright sunlight. The tanks were swopped around quite often, so unless you are building to a specific photo the colour is open to interpretation.
-
Very nice. I fancy having a go at one myself. The Telford list just got longer!
-
Here you go, another ex Binbrook resident offering an opinion.
I know that if we needed a replacement they used to come painted silver and have a manufacture date going back to the sixties (I was there 83-87).
They could be a git to fit if the cables had'nt been strapped tight enough. The gaps between them were then sealed with a brown sealent called PRC.
Paul........


 One of the other guys had a text saying the German Tornado's had gone through the lakes in the morning - you can imagine the swearing that followed! Then at 3pm they paid us a visit. Perfect end to a great (if a bit chilly) week.
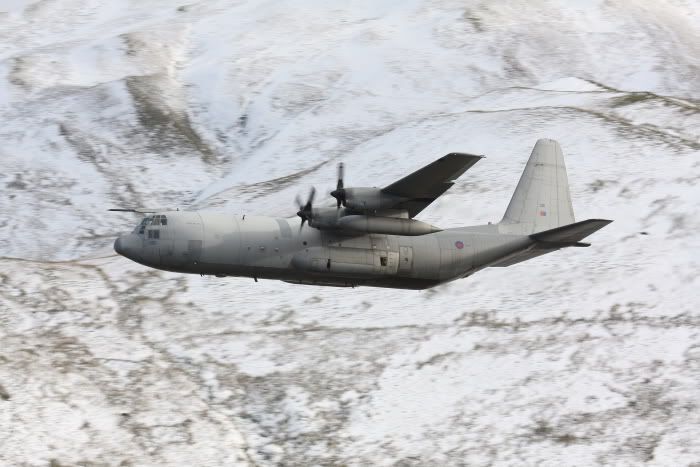


 ). Trim the console edges especially around the rear end of the pilots tub, thin the back wall of the rear tub, trim the upper inner sections of the front IP, trim back the very forward corners of the front floor pan, remove the lower sections of ribbing on the kit walls and remove the locating tabs on the rear IP and on the kit walls that locate the rear IP hood.
 newbie myself.

New Italeri BAe Hawk
in Aircraft Modern
Posted
The T1's at Valley had the same area unpainted. Had to repair a couple that popped their rivets and cracked during my time at Valley.