
All Activity
- Past hour
-
Why was the S.81 such an anachronistic design compared to the S,79.and S,82? I can imagine that it was designed perhaps as a colonial bomber-transport to replace the C.133, but was this true? Or did S-M simply have a more confusing (to me) non-chronological design number sequence?
-
 So it did have to come apart again one more time..... access to the firewall wasn't good for attaching all the little boxes and greeblies... but now, I think I'm calling this engine bay done, and moving along. The top radiator "hose" is some aluminum florists' wire I bought in several sizes for things like this and exhaust pipes and headers. It's very flexible but not floppy, and goes where you put it and stays there. The rubber ends are heat-shrink tube. The characteristic and brightly-colored "289 High Power" label on the air cleaner is a home printed decal... I found some old "Lazertran" paper lying around which promises that the inkjet colors dry and don't need a clearcoat, and to be on the safe side I freed the decal by putting the paper down on a damp cloth for a while rather than dropping it into water. The little boxes around the firewall, foot-wells and wheel wells are a combination of parts sliced from the original kit, some reading of a handy 289 Cobra wiring diagram and a Mustang parts supplier's online catalogue (want to know what the starter solenoid switch looks like? Pretend you're buying one...), and some creative "gizmology". I should probably put a wash bottle in there somewhere. There is a steering column that runs almost to the right place, and I did manage to slip in the two diagonal frame braces in a way that looks reasonably convincing, thanks to the flexibility of styrene rod and the reasonable amount of wiggle room through the frame as I was working them into final positions. Time to get the wheels and exhausts on and then finish up the cockpit... best, M.
 -

1/48 - North American P-51B/C Mustang by Eduard - P-51B released
jackroadkill replied to Homebee's topic in The Rumourmonger
I need some of these. -

Revell Schnellzuglokomotive BR 01
raider of the lost part replied to Bobby No Mac's topic in The Golden Age Of Transport GB
i agree, good start on the weathering. I am surprised how well cast the parts look with some paint on them. Especially the parts moulded in red look bad without. -

Lancaster fit for Op Chastise - help needed please!
brooksy replied to brooksy's topic in Aircraft WWII
Thank you all for your replies. It seems there are no straight forward answers without undertaking some very deep research, which I'm not able to do due to time constraints. That's why I bought the book! I should have stressed in my first post that I'm not criticising the book. I absolutely love it. One of the WIP comments caused me to start questioning things and I just want to do the best job I can for my friend. @Mark Postlethwaite I would dearly love to buy one of your new books as soon as they become available, if you wouldn't mind letting me know? Thanks again guys and have a good evening. Best regards Andy 🙂 -
time is here Gentlemen
-
Macchi MC202 Folgore with Daimler Benz DB605 engine
ClaudioN replied to GiampieroSilvestri's topic in Aircraft WWII
That would be quite interesting, as the last time Sannites fought as an independent force must have been around 3rd century B.C. They probably had no aircraft to field against the Roman legions, which may explain why they were eventually subdued. "Aeronautica Sannita" would be, literally, "Sannite Aeronautical Company", a short-lived industrial activity located in Benevento, Italy. That is, "unit insignia": the 51st Stormo would have had the black cat with green mice. The Italian Co-belligerent Air Force used numerical codes including the Gruppo number (21 in this case) and the aircraft individual number, that were usually located on the "tail". For a Gruppo at the time, unit strength was probably that of a RAF squadron. -
I've already got mine pre-ordered with Squadron and the local hobby shop, the 100th boxing. Should be fun!
-

B-17 Flying Fortress: El Lobo II-Build
Joanna replied to Joanna's topic in Work in Progress - Aircraft
I've been eager to see how the interior will look together, so take a look at the first photo. On the left is the cockpit and navigators position, then the bomb bay, and the radio station. I'm glad to see how it's coming together, and most of the work I've done since the last post has been to the bomb bay. The second picture is of the bomb bay door to which I added balsa wood pieces to. These are going to resemble the hinges of the door in its open state. They do need trimmed still, which I'll do later in the build. I already did some adjusting to the 3d bomb prints, and they've gotten pretty close. Secondly, I've sketched out on the bulkheads where I'm going to add the frames and general supports that was not on the model to begin with. The brown foam you can see in the picture underneath the bulkheads is where I'm going to add a piece of plastic to fill the gap between the bottom of the floor parts and the fuselage. However, the major issue currently is the attachment of the wings. It snaps in quite nicely, but leaves weird knobs on the inside of the bomb bay (In one of the photos, I circled in green what I'm talking about). I have a few ideas, but I don't want to compromise the structural integrity of the attachment of the wings. Anyways, I was also able to print some of the crew of this airplane. There is good news and bad with them though- I was able to get them sized perfectly on the first try, but they look at little rough. Well, really rough.😬 I foresee either a lot of filler, or a major change of my 3d printer settings. I think I'm going to decrease the head speed and maybe make the layers thinner. Either way, it may delay getting the fuselage together. Until next time, Joanna -
1/48 - Boeing B-17G by HK Models - Release Oct 19 - Eduard F Summer 2024
hopkp replied to Sidders's topic in The Rumourmonger
Me too..... -
try the blue-pill cocktail
-
1/48 - North American P-51B/C Mustang by Eduard - P-51B released
hopkp replied to Homebee's topic in The Rumourmonger
That sort of nonsense seems to be the prevailing 'style' just about everywhere these days unfortunately..... -
Available here as a pre-order for euro 55.86: https://www.aviationmegastore.com/en/modelling/kamov-ka-52-russian-attack-helicopter-zvezda-4830-202908.html
-
Eduard did a set for WW2 RAF uniforms in colour PE -1/48th scale, I have it somewhere in the stash but I do hold reservations on how good it would actually be in application. I think its long been discontinued?
-
Who knows more about the internal camouflage of J7W1 Shinden?
John B (Sc) replied to BOBO's topic in Aircraft WWII
Given that the Shinden was built largely in 1945, in considerable haste - and actually flew only just before the end of hostilities, it is quite likely that less attention was paid to painting and finish than would normally be the case for a prototype. Get it airborne ASAP, find out if it works. So having unpainted undersides is quite probable, Interior colours may also have been whatever was readily and rapidly avaialible, not necessarily to the precribed standard. John B -
for a stiff drink
-

Pratchett's Figurines
Pete in Lincs replied to Rumblestripe's topic in Ready for Inspection - SF & RealSpace
Nicely done and, like the others, looking close to what was pictured inside my head. I have a plan to read the whole lot of Discworld books again. They're sitting on the shelf ready and waiting.* * All except that last one about the steam trains. It was awful! -
 Nice preshades on the Mikasa. ⚓👍
 -
love you long time
-
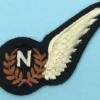
Uniform insignia, I found there are a few about from all era's, but always as part of an aircraft decal sheet.
-
Does she get discount for being a redhead? 😁
-
You pay ten Dollar
-
Twin Trainer Twin Build -Jetstream/Domine
Graham Boak replied to Billos's topic in Work in Progress - Aircraft
You will also need to reshape the ventral fairing and add a bit of filler to represent the 4-way fairing at the leading edge of the tailplane/.fin intersection. The doors for the undercarriage legs are too long and need a section removing from the top and gluing into the hole, then filling. The door will then need to be severely thinned and the kink at the bottom has a curve. I glued the main wheel doors in place then created a hole for the wheels, with a section removed where the outer door kink fitted. Fiddly but a great improvement. I have not yet approached the A Model kit re the same details. -
EMA Plastic Weld may be your best bet, but no idea if you can get it in Canada.
-
Who knows more about the internal camouflage of J7W1 Shinden?
Antti_K replied to BOBO's topic in Aircraft WWII
Hello guys, some close up photos taken at NASM (after the Shinden was put on display) suggest that the canard undersides may be unpainted. Check these photos: https://447bg.org/ww2-planes/ww2-japan/j7w1-shinden/ For the cockpit: have you seen Robert Mikeshi's "report" on Shinden colours? You can find the information in the "Aviation of Japan" blog. It seems that the original interior colour would have been an olive green. Something like in that photo the OP posted. Cheers, Antti


-
Forum Statistics
239.4k
Total Topics4.1m
Total Posts -
Member Statistics
34,552
Total Members3,626
Most Online
-
Who's Online 178 Members, 4 Anonymous, 932 Guests (See full list)
- Bonhoff
- NostalgicBlue2014
- Starfighter
- klr
- plasticmasher
- murfv
- AlxBNE
- ragnarec
- rod mcq
- brooksy
- pheonix
- ViggenXC
- Corsairfoxfouruncle
- Graham Boak
- Gondor44
- raider of the lost part
- oileanach
- echen
- Richard Humm
- markrob
- Electric Indigo
- gengriz
- bigfoot
- exdraken
- Dr Evil
- cduckworth
- Exam89
- Jagdtiger1
- Bernd A.
- RicheyAB
- neilfergylee
- paddesky
- Troy Smith
- Mal_Belford
- dcrfan
- bigbadbadge
- Dads203
- Mike N
- Hinksy
- Redstaff
- jackroadkill
- Adra
- SeventySecond
- dnl42
- kiseca
- Karearea
- fatfingers
- PHIL B
- Wings unlevel
- theplasticsurgeon
- RAF4EVER
- edjbartos
- esaum
- psdavidson
- LansVVS
- IT_Man
- PhantomBigStu
- tomprobert
- Smudge
- WarhoffModels
- stevej60
- Galligraphics
- mjfigg
- ClaudioN
- Bozothenutter
- Chimpion
- luis pacheco
- Lloydylloyd
- cger
- Peter O
- Paul in Napier
- Pappy
- Paul Gross
- Jack Clemens
- Momomato
- coneheadff
- Model cobber
- Dana Bell
- Rumblestripe
- Woodziee
- Stef N.
- Ali62
- Nenad Ilijic
- Hunter Rose
- Михаил Поляков
- Joanna
- nicolasd520
- Jeff.M
- Unkempt
- Ossington 2
- Steve N
- tom2112
- Mike
- Erik Leijdens
- Andrés S.
- Wayne B
- John
- dgg20
- PatG
- V.M.
- GStreet
- Louis E
- jovapad
- ModelingEdmontonian
- Dmitriy1967
- PenquinTony
- Vultures1
- sidevalve
- The Keeper
- Ptmvarsityfan
- Bradders
- achilles19
- Silver Seraph
- JohnWS
- phat trev
- gamevender
- beefy66
- robstopper
- Solar Panel Phil
- ForestFan
- Steve D
- cmatthewbacon
- airbus320
- Lord Riot
- Drakendk
- Tegethoff
- Tabio
- DannyB
- Keeff
- modelling minion
- Adi Turcu
- patjb
- MagisterMan
- TISO
- John B (Sc)
- AlexM19
- Colin W
- Circloy
- Tigerausfb
- JohnT
- scautomoton
- JOCKNEY
- davecov
- gunzo
- Jb65rams
- Airbusboy
- NAVY870
- SNAFU
- rs2man
- Julien
- Captain Glumbo
- mark.au
- pbrian49
- theaa2000
- Creepy Pete
- GioCare
- TJJ
- fox1_BE
- bar side
- CheapTricked
- HKGBravo1
- Shanec
- Farmerboy
- wekusta
- kingcanberra
- Lex77
- Pauly Boy
- bentwaters81tfw
- bissyboat
- Apex
- Richard Cawsey
- Bedders
- giemme
- Jan_D
- BushBrit66
- Abandoned Project
- TallBlondJohn
- Lifeline