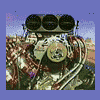
Ponti Posted January 1, 2008 Share Posted January 1, 2008 Ok here's my contender. Have decided on a fairly straight from the box build, but with a bit of detail in the engine bay and other visable bits. Kit looks quite good quality will have to compare to pictures of the real car now. Sorry about the picture quality couldn't find the camera so used my phone. Real thing Link to comment Share on other sites More sharing options...
paul_c Posted January 1, 2008 Share Posted January 1, 2008 now thats cool. look forward to seeing the build Link to comment Share on other sites More sharing options...
dswoofie Posted January 1, 2008 Share Posted January 1, 2008 Sure is a good'un. We've got a fantastic selection building up for the GB now... not too long to go now... Karl. Link to comment Share on other sites More sharing options...
seanrgb Posted January 2, 2008 Share Posted January 2, 2008 Sure is a good'un. We've got a fantastic selection building up for the GB now... not too long to go now...Karl. Can't we start it sooner ... Link to comment Share on other sites More sharing options...
Ian Posted January 8, 2008 Share Posted January 8, 2008 How you going to tackle those red-lines on the front wheels?? Ian Link to comment Share on other sites More sharing options...
Ponti Posted January 8, 2008 Author Share Posted January 8, 2008 How you going to tackle those red-lines on the front wheels??Ian Am thinking of a set of SATCO red lines. SATCO look under American Satco, vintage tyres Link to comment Share on other sites More sharing options...
palacefan Posted January 11, 2008 Share Posted January 11, 2008 Nice one squirt, this will look good. Link to comment Share on other sites More sharing options...
russ Posted January 17, 2008 Share Posted January 17, 2008 Am thinking of a set of SATCO red lines.SATCO look under American Satco, vintage tyres I've got a revell 68 firebird in the stash and that has decals for the red lines, as I'm building the drag version, you are welcome to the red line decals. Russ Link to comment Share on other sites More sharing options...
Ponti Posted January 18, 2008 Author Share Posted January 18, 2008 I've got a revell 68 firebird in the stash and that has decals for the red lines, as I'm building the drag version, you are welcome to the red line decals.Russ Hi Russ, Not sure if I'm going to have redlines or not as various pictures I have show different wheels, some with some without. Thanks for the offer might still take you up on it depending on how it's looking. Link to comment Share on other sites More sharing options...
russ Posted January 18, 2008 Share Posted January 18, 2008 Hi Russ, Not sure if I'm going to have redlines or not as various pictures I have show different wheels, some with some without. Thanks for the offer might still take you up on it depending on how it's looking. No problem, just let me know if and when you want them. Russ Link to comment Share on other sites More sharing options...
Ponti Posted January 20, 2008 Author Share Posted January 20, 2008 (edited) Ok I've started. Chrome was in the Mr Muscle at 7:00 yesterday. And have made a start on some new scripts for the side of the car as looking at the pictures I have of the original the one's on the kit are wrong, basically they have reused a stock road car body and not retooled it ( Nothing new there). So here are the pic's of my new scripts need cleaning up etc. 1st attempt some of the text didn't come out but Gives you the idea of the size 2nd attempt these came out much better just need cleaning up Sorry pic a bit fuzzy but give me a break they are SMALL Edited January 20, 2008 by Ponti Link to comment Share on other sites More sharing options...
Ponti Posted January 21, 2008 Author Share Posted January 21, 2008 (edited) Ok halfway through today, engine halves are glued sorry no pic yet needs holes drilling. Main work today is on the body. Having looked at pic's of the real car I noticed that there is no chrome strips on the sill's or wheel arches, so file in hand and a bit of luck there off. Before and after shots ( well driverside and passenger). Hopefully you can also see that the scripts have been removed off the front wing ready for the one's I made to be fitted. Edited January 21, 2008 by Ponti Link to comment Share on other sites More sharing options...
Diesel Gypsy Posted January 21, 2008 Share Posted January 21, 2008 Looking Good there Andy. Link to comment Share on other sites More sharing options...
Ian Posted January 21, 2008 Share Posted January 21, 2008 I'd guess that most of the badgework would have been removed. Been looking for pics of the S&M GTX, not too many around, plenty of the Challenger and Duster, but not the '67 ! Ian Link to comment Share on other sites More sharing options...
Ponti Posted January 21, 2008 Author Share Posted January 21, 2008 I've got 15 pic's of I think 3 different year GTX's I think only 4 are of the '67 Link to comment Share on other sites More sharing options...
Ian Posted January 21, 2008 Share Posted January 21, 2008 Wanna send them to me ?????..... MOPAR's are my 'thing' I can cross-check them for you if you want..... just a thought. Ian Link to comment Share on other sites More sharing options...
Ponti Posted January 22, 2008 Author Share Posted January 22, 2008 OK todays work, still on the body. Decided the bonnet needed some extra detail to the strenghtening ribs as these were only marked on the kit, so to give them some depth have started to thicken them with some foil. Before during after Ok this was the 1st round. Have left it for a few hours as it's making my eye's go Also whilst giving my eye's a break been working on the motor. Link to comment Share on other sites More sharing options...
Ponti Posted January 23, 2008 Author Share Posted January 23, 2008 OK folks, Think i've finished with the detailing the underside of the bonnet for the moment. Last couple of layers of foil have been a pig to remove sections from as it stick to well to it's self. just need to tidy the opening for the scoop and work out the latch. Link to comment Share on other sites More sharing options...
Diesel Gypsy Posted January 23, 2008 Share Posted January 23, 2008 (edited) Very nice Andy. Its coming along a treat, the foiling is excelent. Dazie oops, typo Edited January 23, 2008 by Diesel Donkey Link to comment Share on other sites More sharing options...
palacefan Posted February 4, 2008 Share Posted February 4, 2008 i like the foil, very effective Link to comment Share on other sites More sharing options...
Ponti Posted February 5, 2008 Author Share Posted February 5, 2008 Ok update, Haven't done much more that can be photo'd loads of small bits done. Only thing done that I've photo'd is I've removed the moulded on handbrake cable and have drilled and temperally fitted a wire 1 to check fit. Getting there slowly, hope I can finish in time. Link to comment Share on other sites More sharing options...
Stevenski Posted February 7, 2008 Share Posted February 7, 2008 This should be fun to follow. Link to comment Share on other sites More sharing options...
Ponti Posted February 17, 2008 Author Share Posted February 17, 2008 Horray, finally managed to get some modelling done. Had been looking at the kit's moulded on fuel filler pipe and decided I didn't like it, so would have a go at making a proper looking one. At present it's just mocked up for the picture, still needs a bit of furtalling on the join between the 2 pipes. Before After Link to comment Share on other sites More sharing options...
dswoofie Posted February 17, 2008 Share Posted February 17, 2008 Looking good Ponti! It's great to see some of the ideas coming out of this GB for improving the standard kits... Karl. Link to comment Share on other sites More sharing options...
seanrgb Posted February 17, 2008 Share Posted February 17, 2008 Looking good so far Link to comment Share on other sites More sharing options...

Recommended Posts