Mike Posted January 11, 2010 Share Posted January 11, 2010 Crazy, but interesting Link to comment Share on other sites More sharing options...
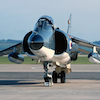
NG899 Posted January 11, 2010 Author Share Posted January 11, 2010 Hi from the Nutty Boy, Dave and Dennis, when XP831 is sitting on the tables at Telford and you're looking at it, then we'll reassess mental states! The first photo shows the 12th September 1960 configuration I'm aiming at including wing LE, so straight with kinky bit at the end inside the missing outrigger fairings. Note also the open rear RCV... The rear fuselage section is now back on and faired-in with extra milliput over the join. Before adding it I rounded the tailboom fairing and have added a bit more to the fin tip which I'll blend in - I'd accidentally reduced its height below a scale 5' 3/4". BTW Dennis, don't forget you've promised me a 48th G-VTOL in its original R/W/B scheme in a Farley climb for the same Telford tables... Thought, would JF have flown G-VTOL in its original scheme and done a Farley Climb in it in that scheme? Cheers for now, Nick Link to comment Share on other sites More sharing options...
Dave Fleming Posted January 11, 2010 Share Posted January 11, 2010 I'm just jealous - I couldn't do anything like that!! Link to comment Share on other sites More sharing options...
NG899 Posted January 11, 2010 Author Share Posted January 11, 2010 You never know until you try it Dave. I'm not sure I can do this one yet, but I'll put 100% into the attempt. Nick 1 Link to comment Share on other sites More sharing options...
AnonymousFO98 Posted January 11, 2010 Share Posted January 11, 2010 You know you can Nick! no worries! this is the sort of build that gets me wanting to try things out get ye yer razorsaw out Dave and cut some styrene Link to comment Share on other sites More sharing options...
sloegin57 Posted January 12, 2010 Share Posted January 12, 2010 Hi from the Nutty Boy,Dave and Dennis, when XP831 is sitting on the tables at Telford and you're looking at it, then we'll reassess mental states! I'll bring my white coat !! BTW Dennis, don't forget you've promised me a 48th G-VTOL in its original R/W/B scheme in a Farley climb for the same Telford tables... Thought, would JF have flown G-VTOL in its original scheme and done a Farley Climb in it in that scheme? It's back on the bench at number one especially as I have discovered that it did have the tanks in that scheme and Ferry tips fitted as well !! Looking Good. JF may not have done in that scheme but he will be doing it in 48th in November !! Cheers for now, Nick Seriuosly Nick, I'm following this one with even more interest than usual, especially when you get to the nozzles and canopy, on the basis that what you can do with the old Monogram kit others can do with the Airfix kit and I'm seriously considering the latter (I'm even seriously dragging out the "Big un" I told you about and progressing. Go for it Nick - this is going to be a "Good Un". Dennis Link to comment Share on other sites More sharing options...
NG899 Posted January 12, 2010 Author Share Posted January 12, 2010 (edited) Hi Dennis, So, G-VTOL doing a Farley Climb in R/W/B, that'll be a 'what-if' then, yes? Nick Edited January 12, 2010 by NG899 Link to comment Share on other sites More sharing options...
sloegin57 Posted January 12, 2010 Share Posted January 12, 2010 Hi Dennis,So, G-VTOL doing a Farley Climb in R/W/B, that'll be a 'what-if' then, yes? Nick Slight technical problem there. To do a "Farley Climb" you need Flaps Fully Down, Nozzles 85 degrees, rear cockpit empty, tail boom ballast removed, de-min water On - VTO and rotate the aircraft around the nozzles as you climb. Trouble is - with big juggs fitted you are limited to flap travel by a stop in the cockpit. Hmmm. I'll do it in Desert Camo (don't like "What Ifs) DR Link to comment Share on other sites More sharing options...
NG899 Posted January 13, 2010 Author Share Posted January 13, 2010 AOK with that Dennis. I was aiming to reproduce that photo of yours in 48th scale myself but I'll keep working on the 1127 and Kes and if I get the time get round to G-VTOL. Cheers for now, Nick Link to comment Share on other sites More sharing options...
sloegin57 Posted January 14, 2010 Share Posted January 14, 2010 You know, having finally got both conversions on the alternate work bench (in the Conservatory - also passes quite well as a dining table), I am beginning to realise why modellers are moving up to 1/32nd. 48th are titchy aren't they. Bit like in my long gone youth, 72nd were when I moved up to 48th. Just an idle thought - carry on carving Nick. Dennis Link to comment Share on other sites More sharing options...
Jon Kunac-Tabinor Posted January 14, 2010 Share Posted January 14, 2010 Hiya Nick - just caught this. I like it, and I like what you are doing. Keep going sir, and post pics too. Onwards and upwards (from a standing start) Jonners Link to comment Share on other sites More sharing options...
NG899 Posted February 7, 2010 Author Share Posted February 7, 2010 (edited) Hi Chaps, it's Mad Nick here! Slow progress: work was an expected problem, a hospitalised Dad, 100 miles from home, wasn't. I managed to stick the tail section of the fuselage back to the front end two weeks ago: using thick superglue rather than quick araldite. A smear of milliput was applied with plenty of water to smooth everything in and minimise further sanding. A new tip was added to the fin, faired in and sanded back; remember, I'd reduced the height a tad too much. I still have the rudder line to rescribe there. I've also reshaped the tailboom fairing and cut a thin section of tubing to aid the rest of the shaping there. The result so far looks like this... I'm hoping to see a few of you at the Fleet Air Arm Museum's Model Show on Saturday 13th February and, yes, I'll be trying to do some more on the P.1127 there. I must thank the FAAM for our location next Saturday. Once more the Harrier SIG is at the low end of the ski jump, so we're probably the only single-aircraft-SIG display at any show to have a 1:1 scale real thing* as part of its display... which is nice. (* Yes, I know it's really only the nose of FRS.1 XZ493 attached to the body, etc. of GR.3 XV760.) Don't work too hard! Nick Edited February 7, 2010 by NG899 Link to comment Share on other sites More sharing options...
Col. Posted February 7, 2010 Share Posted February 7, 2010 Even slow progress is progress Nick. Sorry to hear about your dad, hope he recovers soon. Link to comment Share on other sites More sharing options...
NG899 Posted April 6, 2010 Author Share Posted April 6, 2010 Hello once more! I've managed to make some good progress with the Dremell (and the Henry - for cleaning up what the Dremell produces) this weekend. I now have the basic shapes ahead of the front nozzles sorted and the revised shape of the upper fuselage between the wings. Having decided on the finished display mode, I've drilled a hole in the top of the main u/c bay and added some tubing and securely fixed all of that in place with braces on the top of the bay and microstrip down the sides of the bay inside the fuselage. I've also hacked both wings to the basic shape needed, though not photographed those yet. 4 photos of progress... OK, the BIG question... how to depict the paint finish and the rivets in 1:48th scale that are so visible on the real thing (thanks to Colin Small for the photo of XP831...) What would you recommend? Cheers and thanks in advance for the ideas... Nick Link to comment Share on other sites More sharing options...
Jackman Posted April 7, 2010 Share Posted April 7, 2010 (edited) OK, the BIG question... how to depict the paint finish and the rivets in 1:48th scale that are so visible on the real thing (thanks to Colin Small for the photo of What would you recommend? You have to use either use a pin in a vise, a riveter or Mike Grant's Rivet decals: http://www.mikegrantdecals.com/Rivets.html The paint looks like faded grey-aluminium. You could use Bare Metal Foil matt Aluminum. EDIT: Have you seen this? http://www.britmodeller.com/forums/index.p...7&hl=P.1127 I think he used a mixture of (75% white, 25% silver) for the paint & actually drew the rivets.. Edited April 7, 2010 by Jackman Link to comment Share on other sites More sharing options...
Colin W Posted November 13, 2010 Share Posted November 13, 2010 Hi Nick Great to see the model at SMW today. Hope you get time to get stuck in again. Id appreciate a set of the plans if you could PM them to me. Many thanks Colin Link to comment Share on other sites More sharing options...
Gondor44 Posted June 15, 2015 Share Posted June 15, 2015 Did this ever get finished? Gondor Link to comment Share on other sites More sharing options...
NG899 Posted June 18, 2015 Author Share Posted June 18, 2015 Hi Gondor, Thank you for asking, the answer is, sadly, not yet! I've had trouble with the milliput fine I used shrinking... Yes, folks you heard it hear first! Milliput fine does shrink. So, until I can find something relaible that won't shrink, it's on hold and won't be finished. After that, I just have to work out how to depict the rivets on the surface without it looking like a load of pot holes filled with wash or a load of tiny black O decals. As I don't airbrush, a fine spray over the decals isn't an option. All ideas welcomed on the milliput and the decals; thanks! Cheers, Nick Link to comment Share on other sites More sharing options...
Dave Fleming Posted June 18, 2015 Share Posted June 18, 2015 Nick, I have heard good things about Magic Sculpt http://www.magicsculp.co.uk/ Have asked some people about it! Link to comment Share on other sites More sharing options...
Tom Cobbley Posted June 19, 2015 Share Posted June 19, 2015 Nick. Its great to see this project again. Sorry its stalled but at least you have shown us its possible. I am midway through converting the Revell 1/32 to a Kestrel and am now tempted to have a go at a P1127. Would it be possible to PM me a copy of the drawing you have? I have not been able to find anything decent anywhere else. Link to comment Share on other sites More sharing options...

Recommended Posts
Create an account or sign in to comment
You need to be a member in order to leave a comment
Create an account
Sign up for a new account in our community. It's easy!
Register a new accountSign in
Already have an account? Sign in here.
Sign In Now