zero Posted January 4, 2009 Share Posted January 4, 2009 (edited) Well as soon as I can shake this damn flu off (week 3 and counting!) I'll dig one of my Sea Fury's out of the loft for this build. I have two different boxing of the three, so I'm not going to commit to doing a certain model or scheme until I have got them both out of the loft and had a look. I did ask my son to pop up and drag one down but with my stash being all over the place he could not see one, and at present I just don't have the ablitity to get up there yet, so I'm going to have to play catch up! Dave Edited January 19, 2009 by zero Link to comment Share on other sites More sharing options...
Dr_Fester Posted January 6, 2009 Share Posted January 6, 2009 Hope you shake the flu off soon Dave and get started on the Fury. Really looking forward to seeing that one. Cheers Doc Link to comment Share on other sites More sharing options...
zero Posted January 7, 2009 Author Share Posted January 7, 2009 Hope you shake the flu off soon Dave and get started on the Fury. Really looking forward to seeing that one.Cheers Doc Thanks Doc Well I can at least breath today, second day in to the antibiotic, I'm hoping to be back on line shortly, the weather is not helping at all, and 3 weeks of coughing is really p@@@ing me off. I still have yet to get the kit down, but I will do tomorrow. I probably will do one of the more colourful Fury's over a Suez version, as I have two of these kits seems logical to leave the strips till summer when the paint will dry quicker. (the kit doesn't have suez strips, you have to paint them!) Dave Link to comment Share on other sites More sharing options...
bexwh773 Posted January 7, 2009 Share Posted January 7, 2009 I probably will do one of the more colourful Fury's over a Suez version, as I have two of these kits seems logical to leave the strips till summer when the paint will dry quicker. (the kit doesn't have suez strips, you have to paint them!) Dave Sounds like a great choice Dave, it will make a change from a Korean Fury Get well soon......... have u had a package arrive yet? Bex Link to comment Share on other sites More sharing options...
zero Posted January 8, 2009 Author Share Posted January 8, 2009 (edited) Sounds like a great choice Dave, it will make a change from a Korean Fury Get well soon......... have u had a package arrive yet?Bex Sadly nothing has arrived yet Bex, if it was posted before crimbo, I doubt it will get here now! Ho Hum (thanks for trying) I've packed the Phantom up for now, as I did so little on it, It basically is not started bar the bottom wing section glued together and all the major bits assembled (more so they don't get lost. the biggest downer on the kit is cockpit, It really does need a resin replacement as it is so open, but I don't want to use the one I have just at the moment, certain as another one may be harder to find, I saw another legend one on Ebay sell for £27.00 pound, with that being the price, plus Kit, plus Decent Decals, over the old revell ones, you might as Well buy a tamiya F4 and be done with it. Dave Edited January 8, 2009 by zero Link to comment Share on other sites More sharing options...
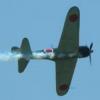
zero Posted January 8, 2009 Author Share Posted January 8, 2009 (edited) Well I struggled up in to the loft yesterday evening, and pulled down the kits. It was only a few small steps up in to the stash, but after 3 weeks of being ill, I felt like Sir Edmund Hilary on getting there. These are the two Fury Kits from the stash. Just to show, how my head is, it not Suez, it the Korean war version boxing, however after a quick sprue check, bother the Korean war and Middle East versions are the same Kit bar decals, so I can use the spare decals from the Korean war boxing as I have no interest in doing or using the middle east versions decals at present (egypt, Iraq, Pakistan) my only problem is probably going to be a stencil or two, but I hope I can work round that. So the fury I'm going to build is an Australian one. Royal Australian Navy RAN Bankstown (1968) (That'll be the blue one, with the kangaroos on!) As you can see from the Sprue shots this is not going to be a demanding build, Dave Edited January 8, 2009 by zero Link to comment Share on other sites More sharing options...
zero Posted January 8, 2009 Author Share Posted January 8, 2009 Quick First impressions of the kit before starting Well this is the second Hobbycraft kit I have built, the first was a vampire, that needed major surgery to get the wings right. so I'm hoping this kit will not be so troublesome. the kit plastic feels very different maybe softer and smoother than Airfix or Revell, but it may need more care when working with. the etched panel lines look okay but some may need re-cutting as there are very faint in places, I'm going to try my best not to lose them As you can see from these shots not a complex kit at all, and as I will be builing this one clean, ie no weapons or drop tanks, even more of these parts will disapear in to the other box as spares Some things I would have like to have seen changed It would have nice to have a two piece canopy over it molded in just one piece. I would have like to have seen the wing tip lights in clear plastic over the grey. the top of the wings carry quite a curve, which I hope won't look odd when built. Dave Link to comment Share on other sites More sharing options...
zero Posted January 8, 2009 Author Share Posted January 8, 2009 Well a Serious Shedding of unwanted parts later, and with a bundle of masking tape and very little cleaning up later, here is a very quick test build of the kit and the parts I need for the build, ready to be painted. Building like this may seem wasteful to some, however there is very little tape holding the model together, but it servers several purposes. 1, I've now seen what the model looks like, so I don't need to rush it to see it all together, as you can see it's already all together. 2, you get a feel for how good it will go together, actually this one feels pretty good and doesn't seem to have any major vices. 3, all my parts are now sorted, I have no confusion on which bit goes where, so if there are optional parts to a kit, I've already sorted the one I want to use, way before I even get there. Dave Link to comment Share on other sites More sharing options...
spitfire Posted January 8, 2009 Share Posted January 8, 2009 Done one of those recently and it was a nice relaxing build, nothing complicated, fits great, and at the end you have a very impressive model. Cheers Den Link to comment Share on other sites More sharing options...
zero Posted January 8, 2009 Author Share Posted January 8, 2009 Done one of those recently and it was a nice relaxing build, nothing complicated, fits great, and at the end you have a very impressive model. Cheers Den Den I could not agree more, this kit is a delight to build and it all slots together, the only place I have used filler so far is to block up the wing pre-drilled holes for the weapons and drop tank. Dave Link to comment Share on other sites More sharing options...
zero Posted January 8, 2009 Author Share Posted January 8, 2009 As I said this kit has built like a dream, couple of little niggles, but I'll cover those in pictures (where I have taken them) First slight problem was the wheel well box, this did not want to sit flat So I glued it in place with liquid poly, then force it down with my hand where it didn't me, used thin super glue, and kicker to sit it there and then, had to do this in three places but no real hastle. I also forced filler from the back of the wings in to the holes so that when filling from the other side when preping it would not just be pushing through the holes in to the wing recess. The parts did actually fit well, and because these are quite new kits there was not a lot of cleaning up to do on the parts. The cockpit is very basic, and is no major work, I did make a couple of seat belts from masking tape, but once in the aircraft you can bearly see anything, with the canopy you not going to see much at all. The wing fit is quite nice, and as long as you remember the internal radiator (i did) all you need is some glue an to snap them together. The fuselage is not much of a build, there is a pin for the prop, a plate for the rear wheel assemble to glue in to, the Exhausts also are glued in place and the two halves can be joined. I taped mine up and then ran liquid poly all around the joins from the inside, most of which are accessable till the wings go one. The cockpit, is dropped in after the fuselage is sealed, was not to impressed with this as it was difficult to line up this in a dark cockpit, let alone gluing inplace, in the end I ran super glue on the inside of the cockpit first then put it in to place, probably the trickest job to do on the model so far. the fit, of fuse, to the wings is superb. It's taking me just a few short hours to get to this stage (including a long lunch break) Basically all the major assemble work is done, and the model is ready for cleaning seaming and priming. I'm really impressed with the kit, it a lovely little build, not sure it warrents the £30+ price tag it has. Dave Link to comment Share on other sites More sharing options...
zero Posted January 8, 2009 Author Share Posted January 8, 2009 Well this is Close of play picture for today. I've now lost the natural light and as I'm on the seams I'm going to stop. I've cleaned up what I can see needs doing, and painted the joins ready for the morning to see how bad they are, what needs work, and to put back any panel lines I may have erased in the process. All in all, not a bad days work, getting the paint on may take a couple of days due to the temp, bur we will see when we get there. So far I'm really happy with this. Dave Link to comment Share on other sites More sharing options...
bexwh773 Posted January 8, 2009 Share Posted January 8, 2009 You aint hanging around are you Dave Looking good so far Oh, spoke to Louise earlier, she "thinks" she posted the package....... So we shall wait and see. Bex Link to comment Share on other sites More sharing options...
zero Posted January 8, 2009 Author Share Posted January 8, 2009 You aint hanging around are you Dave Looking good so far Oh, spoke to Louise earlier, she "thinks" she posted the package....... So we shall wait and see. Bex Thanks Bex. (all we can do is put our faith in the post office!) As for build speed, this is not a complex kit, the cockpit is limited, but I could not be bothered to throw to much time or effort at it. so it got a basic paint job, a few masking tape seat belts, and as the office is so dark, ie black seat, black walls and black IP, it's like the black hole of calcutta. you might just see the straps if your lucky once the all in one canopy is in place. I just wanted to get a build under my belt this year, so this is the idea kit, simple build, simple paint job, and as I'm not back to work until monday I hope to have it nailed by then. Thanks for the bits Bex, I hope they arrive, we will see what posty has to offer over the next week or so. Dave Link to comment Share on other sites More sharing options...
Tony Whittingham Posted January 9, 2009 Share Posted January 9, 2009 Well this is Close of play picture for today.I've now lost the natural light and as I'm on the seams I'm going to stop. I've cleaned up what I can see needs doing, and painted the joins ready for the morning to see how bad they are, what needs work, and to put back any panel lines I may have erased in the process. All in all, not a bad days work, getting the paint on may take a couple of days due to the temp, bur we will see when we get there. So far I'm really happy with this. Dave Hello Dave, I did my Sea Fury in the scheme you are working on. It is worth noting the Hobbycraft recommended colour of Navy blue appears wrong. My Aussie book refers to Oxford Blue. I did not notice this before painting! :shithappens: Looks as if you are not using FS15042 on yours! Cheers, Link to comment Share on other sites More sharing options...
AnonymousDFB1 Posted January 9, 2009 Share Posted January 9, 2009 Looking good Dave Link to comment Share on other sites More sharing options...
zero Posted January 9, 2009 Author Share Posted January 9, 2009 (edited) Thanks for the comments. bit of a non event today, I tried painting today after rescribing a few removed panel lines. Way to cold. the paint would not atomise or dry and all I made was a mess. I've leave this to dry fully now and I'll only need to clean up a few duff areas before going again, but clearly I'm going to have to wait for the temp to rise enough outside before my heater in the conservatory will get the temp up warm enough to spray. at present it -7 outside my door accouring to my car and it's not been much warmer in here. Also beware Heaters, and Naked Flames when spraying, I always heat the room up and turn it off before starting to paint Dave Edited January 9, 2009 by zero Link to comment Share on other sites More sharing options...
zero Posted January 11, 2009 Author Share Posted January 11, 2009 Finally got the temp up enough in the conservatory to spray this, now awaiting this to dry fully before getting on to the under side. Dave Link to comment Share on other sites More sharing options...
zero Posted January 11, 2009 Author Share Posted January 11, 2009 (edited) Hello Dave,I did my Sea Fury in the scheme you are working on. It is worth noting the Hobbycraft recommended colour of Navy blue appears wrong. My Aussie book refers to Oxford Blue. I did not notice this before painting! :shithappens: Looks as if you are not using FS15042 on yours! Cheers, Hi Tony No I like to use Tamiya paints so I tend to mix paint to suit my needs, but I don't think I'm far out. the light and camera shading makes the colour look different to what it actually is Dave Edited January 11, 2009 by zero Link to comment Share on other sites More sharing options...
zero Posted January 12, 2009 Author Share Posted January 12, 2009 CAN ANYONE HELP? Question on this models left wing there is a piece that has been moulded to fit in the place shown. (see picture, grey plastic part!) At first I though this would be for a landing light, but on pictures I've found of Sea Fury's this doesn't seem to be the case, I'm now unsure as to paint this sliver as if it was a lens, or blend it in to the wing and just paint it the same colour I can't see why Hobbycraft have done this. sadly could it be meant to be a lens? As the wing tip lights are also moulded in grey plastic over clear as well Having looked at many pictures of sea Fury's I can see why this has been done! http://www.warbirddepot.com/dbimages/82/82-i-1280.jpg http://www.flightglobal.com/airspace/photo...ury-cutaway.jpg Dave Link to comment Share on other sites More sharing options...
spitfire Posted January 12, 2009 Share Posted January 12, 2009 Hi Dave, had the same problem, but after looking at photos of Sea Furys and other peoples model builds I blended it in and painted it. Cheers Den Link to comment Share on other sites More sharing options...
zero Posted January 12, 2009 Author Share Posted January 12, 2009 Hi Dave, had the same problem, but after looking at photos of Sea Furys and other peoples model builds I blended it in and painted it.Cheers Den Thanks Den After viewing numerous pictures, and you cvonfirming the same. I think I'll blending it in and paint it. Glad I still have a coat of paint to go. Cheers Dave Link to comment Share on other sites More sharing options...
Tony Whittingham Posted January 13, 2009 Share Posted January 13, 2009 CAN ANYONE HELP?Question on this models left wing there is a piece that has been moulded to fit in the place shown. (see picture, grey plastic part!) At first I though this would be for a landing light, but on pictures I've found of Sea Fury's this doesn't seem to be the case, I'm now unsure as to paint this sliver as if it was a lens, or blend it in to the wing and just paint it the same colour I can't see why Hobbycraft have done this. sadly could it be meant to be a lens? As the wing tip lights are also moulded in grey plastic over clear as well Having looked at many pictures of sea Fury's I can see why this has been done! Dave Hi Dave, I noticed that panel on my build. Apparently this panel is the access cover for the wing fold hydraulic cylinder. There should also be one on the other wing.It fits very badly, so I filled it over altogether. It is on the M & AP drawings in Scale Models International issue for October 1983. As for the wingtip lights, the panel outlines are too big ,IMHO. I used red and green toothbrush offcuts to make new lenses. Hope this helps Link to comment Share on other sites More sharing options...
zero Posted January 13, 2009 Author Share Posted January 13, 2009 Hi Dave,I noticed that panel on my build. Apparently this panel is the access cover for the wing fold hydraulic cylinder. There should also be one on the other wing.It fits very badly, so I filled it over altogether. It is on the M & AP drawings in Scale Models International issue for October 1983. As for the wingtip lights, the panel outlines are too big ,IMHO. I used red and green toothbrush offcuts to make new lenses. Hope this helps Hi Tony that makes logical sence. Thanks for info. I've already glued mine in place and it will be filled and sanded later today ready for the final paint coat, hopefully tomorrow morning. Most of the small parts are now done, ie gear, doors etc, so things are going on, just nothing to really show. Yep the panel lines are a bit matchbox ish, but I do tend to lay a lot of paint on my models so that has closed them up a little, the nav lights idea is a good one, however moulding them on the clear sprue would have been better one, I'll probably paint mine white first, then lay clear paint on them to give a glazed affect, something I need to play with to see which colours give the best affect (ie silver may work better than white) We will see Dave Link to comment Share on other sites More sharing options...
Col. Posted January 13, 2009 Share Posted January 13, 2009 After tracking down a 48th scale Hobbycraft Sea Fury the other day I couldn't resist comparing the sprues against the ones in your thread, it seems they've simply scaled the whole thing up and added some weapons. Since this has to be my favourite piston-engined aircraft I'm a bit biased but always good to see another one Dave. Link to comment Share on other sites More sharing options...

Recommended Posts