Billos Posted January 31, 2023 Share Posted January 31, 2023 Just started the Heller 2014 release SU-27, searched round found Ukraine color scheme, and now guess what -yes Heller announce the 2023 release of a Ukrainian Digital Camo version Grrrr. Ah well remember Niven's revelation - the perversity of the Universe tends to a maximum! Anyway searching round I couldn't find any reference to Nose weight for this. There's nothing mentioned in the instructions. So after taping the main structure together and some careful balancing on a kitchen scale, I estimate about 30g is needed (1oz in old money). Fortunately there's plenty of room in the nose cone and under the cockpit. Incidentally the instructions are a seriously confusing mix of color numbers and part numbers, with every part labelled with a color number and a part number.... Some people may welcome this but I find it annoying and unhelpful, especially since the color numbers are all for a Russian version. The ukrainian version is different in several respects - the cockpit colors, etc. Still we struggle on. I mean really if that's the worst we have to deal with, we're pretty lucky. Pics to follow. Slava Ukraini! Link to comment Share on other sites More sharing options...
Billos Posted February 1, 2023 Author Share Posted February 1, 2023 Link to comment Share on other sites More sharing options...
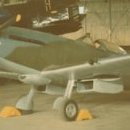
Billos Posted February 1, 2023 Author Share Posted February 1, 2023 The fit of the wings is truly bad. You can line them up underneath, or on top... take your pic. Whichever way you do it, you'll end up with huge gaps on the other side...... I chose to fit them into the wing recess from below, and then force bend and apply lots of glue and filler to get them to mate on top with the fuselage. Still going to neeed lots of filler... 1 Link to comment Share on other sites More sharing options...
Billos Posted February 2, 2023 Author Share Posted February 2, 2023 I hadn't really realized how big the Flanker is...... comes out to 32 cm in 172 (12.5 inches for you oldtimers) pitot tip to tail . I'd previously shied away from the Flanker cos I thought it was too much like the Mig-29, which is true in basic conformation. But it's sooo much more impressive. It's probably not politically correct to say so, but it really is a fine looking airplane. A bit more work to do on fine smoothing of the wing/fuselage join, but it's looking good, even if I say so myself. 1 Link to comment Share on other sites More sharing options...
cpoud117 Posted February 3, 2023 Share Posted February 3, 2023 Hey Billos, Your pictures are not displaying in the thread. You may see them since they are cached on your end but the only way for us to see them is to click on the dead pics links. Check the thread in a different browser from the one you use to see what I mean Link to comment Share on other sites More sharing options...
Ryan Hothersall Posted February 3, 2023 Share Posted February 3, 2023 Looking good so far. I can see the pics just fine on safari on iPad. Link to comment Share on other sites More sharing options...
Zorglub Posted February 3, 2023 Share Posted February 3, 2023 1 hour ago, cpoud117 said: Hey Billos, Your pictures are not displaying in the thread. You may see them since they are cached on your end but the only way for us to see them is to click on the dead pics links. Check the thread in a different browser from the one you use to see what I mean 17 minutes ago, Ryan Hothersall said: Looking good so far. I can see the pics just fine on safari on iPad. Pictures cannot be displayed with Vivaldi ( based on Chromium ) but work fine with Firefox Link to comment Share on other sites More sharing options...
Billos Posted February 9, 2023 Author Share Posted February 9, 2023 Pictures not showing up is browser dependent. Especially in Chrome and derivatives, the default setting is not to display stuff from a source that does not have an SSL cert. Firefox (praised be it's name) is a far better browser. Chrome was explicitly designed to deliver ads. (That's not just my opinion, It's Google's own description. I'm working on getting a ssl cert for my site, but the ISP has just changed so I'm waiting for them to settle down. Any way back to the Plane. Wings aside the rest of the fit was quite straightforward. The undercarriage despite it's spindliness seems to be quite robust. Using photoshop and a sharp knife I created individual Templates for each of the Splinter Patterns. Then the process of cutting tape, applying, painting, next level, etc etc. I did the dark blue first followed by the grey. Then careful touching up which always seems necessary no matter how carefully you cut the tape and apply the paint. Several very thin coats applied at a time. A pretty good result I feel. But there's a large discrepancy with the decals. Printed by Eduard, they are fine and in register, but the Ukrainian roundels, bort numbers and pennants are very overscale. I decided to live with it. This is not a competition, just for my own personal pleasure, and frankly no-one's going to know unless I tell them. They are also very fragile. Even using my normal method of a wet paintbrush to position them, they were very susceptible to tearing. Again persistance and patience necesary. Then a final coat of Matt fixative. Just the missiles and clear parts to finish. Yes I took a bit of a liberty with the Tailfin! 1 Link to comment Share on other sites More sharing options...
Billos Posted February 10, 2023 Author Share Posted February 10, 2023 So started painting the canopy and I thought Babushka! Don't wanna get on the wrong side of those Ukrainianwomen! Link to comment Share on other sites More sharing options...
Billos Posted February 13, 2023 Author Share Posted February 13, 2023 All Done. Quite a satisfying result. Hopefully a tribute to our brave Ukrainian Freinds. Наші серця і думки з тобою Бережи себе Link to comment Share on other sites More sharing options...

Recommended Posts
Create an account or sign in to comment
You need to be a member in order to leave a comment
Create an account
Sign up for a new account in our community. It's easy!
Register a new accountSign in
Already have an account? Sign in here.
Sign In Now