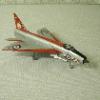
TimJ Posted June 25, 2022 Share Posted June 25, 2022 (edited) Well, somebody had to do it so I'm going to build the 1/72 Mustang so nobody else has to. 😀 While possibly not a classic in the usual sense it is a classic example of how sometimes things can go wrong. The banana shaped fuselage, along with the over sized wheel wells and drop tanks mean that most people will give it a wide berth and with good reason although on the plus side it does have some cockpit detail, which was unusual for a 1/72 kit in the early 60's. The early box art showing 'The Millie P' in its silver an red livery no doubt was responsible for a lot of sales to young modellers back in the day, it certainly caught my brother's eye as he built one back in the 70's. The later box art with a photo of the model didn't do it any favours though. Anyway, here's the kit. DSCF3308 by timothy jones, on Flickr DSCF3310 by timothy jones, on Flickr There's quite a bit of flash and some sink marks but nothing that can't be sorted. DSCF3309 by timothy jones, on Flickr I'll make a start on it soon as if I think about it for too long I might put myself off. Wish me luck. 😀 Edited June 25, 2022 by TimJ 13 Link to comment Share on other sites More sharing options...
Toryu Posted June 25, 2022 Share Posted June 25, 2022 My first 1/72 kit which started my affection for the P-51, and yes, it was the red fuselage of The Millie G (!). Good luck! 1 Link to comment Share on other sites More sharing options...
stevej60 Posted June 25, 2022 Share Posted June 25, 2022 Good lord Tim that was an unexpected arrival,I remember building the very same red fuselaged version a lifetime ago. 1 Link to comment Share on other sites More sharing options...
PeterB Posted June 26, 2022 Share Posted June 26, 2022 20 hours ago, stevej60 said: Good lord Tim that was an unexpected arrival,I remember building the very same red fuselaged version a lifetime ago. Snap! It was only several years later that I discovered it should have been blue, or was it OD? Pete 1 1 Link to comment Share on other sites More sharing options...
TimJ Posted August 9, 2022 Author Share Posted August 9, 2022 (edited) I have made a start on this, beginning with the cockpit interior which is more detailed than I expected it to be. It even has some sidewall detail. Apart from the decals this is probably the best part of the kit. DSCF3371 by timothy jones, on Flickr DSCF3372 by timothy jones, on Flickr After assembling the wings I found that there were big gaps at the wing roots. DSCF3445 by timothy jones, on Flickr Some plastic strip was used to fill the gaps and also to hold the inner undercarriage doors in place. DSCF3447 (2) by timothy jones, on Flickr Despite this there will still be some filling and sanding needed to get a decent fit between the wing and fuselage as they don't line up very well. Edited August 9, 2022 by TimJ 7 Link to comment Share on other sites More sharing options...

Recommended Posts
Create an account or sign in to comment
You need to be a member in order to leave a comment
Create an account
Sign up for a new account in our community. It's easy!
Register a new accountSign in
Already have an account? Sign in here.
Sign In Now