kapteenipirk Posted June 13, 2022 Share Posted June 13, 2022 (edited) Soon as i saw there was a GB about Japanese stuff, i knew i had to take part with something. So, here's my contribution.... The plan is to make it in 1/16 scale with the whole anglerfish team onboard. The reason im going for the F2 instead of the Ausf.H or "Mk.IV Special" as Yukari called it, is because i sligthly prefer the look of the F2.... actually in reality im not sure if my tight budget would allow me to get like 3 cans of Tamiya red-brown spraypaint in time to do the entire vehicle. The overall "pose" for the tank and the crew will likely be based on this image. I will be 3D-modelling this in Fusion 360 myself from scratch using some drawings and loads of images of models and real tanks to get every detail more or less correct. And yes, i will be doing the Interior as-well. I will likely also be adding a bunch of functionality to the model as-well, like working tracks, openable hatches, operating turret... etc, but it will not be RC compatible tough. it's just a very large display piece with enough functionality to make it... "pose-able" if you will. Tough it will remain to be seen how much functionality i will add in the end, as my main points when doing 3D-printable stuff is, printability first, functionality second, and detail third. Due to the time-frame, i will likely be 3D-printing bits while the modelling process is going on, meaning i will have to do some careful planning and make sure everything goes right from the get-go. Ill probably allow myself a week of time where it's nothing but modelling, after that begins the printing part. I need to start fairly early with the printing but i don't want to end up printing a large outer-hull only to realize i have to do some editing to it or i forgot some attachment point of some sort, resulting in a reprint. As for the figures, i will be using some premade 3D-models from the Garry's-mod Workshop. Ive worked with these before and they are not exactly the most printable of models, but it's enough that i can fill in the details later "manually" And these figures is the main reason im going with 1/16 scale, they just don't come out very well in 1/35 scale when printed with PLA... plus, i get to sink in more detail on the tank itself. Id be lying tough if i didn't say another big reason for this large of a scale, is because i think subject deserves it. The anime itself to me was some of the most fun ive had watching a series in a very VERY long time, and basically acted as my "gateway" to the weird and wonderful world of anime, something that has become a pretty big part of my life. I think that about does it for the basics, ill fill in the rest as the project progresses. Edited June 22, 2022 by kapteenipirk how on earth did i miss that... 7 Link to comment Share on other sites More sharing options...
kapteenipirk Posted June 14, 2022 Author Share Posted June 14, 2022 Time to begin with the first design update. Haven't yet got too much time for this, but i think we have gotten off to a pretty good start. These couple of drawings have acted as my canvas from which to start designing the thing. They don't exactly line up and are drawings of different versions, but for me i doesn't really matter, they should still get me pretty darn close as far as all the primary measurements. All the details and stuff will be filled in using images of models and real life tanks. Plus, it's not like im going for a 100% accurate vehicle anyways. Like i mentioned earlier, printability first, functionality second and detail third. And here is what we have so far. The basic shape of the upper hull is now done, next up will be the lower hull and fenders, and then the turret. Thought it would be a good idea to get the basic shape of the entire outer hull done first before i start fitting any of the details or interior elements. The print/build as far as the outer hull is concerned, will be made up of a load of smaller panels, kind of like you would get on a model-kit, but even more broken up, because i want to use as little support material as i can, so no boxes with the top missing type situations in most cases, cause otherwise the bottom would have to be totally flat, or the entire box would be full of support material. And not only is removing that stuff annoying, it leaves some pretty nasty areas/marks in some cases... plus, it eats up loads of extra time and is ultimately money and time down the drain. Once the outer hull has been figured out, im going to have to start braking it up into printably sized bits and then create all the attachment/glue joins/points so i can properly put it together. So far all the panels where you can actually see the thickness of it (front armor and back plate in this case) should be about right in terms of that, the rest is based on my own set of standards and a bit of logical thinking. So, expect some compromises to be made here and there. Hopefully by tomorrow the basic shapes of the outer hull, fenders and turret should be done so i can start working on the smaller details. 4 Link to comment Share on other sites More sharing options...
Jinxman Posted June 15, 2022 Share Posted June 15, 2022 Ambitious project - good luck with it. Link to comment Share on other sites More sharing options...
kapteenipirk Posted June 16, 2022 Author Share Posted June 16, 2022 17 hours ago, Jinxman said: Ambitious project - good luck with it. Cheers. Now for the next update. I have gotten the basic exterior shapes complete. First tough, i'll need to brake some of these bits up and make more proper attachment point's between them. will also need to do some editing in terms of tolerances to make sure everything goes together smoothly. Since im at it and the scale seems to allow it, might as-well play around a little more with wall thicknesses to somewhat represent how the armor protection would have been on the Pz.IV. 3 Link to comment Share on other sites More sharing options...
kapteenipirk Posted June 17, 2022 Author Share Posted June 17, 2022 Work continues with the exterior of the turret being just about done. I wasn't supposed to get that far with it at the moment, but i got a little too exited. The turret functionality wise includes crew hatches with pinholes/hinges so they can function properly, and closable vision-slots for the commanders cupola. Unfortunately there isn't really a way of doing the vision slot's in a way that doesn't involve gluing them in place. Pretty much all the exterior details of the turret should be accounted for, there are a couple minor details on the gun that need doing, but otherwise it should be done. 4 Link to comment Share on other sites More sharing options...
CliffB Posted June 17, 2022 Share Posted June 17, 2022 Both 3D printing and anime are complete mysteries to me, so this one should be an education! Fantastic work so far Link to comment Share on other sites More sharing options...
kapteenipirk Posted June 17, 2022 Author Share Posted June 17, 2022 13 hours ago, CliffB said: Both 3D printing and anime are complete mysteries to me, so this one should be an education! Fantastic work so far Cheers. Well, let's hope so Link to comment Share on other sites More sharing options...
kapteenipirk Posted June 17, 2022 Author Share Posted June 17, 2022 Design of the hull attachment points/tolerances and tracks has begun... and oh boy, this is going to be a doozy. I really wanted to try and achieve it, and i believe i should be able to make separate working track-links, drive-wheels and drive-sprockets. No suspension tough. The track-links themselves should be beefy enough to print right and support the usage of iron-wire as the connecting "pins". Operation of these is bound to be rough, but then again, it's not like this needs any of that anyways... but, if in the future i wanted to do an actual RC compatible vehicle, i could use the experience. Oh how im looking forward to having to assemble all those individual track-links and cleaning the supports off them Link to comment Share on other sites More sharing options...
trickyrich Posted June 17, 2022 Share Posted June 17, 2022 welcome along to what is probably your 1st GB. When you first asked about this I was really hoping you you would join in with this project, and what a project to! A 1/16th Anime Panzer 4 with panzer Girls! I have seen a few episodes of this show, lots of fun. 3D printing is just so interesting/amazing to me, I really wish I had the time to learn/player with it...am flat-out just trying to use my Silhouette Print/Cutter!! Well good luck with this build, I can imagine it'll attract a lot of attention, I for one am all set to follow this one!! Link to comment Share on other sites More sharing options...
kapteenipirk Posted June 23, 2022 Author Share Posted June 23, 2022 On 6/18/2022 at 2:47 AM, trickyrich said: welcome along to what is probably your 1st GB. When you first asked about this I was really hoping you you would join in with this project, and what a project to! A 1/16th Anime Panzer 4 with panzer Girls! I have seen a few episodes of this show, lots of fun. 3D printing is just so interesting/amazing to me, I really wish I had the time to learn/player with it...am flat-out just trying to use my Silhouette Print/Cutter!! Well good luck with this build, I can imagine it'll attract a lot of attention, I for one am all set to follow this one!! Apologies, forgot to reply before i went off for the weekend. "In Shensa-dö there's no such thing as luck, just skill"... but thanks. Tough i feel it's just a matter of time at this point, my new printer is a bit of a ❓ since i haven't tested it yet. Remains to be seen if i can get consistently good prints with it. Form my experience, i can say 3D-printing is a pretty simple process in the end. Im sure with a bit of time you'd be able to get right to it and start filling your house with piles of useless printed tat like i have It is certainly my first GB. Let's just hope it won't be the last. Link to comment Share on other sites More sharing options...
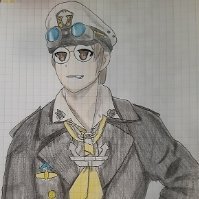
kapteenipirk Posted June 24, 2022 Author Share Posted June 24, 2022 Time for a mid process update before i get too far I have the tracks and their guidewheels and stuff pretty-much done. I have decided that the wheels will be glued in place, i know i could probably figure out some sort of way to make em roll semi nice, but what's the point. Plus, the overall smallness of the wheels makes me feel they wouldn't be very sturdy otherwise. The rear guide-wheels are still missing their mounting point, haven't really figured out yet weather to make those mountings part of the side-wall, a separate part, or part of the rear-wall... so many options... The hull's underside is now complete as-well. Pretty-much all the rivets and panels where eyeballed using some existing features as reference, to hopefully get everything about where it should be and in the right size. I have decided that to help printability, and to better emphasize the fact the interior is a separate optional addition to the model. I will be modelling a separate "sub-floor" on top of which all the interior bit's go. Essentially what i want to end up with, is panels where the details and attachment-points are on the other side, while the other side is completely flat, allowing me to hopefully print most, if not all the panels, with zero supports. I will probably be working on the exterior panel per panel, and hopefully by the end of today the exterior of this model will be finished... As far as the whole print parts while im modelling new ones... nah... as we speak, im making constant small changes to existing parts and am getting new ideas on how to better optimse them for printing. So, best to just complete the model first, then i can start printing it and not have to worry about reprinting bits. Oh, and forgot to mention, i will be making this available for everyone to download for free on thingiverse: It means you'll have to print it yourself, and it's not going to be the cheapest of quickest to print, but its' sure to be a lot cheaper to do than one of those 1/16 scale kits. Especially since this will be made of either very small or very thin parts, meaning that while it's large, the overall volume of material should be low, and with minimal supports, it will be even more economical (even more so if you leave out all the interior bits). So there's something for you to look forward to Oh, and here's a little bonus for you. (sorry, i don't have a working scanner, so you'll have to do with this phone camera pick) Miho would like to say hi. Yeah, drawing portraits/art of some of my favorite anime characters is one of my big past-times now. It's an absolutely perfect way for me to re-leave some stress and bring a little extra smile to my day . This particular one, and most of the ones i do, are just recreations of art done by other people. Just treading the waters and getting some experience before i move on to my own fully custom stuff. 5 Link to comment Share on other sites More sharing options...
kapteenipirk Posted June 25, 2022 Author Share Posted June 25, 2022 Time for another mid process report. As i kinda figured while writing the earlier update, getting the exterior done that day... let's just say shortly after that i couldn't keep my eyes open anymore... Anyways, work continues on the front of the hull. Quite a number of functionalities have been created in this area. These will likely need some extra doing tough. The drivers and machine-gunner/radio-operators hatch can be opened or closed , same goes for the transmission inspection/maintenance hatches. Also the drivers vision slot can be closed and opened too and the machinegun is mounted on a ball-joint so it can move about as-well . Im starting to feel like i should spend the extra time and figure out a way to get the wheels and sprockets rolling... but i dunno, maby, maby not... Link to comment Share on other sites More sharing options...
kapteenipirk Posted June 25, 2022 Author Share Posted June 25, 2022 (edited) Got a bit further today, with the front hull's exterior just about done. Also got the computer killing pattern done on the fenders. Had to do it in multiple parts to stop Fusion 360 from... ... (Don't want to risk another case of the program freezing and crashing so hard i have to reinstall the entire program... yeah... that actually happened to me once) It's now getting pretty close to the end as far as the vehicles exterior goes. Knowing the current pace, it's probably going to be a day until the exterior is done, and then it's going to be another day of modelling all the tools. Edited June 25, 2022 by kapteenipirk ... 5 Link to comment Share on other sites More sharing options...
kapteenipirk Posted June 29, 2022 Author Share Posted June 29, 2022 Work continues on the engine-bay. Even got some other areas finalized. With open-able/removable engine-bay doors, you should be able to get a pretty good view of the whole engine assembly even after the tank has been painted and put together. Now it's really only the lower rear panel and the side vents left and then the exterior of the tank should be about done... minus the tools of-course. Oh, and i need to remember to install the little "gutter" for the folding antenna. Not exactly sure how detailed im going to make the interior on this one, i have some really good reference material, but we shall see if im going to go all the way with that, like i have done with the exterior. But... considering the amount of open-able/removable hatches and the scale of those openings, i feel like i don't really have a choice... it's basically all or nothing. 5 Link to comment Share on other sites More sharing options...
kapteenipirk Posted July 10, 2022 Author Share Posted July 10, 2022 Welp, had to keep a small break as i have to honest, and say my mojo has been a bit ran over by a tank thanks to me kinda starting this out of nowhere. But, thankfully we are getting close to the end. So far in fact, that the exterior is now fully complete, tools and all...well... minus the jack, that i forgot to do. You'll even be able to see that i have began doing the interior as-well. The rear drive wheels should be able to have a mount that allows it to be adjusted before final installation so you can slightly tighten the tracks that way... as-well as by removing or adding track links. Oh, and the antenna on the side can be stowed and deployed. I will try my hardest to get the modelling portion of this done in the next session as there are other things i would like to get to, and it would be nice to keep another small break before i begin printing all this. The modelling of the figures i'll be able to do as i print bit's for the tank, so no need to hurry too much with those. 2 Link to comment Share on other sites More sharing options...
kapteenipirk Posted July 11, 2022 Author Share Posted July 11, 2022 Alright, time for a little brake before i continue. I have now... for the most part at-least... completed the interior below the turret. Everything from batteries, shell-racks, the tunnel for the drive-shaft, it should all be there. Gotta say tough, not the most fun to do, as you have to keep turning parts on and off and on and off... .... to not only see what your doing, but to make sure everything fit's nicely. And since there's about 280 parts to scroll trough... yeah... Even did 3D version of some of the rounds used in the KwK 40, the tank mounted cousin of the PAK 40 AT-gun. The ones i did are the Patr. 34 (HE), Patr. 39 (AP) and Patr. 38 (HEAT). 4 Link to comment Share on other sites More sharing options...
trickyrich Posted July 12, 2022 Share Posted July 12, 2022 been waiting for an update on this project, and not disappointed at all, amazing work. Link to comment Share on other sites More sharing options...
kapteenipirk Posted July 18, 2022 Author Share Posted July 18, 2022 (edited) On 7/12/2022 at 10:24 AM, trickyrich said: been waiting for an update on this project, and not disappointed at all, amazing work. Thanks. And a huge thanks to everyone else too, if i had started this as a personal project, i would have run out of motivation long ago, but thanks to your guy's support, the timetable and doing this as part of a group build, im nearly there... but... even with the extra help, it's been a slow grind for the last couple of weeks and im going to have to keep a few days off from this project... even if it might stretch my timetable to it's limits. Here's where ive got during this while. The Interior at the front of the tank is nearly complete, it still needs the radio-set installed and a couple gas-mask cans also need to be placed there too. It's more of an approximation of the real thing, i didn't really feel like spending that much time on something that is going to be hard to see after the vehicle has been put together. But, despite that, i still went ahead and tried to put in all the major elements, as-well as some more minor details. The engine-bay follows the same way. More or less all the major details are there, but some of the more minute details i left out. The piping will be added later. While i keep my brake, here's a little something extra for you to look at. Some years ago a did my first proper large scale 3D modelling project of my own. It was a 1/35 scale model of the Faun SLT-56 tank transporter. The model i very how you doing with features that don't work, basic details, and a "suspension" that barely holds together. As a part of that project i decided it would be most fitting for me to put a 3D-printed German tank in the back of it, and the one i chose, was an upscaled 1/100 Leopard 2A4 from M Bergman on Thingiverse. Once i got to printing it, i decided i should customize it to make it a little more interesting. And as a bonus, i added some stowage stuff from Tigerace (that stuff can also be found on Thingiverse) And here is what i came up with... well... not quite, as a couple days ago i felt like pulling it out of storage and improve it a little and give it an even more anime'ish/cell-shaded look. Styled to look as if it was part of the Continuation team from Gup. It's not much to write home about as the model was originally supposed to be printed at 1/100 scale, so the details are a little chunky, and it's not the best quality print either. Buut... a part of me still really loves the way it turned out, with the overall white fitting really well, and the stowage stuff adding some nice extra detail and color to it. What i did as part of my recent upgrade, was to go over pretty-much every clear edge and highlight it with a pen, and then add some shading around those with a pencil. I did also add a couple of blue stripes and painted the gun mantle grey, to give it even more color. Oh, and those antennas on the turret are also a later addition. Given that the Panzer IV needs to be Animefied like this as-well, it's good to have a better idea of how that will look like in practice. I don't think it's a style that can ever be correctly replicated, but id say this works pretty nicely. Edited July 18, 2022 by kapteenipirk So tired.... 4 Link to comment Share on other sites More sharing options...
trickyrich Posted July 20, 2022 Share Posted July 20, 2022 alll really nice!!!! Link to comment Share on other sites More sharing options...
kapteenipirk Posted July 20, 2022 Author Share Posted July 20, 2022 12 minutes ago, trickyrich said: alll really nice!!!! Link to comment Share on other sites More sharing options...
kapteenipirk Posted August 3, 2022 Author Share Posted August 3, 2022 Time for a quick update. So, time is running short and unfortunately my motivation for the modelling portion...kiinda came and went after my small brake (Knew it was a mistake... but oh well). Thankfully im so close to the end that all i need is one good days of work and it will be done... the vehicle that is. The figures and some small accessories will still need doing as-well. To give myself a little more breathing room, i already started the printing process. Not fully tough, as i can't really start printing any of the large pieces before i get everything modeled and checked for any errors. I'll also have to add some attachment point to some of the parts as-well. 12 of each shell has been printed, and also all the outside bits related to the tracks... minus the tracks themselves... have been printed. Turns out i made an error during the modelling of the tracks, and because of that i had to throw nearly a hundred links wort away. Not too much of a loss, but not great either. I think i will actually leave the printing of the tracks till the end, as i have a bit of a plan. In-case i would run out of time, i will simply replace the tracks with some 2D paper ones, it wont be ideal, but comparatively, it is the most time consuming part of this project, and also the least critical in many ways. My initial calculation estimated that it would take about 3 days to print enough, and god knows how much time it will take to put them together. If the tank had no paint, it would feel far too incomplete, and without any of the crew... what's even the point. 2 Link to comment Share on other sites More sharing options...
trickyrich Posted August 4, 2022 Share Posted August 4, 2022 actually what you are doing is epic!!!! The printed bits we can see look amazing. Have my fingers crossed for this one!!!! Link to comment Share on other sites More sharing options...
kapteenipirk Posted August 9, 2022 Author Share Posted August 9, 2022 And i was so sure in my memory that the deadline was 18th, not 8th . Welp, that's me done. Work will continue as usual regardless and i'll just park the tank somewhere else once this is done. Im just super happy to have gotten this far to begin with, not only because of reasons meantioned earlier, but because this project will no doubt maker any previous projects and upcoming project feel like a light snack and be a good morale boost. Haven't even had the time to do updates on this as ive been so busy juggling between finishing off the modelling portion and preparing print's for two printers, one that just got it's first ever prints complete. And there was some other IRL stuff that needed doing. But, here is where im at right now... or more accurately... was a couple days ago, as printing is happening with 2 machines at the same time, so lot's is being produced. For those that wanted to see the vehicle 100% complete in it's digital form, here are some shot's of that. Or more accurately, it was around 98%. i did some little things here and there to improve part attachments, alignments, and did some cutting to improve the printability of certain bits. But all the parts are here and counted for... minus the the tracks on the right side. There is still some work to be done. The figures need to be posed, and some extra accessories need to be made, but they won't take too long. And here's some more printed bit's. So i don't have to keep spending time on it, in a semi sleepless night , i sliced and prepared every single piece for printing, so now all i have to do is print them. And here is the second ever print of my Ender 3 max... First attempt ended about half way as the extruder stopped feeding material. Lowering the build-plate seemed to fix it more or less (im pretty sure the tip was too close to the buildplate/print and wasn't able to feed properly, hence it got clogged), but as i figured, the Ender is a bit hit and miss as far as results . The 10H print with the fenders went right on the first attempt, but the upper-hull sidewalls needed 2 as the first print came off almost immediately. And now with the current print, it seems to be going well, but the is a high chance i will need to fix, or either replace a couple of the bits. So, not too bad all things considered . As long as the prints fail fairly early on, im perfectly ok with a few misses, but... say... if something like a 12 - 24H print failed when it was 80 - 90% complete... not so great, but i suppose it's just one of those inescapable facts of 3D printing, at some point a huge print will fail near the finish line an you will... . Now, time to start preparing all those extra bits that distinguish this from a regular Panzer IV. 1 Link to comment Share on other sites More sharing options...
trickyrich Posted August 11, 2022 Share Posted August 11, 2022 Gosh this is so good, don't worry about not making the finish intake, perfectly understandable in a case like this. Please keep up the posts, I'm dying to see how this all turns out, and I bet there are many others following as well! Link to comment Share on other sites More sharing options...
kapteenipirk Posted August 13, 2022 Author Share Posted August 13, 2022 On 8/11/2022 at 11:00 AM, trickyrich said: Gosh this is so good, don't worry about not making the finish intake, perfectly understandable in a case like this. Please keep up the posts, I'm dying to see how this all turns out, and I bet there are many others following as well! Don't worry, the printing/modelling portion is now done and after making my final update on that side of the project here, i will move over the updates to the 1/16 AFV section of the forums. I mean... what's the point in playing music for an empty concert-hall . So, updates will be coming, and im sure in a week or two, the project should be done and dusted... minus the tracks, that i will be printing/putting together at a later date due to logistical issues. 1 Link to comment Share on other sites More sharing options...

Recommended Posts
Create an account or sign in to comment
You need to be a member in order to leave a comment
Create an account
Sign up for a new account in our community. It's easy!
Register a new accountSign in
Already have an account? Sign in here.
Sign In Now