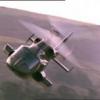
Tomjw Posted May 12, 2021 Share Posted May 12, 2021 Hi All, I'm really happy to be joining my first group build for many years. I hearby present the 1/72 BAe EAP from Pegasus. Yes, I'm a glutton for punishment and this kit makes most other short run kits look like those from Tamiya. I bought the kit from the Huddersfield show some years ago for a mere £7. Looking at it now that I've unpacked the parts from the bag, I think I should have been paid £7 to accept it. So, without further ado, some photos:- The kit... The sprues and other bits and pieces... The decals. Not exactly Cartograph... And finally, the comprehensive instructions... Looking forward to the starting gun on Saturday. Cheers, Tom 10 Link to comment Share on other sites More sharing options...
PlaStix Posted May 15, 2021 Share Posted May 15, 2021 Hi Tom and welcome to the GB and your first GB! Hope you have a good time. And it looks like a really great kit for the Less Than A Tenner GB! I'm really looking forward to seeing your build. Kind regards, Stix 1 Link to comment Share on other sites More sharing options...
Tomjw Posted May 15, 2021 Author Share Posted May 15, 2021 (edited) 31 minutes ago, PlaStix said: Hi Tom and welcome to the GB and your first GB! Hope you have a good time. And it looks like a really great kit for the Less Than A Tenner GB! I'm really looking forward to seeing your build. Kind regards, Stix Thanks Stix. It's great to be here. I've been itching to get started, so I thought I'd be traditional and start with the cockpit. Now the instructions just say "Detail cockpit to choice, then join fuselage halves..." The funny thing is, you don't get a cockpit!!! All you get is this:- And after some considerable cleaning up, I ended up with this... Okay, it's point and looks okay from this angle, but underneath is a different story... I need to scratch build a cockpit tub, but I think I'm going to change strategy and clean up all the fuselage parts and tape them together to see what I have. It seems that for my £7 I get a kind of EAP shape in poor quality plastic. Can you tell I'm enjoying this. All comments and advice welcome. Cheers, Tom Edited May 15, 2021 by Tomjw 1 1 Link to comment Share on other sites More sharing options...
PlaStix Posted May 15, 2021 Share Posted May 15, 2021 1 Link to comment Share on other sites More sharing options...
janneman36 Posted May 16, 2021 Share Posted May 16, 2021 You are a brave men for trying to build this one ..I had one once and I have binned it last year! I once had an Typhoon for the extra parts like the cockpit canopy and the gear! The glass is horrible as well but hey it is an EAP..good luck with this one and I love to see it finished😉 cheers, Jan 1 Link to comment Share on other sites More sharing options...
bentwaters81tfw Posted May 16, 2021 Share Posted May 16, 2021 Leave the sprue attached to the back of the intake box. With a little filing it will give you the engine ducts and provide a mount for the nose gear. 1 Link to comment Share on other sites More sharing options...
Tomjw Posted May 17, 2021 Author Share Posted May 17, 2021 7 hours ago, janneman36 said: You are a brave men for trying to build this one ..I had one once and I have binned it last year! I once had an Typhoon for the extra parts like the cockpit canopy and the gear! The glass is horrible as well but hey it is an EAP..good luck with this one and I love to see it finished😉 cheers, Jan Thanks Jan. I'm actually wondering am I brave or stupid for even attempting it. I won't be beaten though, at least not yet 😂 Cheers, Tom 1 Link to comment Share on other sites More sharing options...
Tomjw Posted May 17, 2021 Author Share Posted May 17, 2021 7 hours ago, bentwaters81tfw said: Leave the sprue attached to the back of the intake box. With a little filing it will give you the engine ducts and provide a mount for the nose gear. Thanks for the tip. I think I'm going to need all the help I can get, and quite possibly all the Isopon P38 car body filler I can get my hands on Cheers, Tom Link to comment Share on other sites More sharing options...
Hockeyboy76 Posted May 17, 2021 Share Posted May 17, 2021 Good luck with your build. It looks a challenge, but I’m sure you can beat her into shape. Link to comment Share on other sites More sharing options...
bentwaters81tfw Posted May 17, 2021 Share Posted May 17, 2021 As for the decals, they are obviously shot. About 3 coats of Microscale liquid decal film, and remove the serials and the EAP letters. Paint the arrow, and with luck, the other bits will be usable. You might need to attach them with Klear. 1 Link to comment Share on other sites More sharing options...
Tomjw Posted May 17, 2021 Author Share Posted May 17, 2021 1 hour ago, bentwaters81tfw said: As for the decals, they are obviously shot. About 3 coats of Microscale liquid decal film, and remove the serials and the EAP letters. Paint the arrow, and with luck, the other bits will be usable. You might need to attach them with Klear. They certainly are shot. Thanks for the tip. I'll get myself some liquid decal film and cross my fingers as the decals hit the water. Here's hoping they don't shatter. Painting the arrows won't be a problem. I'm just working on a basic cockpit then I'll post my latest progress photos. Just for comedy effect. Cheers, Tom Link to comment Share on other sites More sharing options...
Tcoat Posted May 17, 2021 Share Posted May 17, 2021 All of a sudden my poor old Lindberg Ford looks state of the art! 1 Link to comment Share on other sites More sharing options...
Tomjw Posted May 28, 2021 Author Share Posted May 28, 2021 (edited) Time for an update on what is probably going to be a slowish build. No surprises there then 🙂 I've finished scratch building a cockpit and this being the first time ever for me, I don't think it turned out too badly. There is more to add such as the flight test instrumentation packs on the shelf behind the ejection seat and the holographic HUD. I added a bulkhead behind the seat and my reference photos show that there were gaps between the canopy frame and the bulkhead. There also seemed to be gaps between the bulkhead and the cockpit side walls. I'll add the bulkhead bracing strut behind the seat headbox later. Notice the handy location to place some lead weight... Glueing the two fuselage halves together proved interesting. I once heard the expression "it fits where it touches". That applies with this kit, only the two halves don't touch very often. Note how the two halves are different lengths 😂 Looking at the seam along the spine, it might need a touch of filler... The final area to show is how the lower fuselage fits. Did I say fit? This is going to take some work... The next stage will be scratching some basic wheel bays and seeing if I can glue the lower fuselage in place. Thanks for looking in. Tom Edited May 29, 2021 by Tomjw 3 Link to comment Share on other sites More sharing options...
PlaStix Posted May 28, 2021 Share Posted May 28, 2021 Looks like you are making excllent progress Tom and I do like the work you have done in the cockpit! Very well done. Kind regards, Stix 1 Link to comment Share on other sites More sharing options...
Tomjw Posted May 28, 2021 Author Share Posted May 28, 2021 Thanks Stix 😀 Link to comment Share on other sites More sharing options...
AdrianMF Posted May 29, 2021 Share Posted May 29, 2021 Think of how nice it will be when it stops! You are making good progress. Just go one step at a time. Regards, Adrian 1 Link to comment Share on other sites More sharing options...
Tomjw Posted May 29, 2021 Author Share Posted May 29, 2021 Thanks Adrian. One step at a time is good advice. By the time is is finished, I'll have single handedly kept the putty industry going. Cheers, Tom 2 Link to comment Share on other sites More sharing options...

Recommended Posts
Create an account or sign in to comment
You need to be a member in order to leave a comment
Create an account
Sign up for a new account in our community. It's easy!
Register a new accountSign in
Already have an account? Sign in here.
Sign In Now