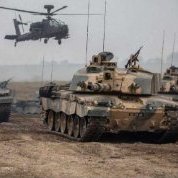
British Army Platforms Posted February 28, 2021 Author Share Posted February 28, 2021 I need a Titan, Trojan and CRARRV model, and I need them now.😂 2 2 Link to comment Share on other sites More sharing options...
British Army Platforms Posted March 1, 2021 Author Share Posted March 1, 2021 As I had decided to go over the Trumpeter model with more patience to remove seam lines, moulding artefacts and generally to make the whole model neater, here is the progress oh which I have made today. Starting with the tow cables, I used my scalpel and files to remove the seam lines and make sure the conical shape of eyelet is intact through removing sprue artefacts and any excess string that was protruding. The loop in my hand in the picture is before and the one below is after. Next I wanted to neaten up the dozer blade. Doing the same cleaning up process but also putting in this fuller between the blade and the plate which seems to protect the driver? Its hard to see in the photograph but should become a neater detail once the crud is washed out with soapy water and when it is painted! Also I added some damage to the blade. Here are some images from the general cleaning up of seams etc on some other parts: Then I spent some good time sorting out the turret. Annoyingly there is no way to have the storage boxes level, neatly attached and in the exact place all at once. I think will allot more time and filler - which I don't have - could have resolved this fitting issue. Nevertheless, I spent some time doing what I could so there was less overlapping and parallel surfaces ran along the same plane. It should look allot neater I may add, once I have washed the pieces, and these small imperfections become hidden in the paint scheme. After clean up I have decided with @diablo rsv's help, to invest in some anti slip aggregate. The challenger 2 only seems to be lightly covered, so with that in mind and that I will be brushing it on, this is what I will be using: Ammo Mig, 1/35 sand coloured anti slip paste. 6 Link to comment Share on other sites More sharing options...
Stef N. Posted March 1, 2021 Share Posted March 1, 2021 17 hours ago, British Army Platforms said: I need a Titan, Trojan and CRARRV model, and I need them now.😂 I love those monsters. Quite rapid for something that big. And I assume that building in the background is a homage to the Berlin camo scheme? It would be too much of a coincidence. 1 Link to comment Share on other sites More sharing options...
British Army Platforms Posted March 1, 2021 Author Share Posted March 1, 2021 2 hours ago, Stef N. said: I love those monsters. Quite rapid for something that big. And I assume that building in the background is a homage to the Berlin camo scheme? It would be too much of a coincidence. Aren't the so formidable. Scary how fast it goes. I would assume the Titan is about 60T as it has no turret and knowing engineers well that foldable bridge will be light and strong. Yes I did notice that too and though about commenting about it, though it would be better left as an Easter egg for someone as attentive as you to find! Certainly a fun coincidence for this topic, but I would like to think the building is such to pay tribute to the Camo. Or things would be allot more spooky. 1 Link to comment Share on other sites More sharing options...
ERK Posted March 1, 2021 Share Posted March 1, 2021 Thats some nice work - always worth doing the tidy up work you are doing - they say the "the devil is in the detail" Erk. 1 Link to comment Share on other sites More sharing options...
British Army Platforms Posted March 2, 2021 Author Share Posted March 2, 2021 Some exciting gossip for us RFM Rye Field fans! Have been speaking to the chap who runs their media avenue, and here's some of the conversation we've had. Looks like we might be able to expect a few more British vehicles! I really hope they are more modern but he wont say much more than what's below. However, knowing their current theme of tanks, a Mk IV or Chieftain etc would be extremely welcome! Link to comment Share on other sites More sharing options...
British Army Platforms Posted March 3, 2021 Author Share Posted March 3, 2021 A large update with some exciting things to talk about. I took a delivery today with lots of good bits. Before we get to that however, Progress on the model (trumpy) itself; Unfortunately the Trumpeter kit is a bit limiting in regards to the modelling of optics and fire & control sights. Most of them are covered up and not very well. In the case of the commanders TOGS there wasn't even a piece to imitate the doors closed let alone any clear pieces suggesting a camera. As a result, using a number panel from a left over sprue this is how I have solved the issue. Following this, I have also made some holes in the antenna bases, ready to receive some polymer bristles from the end of a hoover attachment! The antenna imitating bristles worked well from me in the previous challenger, but the holes should insure it is easier to attach them upright unlike how they are a little wonky on the first CR2 I flopped together where I just tried to glue the bottom of the bristle to a flat surface. Finally on 'progress made with the model', some may remember that I have made the operators hatch able to open and close, yet with the frame that the GPMG mounts to, it was obstructed from closing! In looking for some reference images I stumbled across one which tells an interesting story. When I first constructed the GPMG stand It looked like so: The two pillars that hold up the bar have an overhang and I put them on the outside. Profanity was heard after the cement had set well and as I realised this is not what the instructions say: As you can see the instructions show the overhand on the inside. However, I had to rebuild it yet again as the instructions were wrong! sweethearts. This makes sense that with the first rebuild the hatch couldn't close: It was only today that I had to rip it apart to rebuild it - which as actually fortunate as it allowed me to clean up the pieces more easily before re-reconstructing - this was prompted by that reference image I found. Below you can see it is correct for the pillars to overhang on the outside as seen in the photo below. This photo also makes me feel less frustrated at the uneven storage boxes on the turret . FOR THE EXCITING BITS! Some more Tamiya extra thin cement turned up in the delivery today, and as I stupidly spilt allot of the last bottle, I have made sure spillage won't happen again. 😂 I know bases exist to do this job, but how much cheaper and RRR is this: I really will have to be clumsy to spill it now.... Famous last words.... The next interesting arrival was of the Anti Slip paste, a new and trivial tool for me. Anyways, after brushing it on and texturing with some sponge it looks great. However several licks of paint are needed to cover the sand completely due to the self levelling nature of the paint wanting to leave the tops of the sand particles alone. Here are the test photos: Finally the best delivery items are saved for last. The Tamiya masking tape and spray cans arrived for the berlin camo! I couldn't decide between the Ocean Grey 2 which @Stef N.suggested and the Dark Ghost Grey. So I got both and tested 😂 The greys are pretty indistinguishable on the can lids, but after making a very crude test using a redundant bazooka plate, I have decided the Ghost Grey (seen lower down the test piece) matches the more light blue-grey seen on Challengers with the Berlin Camo. I will add that it looks like a better match in person, as the photos don't do the paint tones any justice. As @diablo rsv discuses in his Chieftain Mk.10 build the different scales of the same colour, and distance from viewing the colours and indeed in different lighting, the colour can look lighter or darker. To illustrate this here is the test scheme under both light produced from LED and Filament: Anyway, I'm pretty sure I am happy with the lighter grey of the two. However I'm sure that will likely change as my perfectionist genes (which oddly pay more attention to things such as paint schemes than the quality of small parts such as the dreaded grab loops on the engine bay) will try to match the colour accurately. I also noticed that starting with white paint first, on top the green colour of the moulded parts will require more layers to get good coverage. Having learnt that a whole 100ml can Is needed to cover the CR2, I cant afford two coats of white. Thus the first colour to go down in my scheme will be the grey, then white and then brown. Last naturally, as painting light colours over darker ones doesn't make sense! The other thing I noticed using the very nice Tamiya (18mm) Masking Tape, was that the lines where two colours meet are neater due to less bleeding, when the edge of the tape is used, as opposed to the edges of tape that I cut. It may not be efficient to cover the model following this principal. But if I don't cut the tape other than off the reel, I can reuse the take again. Finally in this test paint mock-up, It was made apparent how long the whole masking and painting process will take. Given I'd like sharp, clean and straight shapes to make up the camo, I'll need to take time in masking plumb and level. 5 Link to comment Share on other sites More sharing options...
ERK Posted March 3, 2021 Share Posted March 3, 2021 I feel your pain mate, I too have had destructions that show things the wrong way round - that cause a real headache. Love the paintwork though - that will look super. Erk. Link to comment Share on other sites More sharing options...
British Army Platforms Posted March 4, 2021 Author Share Posted March 4, 2021 9 hours ago, ERK said: I feel your pain mate, I too have had destructions that show things the wrong way round - that cause a real headache. Love the paintwork though - that will look super. Erk. Yea it’s slightly frustrating but I’m not too upset with Trumpeter as the rest of the model has been a class for only £20. Excited to get back on the RFM kits for the Tes however. Yea I’m hoping that although the test paint looks very scruffy, after hours of enjoyable masking, it should look good. Should it not, there’s weathering 😂 1 Link to comment Share on other sites More sharing options...
Widow 65 Posted March 6, 2021 Share Posted March 6, 2021 On 2/25/2021 at 8:25 PM, British Army Platforms said: Progress by the end of today. Having done another hour today, I started the gun mount and turret. As you can see the barrel is made and fixed now onto the Turret. There were a few detials to add to the turret and I started making the mounted GPMG 6.75mm. The operators hatch was poorly moulded meaning that you have to close it and even then the hinges don't line up. So with some modification I have made it open-able and closable, With one shortfall, which I'm curious about if its something seen on the real CR2. In this model there is one option for the hatch to have bars around it. These prevent the hatch from closing all the way!! So, this is the D mount for the Loader's Machine gun. I believe there are still fitted on some CR2s but the majority have the pintle mount. The D mount is a bid of a dodgy mount as it is spring loaded and can release from its lock when knocked hard, which happens regularly when travelling at full tilt across rough ground. The result is that if the loader is not careful he will get a face full of L7. Another classic design fault. 1 1 Link to comment Share on other sites More sharing options...
British Army Platforms Posted March 6, 2021 Author Share Posted March 6, 2021 9 hours ago, Widow 65 said: So, this is the D mount for the Loader's Machine gun. I believe there are still fitted on some CR2s but the majority have the pintle mount. The D mount is a bid of a dodgy mount as it is spring loaded and can release from its lock when knocked hard, which happens regularly when travelling at full tilt across rough ground. The result is that if the loader is not careful he will get a face full of L7. Another classic design fault. How are they still being used?! Hopefully with less spring loaded issues I hope. 1 Link to comment Share on other sites More sharing options...
ivan-o Posted March 7, 2021 Share Posted March 7, 2021 Very good progress indeed👍 In an earlier reply I did say the Trumpy kit wasn’t a match for the RFM one😀. just a quick one though the gap on the dozer blade should be there as it is hinged,you should not be using the frame on the loaders hatch for the gimpy. that was ditched for the pintle mount quite quickly. Ivan 1 Link to comment Share on other sites More sharing options...
British Army Platforms Posted March 7, 2021 Author Share Posted March 7, 2021 9 hours ago, ivan-o said: Very good progress indeed👍 In an earlier reply I did say the Trumpy kit wasn’t a match for the RFM one😀. just a quick one though the gap on the dozer blade should be there as it is hinged,you should not be using the frame on the commanders hatch for the gimpy. that was ditched for the pintle mount quite quickly. Ivan Yea your certainly right 😂. Which gap are you referring to? And yea okay, think I’ll build the pintle mount if it’s to be modern. Thanks ! 1 Link to comment Share on other sites More sharing options...
British Army Platforms Posted March 8, 2021 Author Share Posted March 8, 2021 Quick update after a long weekend of assessment at Westbury Had a quick little sit down with the models today. Firstly I rearranged and corrected the Aerial / Antenna on the finished RFM Chally. There are now only 2 on the turret and are much longer. This better matches the way CR2's are seen today. Additionally, I added on the missing one that comes from the can storage. Then as suggested by some of you, I built the pintle mount for the Trumpeter as if its going to be modern it better conform to todays standards. It was much like a brain transplant today moving the hatch from the old part to the new. Anyway, I am happier as it is more accurate and now the hatch can also close fully! As you may have noticed I have also found the cutting mat! This was useful for cutting masking tape which you will see below and will be used primarily for this when masking the whole tank for the berlin scheme. But for the show stopper of todays post, I had a crack at anti-slip'ing the turret! Following the distribution from some sources and other models, this is how I have covered up the shooty bit. I think it doesn't look too bad given the application was by hand. Anyway, with some paint over the top with a scheme that breaks up the panel lines and defining features of the tank, it shouldn't be so obvious where some parts are slightly messy. 6 Link to comment Share on other sites More sharing options...
British Army Platforms Posted March 14, 2021 Author Share Posted March 14, 2021 Didn't really do allot this week so dedicated a whole day to the chally yesterday. Started by sorting out the rubber tracks, making them pucker. I shortened the set so it has the same links as the RFM plastic tracks, which do still connect when installed although the rubber does stretch slightly. However, the amount of care used when finally installing and connecting them will determine whether they break or not. I did cut out a section between the pads as when connecting a small part of the pads are moulded on both ends which prevents better mating. Spot the connection point.... Next I glued the custom fixing for the hydraulic type part of the dozer mount. When removing excess rod, i could easily clip one side off but had to use the sharp edge of a file to remove the other: As some may recall I turned my nose up at spending time on the idler wheel, fixing its hexagonal miss-moulding. Well I sorted that out too😂 Then I finished off the anti-slip texturing which is by far one of the most rewarding processes I think. The texture looks great IMO. Again being careful - this time with the hull - not to cover the wrong features. And with the first few coats of the berlin camo leaving a turquoise looking challenger (The grey is the right choice I think, and won't look so odd when the rest of the camo is painted) I am extremely happy with how the texture looks through paint! The I spent about half the day masking. About half way there till I can apply white, repeat and then brown. 7 Link to comment Share on other sites More sharing options...
ERK Posted March 14, 2021 Share Posted March 14, 2021 Looking good mate - masking is always the pain bit. Erk. 1 Link to comment Share on other sites More sharing options...
mick Posted March 14, 2021 Share Posted March 14, 2021 great work 1 1 Link to comment Share on other sites More sharing options...
British Army Platforms Posted March 14, 2021 Author Share Posted March 14, 2021 After a very very very very very long evening of masking.... its ready for colour no. 2 - white. Visibly it doesn't look as if I have made allot of change happen but there is allot of work on the hull. 3 Link to comment Share on other sites More sharing options...
Stef N. Posted March 14, 2021 Share Posted March 14, 2021 I wasn't sure where it was heading with the texture but it does look good under paint. Nice job.👍 1 1 Link to comment Share on other sites More sharing options...
British Army Platforms Posted March 14, 2021 Author Share Posted March 14, 2021 16 minutes ago, Stef N. said: I wasn't sure where it was heading with the texture but it does look good under paint. Nice job.👍 Yea, looking back at the pictures the contrasting colours and my semi inconsistent application did make me question how it was going to turn out. The only worry now is whether a total of 4 coats of paint will hide the details or bridge the wells created by the texture. 2 Link to comment Share on other sites More sharing options...
Stef N. Posted March 14, 2021 Share Posted March 14, 2021 You should be fine I think. Tamiya cans are quite fine paint so shouldn't be too overwhelming. Only one way to find out though.😀 1 Link to comment Share on other sites More sharing options...
British Army Platforms Posted March 14, 2021 Author Share Posted March 14, 2021 1 hour ago, Stef N. said: I wasn't sure where it was heading with the texture but it does look good under paint. Nice job.👍 Not the best photo, but also pleased with how the texture looks on closer inspection too, with the gaps left between panel lines and divits. 42 minutes ago, Stef N. said: You should be fine I think. Tamiya cans are quite fine paint so shouldn't be too overwhelming. Only one way to find out though.😀 Yea I think we should be good. But as you say. We’ll find out this week 😂 4 Link to comment Share on other sites More sharing options...
ERK Posted March 14, 2021 Share Posted March 14, 2021 I do like that texture - it came out really well. Erk. 1 1 Link to comment Share on other sites More sharing options...
British Army Platforms Posted March 17, 2021 Author Share Posted March 17, 2021 Interestingly stumbled across some images from this tank computer game, where someone from the community made a Berlin Scheme for the In-game Challenger 2. They make some decent reference photos. However, I don't like the way the scheme is applied on the large enhanced armour. Perhaps it was based on the scheme seen on Chieftains as there are no images of real challengers in Berlin scheme with any other side skirts apart from the Bazooka plates. 2 Link to comment Share on other sites More sharing options...
British Army Platforms Posted March 17, 2021 Author Share Posted March 17, 2021 (edited) Made progress with the painting. I planned the scheme to be painted in a specific order to help with the issue where the white paint didn't cover the model's texture well and pooled. Unfortunately, painting the grey first then the white didn't actually solve this problem and I had to take my time with several coats to insure good coverage. Sometimes the white did collect leaving horrible consistency of tone. The other issue was even with several coats the texture made this odd movement of the pain worse as the pain was reluctant to stay on top of all the mini peaks of the anti slip texture and collected in the troughs. This was solved by allot of coats, which also solved the problem where the grey colour came through the white making it a blue-white wash. However, two steps forward of course meant two steps back. In these thicker coats the texture was sometimes lost. Also, the running nature of the white paint which I am naming 'obnoxious self-levelling' meant (as you will see later 💫) it crept through some imperfections that appeared in my generally watertight masking. I have been amending that and hopefully with weathering and chipping it wont be a problem. All that said, here is the model once the white paint shift was complete. Most of the texture isn't lost which is good, and all issues above have and will be resolved hopefully. Edited March 17, 2021 by British Army Platforms 5 Link to comment Share on other sites More sharing options...

Recommended Posts
Create an account or sign in to comment
You need to be a member in order to leave a comment
Create an account
Sign up for a new account in our community. It's easy!
Register a new accountSign in
Already have an account? Sign in here.
Sign In Now