Dandie Dinmont Posted January 9, 2021 Share Posted January 9, 2021 A happy new year to you all (if it's not too late to say that)! I thought I would greet the new year by starting a new build and scanning the stash my eye was caught by this (apologies for the cat which is aftermarket and not included in the box): It's an Aldi purchase from a couple of years ago. I have been unexpectedly excited by the revelation that Arma are about to bring out a new P51B/C so I thought it would be nice to have a go at what seems to be one of the better 1/72 examples of the Mustang currently available. I started my research for the build by trying to establish the colours of the cockpit, wheel wells and other interior bits and discovered that I had opened a can of worms of considerable size. I sometimes wonder, is there a World War 2 aircraft on any side where the manufacturers left comprehensive documentation on which colour each component of the aircraft should be painted, supported by contemporary colour photographs and films? Eventually, I decided to go with a mixture of Tamiya XF-3 and XF-5 for the cockpit interior green with XF-4 representing Yellow Zinc Chromate primer on most of the rest of interior. This may, or may not be correct depending on when this particular P51D was produced but it's close enough for me. Of course I didn't have most of these colours in my collection so there was an unavoidable delay while I procured them via the click and collect service of my LMS. Somehow an Airfix 1/72 Typhoon (1940s vintage) fell into the basket at the same time. Shocking. For some reason, probably hanging out in too many @CedB builds, I decided that this pony would feature a pilot. This is something I almost never do after the childhood trauma I suffered when my younger, figure mad, brother would regularly crack off the (inevitably glue fume clouded) canopies of my latest masterpieces to get at the intrepid aviators within, but time (rather too much of it to be honest) heals all wounds. To be frank, I think I decided to go down this path because I couldn't be bothered scratching belts for the seats. Anyway, here is the bold flyboy after some initial painting: Look at that manspreading! For the base blue coat, I used a Humbrol enamel which I had picked up at the same time as an Airfix 1/48 Hurricane. Too late, I remembered that I really hate the smell of enamel paint The Hurricane was actually a Sea Hurricane so the colour was probably more suited to a matlow's trews. Still, with the canopy closed, who's going to notice? A question for any P51 experts who may be passing. For this build I am stealing blind from being inspired by @Cookenbacher's eponymous build of the same kit. As part of this, he filled in a lot of the panel lines on the wings as this was apparently done for Natural Metal machines. My question is: would this also have been done for the painted examples in use by the RAF? Thanks for reading, Craig. 5 Link to comment Share on other sites More sharing options...
Cookenbacher Posted January 9, 2021 Share Posted January 9, 2021 Off to a great start Craig, and glad to see that your Mustang will be piloted. As far as the puttied wing panel lines, I think that painted airframes would have them too, but hopefully someone with much more knowledge on the subject will be along to answer definitively. Either way, this detail will be much more obscure on a camouflaged aircraft, and you should only go through the trouble if you think it will add to your enjoyment of the project - both in construction and subsequent admiration on the shelf - just my opinion of course! 1 Link to comment Share on other sites More sharing options...
Dandie Dinmont Posted January 10, 2021 Author Share Posted January 10, 2021 19 hours ago, Cookenbacher said: Off to a great start Craig, and glad to see that your Mustang will be piloted. As far as the puttied wing panel lines, I think that painted airframes would have them too, but hopefully someone with much more knowledge on the subject will be along to answer definitively. Either way, this detail will be much more obscure on a camouflaged aircraft, and you should only go through the trouble if you think it will add to your enjoyment of the project - both in construction and subsequent admiration on the shelf - just my opinion of course! Thanks Cookie. I think you're right, if no-one comes up with a definitive answer, I'll see how I feel when the time comes. Must remember, the point of all this is to have fun! I got a little more done today. First up, I did a test fit of the fuselage sides and cockpit floor to see exactly what would be visible. It's hard to be sure but I think the fuselage sides may be slightly warped. In general, the kit moulds don't seem to be holding up that well, with a few of the finer parts being afflicted with flash or slight mis-alignments. Next, various bits got some paint. and Percy the Pilot got a little more attention The sharp eyed may notice that I have actually painted the control column, widely regarded as a part that is impossible to remove in less than three pieces Still, life loves an optimist eh? Thanks for reading, Craig. 6 Link to comment Share on other sites More sharing options...
Dandie Dinmont Posted January 27, 2021 Author Share Posted January 27, 2021 And here is Percy finished, undoubtedly the star of the build: Considering that this is my first attempt at figure painting in decades, I'm pretty pleased with how he has turned out. I added his eyes and lips with some weathering pencils I bought some time ago and have never quite worked out how to use. I think I may have overdone things but I doubt it will be too noticeable once everything is closed up. Next the cockpit was completed For a few heady moments, I thought I would achieve everlasting fame with my fellow modellers by actually including an intact control column but it was not too be, it broke while being fitted into place. Sadly, this means that Percy will be without a means of controlling his steed but I'm sure he'll be fine. At least, unlike many of his fellows, he got to retain all of his limbs. Note also the use of a silver weathering pencil on the radio boxes behind the pilot. Well, I had the packet out... Next the cockpit was glued to one of the fuselage sides, no easy task considering the banana like contours of the part and when that had dried, the fuselage sides were joined with the aid of many clamps and no little swearing. While I had the TET out, I also joined the wings together. These days I usually prefer to join the bottom of the wings to the fuselage and then attach the tops in such a ways as to minimise the gap between the wing root and the fuselage but because the tops of the wings incorporates the tops of the undercarriage bays, I wasn't sure whether this would be a winner. We will soon see whether or not this was a ghastly error. Also, still no decision on whether I'm going to fill the panel lines in the wing. It may depend on how much work the other seams require. Thanks for reading, Craig. 2 Link to comment Share on other sites More sharing options...
2996 Victor Posted January 27, 2021 Share Posted January 27, 2021 Hi Craig, Not sure how I missed this, but a great start on your Pony! I'll follow along if I may, as I suspect there may be one joining my to-do list in the near future! Warping on the fuselage halves? Barely visible, I'd say but you've got it under control. I was rooting for you on the control column - the Airfix Tomahawk is just the same, and of the three Tomahawk kits I've started, I managed to get only one column parted from the sprue in one piece, and then I promptly broke it! But I have to say that Percy the Pilot is a masterpiece, and I've no doubt the local Land Girls will be queuing up to dance with him at the next local hop! Cheers, Mark 1 Link to comment Share on other sites More sharing options...
Dandie Dinmont Posted January 27, 2021 Author Share Posted January 27, 2021 3 minutes ago, 2996 Victor said: But I have to say that Percy the Pilot is a masterpiece, and I've no doubt the local Land Girls will be queuing up to dance with him at the next local hop! Thanks for the kind words Mark and the good thing is Percy won't even have to hop since I managed to cram all of his legs into the cockpit! Craig. 1 Link to comment Share on other sites More sharing options...
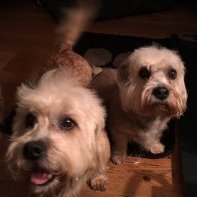
2996 Victor Posted January 27, 2021 Share Posted January 27, 2021 22 minutes ago, Dandie Dinmont said: Percy won't even have to hop since I managed to cram all of his legs into the cockpit! He'll be thankful he's not flying one of @CedB's aeroplanes I also meant to ask where you got your aftermarket cat. I find mine is a great help..... 2 Link to comment Share on other sites More sharing options...
dogsbody Posted January 27, 2021 Share Posted January 27, 2021 Looking good! Are your undercarriage legs okay? The ones in my kit are both warped. Regarding the putty on the wings of Mustangs. I believe it was done to improve the laminer flow characteristics of the wing and was done on all Mustangs, painted camo or aluminum. Somewhere on this forum or online, you can find diagrams that show where the putty was. Chris 3 Link to comment Share on other sites More sharing options...
thorfinn Posted January 27, 2021 Share Posted January 27, 2021 10 minutes ago, dogsbody said: Regarding the putty on the wings of Mustangs. I believe it was done to improve the laminer flow characteristics of the wing and was done on all Mustangs, painted camo or aluminum. Entirely correct. It was a 'laminar flow' thing...a design feature...regardless of colors or operating arm. 3 Link to comment Share on other sites More sharing options...
Dandie Dinmont Posted January 28, 2021 Author Share Posted January 28, 2021 19 hours ago, 2996 Victor said: I also meant to ask where you got your aftermarket cat. I find mine is a great help..... We don't really get our cats. They just sort of show up and move in, sometimes within hours of the previous incumbent going to the great litter tray in the sky. In what way do you find yours a great help? Mine mostly leave hairs everywhere, insist on occupying most of the cutting mat so I'm reduced to working in a tiny corner, and make me sneeze (I am allergic to cats. So why do we have them? Don't ask...). It does have the benefit of giving me an excuse for the shoddy results I produce though. 17 hours ago, dogsbody said: Are your undercarriage legs okay? The ones in my kit are both warped. Just had another look and they're ok, I think. It seems to be the major components like the fuselage halves and the bottom wing that are warped in my kit. 17 hours ago, dogsbody said: Regarding the putty on the wings of Mustangs. I believe it was done to improve the laminer flow characteristics of the wing and was done on all Mustangs, painted camo or aluminum. Somewhere on this forum or online, you can find diagrams that show where the putty was. 17 hours ago, thorfinn said: Entirely correct. It was a 'laminar flow' thing...a design feature...regardless of colors or operating arm. Thanks chaps. You have shamed me into doing some actual research and I've found a suitable diagram. No idea if it matches up in any way with the panel lines Airfix have provided but puttied up the wings shall be! Craig. 3 Link to comment Share on other sites More sharing options...
2996 Victor Posted January 28, 2021 Share Posted January 28, 2021 10 minutes ago, Dandie Dinmont said: We don't really get our cats. They just sort of show up and move in, sometimes within hours of the previous incumbent going to the great litter tray in the sky. I think most cats do that, don't they ones I've had in the past have generally moved out and and taken up residence with the neighbours. Makes me sound like a bad owner, but I'm not! Honest! 23 minutes ago, Dandie Dinmont said: In what way do you find yours a great help? Daisy is very good at tidying up - she removes lots of bits and pieces when I'm not looking. Mostly things I need, of course, but you can't have everything, I suppose! She seems quite keen on the Airfix Spitfire Mk.Vc slipper tank. Last evening she took a fancy to a piece of sandpaper I was using, and had momentarily put down. It's now her latest favourite toy...... 17 hours ago, dogsbody said: Regarding the putty on the wings of Mustangs. I believe it was done to improve the laminer flow characteristics of the wing and was done on all Mustangs, painted camo or aluminum. Somewhere on this forum or online, you can find diagrams that show where the putty was. I never knew this! So all P-51s, even NMF examples, actually had their wings filled, painted and lacquered. Would I be right in saying, then, that apart from detachable panels the wing surface should be smooth? Cheers, Mark Link to comment Share on other sites More sharing options...
Dandie Dinmont Posted January 29, 2021 Author Share Posted January 29, 2021 On 1/28/2021 at 12:31 PM, 2996 Victor said: I never knew this! So all P-51s, even NMF examples, actually had their wings filled, painted and lacquered. Would I be right in saying, then, that apart from detachable panels the wing surface should be smooth? I believe (after a hasty trawl through the internet) that only the front third of the wings were so treated. I also found a useful image at: http://www.arcforums.com/forums/air/index.php?/topic/21362-mustang-wings-and-panel-seams/page/6/&tab=comments#comment-2965871 Amazingly, this matches up pretty well with the panels as depicted in the airfix kit so that's what I'll be following. At some point. Craig. 1 1 Link to comment Share on other sites More sharing options...
2996 Victor Posted January 29, 2021 Share Posted January 29, 2021 11 minutes ago, Dandie Dinmont said: I believe (after a hasty trawl through the internet) that only the front third of the wings were so treated. I also found a useful image at: http://www.arcforums.com/forums/air/index.php?/topic/21362-mustang-wings-and-panel-seams/page/6/&tab=comments#comment-2965871 Amazingly, this matches up pretty well with the panels as depicted in the airfix kit to that's what I'll be following. At some point. Craig. Hi Craig, thanks for the extra info and the link, all very interesting and something to bear in mind for the future. Good that Airfix seem to have done their homework, hopefully Arma Hobby will have as well when they release their kit in due course. Kind regards, Mark 1 Link to comment Share on other sites More sharing options...
Lewis95 Posted January 29, 2021 Share Posted January 29, 2021 Looks like your cat is jealous of the pony. She's coming along nicely though. And pilots are mandatory in all my builds if I can, as well as fully crewed bombers. If it's any consolation, my long haired cat won the award for wettest cat in Wales for his valiant puddle jumping skills. My short haired tortoishell put up a good effort to bag 2nd place in the Wettest Cat in Wales competion. Their podium of choice? My cutting mat. 2 Link to comment Share on other sites More sharing options...
dogsbody Posted January 29, 2021 Share Posted January 29, 2021 2 hours ago, Dandie Dinmont said: I believe (after a hasty trawl through the internet) that only the front third of the wings were so treated. I also found a useful image at: http://www.arcforums.com/forums/air/index.php?/topic/21362-mustang-wings-and-panel-seams/page/6/&tab=comments#comment-2965871 Amazingly, this matches up pretty well with the panels as depicted in the airfix kit so that's what I'll be following. At some point. Craig. Yeah! That's what I was talking about. Chris 1 Link to comment Share on other sites More sharing options...
Dandie Dinmont Posted January 31, 2021 Author Share Posted January 31, 2021 On 1/27/2021 at 3:09 PM, Dandie Dinmont said: We will soon see whether or not this was a ghastly error. Of course it was. Mere words cannot express the emotions I felt when I realised I hadn't opened up the holes for the drop tanks in the lower wing so instead here's some emojis: "What a plonker", to quote a beloved sitcom character. I am now involved in detailed research trying to prove that RAF P51s in Italy were known to fly missions without drop tanks. Modelling isn't often described as an edge of the seat activity but it can be for me Still, despite an aching bum bone, I got a little more done yesterday, namely filling in the much debated panel lines of the wings. For reasons, I cannot explain, I took two different approaches to this filling the tops of the wings with PPP applied with the Mk. 1 forefinger and the lower surfaces with Mr. Dissolved Putty applied with the point of a pin, though if doing this again, I think I would sacrifice a fine paintbrush to do the job. I've read that you can clean brushes of MDP with TET but what do you then use to clean off the TET? It's a mystery. The MDP approach certainly looks neater at the moment but the truth will become clear once the sanding and smoothing starts. Progress on this may slow down a little for a wee while as a recent birthday has provided me with another distraction which may be of interest to @2996 Victor at least if his forum picture is anything to go by. I've been meaning to ask, is that a J94 Mark? Thanks for reading, Craig. 2 Link to comment Share on other sites More sharing options...
2996 Victor Posted January 31, 2021 Share Posted January 31, 2021 Hi Craig, I've just had a look at your loco build - what an excellent thing! I can see one coming my way in the not too distant future My photey isn't a J94, although it looks quite similar from that angle. Its actually one of a class of three 0-6-0 saddle tanks built by WG Bagnall of Stafford, known as the "New Standard 18" Class". They were constructed in 1951 for working at the Port Talbot Steelworks. They were named after the RAF V-Bombers, c/n 2994 Vulcan, c/n 2995 Valiant and c/n 2996 Victor. They worked the steelworks until 1957 when they were replaced by diesel locomotives. Vulcan and Victor were then sold to the Austin Motor Company and worked at Longbridge until 1971, Valiant was sold to a scrap dealer who sold her on to the National Coal Board, where she worked until 1967 when her firebox was failed and she was scrapped. Vulcan and Victor were bought by the fledgeling West Somerset Railway in 1973, and Victor hauled the first post-preservation trains in 1976 alongside GWR Pannier Tank 6412. Vulcan was also brought into use until 1986. Vulcan is currently on the North Tyneside Steam Railway, and Victor is on the Lakeside & Haverthwaite Railway. I remember seeing Vulcan, Victor and 6412 as youngster, as I grew up just outside Taunton. The West Somerset was my local line, and I've got happy memories of 2996 blasting up Crowcombe Bank Cheers, Mark Link to comment Share on other sites More sharing options...
2996 Victor Posted February 12, 2021 Share Posted February 12, 2021 Hi Craig, Just wondering how the Mustang was progressing? Mine have arrived but I can't make a start yet as I forgot to order any zinc chromate yellow and green. Plus I really need to finish something else first. Looking forward to seeing the next instalment. Cheers, Mark 1 Link to comment Share on other sites More sharing options...
Dandie Dinmont Posted February 20, 2021 Author Share Posted February 20, 2021 Sorry for the delay in recent updates chaps. Modelling has been taking place but my muse has been failing me as far as reporting progress goes. The freshly puttied wings were smoothed and then they and the tail feathers were attached to the fuselage. By and large, they fitted pretty well, apart from forward of the wings where a couple of mysterious holes appeared. To be fair, this may have been something of a self-inflicted injury since the front of the wings hadn't been that great a fit anyway, and I may have been a little too enthusiastic with my sanding. Anyway, my new favourite filler, Mr. Dissolved Putty was liberally blobbed on everywhere a seam might possibly lurk and then sanded away. I used these, which I had come across in the back of a drawer. No idea when I bought them but I must confess, I do have a bit of an abrasives problem. They worked pretty well. Finally, I took a leaf from Cookie's book and painted all the seams and filled in panel lines with a coat of yellow zinc chromate to see how things were looking. First impressions were good but the real test will come when I sand the YZC back. I don;t think I've mentioned this but I had an ulterior motive in starting this build. I have a Spitfire build in progress which has been going well but is now at the point where paint is going to come into the equation in a serious way. Having had some setbacks in the painting field recently, I conceived the cunning plan of building a similarly hued test piece which I could experiment with first and try and get the disasters out of the way. Problem is, I'm pretty chuffed with the way the Mustang is going and now don't want to muck it up. Looks like I need to start building something else. More news as it happens, Craig. 4 Link to comment Share on other sites More sharing options...
Marklo Posted February 20, 2021 Share Posted February 20, 2021 (edited) On 1/28/2021 at 11:56 AM, Dandie Dinmont said: We don't really get our cats. They just sort of show up and move in, sometimes within hours of the previous incumbent going to the great litter tray in the sky. Funny you should say that I’ve had many cats over the years and only went looking for a cat once. My current cat (Sox) is my next door neighbours cat who has basically moved in because they don’t let him into the house and he gets better food from us too. My previous cat (Snoball) was a stray who just turned up a few weeks after the death of my previous cat. His predecessor (Pip, my avatar) was born in my back garden and was from the second litter of kittens that his mother ( who we named Molly after we eventually tamed her) and was so friendly we kept him and homes his brothers and sisters. And so on. liking the Mustang too I built one of these a year or too ago d as me it’s a nice little kit. On puttying panels I had heard of FW190 ground crew doing this and getting a small ( 5kph) speed increase out of it and if Luftwaffe directives absolutely banning the practice because of the amount of work involved that could be more productively used elsewhere. Edited February 20, 2021 by Marklo 2 Link to comment Share on other sites More sharing options...
2996 Victor Posted February 20, 2021 Share Posted February 20, 2021 Craig, You're making great progress on the Mustang, and it's really coming together nicely! I couldn't help myself and had to start one of mine, still waiting for the YZC paint to arrive, but doing small bits in between painting other things. Hope the wing seam filling works nicely - I'm going to have to do that soon! Kind regards, Mark 1 Link to comment Share on other sites More sharing options...
Dandie Dinmont Posted February 22, 2021 Author Share Posted February 22, 2021 On 2/20/2021 at 9:17 PM, 2996 Victor said: Craig, You're making great progress on the Mustang, and it's really coming together nicely! I couldn't help myself and had to start one of mine, still waiting for the YZC paint to arrive, but doing small bits in between painting other things. Hope the wing seam filling works nicely - I'm going to have to do that soon! Kind regards, Mark Good stuff! Are you doing a WIP? Craig. 1 Link to comment Share on other sites More sharing options...
Dandie Dinmont Posted February 22, 2021 Author Share Posted February 22, 2021 On 2/20/2021 at 7:07 PM, Marklo said: Funny you should say that I’ve had many cats over the years and only went looking for a cat once. My current cat (Sox) is my next door neighbours cat who has basically moved in because they don’t let him into the house and he gets better food from us too. My previous cat (Snoball) was a stray who just turned up a few weeks after the death of my previous cat. His predecessor (Pip, my avatar) was born in my back garden and was from the second litter of kittens that his mother ( who we named Molly after we eventually tamed her) and was so friendly we kept him and homes his brothers and sisters. And so on. Likewise, we've had 10 cats in total (Unless I've missed out any). 3 we actually made an effort to acquire, 2 were neighbour's cats who moved in, two were found in the corner of a farmyard and dumped on us by a local farmer and the other three just showed up. I think there must be a sign on our gate that only cats can see or something. On 2/20/2021 at 7:07 PM, Marklo said: liking the Mustang too I built one of these a year or too ago d as me it’s a nice little kit. On puttying panels I had heard of FW190 ground crew doing this and getting a small ( 5kph) speed increase out of it and if Luftwaffe directives absolutely banning the practice because of the amount of work involved that could be more productively used elsewhere. I hadn't heard that before, that's really interesting. I do wonder how much extra performance the whole puttying of the Mustang wing produced despite all the talk of it being an essential feature of the laminar flow wing design. Craig. 2 Link to comment Share on other sites More sharing options...
2996 Victor Posted February 22, 2021 Share Posted February 22, 2021 12 minutes ago, Dandie Dinmont said: Good stuff! Are you doing a WIP? Craig. Hi Craig, thanks! I've been taking a few photos as I'm going along, but not started a WIP yet, but I do intend to. I haven't got very far as yet, and didn't make much progress on anything over the weekend! Cheers, Mark 1 Link to comment Share on other sites More sharing options...
Dandie Dinmont Posted February 28, 2021 Author Share Posted February 28, 2021 Enough of this cat chit chat, back to modelling! Once the YZC had dried, I settled down to some serious sanding and smoothing. It looked like both panel line filling methods had worked pretty well but of course the proof will be in the priming. The frame of the sliding part of the canopy was attached with some difficulty, since it appeared to have been made for a considerably thinner aircraft, then the canopy and windscreen were masked and attached. Next, the flaps were added to the wings. I was impressed to see that Airfix had included two sets of flaps, one retracted and one deployed, but was less impressed when the retracted option showed little inclination to slip into place. Radical surgery on the locating tabs did the trick however, so much so that after dry fitting them, they refused to come off again. Accepting my fate, I simply flooded the joins with TET. There was no escaping the fact. It was time to break out the airbrush. I had not been looking forward to this since the last time I used the airbrush in anger, things did not go well. I attribute this to the fact that I was using a new (to me) primer, Stynylrez, and didn't really know what I was doing. I could have chucked the stuff away but I am too mean to waste it and besides, others swear by the stuff so with advice from a number of fellow Britmodellers, particularly @CedB, I filled every available orifice on the pony with some washing up sponge and girded my loins. But my loin girding was in vain because there was another problem You wouldn't believe it from his "mess with me and lose a couple of pints of blood" expression but Rudi really is a sweet natured lad. Nevertheless, I thought it prudent to retreat for the day and headed downstairs musing on whether this might offer an explanation for all the black hairs that keep mysteriously appearing on my finished models. This morning, I sneaked back into the man-cave, hoovered out the spray booth and set to work. What do you know? It all seemed to go pretty smoothly. I shall make a closer examination later though I fear I can already see lines where no lines should be. Back to the Mr. Dissolved Putty! Thanks for reading, Craig. 3 Link to comment Share on other sites More sharing options...

Recommended Posts
Create an account or sign in to comment
You need to be a member in order to leave a comment
Create an account
Sign up for a new account in our community. It's easy!
Register a new accountSign in
Already have an account? Sign in here.
Sign In Now