Cerberus Posted January 22, 2021 Share Posted January 22, 2021 On 12/12/2020 at 14:04, NIK122 said: The towing hooks front and back either have basic or missing detail that I have had a go at improving. I don't know what the parts are called, maybe one of you could help with this? Here is a reference picture. They are spring loaded locking latches/tabs designed to stop the eye of the towing cable from jumping off the towing hook. Very nice build btw, It's good to see an old Tamiya kit getting some added extras 2 Link to comment Share on other sites More sharing options...
f matthews Posted January 22, 2021 Share Posted January 22, 2021 This kit was my first armour kit when I returned to modelling in the early 1990s. A fun build although mine only had the OTM PE set (that was cutting edge back then). I have a Miniart 122 in the stash that is so much nicer. Great build log you have going-I’m watching for sure. 1 Link to comment Share on other sites More sharing options...
NIK122 Posted January 29, 2021 Author Share Posted January 29, 2021 Good morning. A little more. Finally ready to start painting. The model has been shot with 'Ultimate self levelling surface primer'. I'm waiting on a replacement barrel as the CMK offering I initially ordered is a bad fit and to my eye looks incorrect. The surface texture has worked well I think. This will help add interest to the painting and weathering of the vehicle as its just one colour. Next time I post the pre shading and colour modulation will have been added and maybe even some decals. Also I hope the beginnings of a small base. Until next time thanks for looking 7 Link to comment Share on other sites More sharing options...
NIK122 Posted March 4, 2021 Author Share Posted March 4, 2021 Good evening. Its been a while but now back on the bench and painting. Here are a few pictures to date. I'm not sure that the pre-shading was necessary but I went with it anyway. The aftermarket barrel from Eduard was a much better fit than the first one ordered but the end of it needed thinning out. This shows the first modulation coat of MIG Russian dark base. All the modulation colours have been added in this shot. MIG Russian base, light base and high lights. Finally a highly thinned coat of Russian base was added to bring back what to my eye is the distinctive Russian green colour. There is still a way to go with this project and I'm currently working on painting the tracks which I will post next time. As always thanks for looking 9 Link to comment Share on other sites More sharing options...
Cerberus Posted March 5, 2021 Share Posted March 5, 2021 Looks very nice indeed 👍 Matt 1 Link to comment Share on other sites More sharing options...
NIK122 Posted March 11, 2021 Author Share Posted March 11, 2021 Good evening. A few pictures of progress. I've been weathering the lower hull, wheels and tracks. I didn't spend much time on effects here as its nearly all hidden. Light earth wash and dark earth splatters on the lower hull. Just a light wash on the road wheels. In natural light the superstructure texture is a lot more clear. The top track shows gun metal base with a track wash and black pin wash. The lower track has had rust pigments added. I sealed the tracks and it dulled the effect too much I think, which was a shame. In the future an experiment with different sealants is needed. Maybe someone could recommend something. Adding dark steel pigment possibly didn't help. Sticking with it, it was sealed again and a light earth wash added. The wash has helped but there is room for improvement. Finally in position. The hubs on the road wheels need some attention. Thanks for looking 9 Link to comment Share on other sites More sharing options...
Vaastav Posted March 11, 2021 Share Posted March 11, 2021 Excellent work. Looks very real. 1 Link to comment Share on other sites More sharing options...
edjbartos Posted March 11, 2021 Share Posted March 11, 2021 Very nice work, the tracks look great.... Ed 1 Link to comment Share on other sites More sharing options...
Jasper dog Posted March 11, 2021 Share Posted March 11, 2021 Looking really good, tracks and wheels look great! 1 Link to comment Share on other sites More sharing options...
NIK122 Posted March 15, 2021 Author Share Posted March 15, 2021 Good evening. A little more painting done. Lots of chipping using a sponge and brush. Maybe too much but the plan is to tone everything down with a dust wash and pastels eventually. I've got a bit ahead of myself adding dust effects to the running gear before chipping so I need to return to and correct this. Here are the results so far. Thanks for looking 9 Link to comment Share on other sites More sharing options...
echen Posted March 16, 2021 Share Posted March 16, 2021 Very nice. Like the weathering so far. Keep up the good work.👍 1 Link to comment Share on other sites More sharing options...
Nenad Ilijic Posted March 16, 2021 Share Posted March 16, 2021 Nice work! I usually try to avoid sealing tracks at all. Didn't found any medium so far that will not dull it more than I would like. And I don't find it necessary unless you handle model a lot once it's finished. Nenad 1 Link to comment Share on other sites More sharing options...
NIK122 Posted March 17, 2021 Author Share Posted March 17, 2021 13 hours ago, Nenad Ilijic said: Nice work! I usually try to avoid sealing tracks at all. Didn't found any medium so far that will not dull it more than I would like. And I don't find it necessary unless you handle model a lot once it's finished. Nenad Thanks Nenad. The problem I figured would be having to handle the tracks when installing them. The other problem is applying a dust wash without sealing. I think in the future I may try pastels for the dust effects on the tracks. When the model is fixed to its base I will have another go at adding some rust to the exposed portions of the tracks. Thanks for your advice, its appreciated. Link to comment Share on other sites More sharing options...
NIK122 Posted March 28, 2021 Author Share Posted March 28, 2021 Hello. I hope everyone is safe and well. A little more. I wasn't going to add unit numbers but changed my mind. Some pictures of the process follows. I've used the decals as masks by cutting out the numbers. This was done as carefully as I could but without being too precious as I believe they were hand painted by the crews. As you can see its a bit rough. The test has turned out pretty well I think. Airbrushed on not too heavily. The shot below has some chipping added and is in natural light which shows the colours better. The aim is to washout the white of the numbers with oils. Thanks for looking 11 Link to comment Share on other sites More sharing options...
Bullbasket Posted March 28, 2021 Share Posted March 28, 2021 That's looking really good so far. The paint chipping is very realistic, and I especially like the way that you've done those numbers. Great job. John. 1 Link to comment Share on other sites More sharing options...
NIK122 Posted April 5, 2021 Author Share Posted April 5, 2021 On 3/28/2021 at 3:57 PM, Bullbasket said: That's looking really good so far. The paint chipping is very realistic, and I especially like the way that you've done those numbers. Great job. John. Thanks John. Where abouts in France are you if you don't mind me asking? Link to comment Share on other sites More sharing options...
Bullbasket Posted April 5, 2021 Share Posted April 5, 2021 10 minutes ago, NIK122 said: Thanks John. Where abouts in France are you if you don't mind me asking? Dept.79, about 40kms south of Poitiers. 1 Link to comment Share on other sites More sharing options...
NIK122 Posted April 5, 2021 Author Share Posted April 5, 2021 Hello. Happy Easter everyone. A little more. Finished chipping and added an oil dot filter and streaking. I will let this dry then reseal and continue with the dust effects. Thanks for looking 12 Link to comment Share on other sites More sharing options...
NIK122 Posted April 5, 2021 Author Share Posted April 5, 2021 3 minutes ago, Bullbasket said: Dept.79, about 40kms south of Poitiers. Ah OK. I'm 47. 1 Link to comment Share on other sites More sharing options...
Cerberus Posted April 6, 2021 Share Posted April 6, 2021 Looking very good Matt 1 Link to comment Share on other sites More sharing options...
edjbartos Posted April 6, 2021 Share Posted April 6, 2021 Very nice, the paint work looks great , lovely modulation and chipping....👍 Ed 1 Link to comment Share on other sites More sharing options...
Bullbasket Posted April 24, 2021 Share Posted April 24, 2021 On 05/04/2021 at 16:14, NIK122 said: Ah OK. I'm 47. L&G is about 250kms south of me. Nice work with the weathering. It's really turning out well. John. 1 Link to comment Share on other sites More sharing options...
vytautas Posted April 24, 2021 Share Posted April 24, 2021 Beautiful work! I am really enjoying following your thread. Vytautas 1 Link to comment Share on other sites More sharing options...
fittedkitchens Posted May 2, 2021 Share Posted May 2, 2021 Excellent work so far, the paint job is great. It's a lovely kit, the 1970's Tamiya T-34/Su-122/Su-85 series are great fun builds. 1 Link to comment Share on other sites More sharing options...
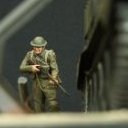
NIK122 Posted June 3, 2021 Author Share Posted June 3, 2021 Hello everyone. I hope all is well and returning to normal. Subjective yes but hey! I've almost finished this build and I'm itching to start the next build so here is where I am to date with this one. On with the base. I like building my bases on oak plank and had a suitable piece kicking around. I used to buy this from my local builders merchant and thirty five quids worth will keep you stocked up for years if you build models at my pace or just one build if your into 1/35 railway guns. The terrain base is model foam board. The beige coloured section is better quality but for the life of me I couldn't remember the brand name and I've since run out of it so hence the difference. The putty is 'Perfect Putty', other brands available. The next step was a little redundant, airbrushing some colour, but shows the gouged out track depressions. I've never used this product before but found it 8/10 for ease of use. After some cutting and stretching to fit the base the matting is fixed with PVA. Following on I've added milliput to the track depressions and used the left over rubber band Tamiya tracks for texture. The edges have then been blended with Mig acrylic mud. Because the SU122 is so stealthy looking I didn't want a base that detracted from this. Originally my plan was something urban but the Russian Steppes suits it better I think. To create some height on the base I've simply added some tall grass. Using a cheap paint brush, tube and super glue will save a few pennies on aftermarket. Separate out the bristles before cutting from the brush with the tube. Once the ends are glued remove the tube and scrape the bristles with a blunt cutting edge and hey presto. Some shots once added. Whilst the colours of the grass are kind of OK they are shiny and I'm aiming for a more arid, dusty look so airbrushing and washes to the mud/soil were added. That is pretty much it for the base with the addition of some weathering powders that I also used on the vehicle to tie it all together. I've still some finishing touches to add so the next post on this will be in the finished model section. So for now this is it. Thanks for looking 9 Link to comment Share on other sites More sharing options...

Recommended Posts
Create an account or sign in to comment
You need to be a member in order to leave a comment
Create an account
Sign up for a new account in our community. It's easy!
Register a new accountSign in
Already have an account? Sign in here.
Sign In Now