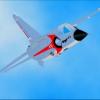
PaulT 876 Posted September 28, 2020 Share Posted September 28, 2020 (edited) Hi Here is my build the Mirage IVA A/C Number 9. The box open and some info. The Parts Must have got this between 1985 to 1987 when i lived in Aberdeen and a member off AMS. Also in the box keeping this it's mint. More Later once i start the build. Paul Edited September 29, 2020 by PaulT 876 6 Link to comment Share on other sites More sharing options...
Rabbit Leader Posted September 28, 2020 Share Posted September 28, 2020 Great to see the larger Mirage in 1/72. I’ve always been keen to get one and looking at those parts it’s not too dissimilar to a Mirage III. Glad you’ve joined us and it’ll be one small way to put a dent in that impressive Heller stash. Cheers and best of luck.. Dave Link to comment Share on other sites More sharing options...
Wez Posted September 28, 2020 Share Posted September 28, 2020 Paul, Thanks for bringing us the 1/72nd scale version of this very elegant jet. I've said it before but the top seam is very prone to flexing so needs reinforcing. Released in 1979, as the box shows, catalogue number 351 (not 315 ). Welcome and good luck. Link to comment Share on other sites More sharing options...
jean Posted September 28, 2020 Share Posted September 28, 2020 Hi, this is an impressive kit of an impressive aircraft! Can't wait to see it built. I was chatting to a Mirage IV pilot, many years ago. He was telling that one day, on a mission at very low altitude and very fast, he was overtaken by a pair of F-111 flying much lower and much faster than he was..... Vive la France! JR 1 Link to comment Share on other sites More sharing options...
PaulT 876 Posted September 29, 2020 Author Share Posted September 29, 2020 (edited) Hi Jean I grew up with Voodoo,s Phantoms and F-111E flying over head, ie near Upper Heyford. Changed it WEZ , its been some time i think 1994 since i last did a IVA a 48th one and mid 80's a 72nd one so will be quite new again. I will see how i get on with it. Paul Edited September 29, 2020 by PaulT 876 Link to comment Share on other sites More sharing options...
PeterB Posted September 29, 2020 Share Posted September 29, 2020 Hi Paul, I will of course be watching this build with great interest and shamelessly copy anything useful on my build - hope you don't mind! Pete 1 Link to comment Share on other sites More sharing options...
TonyOD Posted September 30, 2020 Share Posted September 30, 2020 I'm looking forward to this one. Until I did a bit of light reading last night, I was under the impression that all the Mirages were basically variants of the same aircraft, whereas in fact the IV was a dirty great bomber. Enjoy the build. Link to comment Share on other sites More sharing options...
PaulT 876 Posted October 5, 2020 Author Share Posted October 5, 2020 (edited) Hi I started this on Sunday and did a hour 1st thing before i went to work. 42 side as the parts come in the kit 43 side as corrected by me both now corrected I started on the intakes i normally do this on Mirages, the kit is nearly right not like some kits all i have done is thinned down the surports from 1.12mm dia to 0.80mm as they are a bit big faster than replacing with rod i then added the centre bit thats missing and thinned down the flat bits of parts 42- 43 as they are quite thick then cleaned up the insides of the intake outer parts and thinned down the intake fronts. I then put the cockpit togeather I have add a strip of card to the top seam and some lead to keep the nose down. This is as far as i have got to now, need to clean up the seams now. Not doing much to the cockpit as you can not see much, next up is sort the wings. Not working on this all the time just a few times a week other builds on the go. Till the next time Paul Edited October 5, 2020 by PaulT 876 4 Link to comment Share on other sites More sharing options...
PaulT 876 Posted October 5, 2020 Author Share Posted October 5, 2020 (edited) My Other builds Heller 2000N REVELL 32nd Mirage IIIE Kinetic Mirage 2000-5 All going to be in French markings plus 6 more 2000's on the go. Paul Edited October 5, 2020 by PaulT 876 1 Link to comment Share on other sites More sharing options...
PeterB Posted October 5, 2020 Share Posted October 5, 2020 Hi Paul, Looking good so far and I am making notes! The Mirage 2000N is I believe the one designed to carry the ASMP stand off nuclear missile? Pete Link to comment Share on other sites More sharing options...
PaulT 876 Posted October 5, 2020 Author Share Posted October 5, 2020 Hi Peter Yes the N is the main Nuclear a/c now out of service. Paul 1 Link to comment Share on other sites More sharing options...
PaulT 876 Posted October 17, 2020 Author Share Posted October 17, 2020 (edited) Hi A bit more done i have sanded the raised lines of the fuselarge and put the nose togeather. The nose cone i have put some foil into it to give a silver backing to the lights. I filled the nose with some Clearfix that was on its last legs it makes a good backing for the foil. How it looks just need to wait till it sets to trim the foil and any over spill. I have run some superglue along the seams that need a bit more filling as only fine filling needed, will let it go hard then sand it. This is as far as i have got, next up the wings then pop the nose on and sand it all till i get the finish i wish as it is going to be silver need to get this right as it shows all the mistakes up. I keep forgetting to take photos, i now have my internet sorted at home so that helps do not have to wait till work at lunch time to do things like up load photos and post them like before so we shall see how i get on. There is a lot of builds it takes ages to look at them all, so till next time. See ya Paul Edited October 17, 2020 by PaulT 876 5 Link to comment Share on other sites More sharing options...
Rabbit Leader Posted October 17, 2020 Share Posted October 17, 2020 Coming up nicely Paul... now why wait till lunch time at work to upload photos, just do them as soon as you get in I say! You are correct, there are plenty of builds to keep track of, however we (hosts) are hopefully doing OK at that? Let us know via the chat section if we need to up our game, but please factor in we are all modellers and family people too, although I’m not sure which one takes precedence?? Cheers and nice progress.. Dave Link to comment Share on other sites More sharing options...
PaulT 876 Posted October 20, 2020 Author Share Posted October 20, 2020 (edited) Hi More done to the Mirage in the last few days. I have started on the wings i glued the lower section on 1st after i scored the elevons at the rear and cut a small wedge shape in the arms to allow them to drop a bit i then bent them down went to far on one side and it snaped off. I then glued it to the fuselarge let it set I then got the top wing parts and scored the same as the lower did not snap these of this time. I found i needed some card to help get the top wing to sit ok if not it just sat to low the big bit is 60thou and the long bit 10thou this allowed me to fix the wing at the fuselarge side 1st glued it and let it set then i glued the wing edges and just held togeather till set. The wings on not to bad took my time, airbrakes i will add later. As it is now time to start the sanding the wings and the other bits then the nose next. I might get some more done this week we shall see as other Mirages that need doing. See Ya Paul Edited October 26, 2020 by PaulT 876 6 Link to comment Share on other sites More sharing options...
exdraken Posted October 20, 2020 Share Posted October 20, 2020 looks very promising! Link to comment Share on other sites More sharing options...
JeroenS Posted December 11, 2020 Share Posted December 11, 2020 Hi @PaulT 876, how's the Mirage coming along? I hope you'll be returning to it soon! Link to comment Share on other sites More sharing options...
PaulT 876 Posted December 15, 2020 Author Share Posted December 15, 2020 Hi A bit more done. AirBrakes fitted and sanded flat and nose fitted.Most of the rubbing down is done. Nice shape from this view. Seats done only a quick paint job and a faceblind handle fitted and a spash of black paint inside as you can not see much when the canopy is closed. Missed a few photos along the way forgot. Just adding the last bit, then close it up. Closed up just a small gap at the front filled with clearfix. As she is just now, done a small it on it 1st thing today,hope to get more done soon just got to undercoat it. The other bits for it are in the tub behind most just ready for paint again for got to take photos. Till next time. Paul 4 Link to comment Share on other sites More sharing options...
JeroenS Posted December 15, 2020 Share Posted December 15, 2020 Very nicely shaped indeed. Link to comment Share on other sites More sharing options...
PaulT 876 Posted January 13, 2021 Author Share Posted January 13, 2021 Hi A bit more done got the main painting started just to do the diffrent silvers. It took a bit of time but not to bad finish all from rattel cans. I shall get a bit more done this w/e. See Ya Paul 5 Link to comment Share on other sites More sharing options...
JeroenS Posted January 14, 2021 Share Posted January 14, 2021 That's a nice smooth coat. Link to comment Share on other sites More sharing options...
Bjorn Posted January 14, 2021 Share Posted January 14, 2021 No panel lines? Interesting! I like it! Link to comment Share on other sites More sharing options...
fightersweep Posted January 14, 2021 Share Posted January 14, 2021 That's a super smooth looking Mirage IV! Great job on the seams and joints as silver is very unforgiving, and it all looks....well.....seamless! Nice work! Link to comment Share on other sites More sharing options...
JeroenS Posted February 7, 2021 Share Posted February 7, 2021 HI @PaulT 876, did you manage to get some more work done on this silver beastie? No pressure, one week left to get it into the gallery 🙂 ... it would look good there! Link to comment Share on other sites More sharing options...

Recommended Posts
Create an account or sign in to comment
You need to be a member in order to leave a comment
Create an account
Sign up for a new account in our community. It's easy!
Register a new accountSign in
Already have an account? Sign in here.
Sign In Now