Andy I Posted May 22, 2020 Author Share Posted May 22, 2020 Many thanks to the suggestions for the intercom cables. My first attempt with 5A fuse wire wrapped around 0.4mm brass bar. 6 Link to comment Share on other sites More sharing options...
exdraken Posted May 23, 2020 Share Posted May 23, 2020 Nice and tidy work! Great cabin! Link to comment Share on other sites More sharing options...
Martian Posted May 23, 2020 Share Posted May 23, 2020 7 hours ago, Andy I said: Many thanks to the suggestions for the intercom cables. My first attempt with 5A fuse wire wrapped around 0.4mm brass bar. That looks like it worked well. Martian 👽 1 Link to comment Share on other sites More sharing options...
Andy I Posted May 29, 2020 Author Share Posted May 29, 2020 The Tamiya 1/48 Tomcat ordered before the lockdown finally arrived today. Must resist and finish this one first! The intercom cables are all made and painted, the weather not looking great for the long weekend, so hopefully some progress to show soon. NZ gives you a day off work for the Queen’s birthday 👍 1 Link to comment Share on other sites More sharing options...
Andy I Posted May 31, 2020 Author Share Posted May 31, 2020 The first cable is fitted. A bit of a schoolboy error and top tip. Fit them BEFORE fitting the sides of the cabin to the base! 5 Link to comment Share on other sites More sharing options...
stevehnz Posted June 1, 2020 Share Posted June 1, 2020 That is looking good Andy, the coily cables have come up a treat. Steve. (Working nights through QB weekend, ) Link to comment Share on other sites More sharing options...
Andy I Posted June 1, 2020 Author Share Posted June 1, 2020 Thank you Steve. I have made more progress but I was having a few problems uploading the photos last night. I’m sure operator error is involved somewhere. Link to comment Share on other sites More sharing options...
Andy I Posted June 2, 2020 Author Share Posted June 2, 2020 A few views of the cables and harness. I suspect that a lot of it will be difficult to see once the cabin is all closed up but I know it’s there. 5 Link to comment Share on other sites More sharing options...
Andy I Posted June 2, 2020 Author Share Posted June 2, 2020 Does anyone have any suggestions for giving the seat belts a more used look? They look a little too clean to me, feel free to tell me I’m going too far as they will be difficult to see on the final model. Link to comment Share on other sites More sharing options...
Chewbacca Posted June 2, 2020 Share Posted June 2, 2020 Hi Andy, I'm glad you said that because I wondered that a few posts back. I also think they're a tadge too wide I would say that the first issue is that they are too yellow. The straps have a distinct orange hue as you can see in these two images: https://www.airliners.net/photo/UK-Air-Force/EHI-EH-101-Merlin-HC3-Mk411/871381 My suspicion is that by using Tamiya tape, they are too smooth. Personally, I'd spray some tin foil with matt paint on both sides (sorry, can't advise on colour but the key thing is that it is matt) and when it's dry, cut the straps from that. Tidy up the edges to avoid the silver bleeding through and then a very light dry brushing on the matt side of the foil with a light or mid grey followed by a coat of satin to give them their distinctive sheen. Because the matt paint is slightly rough, it will pick up the flecks of grey in the dry brushing. I suppose you could use a very thin wash instead. I have also used this technique with newspaper instead of foil and the roughness of the paper gives the dry brush a little more to bite on but the advantage of foil is that it sits more naturally where tape and to a lesser extent newspaper can bulge upwards. Finally, as you refit them, don't forget that every strap has a smaller adjusting strap and buckle in black 😁. (Sorry, I know that's a lot of extra work) Hope that helps 4 Link to comment Share on other sites More sharing options...
Andy I Posted June 3, 2020 Author Share Posted June 3, 2020 I don’t disagree with you, thanks for the advice. This is the first time I’ve done anything other than add a few aftermarket resin parts. Definitely a learning curve for me. One for next time. For this I think too much damage will be done trying to start again (with my limited skills) so will experiment with some washes over the tape. Link to comment Share on other sites More sharing options...
Andy I Posted June 9, 2020 Author Share Posted June 9, 2020 The cabin is all put together, a lot of details that you really need a boroscope to see, either that or my photography isn’t up to scratch. 13 Link to comment Share on other sites More sharing options...
Martian Posted June 9, 2020 Share Posted June 9, 2020 That really looks the part! Martian 👽 Link to comment Share on other sites More sharing options...
Andy I Posted June 9, 2020 Author Share Posted June 9, 2020 Thank you, much appreciated. Link to comment Share on other sites More sharing options...
stevehnz Posted June 10, 2020 Share Posted June 10, 2020 That is a great looking interior Andy, you've done a beaut job on it. Steve. Link to comment Share on other sites More sharing options...
RichieW Posted June 11, 2020 Share Posted June 11, 2020 I just came across this amazing thread, that interior looks utterly convincing. What a great bit of modelling! Link to comment Share on other sites More sharing options...
bar side Posted June 11, 2020 Share Posted June 11, 2020 Nice work & good wires. I was going to suggest the thicker acoustic guitar strings. The are generally copper wire wrapped around a nylon core. If you cut the string & then pull the wire it unwraps off the core. Link to comment Share on other sites More sharing options...
Andy I Posted June 13, 2020 Author Share Posted June 13, 2020 I’m hoping that someone can help. The picture isn’t the best but all of the windows have the same curved marks. I’m not sure if these are scratches or a flaw that runs though the whole piece. Any advice on what it is and, more importantly, how to get rid of it would be very much appreciated. Link to comment Share on other sites More sharing options...
Andy I Posted August 4, 2020 Author Share Posted August 4, 2020 3 Link to comment Share on other sites More sharing options...
Andy I Posted August 4, 2020 Author Share Posted August 4, 2020 A bit of a leap forward from the previous pictures. The cabin is complete and masked up for final painting. The fit of these parts was a bit of a struggle, a combination of a very precise kit and room for improvement on my part. Also my first attempts with a dual action airbrush after much practice on paper, definitely more practice required! Link to comment Share on other sites More sharing options...
perdu Posted August 4, 2020 Share Posted August 4, 2020 Looking good to go, lovely interior work. Link to comment Share on other sites More sharing options...
Andy I Posted August 6, 2020 Author Share Posted August 6, 2020 I fear I may have been a little heavy with the overall green and covered a lot of the shading, but looking at a few reference photos it appears that there tends to be different panels that are different shades of green. Worth a try. The engine exhausts are also definitely the wrong colour. 5 Link to comment Share on other sites More sharing options...
Andy I Posted August 9, 2020 Author Share Posted August 9, 2020 3 Link to comment Share on other sites More sharing options...
Andy I Posted August 9, 2020 Author Share Posted August 9, 2020 6 Link to comment Share on other sites More sharing options...
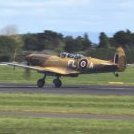
Andy I Posted August 9, 2020 Author Share Posted August 9, 2020 Build is now complete and ready for decals. Historically I would have just applied them but having followed a number of builds it would appear that the way to go is a gloss varnish before applying decals. Any advice from the far more skilled than I would be much appreciated. Link to comment Share on other sites More sharing options...

Recommended Posts
Create an account or sign in to comment
You need to be a member in order to leave a comment
Create an account
Sign up for a new account in our community. It's easy!
Register a new accountSign in
Already have an account? Sign in here.
Sign In Now