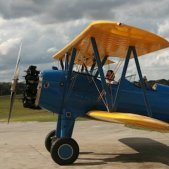
BlueNosers352nd Posted December 24, 2019 Share Posted December 24, 2019 What the heck am I thinking? Just trying to get back into the hobby and I've gone mad apparently. My Revell 1/48 Stearman was meant to get my feet wet again after being out of the hobby for several years and it's on hold until some replacement decals show up. Building two kits for the P-51 STGB. Put one on hold as I didn't want to start messing with masking the canopies or painting until I get back from Vaca in a couple weeks. Waiting on some parts for the A-36A, so that one is on hold as I can't assemble the fuselage yet. This one is meant to be nothing more than a fill in model. Work on it in between this and that when I need something to tinker with until the Stearman and P-51's are done (or close). So who knows how long this will take. Plus my Christmas with the family doesn't really start until the 26 and I didn't want to just sit around watching TV or start any new woodworking projects yet while I am off on Christmas Eve. So this one will be a slower paced one as fill time is needed. Extra fiddly bits include; Ultracast Wheels Ultracast Exhausts Ultracast Intake Quickboost Seat Quickboost Cannon Barrels Aires Cockpit (only bits and pieces) Montex masks for a couple aircraft (maybe) Originally bought the Aires pit, but after the P-51B problems I am just gonna kit bash pieces from the kit and the Aires set. MONTEX masks............LIKE or DISLIKE? If anyone has any cool schemes let me know. Not sold on any particular scheme yet. Read that the wheel wells and the nose profile are wrong, but honestly I am going to just let them be what they are. Assembly begins by Jim Fox, on Flickr 2 Link to comment Share on other sites More sharing options...
Lawzer Posted December 24, 2019 Share Posted December 24, 2019 Nice! the cockpit that comes with the kit is pretty decent (I’ve built this kit and to be honest very little is seen). The one thing to be wary of are the cockpit inserts. I can’t remember how the instructions would have you build it but attach the inserts to the fuselage halves as then you only have the centre seam to deal with. I’ve not read about shape problems on this kit though. But then again to me if something looks like what it’s meant to be I’m happy! 😁 Link to comment Share on other sites More sharing options...
MilneBay Posted December 24, 2019 Share Posted December 24, 2019 Yes attach the fuselage insets to their respective sides first so that you get the exteriors to line up without any major filling. I've built a couple and the easiest fix for the less than a millimetre gap where the insets meet when you join the fuselage halves, is a thin strip of plastic. I used a small section of Evergreen square rod. Glue it in place, lightly sand it to a flush fit and apply a smidge of filler if necessary. Overall its a problem free kit. 2 Link to comment Share on other sites More sharing options...
BlueNosers352nd Posted December 24, 2019 Author Share Posted December 24, 2019 1 hour ago, Lawzer said: But then again to me if something looks like what it’s meant to be I’m happy! 😁 That's generally how I feel with modeling. Kinda use the old adage of...."If it looks like a duck, quacks like a duck, it must be a duck." If I can add simple resin things, or simple PE things I might. 11 minutes ago, MilneBay said: Yes attach the fuselage insets to their respective sides first so that you get the exteriors to line up without any major filling. Yes..........I have done that as well. Fortunately caught several posts about that. 1 Link to comment Share on other sites More sharing options...
Troy Smith Posted December 25, 2019 Share Posted December 25, 2019 7 hours ago, BlueNosers352nd said: Read that the wheel wells and the nose profile are wrong, I suspect the nose profile is slightly out, their Hurricane has a similar problem, I also think that rather than replace the upper cowl, if you use your thumbs to flex up the flat bit, and do it a few times further than it needs to go, the plastic is thin enough to keep the new curved shape, just leaving a small gap at the join, which you can fill with plastic strip. The build also deal with the fuselage inserts (leave gap at top) and scratch build the wheel wells, which is, well, depends if you like playing with plastic sheet and strip I would suggest that it's worth trying making some separate, as while time consuming, it is rewarding, and maybe as much work as getting resin ones to fit, but less frustrating. note most of it is straight bits of sheet and strip, and then some detail. HTH T 1 Link to comment Share on other sites More sharing options...
Corsairfoxfouruncle Posted December 25, 2019 Share Posted December 25, 2019 10 hours ago, BlueNosers352nd said: What the heck am I thinking? Just trying to get back into the hobby and I've gone mad apparently. My Revell 1/48 Stearman was meant to get my feet wet again after being out of the hobby for several years and it's on hold until some replacement decals show up. Building two kits for the P-51 STGB. Put one on hold as I didn't want to start messing with masking the canopies or painting until I get back from Vaca in a couple weeks. Waiting on some parts for the A-36A, so that one is on hold as I can't assemble the fuselage yet. Yep your addicted... 1 Link to comment Share on other sites More sharing options...
BlueNosers352nd Posted April 11, 2020 Author Share Posted April 11, 2020 (edited) In between things drying on the Hellcat for GB, I've been working on the Typhoon. Finally decided what aircraft I will be doing. MN518, R-D flown by W/C Davidson of the 143 Wing. Always looking for unique schemes. While their is nothing unique about the scheme, his scoreboard is interesting. 2 Italian kills while in Greece, 2 Japanese kills while in Ceylon (modern day Sri Lanka) and 2 German Kills. His story is a little interesting too. While flying another Typhoon, he had engine trouble and was forced to land in Béthune (France, south of Dunkirk). Where he was picked up by the French Resistance and fought with them for a while until making it back into British hands. That is not Davidson in the picture though... Edited April 11, 2020 by BlueNosers352nd 1 Link to comment Share on other sites More sharing options...
72modeler Posted April 11, 2020 Share Posted April 11, 2020 That will be one very different Tiffy and a great tribute model! How about this photo of MN518? Only reason I stumbled upon it was because I couldn't tell if she had a 3 or 4 blade prop or Tempest tailplanes, so I did some searching! I think I might have found my Mk 1b build project! (photo via Twitter) Mike 2 Link to comment Share on other sites More sharing options...
BlueNosers352nd Posted April 11, 2020 Author Share Posted April 11, 2020 1 hour ago, 72modeler said: How about this photo of MN518? Only reason I stumbled upon it was because I couldn't tell if she had a 3 or 4 blade prop or Tempest tailplanes, so I did some searching! I think I might have found my Mk 1b build project! (photo via Twitter) Yes, I found that one as well. Not up on British aircraft, but the colorization might be off. Guessing the fuselage codes and spinner were not white. Probably ??Sky?? normally seen on British aircraft. Link to comment Share on other sites More sharing options...
Troy Smith Posted April 11, 2020 Share Posted April 11, 2020 5 minutes ago, BlueNosers352nd said: Guessing the fuselage codes and spinner were not white. Probably ??Sky?? normally seen on British aircraft. Sky. Link to comment Share on other sites More sharing options...
72modeler Posted April 11, 2020 Share Posted April 11, 2020 5 minutes ago, BlueNosers352nd said: Yes, I found that one as well. Not up on British aircraft, but the colorization might be off. Guessing the fuselage codes and spinner were not white. Probably ??Sky?? normally seen on British aircraft. Yep- if you look at the spinner, which we know was in sky, it matches the codes, so pretty sure the photo was either colorized or the film type affected the hue. Mike Link to comment Share on other sites More sharing options...
BlueNosers352nd Posted July 13, 2020 Author Share Posted July 13, 2020 Made some progress on the Typhoon over the past couple months, in between this and that. Today's progress while waiting for the Spitfire to sit a bit. 2 Link to comment Share on other sites More sharing options...
Jeff G Posted July 13, 2020 Share Posted July 13, 2020 Just a suggestion, you should only work on the Typhoon until it's finished. I'm really excited to see this. Not sure if it's been covered already, but does the kit provide a 3 bladed prop? Or will you have to fashion one? Link to comment Share on other sites More sharing options...
BlueNosers352nd Posted July 13, 2020 Author Share Posted July 13, 2020 33 minutes ago, Jeff G said: Just a suggestion, you should only work on the Typhoon until it's finished. I'm really excited to see this. Not sure if it's been covered already, but does the kit provide a 3 bladed prop? Or will you have to fashion one? Trying to finish the Spitfire before the GB end. Fortunately it does come with a 3 blade prop. 1 Link to comment Share on other sites More sharing options...
BlueNosers352nd Posted August 15, 2020 Author Share Posted August 15, 2020 Update on the Typhoon. It's getting more work done on it than the Spitfire as the underside roundel decals on the Spit are giving me fits. Ready for a clear coat and some more weathering. Other than the pilots kill board, the markings are painted on using masks. Masks are not my thing, but neither are decals as of late. First real product with paint masks. They kinda make me break out into a sweat.........and these are just roundels, not Stars n Bars. 😓 1 Link to comment Share on other sites More sharing options...
Jeff G Posted August 15, 2020 Share Posted August 15, 2020 Looking sharp, reeeeally nice work of art, that. Link to comment Share on other sites More sharing options...
72modeler Posted August 16, 2020 Share Posted August 16, 2020 Dayam! You nailed the colors, and your painted markings are incredible! This one s going to be a beaut! Can't wait to see the RFI photos! Mike Link to comment Share on other sites More sharing options...
BlueNosers352nd Posted September 12, 2020 Author Share Posted September 12, 2020 She's up on wheels, we are getting close. BUT NEED YOUR OPINION!!!!! My thinking with the tail wheel was to show it like it turned into it's resting place. On the first pick I think it looks fine, but in the second pic I think it looks really odd, like some Gomer didn't know what he was doing. But to move it means it's probably break, so may need to pin. What do you think? Also not sure how much weathering I will do. Based on the last image, she didn't look to beat up or dirty. Concur? Hawker Typhoon Mk IIb by Jim Fox, on Flickr Hawker Typhoon Mk IIb by Jim Fox, on Flickr Hawker Typhoon Mk IIb by Jim Fox, on Flickr 2 Link to comment Share on other sites More sharing options...
Nachtwulf Posted September 12, 2020 Share Posted September 12, 2020 Putting it on a base showing the wheel track in grass or dirt will make it look right. Try putting it on a piece of paper and drawing the wheel track and you'll see what I mean. 1 Link to comment Share on other sites More sharing options...
Nachtwulf Posted September 12, 2020 Share Posted September 12, 2020 I think you've done a great job! Looks amazing. Typhoons could looks pretty nasty underneath. I personally always seem to under weather my planes as I'm a chicken. 2 Link to comment Share on other sites More sharing options...
72modeler Posted September 13, 2020 Share Posted September 13, 2020 Looks pretty darned good to me! I like to have the tail wheels castored on many of my models, as I think it adds a realistic touch. Mike 1 Link to comment Share on other sites More sharing options...

Recommended Posts
Create an account or sign in to comment
You need to be a member in order to leave a comment
Create an account
Sign up for a new account in our community. It's easy!
Register a new accountSign in
Already have an account? Sign in here.
Sign In Now