AaronKSJ Posted June 3, 2019 Share Posted June 3, 2019 Hello! I'm back again, this time with this... Which was waiting at work for me this morning, nice way to start a Monday. I'll be doing the Photo Reconnaissance version. Not entirely sure if I'll get this one over the finish line in time for the 7th July, but I'll give it a bash! I hadn't been planning on building this kit, but after some faffing about with black basing on my P-38 decided I wanted to try the technique again on something with a simple camouflage - can't get easier than all over PRU blue, right? I ended up with the Wooden Wonder as I wanted a kit that wouldn't require me to buy any new paints so I was limited in my choice to either olive drab / neutral grey, US tri colour or PRU blue / RAF light grey (which I have already for my Eduard Spitfire) Came very close to buying the Tamiya Jug, but then happened to spot the PR version of the Mossie Since getting back into modelling again, I've just been building WWII American planes so this one should please my Dad! I think the Mossie ties with the Spitfire for the most eloquent aircraft of WWII. Curious to hear what others think? It's going to be a out of box build. Might try making the seatbelts with either tinfoil or tape, with the kit supplied seatbelt decals as a back up. As usual - comments, advice and general nattering is more than welcome. Aaron 4 Link to comment Share on other sites More sharing options...
helios16v Posted June 3, 2019 Share Posted June 3, 2019 (edited) The Mossie is definitely a front runner in the aesthetics department in that era for me as well (got a couple in the stash). Some of my other faves include the SBD Dauntless, F6F Hellcat, P-38 Lightning, and P-40 Warhawk. Edited June 3, 2019 by helios16v Link to comment Share on other sites More sharing options...
Col. Posted June 3, 2019 Share Posted June 3, 2019 Lovely subject choice Aaron. The pleasing lines of the Dh Mosquito are suited to an over PRU Blue finish as it accentuates them to great advantage. Link to comment Share on other sites More sharing options...
AaronKSJ Posted June 4, 2019 Author Share Posted June 4, 2019 17 hours ago, helios16v said: Some of my other faves include the SBD Dauntless, F6F Hellcat, P-38 Lightning, and P-40 Warhawk. Yes! Since my return to modelling the first aircraft I build was Eduard Hellcat which was a stunning kit. And just finished off the Hobby Boss P-38. I have one of the reboxed versions of the Accurate Miniatures Dauntless to do at some point 12 hours ago, Col. said: Lovely subject choice Aaron. Thanks Col, I'm excited to build a British WWII aircraft as it's all been US stuff recently. I picked up some UK P.R.U. Blue Vallejo Model Air 71.109 a while back, will be my first time using it and first time using Vallejo so hopefully it goes well! I haven't quite figured out what colour to use for the panel wash yet. Maybe a mix of grey and blue oil? I think just plain dark blue might look a bit cartoonesque? Link to comment Share on other sites More sharing options...
AaronKSJ Posted June 4, 2019 Author Share Posted June 4, 2019 Made a start last night. Tamiya decided that you should start with the nacelles and wings. Pfffffft. I think not. Here's the obligatory sprue shot Last night was mainly a bit of cutting, sanding and gluing for the internal bits and bobs. Tonight I'll be sticking various bits into blue tack and spraying some primer. Here's how it looked at the end of the session I have build a Tamiya Mossie way back when, the Mk VI version. I'd forgot how gorgeous the bomb bay is. Shame I've decided to keep the bay doors closed. But that's a good excuse to build another one in the future! Aaron 2 Link to comment Share on other sites More sharing options...
trickyrich Posted June 4, 2019 Share Posted June 4, 2019 welcome along for your second build Aaron and a fine choice for it. Not a model I've actually seen before or seen built either. Gosh you scared me with the finish date....didn't realize how close it is! Good luck with the build, if it's like you last one it should be smooth sailing. Link to comment Share on other sites More sharing options...
AaronKSJ Posted June 5, 2019 Author Share Posted June 5, 2019 Nothing too exciting to report at this point. Got very frustrated with the airbrush last night while trying to get the prime down. Had to stripe the thing down twice to give it a good clean as there was something somewhere stopping the paint from coming through. I'm used to the Vallejo mecha primer drying on the tip, usually a cotton swab dipped in water is enough to sort that out. But no, last night I turned the air a particularity vivid shade of blue. Anyhow, got there in the end and gave it a splash of Tamiya XF-71 cockpit green. First time I've used this colour, thankfully it looks nothing like the paint lid plastic colour which is a fairly nauseating colour. With a bit of luck tonight I'll get the initial interior colours done on the various bits and pieces, then onto some highlights and washes. Aaron 3 Link to comment Share on other sites More sharing options...
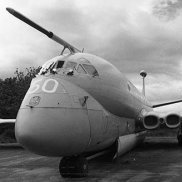
AaronKSJ Posted June 5, 2019 Author Share Posted June 5, 2019 Completely off topic BUT! This just arrived at work, having winged it's way over from Japan 🚀 You actually get two A-Wings in the box. You can't tell from this pic but the gun barrels and engines are side moulded. Now, I MUST NOT GET DISTRACTED. I'll post a further Mossie update tomorrow. Aaron Link to comment Share on other sites More sharing options...
trickyrich Posted June 6, 2019 Share Posted June 6, 2019 arrr distractions, I know them well!! Nice! there is a good following for the use of XF-71 for interiors, general consensus is that it's a good match for interiors and being Tamiya a breeze to use. 1 Link to comment Share on other sites More sharing options...
AaronKSJ Posted June 6, 2019 Author Share Posted June 6, 2019 Normal Service has resumed! Got most of the internal gubbins painted up. The leather bits have had a wash of dark brown and will try some various shades of brown dry brushed to liven them up. Sealed this in with a coat of Tamiya semi-gloss so I can do some oil washes. Thinking of mixing some grey and brown for the oil for the wash over the cockpit green. I was puzzled by the item that's just next to one of the nose window on the starboard side. Spent a while trying find a picture of part and finally found one showing that it's an axe! Presumably so the crew could hack their way out through the wooden frame in the event of a wheels up landing which would block the hatch? So that will get a dab of paint at some point. Speaking of the hatch, did it have two doors? An inter and outer one? There is a part included in the kit that it say's isn't used. However when I was having a nosy at some other kit instructions (may have been Revell) it shows this part used. Either which way I've decided to leave the part off as there is only detail on one side of the part and if it is positioned opened then you can only see the blank surface. Unlikely to get much done this evening as the folks are over for tea. Aaron 2 Link to comment Share on other sites More sharing options...
Dave Swindell Posted June 6, 2019 Share Posted June 6, 2019 1 hour ago, AaronKSJ said: Speaking of the hatch, did it have two doors? An inter and outer one? Yes, the inner door is part J19. It was a lift out hatch rather than a hinged door, and I guess would have most likely been pushed forward into the nose when entering/leaving the cockpit. Link to comment Share on other sites More sharing options...
AaronKSJ Posted June 6, 2019 Author Share Posted June 6, 2019 7 minutes ago, Dave Swindell said: It was a lift out hatch Thanks for the info Dave! That's good to know, at least now when I omit it from my build I can at least claim it was taken out by ground crew for some maintenance It certainly makes sense to have some redundancy built into the hatch / door combo if the bombardier was crawling backwards and forwards over it during flight! Aaron 1 Link to comment Share on other sites More sharing options...
exdraken Posted June 6, 2019 Share Posted June 6, 2019 Nice project and good start!! 1 Link to comment Share on other sites More sharing options...
AaronKSJ Posted June 9, 2019 Author Share Posted June 9, 2019 I spent most of yesterday doing plenty more work on the Mossie. Got a little too carried away and almost forgot to take any snaps before buttoning up the fuselage. I decided to just use the supplied kit decals for the seatbelts. Muted them a little with some pastel chalk. Yesterday evening got the fuselage glued together and then started on smoothing the seams while watching another episode of Chernobyl. This morning before work managed a quick black/grey oil wash around the wheel wells so suspect I'll be assembling those and the wings this evening. Hope everyone has had a most excellent weekend! Aaron 9 Link to comment Share on other sites More sharing options...
Greg Law Posted June 9, 2019 Share Posted June 9, 2019 Really good progress. Looking good too. 1 Link to comment Share on other sites More sharing options...
AaronKSJ Posted June 11, 2019 Author Share Posted June 11, 2019 Nothing too exciting to report at this point. Just been gluing various bits together before getting the bulk of it glue together. And a loose dry fit just to have a gander at the lovely Mossie shape 😍 The wing joints look flawless which is nice to see! I've ordered an Eduard mask set, which should hopefully turn up today. Aaron 3 Link to comment Share on other sites More sharing options...
PLC1966 Posted June 11, 2019 Share Posted June 11, 2019 Chap. Checkout https://www.iwm.org.uk/collections/item/object/205126837 To me it looks like there is a circle for a camera on DZ383 in this photo. I saw it pointed out on BM after I had completed my Tamiya model. I do not know if this was a mod or a standard set up on a PR version of a Mossie. The caption says the photo is at Boscombe Down so I do not know whether that is signicant Link to comment Share on other sites More sharing options...
AaronKSJ Posted June 11, 2019 Author Share Posted June 11, 2019 @PLC1966 Oh Bum. I just had a look at the Tamiya instructions for their 1/72 version and sure enough on that kit they mention opening the hole up and include a clear part. Nuts. The fuselage halves are glued together now, so might just leave it sans camera. I will have a ponder. Aaron Link to comment Share on other sites More sharing options...
Mottlemaster Posted June 11, 2019 Share Posted June 11, 2019 Very nice work on the interior paint job Link to comment Share on other sites More sharing options...
PLC1966 Posted June 11, 2019 Share Posted June 11, 2019 1 hour ago, AaronKSJ said: @PLC1966 Oh Bum. I just had a look at the Tamiya instructions for their 1/72 version and sure enough on that kit they mention opening the hole up and include a clear part. Really...….now I am peeved at that !!!! Link to comment Share on other sites More sharing options...
Vicarage Vee Posted June 11, 2019 Share Posted June 11, 2019 8 minutes ago, PLC1966 said: Really...….now I am peeved at that !!!! Make that two. I never came across that photo when I made mine. I've turned it the other side on in the cabinet now. 1 Link to comment Share on other sites More sharing options...
trickyrich Posted June 11, 2019 Share Posted June 11, 2019 gee the interior work is really nicely done. You might be able to get away with just drilling out the camera window and using some white glue (PVA) to "make" a window, just depends on how big the opening is. Link to comment Share on other sites More sharing options...
AaronKSJ Posted June 12, 2019 Author Share Posted June 12, 2019 @PLC1966 I think the 1/72 version was released after the 1/48 (I've not checked Scalemates - but if memory serves me correctly that was the case!) @Vicarage Vee That's my kind of thinking! @Mottlemaster @trickyrich Thank you I could have gone a bit further with the interior weathering, but not a lot of will be seen, as is often the case! If I decide to drill out the camera aperture, then it looks to be very similar in size to the ones on the underside. I think it may be a little too wide for PVA glue as I suspect it would sag outwards and form a convex dome? Oh Hmm. Yesterday whilst having a look for more info on DZ383 found this page, Shellhuset From what's said there, it sounds like the picture of the two chaps in front of the Mossie was taken just after their return from Shellhuset. Correct me if I'm wrong, but doesn't it look like the Mossie is in a camouflage scheme and not overall PRU blue? Aaron Link to comment Share on other sites More sharing options...
PLC1966 Posted June 12, 2019 Share Posted June 12, 2019 I do not think the Mossie in the picture is a PRU version, would you not see the Camera Window in the Bomb Door behind them. In the text they talk about DZ383 but I suspect they are talking about its role in the raid as opposed to the Aircraft itself if you know what I mean. It is interesting though that he talks about picking up DZ383 from 2 Group, but then talks about carrying incendiary bombs on the raid itself. 1 Link to comment Share on other sites More sharing options...
Dave Swindell Posted June 12, 2019 Share Posted June 12, 2019 DZ383 was built as a B.IV series ii, and converted to PR.IV (all PR.IV's were factory conversions) before delivery to 540 Sqn on 30 November 1942 at RAF Benson. The IWM photo linked above is quoted as being taken at Boscombe Down, I've seen at least 3 shots in what appears to be a classic Boscombe walkaround series of which this appears to be one, but the others are supposed to be at Benson. There's no mention of DZ383 being at Boscombe in Tim Mason's The Secret Years, and it isn't listed as a converion on Mossie.org. It's an earlier serial than all the others listed, so this may have been the first production one off the line and went for testing before delivery, in which case the date is wrong. DZ383 stayed at Benson with 540 Sqn until a flying accident on 29 July 1943, after which it was repaired at Martin Hearn, then went to 27 MU before being allocated to the RAF Film Production Unit. For this role a large part of the forward fuselage was cut away and replaced with perspex to allow filming from many angles (this is visible behind the pilot and cameraman in the Shellhuset link above). It was also repainted in the standard Day Bomber scheme (Dark Green / Ocean Grey / Medium Sea Grey). As a PR.IV DZ383 would have carried long range fuel tanks in the bomb bay, but would have retained the standard attachement points for bomb racks as per a B.IV, so removing the tanks and loading bombs wouldn't have been a problem. 2 Link to comment Share on other sites More sharing options...

Recommended Posts
Create an account or sign in to comment
You need to be a member in order to leave a comment
Create an account
Sign up for a new account in our community. It's easy!
Register a new accountSign in
Already have an account? Sign in here.
Sign In Now