pau10wen Posted May 24, 2019 Share Posted May 24, 2019 Hi Guys New project (again) is a collaboration between me and Ben, my 11 year old son. He had the aoshima lambo aventador SV kit for Christmas as he'd asked us for a car kit like the ones I make. Having opened the box on Christmas day and seeing just how many parts this kits has, I think he slightly changed his mind and would've asked for lego 😂😂😂 Anyway, he LOVES airbrushing so far and has a good steady style already. I've assumed the role of the 'guy who does all the boring bits' - but I will get him in on some of them throughout the build. We started with primer on the body and the engine bay, all airbrush work by Ben, fiddly gluing by me Ben has given the spoiler and other body parts the tamiya semi gloss black treatment, which does give quite a nice approximation of carbon fibre. I'm toying with doing some testing with an overspray of gunmetal through mesh/tights/etc and see what happens? and lastly for now, body colour, we shot some test colours and have decided on the darker of the two oranges. These were achieved by using Tamiya titanium gold + x2-3 coats of Tamiya clear orange for the darker shade and Tamiya chrome silver + x2-3 coats of Tamiya clear orange for the lighter. Ben has final say, so darker it is. More to follow, Got a few jobs over bank holiday weekend, but am also hoping that we can find time for Ben to lay down the coats of titanium gold onto the bodywork to get it underway. You never know, maybe we'll even get the orange on if it rains 4 Link to comment Share on other sites More sharing options...
Cooper645 Posted May 26, 2019 Share Posted May 26, 2019 Nice work and great to see another youngster keen to join the hobby. Even if he falls away at some point I’m sure he will return, I know I have. I still recall the tiger moth I built years ago with my dad. i look forward to seeing the rest of what has started as a great build. Link to comment Share on other sites More sharing options...
pau10wen Posted May 28, 2019 Author Share Posted May 28, 2019 Thanks coop! i can keep his interest with the airbrush, and I quite like the ‘boring’ bits Link to comment Share on other sites More sharing options...
Ian T Posted May 29, 2019 Share Posted May 29, 2019 So that’s Dad’s paint supplies taking a hit. Well done with the encouragement tp your son and we’ll done with the build so far. I’ll be watching this one. Ian 1 Link to comment Share on other sites More sharing options...
pau10wen Posted January 13, 2020 Author Share Posted January 13, 2020 Firstly, apologies for the wait! Long hiatus over on this father/son project. We've finished the build over the xmas break, I can't quite believe how long it's been since posting. Life got in the way this last year I suppose. Anyway, here we go.... We sprayed a base colour of Tamiya titanium gold over all of the body coloured areas... Then overlaid a few coats of Tamiya clear orange until we reached a colour we were happy with (I think three or four coats in total?) combined with the carbon fibre panels the orange looked great. I did experiment with using a Tamiya semi gloss black base, then overspraying in silver using an old pair of tights as a mask. I'm now doing this on EVERY piece of carbon fibre detailing I can in EVERY future build!!! 2 Link to comment Share on other sites More sharing options...
pau10wen Posted January 13, 2020 Author Share Posted January 13, 2020 The brake detail was brought out using Tamiya panel accent colour (black), and the interior was finished with carbon fibre centre console details and dash, and a flocking material used to give the impression of a black carpet (another first for me, I build rally car models, lol) 1 Link to comment Share on other sites More sharing options...
pau10wen Posted January 13, 2020 Author Share Posted January 13, 2020 more interior pics and a full pic of the interior and engine 1 Link to comment Share on other sites More sharing options...
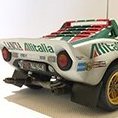
pau10wen Posted January 13, 2020 Author Share Posted January 13, 2020 here's a close up of the wheel detail, overall this was a great kit. Very exacting in fitment and technical, but we got there in the end! And more body work detail, the engine cover and doors are all fully moveable/posable on the finished model out of the box... and finally, the finished car. we still have to fit a couple of decals but this is pretty much it. 3 Link to comment Share on other sites More sharing options...
Alan R Posted January 13, 2020 Share Posted January 13, 2020 37 minutes ago, pau10wen said: I did experiment with using a Tamiya semi gloss black base, then overspraying in silver using an old pair of tights as a mask. I'm now doing this on EVERY piece of carbon fibre detailing I can in EVERY future build!!! Hi Paul, Love the idea of using old tights as a mask to simulate carbon Fibre. I'll give that ago on my Sesto Elemento when I start it (when ? … ) Cheers, Alan. Link to comment Share on other sites More sharing options...
pau10wen Posted January 13, 2020 Author Share Posted January 13, 2020 It'd be a fair project to do that across the whole bodywork Alan, but very achievable. In my limited experience it's about 5 minutes of positioning, muttering swearwords, re-positioning, repeat.... Then a 5 second 'pffft' on the airbrush, remove tights ad stand back to admire. Then repeat again and again for each section. A task to start when you're feeling your most patient 😂😂 1 Link to comment Share on other sites More sharing options...

Recommended Posts
Create an account or sign in to comment
You need to be a member in order to leave a comment
Create an account
Sign up for a new account in our community. It's easy!
Register a new accountSign in
Already have an account? Sign in here.
Sign In Now