Biggles87 Posted June 20, 2019 Share Posted June 20, 2019 And mine, I’ll be interested to see your solution. John Link to comment Share on other sites More sharing options...
ragnarec Posted July 10, 2019 Author Share Posted July 10, 2019 I made my own "beading tool" by sharpening a 0.6 mm syringe needle in a motor tool, and mounting the needle in a pin vice. The lost fastener detail could then be recreated. It was not particularly easy, and the result is far from perfect. Especially the areas with Milliput were troublesome, as Millput is brittle, and the centres of the fasteners tended to come off. In the middle of this process, the beading tool set ordered from China arrived, and I was able to compare it with my home made tool. In general, I feel that the China tool set works better. I think it will be very useful for future modelling project. So thank you for a great tip!! To make opening of the belly camera port easier, some small plastic pieces were cut from each fuselage half and glued together. I have also made a simple representation of the camera lens from a piece of sprue. I have a question regarding the glass in the camera port. Should it be flat, or should it follow the fuselage curvature? All for now! Regards, Ragnar 5 Link to comment Share on other sites More sharing options...
jet-mech Posted July 10, 2019 Share Posted July 10, 2019 Great looking spit so far. The brown "staining" inside of the undercarriage bays is corrosion prevention compound. We still use anti corrosion coating on our aircraft these days. At the end of every hangar input we have to apply various coatings to different areas. This process is called CPCP (Corrosion Prevention and Control Programme). 1 1 Link to comment Share on other sites More sharing options...
Troy Smith Posted July 11, 2019 Share Posted July 11, 2019 13 hours ago, ragnarec said: So thank you for a great tip!! I picked this up from @Basilisk whose builds often have useful tips on tools, just passing the info on. Good tool, just wish i could remember where mine is! 13 hours ago, ragnarec said: To make opening of the belly camera port easier, some small plastic pieces were cut from each fuselage half and glued together. I have also made a simple representation of the camera lens from a piece of sprue. AFAIK the F.24 does not have belly cameras? Cameras were on FR versions. (FR = Fighter Reconnaissance) or the dedicated PR versions 13 hours ago, ragnarec said: I have a question regarding the glass in the camera port. Should it be flat, or should it follow the fuselage curvature? the windows are flat. 1 Link to comment Share on other sites More sharing options...
ragnarec Posted August 5, 2019 Author Share Posted August 5, 2019 On 11/07/2019 at 11:47, Troy Smith said: AFAIK the F.24 does not have belly cameras? Well, frankly I don't know for sure, but the Airfix instructions tells me to install a clear part that looks like a camera port under the rear fuselage. I've posted an inquiry in the "Cold war" section - hopefully someone can give an explanation. Regards Ragnar Link to comment Share on other sites More sharing options...
Troy Smith Posted August 5, 2019 Share Posted August 5, 2019 29 minutes ago, ragnarec said: Well, frankly I don't know for sure, but the Airfix instructions tells me to install a clear part that looks like a camera port under the rear fuselage. I've posted an inquiry in the "Cold war" section - hopefully someone can give an explanation. Not sure what it is. @gingerbob would be a good person to ask. Link to comment Share on other sites More sharing options...
triumphfan Posted August 5, 2019 Share Posted August 5, 2019 I've built a few Airfix F.24's and always ignored that comment in the instructions. To be fair, my research wasn't extensive but I never found a pic showing the window on line or in the books I have. Seafire 47 does have the belly camera so it could be a genuine mistake by Auntie Airfix. The colour and decal illustrations never seem to show a camera window in the belly iirc? Atb, Steve. Link to comment Share on other sites More sharing options...
ragnarec Posted August 7, 2019 Author Share Posted August 7, 2019 I've finely managed to mount wings and fuselage together. The ventral camera is probably incorrect, but it will be an easy task to hide it behind a layer of filler. Just a bit of wasted work... The flaps have been glued in the up-position, as this is the typical position when the Spitfire is parked. Ragnar 5 Link to comment Share on other sites More sharing options...
Biggles87 Posted August 12, 2019 Share Posted August 12, 2019 The flaps look like a good fit. I’m glad that Airfix have finally stopped producing Spitfires with separate flaps, I’ve always had trouble fitting them in the ‘up’ position. ’ 1 Link to comment Share on other sites More sharing options...
ragnarec Posted August 17, 2019 Author Share Posted August 17, 2019 On 12/08/2019 at 14:56, Biggles87 said: The flaps look like a good fit. I’m glad that Airfix have finally stopped producing Spitfires with separate flaps, I’ve always had trouble fitting them in the ‘up’ position. ’ Yes, the flaps are quite a good fit. But I was not careful enough when I glued them in place and they ended up slightly offset in height relative to the wing underside. A little high on one side, and a little low on the other side. Which meant quite a lot of filling, sanding and rescribing. As you can see in the picture above, I have plugged the incorrect camera port with a disk of plastic card, installed the radiators and cut out the ailerons. The latter will be remounted in slightly offset positions. Prior to installing the radiator housings, the walls where adjusted in order to be perpendicular to the wing underside, in stead of vertical relative to the ground. Why Airfix moulded them as the did is a mystery to me... Ragnar 5 Link to comment Share on other sites More sharing options...
Thom216 Posted August 18, 2019 Share Posted August 18, 2019 I'll have to keep that tidbit about the radiators in mind when I finally get back to my pair o' 47s. 1 Link to comment Share on other sites More sharing options...
corsaircorp Posted August 19, 2019 Share Posted August 19, 2019 On 8/18/2019 at 2:20 AM, Thom216 said: I'll have to keep that tidbit about the radiators in mind when I finally get back to my pair o' 47s. Amazingly, I did'nt encountered the problem with my .47... But the .24 was wrong... I corrected it my way. Since the radiator are deepest ones, I made my best ! Reassured to see that I'm not alone in these straits... Good job Ragnar !! Well done ! Sincerely. CC 1 Link to comment Share on other sites More sharing options...
ragnarec Posted August 28, 2019 Author Share Posted August 28, 2019 The work on the Spitfire is progressing slowly. I have cut out the elevators and plan to mount them in dropped position, as is usually the case when the Spitfire is parked. The rudder has been modified with a new trim tab make from sheet plastic, featuring the strange, "split" shape that Airfix failed to portray. The ailerons have been glued back on the wings in slightly offset positions. Ragnar 6 Link to comment Share on other sites More sharing options...
ragnarec Posted September 13, 2019 Author Share Posted September 13, 2019 The control surfaces have been glued to the tail. One of the main issues with the Airfix kit is the sliding canopy, which sits too high on the fuselage. The sides don't reach down to the rails in the fuselage. To remedy the situation, I have acquired a vacuum replacement from Airwaves, and started the process of trimming it to fit. Not an easy task in my experience, due to the kind of plastic used in vacuum canopies. Final adjustments are done by sanding, and this is difficult as the plastic does not sand easily. My plan is to keep Airfix' windscreen, as it is better defined than the vacuformed alternative. The canopy will be mounted in the open positions once painting and finishing is completed. Ragnar 🙂 5 Link to comment Share on other sites More sharing options...
Thom216 Posted September 13, 2019 Share Posted September 13, 2019 I haven't messed with vac canopies yet, but I'm going to have to eventually when I get back to work on my FR46s. Good thing I have a couple damaged ones in the mail to practice on! 1 Link to comment Share on other sites More sharing options...
Joel Abery Posted September 13, 2019 Share Posted September 13, 2019 This is looking to be a serious build my friend, great work so far and it's been a long time since I've been eager to see a finished piece of art 1 Link to comment Share on other sites More sharing options...
Biggles87 Posted September 14, 2019 Share Posted September 14, 2019 I also find vac form canopies very difficult, but this one looks like it’s worth the extra bother. You seem to be doing a good job with it so far. John 2 Link to comment Share on other sites More sharing options...
Johnson Posted September 14, 2019 Share Posted September 14, 2019 Some great work there Ragnar. I find that vac formed canopies can really make a model, but as you say, not easy to work with. Cheers, 1 Link to comment Share on other sites More sharing options...
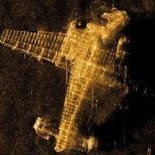
ragnarec Posted September 16, 2019 Author Share Posted September 16, 2019 (edited) Thanks for kind comments and encouragements! Time has come for the painting stage. And this is a stage that I approach with some apprehension. I always tend to screw things up. I am an avid user of Michromesh, which has saved quite a lot of my paint jobs... To check the state of the bodywork, I have applied a layer of primer to the model. Usually, I'm using Tamiya Fine Surface Primer in a rattle can, but this time I wanted to try something different and have used Tamiya Liquid Surface Primer thinned with yellow cap thinner and shot through my airbrush. It was not an immediate success. I think I failed with the thinning ratio, making a too thick mixture. Which clogged by airbrush and dried with a rough texture on the model. Micromesh to the rescue once again... Anyone tried airbrushing Liquid Surface Primer? Pictures of Spitfire 24s in service with 80 Squadron in Hong Kong show heavily weathered aircraft. I have to admit that I'm not good at weathering, and usually add minimal weathering to my models. So I not sure how to proceed. Maybe I have to learn some new techniques... Ragnar 🙂 Edited September 16, 2019 by ragnarec 4 Link to comment Share on other sites More sharing options...
Thom216 Posted September 16, 2019 Share Posted September 16, 2019 (edited) She's in her gray underthings... And looking good too. Minimal weathering is probably a good median. As they say, less is more and at some point they all go from pristine to heavily used. Whatever you do would fit in there at some point in its life. Edited September 16, 2019 by Thom216 2 Link to comment Share on other sites More sharing options...
Crimea River Posted September 17, 2019 Share Posted September 17, 2019 22 hours ago, ragnarec said: To check the state of the bodywork, I have applied a layer of primer to the model. Usually, I'm using Tamiya Fine Surface Primer in a rattle can, but this time I wanted to try something different and have used Tamiya Liquid Surface Primer thinned with yellow cap thinner and shot through my airbrush. It was not an immediate success. I think I failed with the thinning ratio, making a too thick mixture. Which clogged by airbrush and dried with a rough texture on the model. Micromesh to the rescue once again... Anyone tried airbrushing Liquid Surface Primer? Yes, I use this stuff all the time. I tend to thin it 50 to 60% with no issues. Link to comment Share on other sites More sharing options...
ragnarec Posted September 17, 2019 Author Share Posted September 17, 2019 4 hours ago, Crimea River said: Yes, I use this stuff all the time. I tend to thin it 50 to 60% with no issues. Thanks for the tip! Next time, I will try to be more accurate with the thinning ratio. Link to comment Share on other sites More sharing options...
Biggles87 Posted September 18, 2019 Share Posted September 18, 2019 I use plastic pipettes with graduations for measuring my paint to thinner ratio. They are available in packs from 50 to several hundred at a reasonable price. John Link to comment Share on other sites More sharing options...
ragnarec Posted October 5, 2019 Author Share Posted October 5, 2019 The layer of primer revealed a number of issues that needed to be addressed. This meant more filling, sanding and rescribing. To check the result of the work and get a consistent surface over the whole model, I once again used Tamiya Liquid Surface Primer, but this time thinned properly. Now it worked great! I'v replaced the piece that is supposed to fit on the fuselage behind the seat with a scratch built item for more scale appearance. I lost the fuel filling tube to the carpet monster and had to fashion a replacement from a piece of plastic rod. One strange "feature" of the Airfix kit that I have not mentioned so far is that the kit's fuselage is wider at the aft end of the cockpit opening than at the front. I think this is incorrect. At an early stage, before the fuselage halves were glued together, I applied heavy sanding to both fuselage sides to reduce the "hump". The canopy rails almost disappeared as a result, and had to be rescribed. The twisted cockpit door Airfix provides no longer fits and has eventually to be replaced with a scratch built item. In the picture below, I have temporarily glued in a flat plastic piece just to block the opening during paining. Thanks for looking! Ragnar 7 Link to comment Share on other sites More sharing options...
ragnarec Posted October 10, 2019 Author Share Posted October 10, 2019 Finally ready for the painting stage! I've sprayed the wing roots with some Vallejo Metal Color aluminium, but had problems getting a good result. Any tips regarding using Vallejo Metal Color? I got a grainy, flat finish. May be I used to high pressure? Anyway, the intention is to dab on some liquid masking fluid before spraying the camo and create paint chipping after the camo is done. Regarding camouflage. I plan to finish the model as W2-A from 80 Squadron, Kai Tak, Hong Kong, 1951. According the Airfix' instructions, the upper side colours should be Dark Green and Dark Sea Grey. Is this correct? Airfix also provide decals for a F.22, but with colours specified as Dark Green and Ocean Grey. Ragnar 😉 3 Link to comment Share on other sites More sharing options...

Recommended Posts
Create an account or sign in to comment
You need to be a member in order to leave a comment
Create an account
Sign up for a new account in our community. It's easy!
Register a new accountSign in
Already have an account? Sign in here.
Sign In Now