corsaircorp Posted October 10, 2019 Share Posted October 10, 2019 Hello Ragnar, Dark green and ocean grey on the upsides Med sea Grey on the undersides ! A few time after arrival at Kai Tak, the Spitfires received black and white stripes... Not exactly the same than the one used by Fleet Air Arm in Korean war operations But the reasons are the same... Preventing the trigger happy US bomber's crews of shoting at them !! Note that the yellow band on the leading edge are present too... The most known pic show these Spitfire hours after their arrival... Yellow bands are on but the Korean theater stripes are not... Yet !! Great work on your Spitfire !! Sincerely CC Link to comment Share on other sites More sharing options...
ragnarec Posted October 13, 2019 Author Share Posted October 13, 2019 Thank for info regarding camouflage colours, corsaircorp. I have a short article from the February 1978 issue of Scale Models written by Gordon Bowtle, who was pilot with 80 Squadron in Hong Kong and flew the Spitfire 24. According to Mr. Bowtle, the finish of the aircraft deteriorate rapidly due the conditions and "... each aircraft was re-sprayed at the end of its major inspection in dark green/dark sea grey with medium sea grey undersides". I have the understanding that RAF replaced Ocean Grey with Dark Sea Grey as upper side camouflage colour some time after the war, but this was possibly only for new aircraft types? I am no expert on post war RAF camouflage colours, and very grateful for any info that may clarify things. Link to comment Share on other sites More sharing options...
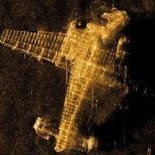
ragnarec Posted October 13, 2019 Author Share Posted October 13, 2019 I have started the painting process. I have tried to apply some kind of pre-shading, something that I normally not do. I have to admit that I'm really not very comfortable with freehand spray painting! But I guess that practice is the only thing that may improve matters. The next step was to apply a thin layer of Medium Sea Grey. I used Tamiya XF-83, and thought it was dark, so I mixed in quite a lot of XF-2 White. Possibly to much... Ragnar 4 Link to comment Share on other sites More sharing options...
Thom216 Posted October 14, 2019 Share Posted October 14, 2019 The great thing about preshading is that you do not have to be precise. A wavy line is as good as a straight line once you get the top coat over it to turn into just that, a shade of color. In fact not being precise is better for that varied look. Yours is looking pretty good from here. 1 Link to comment Share on other sites More sharing options...
ragnarec Posted October 17, 2019 Author Share Posted October 17, 2019 On 15/10/2019 at 00:26, Thom216 said: The great thing about preshading is that you do not have to be precise. A wavy line is as good as a straight line once you get the top coat over it to turn into just that, a shade of color. In fact not being precise is better for that varied look. Yours is looking pretty good from here. Your right - it is not necessary to be very precise with the airbrush when it comes to preshading. But I think I would need more practice with the airbrush before attempting something like WW2 Luftwaffe mottling... Anyway - time has come for the topside. After applying preshading using white and light and dark greys, I masked out the areas that is supposed to become Ocean Grey. I made the masks a little under-size in order to provide for some overlap between the green and grey colours. In retrospect, I see that that I cut that masks a bit too small, which mean that I have to cover unnecessary much Dark Green with Ocean Grey in the next paint stage. Ragnar 2 Link to comment Share on other sites More sharing options...
Thom216 Posted October 18, 2019 Share Posted October 18, 2019 7 hours ago, ragnarec said: Your right - it is not necessary to be very precise with the airbrush when it comes to preshading. But I think I would need more practice with the airbrush before attempting something like WW2 Luftwaffe mottling... Ragnar Well, mottling now that is entirely the opposite!😁 Link to comment Share on other sites More sharing options...
ragnarec Posted October 20, 2019 Author Share Posted October 20, 2019 (edited) Painting continues. The green areas were masked using Tack-it sausages and masking tape. The excessive use of green meant that the preshading had to be more or less redone for the grey areas. This was topped with some layers of well thinned Tamiya Ocean Grey. Next step will be black-and-white fuselage and wing bands, as well as yellow wing leading edges. I also plan to mask and paint the squadron codes, as the Airfix decals in my kit are of poor quality. I have purchased some Xtradecal replacements that provide nice roundels as well as stenciling, but not markings for any aircraft with the black-and-white bands. Ragnar Edited October 20, 2019 by ragnarec 7 Link to comment Share on other sites More sharing options...
Christer A Posted October 21, 2019 Share Posted October 21, 2019 That is just beautiful! 1 Link to comment Share on other sites More sharing options...
ragnarec Posted October 22, 2019 Author Share Posted October 22, 2019 On 21/10/2019 at 08:04, Christer A said: That is just beautiful! Thank you Christer! Link to comment Share on other sites More sharing options...
ragnarec Posted October 23, 2019 Author Share Posted October 23, 2019 Fuselage and wing bands masked out and white applied. White striped masked, black applied and masks removed. Ragnar 🙂 5 Link to comment Share on other sites More sharing options...
ragnarec Posted November 3, 2019 Author Share Posted November 3, 2019 For the squadron codes, I made artwork for masks using the drawing tool in MS Word. Not a very suitable tool for this kind of work I have to admit. Does anyone have any suggestion for a simple, user friendly drawing program for making artwork for masks and decals? The number and letters were printed on frisket film, cut out with a scalpel and applied to the model. This is the first time I have used frisket film. The result was OK, but not perfect. Some touch-up will be needed. For the other side, I decided to try a slightly different approach. In stead of using the frisket masks, I made new masks by printing the artwork directly on Tamiya masking tape. This is something I have done before, and works quite well. The biggest problem is that the masks get very flimsy and are a bit tricky to apply to the model. Again, some touch-up was needed after the masks had been removed. Ragnar 9 Link to comment Share on other sites More sharing options...
Thom216 Posted November 4, 2019 Share Posted November 4, 2019 Nice work with those masks. They look great. Link to comment Share on other sites More sharing options...
ragnarec Posted November 14, 2019 Author Share Posted November 14, 2019 I had a mishap with the "A" on the starboard side. I managed to place my big, fat thumb in the middle of the letter before the paint was dry, leaving a huge fingerprint. After initial attempts of fixing the issue with a fine brush, I gave up and decided to rub the whole thing off. Such things always tend to happen in my builds... That's one of the reasons I stopped using Vallejo Air and went over to Tamiya. I need paint that is sandable! This time, I painted the "A" before the camouflage. Here, I have masked the "A" off and am ready for some preshading/prefading before applying Dark Green. The final result: I'm not really happy with the way the camo on the nose ended up, so I have to redo that too. I may end up using more time fixing errors than I initially used applying the paint scheme... Ragnar 6 Link to comment Share on other sites More sharing options...
Biggles87 Posted November 15, 2019 Share Posted November 15, 2019 Good save. John 1 Link to comment Share on other sites More sharing options...
ragnarec Posted November 17, 2019 Author Share Posted November 17, 2019 I'm working on the paint chipping in the wing roots. Prior to laying the camouflage, I had sprayed on some aluminium + clear gloss. Plus dabbed on some Microscale Micro Mask. I think this was a mistake, and that Micro Mask is not very suitable for this kind of job. I think I will try Humbrol Maskol next time. I had problems removing the camouflage and reveal the aluminium underneath. In the end I managed somehow, but removed may be too much? I consider applying some paint by bush in order to reduce the amount of chipping and may be make it look more convincing. I'm not really sure how to proceed. Any tips?? Ragnar 7 Link to comment Share on other sites More sharing options...
Col. Posted November 18, 2019 Share Posted November 18, 2019 10 hours ago, ragnarec said: I had problems removing the camouflage and reveal the aluminium underneath. In the end I managed somehow, but removed may be too much? I consider applying some paint by bush in order to reduce the amount of chipping and may be make it look more convincing. I'm not really sure how to proceed. Any tips?? Looks fine to me Ragnar but may be worth searching out some photos to put your mind at rest. 1 Link to comment Share on other sites More sharing options...
Christer A Posted November 18, 2019 Share Posted November 18, 2019 Chipping by way of masking fluid has never worked for me, it always comes out as blobby instead of chippy. I haven't found a good method yet, but will experiment more with the hairspray technique in the future. 1 Link to comment Share on other sites More sharing options...
Biggles87 Posted November 18, 2019 Share Posted November 18, 2019 It looks good to me too. I use acrylic paint over a coat of aluminium and than chip it off with a cocktail stick, or for larger areas neat sellotape burnished on in random patches then ripped off. John PS. One suggestion, I don’t think that the black area on the trailing edge would be as worn. 1 Link to comment Share on other sites More sharing options...
ragnarec Posted November 20, 2019 Author Share Posted November 20, 2019 (edited) On 18/11/2019 at 09:46, Biggles87 said: PS. One suggestion, I don’t think that the black area on the trailing edge would be as worn. I take the hint, John! It makes sense. I decided to redo the wing root chipping, and this time I tried the hair spray technique. I decanted some hair spray fluid into a bottle, and applied it by brush to the wing roots. Camouflage colours were then reapplied. With a stiff brush dipped in water, I scrubbed away some of the camo. Not a big difference, but the amount of chipping has been reduced to some extent. And the black walk-way is kept intact. This will be weathered later with pastels or oils. Time will show ... Ragnar Edited November 20, 2019 by ragnarec 6 Link to comment Share on other sites More sharing options...
alt-92 Posted November 20, 2019 Share Posted November 20, 2019 4 hours ago, ragnarec said: I decided to redo the wing root chipping, and this time I tried the hair spray technique. I decanted some hair spray fluid into a bottle, and applied it by brush to the wing roots. Camouflage colours were then reapplied. 👍🏼 I've just come across Will Pattison's video about hairspray & chipping, very interesting. Link to comment Share on other sites More sharing options...
ragnarec Posted November 21, 2019 Author Share Posted November 21, 2019 20 hours ago, alt-92 said: I've just come across Will Pattison's video about hairspray & chipping, very interesting. Thank's for the link! I agree - interesting. I think he gets very nice results. Ragnar Link to comment Share on other sites More sharing options...
Crimea River Posted November 25, 2019 Share Posted November 25, 2019 I've experienced mixed results with hairspray chipping. Seems to be finicky and highly dependent on paint type, thickness, and time left in place. 1 1 Link to comment Share on other sites More sharing options...
OutcastJoel Posted November 25, 2019 Share Posted November 25, 2019 This looks nice, the chipping in particular is great! 1 Link to comment Share on other sites More sharing options...
ragnarec Posted November 29, 2019 Author Share Posted November 29, 2019 I've put down a layer of clear gloss in preparation for the decals. I always tend to struggle with the clear gloss... This time I used Tamiya X-22 thinned with Mr Color Leveling Thinner. I picked up some tips regarding application on the net, including some videos, and was able to get a passable result. Good enough for decals, I hope. The first coat turned out a bit rough and had to be rubbed down with sandpaper and Micromesh before the second coat. Just after application everything looked glass smooth, but as the finish dried a slight texture appeared. I also discovered that X-22 is quite slow drying, and I managed to get fingerprints in the finish even after more than 24 hours drying time. Ragnar 2 Link to comment Share on other sites More sharing options...
ragnarec Posted December 4, 2019 Author Share Posted December 4, 2019 Decals on. The next step will be to protect the decals with another coat of clear gloss, before a careful pin-wash to bring out the surface details. I've considered just brushing on a layer of Alclad Aqua Gloss instead of spraying X-22, but am afraid that the Aqua Gloss may be to fragile to protect the decals against the wash. I plan to make the wash by mixing oil paint (tube type) with odorless thinner. Thanks for looking! Ragnar 2 Link to comment Share on other sites More sharing options...

Recommended Posts
Create an account or sign in to comment
You need to be a member in order to leave a comment
Create an account
Sign up for a new account in our community. It's easy!
Register a new accountSign in
Already have an account? Sign in here.
Sign In Now