Graeme H Posted May 1, 2019 Share Posted May 1, 2019 OK, this a build that I have been promising for at least 2 GB's, but life got in the way big time First effort was what was called a buddy build way back, then the Maritime GB that finished recently So with as much determination as I can muster, I'm off at last, started on the 2nd day of the GB, but only just getting around to posting Nothing was done in either of the 2 previous attempts, just stuff collected First thing you will notice is that this is a late boxing with very nice decals compared to the older boxings It also as I was to find out, has some flash that needs to be addressed, significantly on the fuselage halves, which I would recommend needs dealing with before anything is attached to the fuselage halves The wings needed dressing down as well. As the wings on the Neppie are very busy compared to most, probably the Constellation is close with a four engine arrangement and tip tanks I decided to start with them, so the 2 jet engines and the tip tanks together The Mainwheel wells are not deep enough and I decided to open them up a bit, so put the nacelles together making sure to open up the top half of the locating cup on one side so the landing gear can be put in later then marked on the outside of the nacelles where to cut the idea being to leave the main gear attachments alone and cutting around them, they are more than strong enough I think. Now when you mark on the outside of the nacelle you need to remember to cut several mm's on the inside of the line, on the first one that principal applied, the second one I seemed to forget, but it was about 10 minutes later and my memory is shot So.. packed out with some plastic strip to correct the goof up not had time to do anymore since, but did look at the Resin Cockpit which is very nice, but realised the Eduard PE is flat and the resin is not, so I'm guessing I'm going to have to paint the resin and forgo the PE, maybe try the Hasegawa decals Today I will go and visit my resident SP-2H and have a better look at what's behind the mesh that is significant in the Mainwheel wells, my photos of some of it are up on the Walkaround site Also need to figure out what I'm going to use for that mesh 5 Link to comment Share on other sites More sharing options...
Colin W Posted May 1, 2019 Share Posted May 1, 2019 A classic kit from the last century when Hasegawa were top of the quality ladder. This was a great era for them and the kits are still good today. I suspect the mesh in your local example might be a recent addition to keep out birds. Under it you will find wing structure and fuel tanks. Lots of detail on the net using cutaway drawings to see what's there. Colin 1 Link to comment Share on other sites More sharing options...
Graeme H Posted May 1, 2019 Author Share Posted May 1, 2019 23 minutes ago, Colin W said: A classic kit from the last century when Hasegawa were top of the quality ladder. This was a great era for them and the kits are still good today. I suspect the mesh in your local example might be a recent addition to keep out birds. Under it you will find wing structure and fuel tanks. Lots of detail on the net using cutaway drawings to see what's there. Colin You could well be right there Colin, didn't think of that one. Link to comment Share on other sites More sharing options...
Tailspin Turtle Posted May 1, 2019 Share Posted May 1, 2019 Something to think about: http://tailhooktopics.blogspot.com/2014/02/hasagawa-p2v-neptune-kit.html 2 Link to comment Share on other sites More sharing options...
Graeme H Posted May 1, 2019 Author Share Posted May 1, 2019 Thanks Tommy, some good reference in those photos knew about the Maingear and nose gear bays, and am making plans to do something about it, I doubt I could ever get enough time to build to the correct fit though just too much of a major scratchbuilding job for me My plan is to make it basically a bit closer to the proper config. if that makes sense. Link to comment Share on other sites More sharing options...
Rob S Posted May 3, 2019 Share Posted May 3, 2019 Great to see this one started! Will be following this one closely. Link to comment Share on other sites More sharing options...
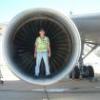
Graeme H Posted June 25, 2019 Author Share Posted June 25, 2019 Well I'm back into this one, been away going to Model shows all over the country, have done 3 in a month, in Perth, Brisbane and Melbourne, that's some serious mileage right there. So plodding along with the main gear wells has driven me mad, I have no reference from my photos, as I was trying to get the detail and now realise that I can't quite figure out the orientation as I didn't include outside parts to help me out One thing that has given me a little bit of a headache is getting good shots of my local one which has some bird netting in it to keep them out, so on a visit to the Brisbane show, took the opportunity to go to the Queensland Air Museum, which has the one that last used to be north of me several hundred kms, and now is south of me over 1200 kms and is more like an in service machine, in that it went into the hands of a private collector almost immediately on retirement of the aircraft, and he has since passed away, and the aircraft has now been removed and reassembled at Caloundra on the Sunshine Coast area of Australia,, a move of a bit over 1600 kms These are looking aft so you can see why I'm struggling, so lets start going forward and see how simple that is, this is the Starboard side and the port the insides are not handed so this is basically true for both sides and this is the front and this is me with the one in Caloundra So after I had modified the wing to open up the wheel bay, I realised after multiple visits that I had basically got it very wrong the insides need to be brought all the way forward to the trunnions that are on the nacelle, not as I first thought back at the main swivel for the whole leg So I now have to spend a bit of quality time cutting up plastic card to fix my mistakes I must stress that you don't follow my lead in cutting back the lower wing as far I did. Especially anything aft of the main swivel tunnions, that is totally wrong My excuse is that as the lower nacelle that is a separate part and I don't want to put it on just yet as I think it will be easier to detail before I fix it onto the wing, but it has the forward cups for the undercarriage the moulded on part on the wing at the forward end of the wing needs to come off as I have done here, to open up the place where the wheel actually goes and speaking of undercarriage, that is the next mountain range I have to cross 6 Link to comment Share on other sites More sharing options...
Rob S Posted July 4, 2019 Share Posted July 4, 2019 Perhaps that old saying "Measure Twice Cut Once" or however it goes needs to be changed to "Photograph Lots Cut only after working out what it actually looks like!". Take comfort that those who follow can learn from your build! Link to comment Share on other sites More sharing options...

Recommended Posts
Create an account or sign in to comment
You need to be a member in order to leave a comment
Create an account
Sign up for a new account in our community. It's easy!
Register a new accountSign in
Already have an account? Sign in here.
Sign In Now