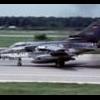
Filler Posted February 26, 2019 Share Posted February 26, 2019 Here I go again with another attempt at transitioning from a theoretical modeller to a real one. This time I have selected Italeri's 1:48 scale Tornado F3 from the stash and will build it entirely out of the box except for probably using some Xtradecals instead of the rather tired looking kit one (in my world using decals from another source doesn't mean a build isn't OOB) I picked this because I like the Tornado, it doesn't have a camo scheme (which I love but sadly cause me all manor of issues when painting) and because I don't have any plans for it as a build that mean I put myself under pressure and can't actually progress with the kit. Oh and it's not a difficult or particularly expensive kit to get hold of and this means I don't have to fear making a mess of it. Here's the kit with the Xtradecals sheet. I've chosen to go with the OEU markings. I don't really know why as they're perhaps the least interesting option but, I guess it's a bit different to the more popular squadrons. This hasn't quite sunk in yet but, I actually made a start with this last night. Not my usual start of looking for aftermarket bits, studying books and surfing the net looking for endless reference photos and worst of all, reading reviews and WIP's and discovering how bad the kit is and putting back in the stash! First step was taping some parts together to get a feel of the fit. In the below image of the two forward fuselage halves joined together I have learnt that there are some bits of plastic missing. Look tricky to simply fill so maybe some wafer thin plastic card will be needed. Next decided to glue the fuselage base in place but only along one side. The instructions have you glue it to one side in isolation but, seemed difficult after dry fitting. So by taping the halves together I managed to support for both sides and (hopefully) get it flush all round. There are gaps but nothing too serious. There are some panel lines that go nowhere but I'm just going to turn a blind eye to them as they're on the underside. I've also assembled the cockpit and seats but didn't think to photograph them. They need some paint now anyway so I'll snap them after that. And that is tonight's monumental task - getting paint out!! 5 Link to comment Share on other sites More sharing options...
bar side Posted March 17, 2019 Share Posted March 17, 2019 I haven’t tried the Italeri kit, only the ESCI and Revell Tonkas. Do like them & remember them as the new RAF jet. The GR1 is a classic, and I do remember the F2 at airshows, so the operational F3 is the next step. The Revell kit has lots of unnecessary fiddly bits (do I need nose wheels in two parts!) but it does build up into a nice kit if you persevere. Hope the Italeri cuts out some bits but keeps the shape right. 3 Link to comment Share on other sites More sharing options...
Filler Posted June 9, 2019 Author Share Posted June 9, 2019 Bit of a late reply but, that's absolutely amazing. Where'd you get the ladders from? After a lengthy period of inactivity I've just done a little more work on this, just a bit of filling and sanding, but at least it's some progress. I'm quite near the point of putting the wings in place and I need to make a decision on the wing sweep. I'm inclined to have them swept for reasons mainly of space saving on the shelf. Can I ask if it was typical/possible the the F.3 would be parked up with wings swept fully back? I seem to recall this would leave a GR.1 sat on its bottom if it did that. Link to comment Share on other sites More sharing options...
bar side Posted June 9, 2019 Share Posted June 9, 2019 Hi @Filler the ladders are part plasticard, part cardboard, part paperclip. It really fits my ESCI GR1 and is a bit tall for the F3. I had always assumed that F3s had the same problem of tail sitting with the wings swept, especially if the tanks were full 1 Link to comment Share on other sites More sharing options...
Alan P Posted June 9, 2019 Share Posted June 9, 2019 On 2/26/2019 at 5:31 PM, Filler said: Here I go again with another attempt at transitioning from a theoretical modeller to a real one. You're modelling, therefore mission success! Keep going 👍 1 Link to comment Share on other sites More sharing options...
Filler Posted June 9, 2019 Author Share Posted June 9, 2019 That's very true Alan. There's definitely something that makes me think that the ADV was ok with swept wings on the deck. Maybe the longer fuselage? Link to comment Share on other sites More sharing options...
Alan P Posted June 9, 2019 Share Posted June 9, 2019 Yes, but I can't believe it would have happened often, the aircraft would have to be very light on fuel and clean of stores. Link to comment Share on other sites More sharing options...
Filler Posted June 9, 2019 Author Share Posted June 9, 2019 3 hours ago, Alan P said: Yes, but I can't believe it would have happened often, the aircraft would have to be very light on fuel and clean of stores. You’re quite right and I’m going with the forward swept wing. At the end of the day it doesn’t take up that much extra space. I’ve done a bit more this afternoon and it’s progress, slow progress but it’s progress. I’ll get a few snaps up as I guess a WIP thread is pretty pointless without them. 1 Link to comment Share on other sites More sharing options...
Filler Posted June 10, 2019 Author Share Posted June 10, 2019 (edited) As promised, I'm updating my build thread and I'm quite determined to see this one through. I checked and over ten years I appear to have started 9 WIP threads around this site and on average I'd say I get to sticking some cockpit parts together before quitting. There's been a TR-1, an F-15, a couple of F-16s, an Etendard, two attempts at the same Jet Provost and a Jaguar. Anyway, yesterday I did some fettling work on the canopy as it did not sit well at all. Happy with it now and once glued in place should sit nicely. I also got the wing top and bottoms glued together and pushed them unto the locating pins. Not going to bother with the swinging mechanism as I've decide to go for the 25 degree sweep and leave it there. The bit that is troubling me is the inflatable bag things that fill the gaps behind the wings in the fuselage. As I'll have the wings spread, there will be big gaps to fill. There is no kit part, so I need to fashion something now and it looks best to fit whatever that is before going much further. This is complicated by me having wanted to sweep the wings back to 25degs in order to mark the darker grey painted area that 'disappears' when the wings are swept before swing them forward to the final position for the model. With the bags fitted, I wont be able to sweep them back and thus not mark the line for painting. I've done it nowbut, by the time it's primed etc, these pencil lines will be gone. Any suggestions on how to get around this? Also got the air brakes in. Not easy as they were definitely made to be deployed as they were the proverbial square peg in a round hole. The main wells have had some white primer and been fitted. The seats had been hastily brush painted but, I've since re-primed them as they looked terrible Don't laugh. Finally, as many of us like to do, I taped and positioned a few bits together to get the feel of the finished thing. Not as big as I thought. Actually expected it to be much larger than the Jag. Shall hopefully crack on a bit tonight and get the top and bottom fuselage together and maybe even joined to the front end. Must remember weight for the nose too. Edited June 10, 2019 by Filler 4 Link to comment Share on other sites More sharing options...
Filler Posted June 11, 2019 Author Share Posted June 11, 2019 Not quite as much done as I'd hoped last night but, some reasonable progress. Wings glued in place. Upper fuselage joined to the bottom. I added some plasticard behind the wing sweep 'hole' to give me something to work against when trying to represent the inflatable bagging. I did however notice a little bit late that the Italeri version is tapered towards the back and the real thing is not, it's rectangular. I'll have a think about that but, not too fussed as the main aim here is just to get something built whilst learning the various basic techniques of modelling (or assembling in my case). I do appear to have a problem here. I was pretty sure that PVA glue was the go to for sticking weight into nose cones etc. I did this around 9pm last night and it still hasn't gone off. Not sure what to do now as I have a gloopy mess that is slowly sliding around in there. And not shown, the nose cone is also full of liquid weight that is also capped by PVA. Any suggestions how I resolve this? Will it eventually go off? Link to comment Share on other sites More sharing options...
George Norman Posted June 11, 2019 Share Posted June 11, 2019 That will go off in int time with a nice bit of Warmth, You jag looks pretty good BTW. I follw this one, I have built 2 of these F.3. Not a bad ol model. 1 Link to comment Share on other sites More sharing options...
Steve Coombs Posted June 11, 2019 Share Posted June 11, 2019 I've only just seen this thread, otherwise I would have suggested you attached the wing nibs (the bits ahead of the wing, bordering on the air intakes) to the upper and lower fuselage parts before glueing them together. Matching them up afterwards can be a swine of a job... I know you're not doing it on this build, but for the wing sweep airbags I use sponge rubber (available from my nearest arts and crafts shop), painted and scored to look like the real thing on the external face. A suitably sized strip at the top of the glove box (?) and a larger corresponding one below do the trick and even conform to a sweeping wing. Works for me! 3 Link to comment Share on other sites More sharing options...
Filler Posted June 11, 2019 Author Share Posted June 11, 2019 57 minutes ago, George Norman said: That will go off in int time with a nice bit of Warmth, You jag looks pretty good BTW. I follw this one, I have built 2 of these F.3. Not a bad ol model. Thanks George, the Jag didn't turn out too bad despite a few problems with the painting in particular. Glad to hear the PVA will go off eventually but, with the weather here at present, warmth is something we're very short of (11 degrees Celsius in Stockport today) - and I refuse to turn on the central heating in June!! 27 minutes ago, Steve Coombs said: I've only just seen this thread, otherwise I would have suggested you attached the wing nibs (the bits ahead of the wing, bordering on the air intakes) to the upper and lower fuselage parts before glueing them together. Matching them up afterwards can be a swine of a job... I know you're not doing it on this build, but for the wing sweep airbags I use sponge rubber (available from my nearest arts and crafts shop), painted and scored to look like the real thing on the external face. A suitably sized strip at the top of the glove box (?) and a larger corresponding one below do the trick and even conform to a sweeping wing. Works for me! Hi Steve. You know, I had a nagging feeling there was something to do with the wing area that required a deviation from the instructions to deal with. And that's a great idea about the sponge rubber. I'm kind of kicking myself that I didn't slow down and try something like that now. Oh well, next time for sure. Link to comment Share on other sites More sharing options...
Filler Posted June 12, 2019 Author Share Posted June 12, 2019 @Steve Coombs, you weren't kidding about those wing gloves; they're going to really take some fitting. And I've also learnt that there'll be a gap where the leading edge of the wing enters the glove. Not sure what to do about that yet. Apart from dry fitting, all I've done tonight is start the intakes. Removed some ejector pin marks and some flash and started filling the inside walls so they're flush and smooth. I've done this in a slightly weird way. I've filled the recessed bit with kind of plasticard crazy paving and then fixed that in place using the sprue glue I made yesterday. I'll see what it's like tomorrow when it's dry. One other thing, the nose cone is on and the PVA had pretty much set around the weights. I pushed some foam in to fill the voids and block in anything that may come loose and slide back towards the tail. 1 Link to comment Share on other sites More sharing options...
Steve Coombs Posted June 13, 2019 Share Posted June 13, 2019 A suggestion for the wing nibs is to glue tabs of thin (therefore flexible) plastic card to the relevant areas of the upper and lower fuselage parts and attach the respective wing nib parts to them so you have a continuous surface above and below. Then you need to fettle the forward edges to meet as they were intended to. This will probably result in a gap with the air intakes on the inner face, but that's a relatively easy fix. Link to comment Share on other sites More sharing options...
Filler Posted June 16, 2019 Author Share Posted June 16, 2019 Another step along the way after I've wrestled the intakes together. They simply didn't want to line up in any plane so I had to glue and clamp a bit and repeat three times per intake. Still haven't dared remove the various clamps yet. Also took @Steve Coombs advice above to glue some support pieces in to assist fitting the notoriously tricky wing gloves. I'll be hopefully getting these bits together today. After that I think it's masking the canopy (hate that) and getting some paint back on the seats. Onwards and upwards! 1 Link to comment Share on other sites More sharing options...
Filler Posted June 25, 2019 Author Share Posted June 25, 2019 Hasn't felt like I've done much at all in the last 10 days but looking at my last post it seems I have done a bit. Here it is this morning. As anyone who has built, contemplated building or even just read about this kit knows that the wing gloves and pretty much everything around the wing sweep is a pretty woeful fit. I've generally managed to get it together ok but, there were large gaps between the wing glove and leading edge of the wing (which shouldn't be there. So I have attempted to fill them and shape them in with mixed success. Hopefully with a bit more fettling and some primer they will at least not stand out as being too obvious. The daft thing with this is that the wings are located on large pins for the swinging option, so they must be in the 'correct' place (as far as Italeri are concerned), surely? But then Italeri have large gaps above and below the wings and of course huge gaps behind where the wings retract into in the 'pointy' config. One thing I am pretty happy with is my effort to represent the inflatable bagging that the wings push through when swept. Italeri leave a triangular hole that is shaped for swept back wings, so I decided the easiest approach was to use the thinnest plasticard I had and cut to fit around the wing. I then glued in place and did some crude scribing. Finally wiped a bit of ink across them to highlight my efforts. I fancy they'll look passable once it's all painted up. The last thing I've done is to address the recesses where the Skyflash missiles would sit. As I have decided to have a clean Tornado, these will be very visible (well, if you turn it upside down) and the starboard one that sits further back just comes to a dead end where the front and rear parts of the model join. So I decided to try and carve out its back end. Now there isn't much material to go at here, so it is actually still a tad shorter than it should be but after a go with a blade and needle file and some sprue glue and sanding I have got a result that I'm actually quite pleased with. A little more cleaning up and a prime and it should be ok. So I'm very close to getting it primed and painted up now. Still a bit terrified of the airbrush but this whole build is just about getting myself back into the hobby and learning and improving the various skills. Oh and I'm still putting off masking the canopy. And the seats, still need to repaint the seats. One other thing, there was no way I was getting in to rescribing as that would more than likely have killed my mojo, but there are panel lines around the front wheel well inset part that apart from likely being fictitious, simply go nowhere. But I think that I'll just live with them, especially as they are on the underside. 4 Link to comment Share on other sites More sharing options...
DougC Posted June 25, 2019 Share Posted June 25, 2019 Hi Filler, Sorry I'm a bit late with this info but to answer your question about sweeping the wings on the ground.... the F3 could quite happily put them all the way back to 67 (63 with the big 2250L tanks fitted) without risk of tail sitting unlike it's shorter GR cousins. I think this was because of it's longer fuselage & the Tank O (just behind the Nav which held 600kg (or was it 800 kg?) which meant a more forward CofG, even with the fin tank full (another 440kg). Whilst we would always sweep the wings fully back for taxying out of a HAS, we would sweep them forward again after pushback/ winchback for parking at the end of a flight so the engineers could do their post-flight inspections. So unless you're modelling a jet taxying out, you're most correct to have the wings at 25 on the ground. Does that make sense? Cheers & good luck with the build - it'll be good to see the old girl finished (just don't do her in a 111 Sqn scheme!). Doug 3 3 1 Link to comment Share on other sites More sharing options...
Filler Posted July 7, 2019 Author Share Posted July 7, 2019 Nowhere near as late as I am at thanking you for that great information @DougC! Finally getting back to this after a period away. Still thinking of TOEU markings or just using the kits 5 Squadron decals as I'm going for a late 80's finish. Trying to get the confidence to spray some primer on it today via an airbrush. Never tried that before and can't even decide whether to try using black or grey primer yet. Still putting off canopy masking too. Weird how there's so many aspects of modelling that I don't particularly enjoy. Gluing and sanding is fine, masking not so much and painting terrifies me!! 😨 1 Link to comment Share on other sites More sharing options...
Filler Posted July 7, 2019 Author Share Posted July 7, 2019 (edited) Wow, just wow! I broke out the airbrush gear and threw some primer at my ADV and I'm delighted with the results. I used Ultimate black primer, straight from the bottle into my old Badger 175 Crescendo with the large needle fitted and it went on brilliantly. I'm sure I can get a lot better too. I suspect I used too much paint (felt like half a bottle) and that might mean I need to work on distance and pressure a bit. Took a heck of a lot longer than when I've used Halfords rattle cans but at least I'm not restricted to outdoors spraying in good weather and no washing on the line. Was probably wasting galons of that too anyway. Doesn't look much being all black and that but, I'm chuffed to bits. Excited to see how it responds to some sanding and touch ups, not that it needs much, if I do say so myself. The canopy got a wipe and a coating of Klear so will tackle the dreaded canopy masking tonight. I love it when it goes well and I get the enthusiasm to sit at the bench. Happy days!! Also wondering if I'd be better sticking with my old Badger airbrush instead of the H&S Evolution 2in1 in bought. Seemed to struggle a bit with that. But maybe primer versus paint isn't a fair fight? Edited July 7, 2019 by Filler 4 Link to comment Share on other sites More sharing options...
Filler Posted January 23, 2020 Author Share Posted January 23, 2020 Six months have passed since my last activity and apart from buying a couple more kits that I don't need, I've done nothing - until about a week or so ago that is. I've been busy getting some paint on the F3 and then getting the paint on again after not liking the colours, then masking off and painting the little black bits and then touching up various places and so on. Eventually happy with it (or maybe just brassed off with going round in masking/painting circles) I took to it with some Klear using a brush ready for applying the decals. What I've now got is a shiny but slightly streaky F3. I tried polishing it to smoothen it a bit, but that hasn't worked. In fact if anything I think I've started to remove paint. Should I give it another coat of Klear? A thicker coat to try and avoid the streakiness? Or should I just get on with it and stick the decals on? I mean, in all honesty, it's not very good anyway so a few streaks aren't exactly going to let the whole thing down. Here's the streaky finish (which looks more blotchy than streaky in the photo). 3 Link to comment Share on other sites More sharing options...
Col. Posted January 25, 2020 Share Posted January 25, 2020 How bad are those streaks and will they continue to bother you more or less than not finishing your Tornado will bother you? 1 Link to comment Share on other sites More sharing options...
bar side Posted January 25, 2020 Share Posted January 25, 2020 Are you going to give it a final flat coat once the decals are on? Tat might even up the finish. I usually give them a quick spray of Humbrol matt clear to seal the decals down & even things up 1 Link to comment Share on other sites More sharing options...
Lord Riot Posted January 25, 2020 Share Posted January 25, 2020 That red light looks good, is it aftermarket or just the kit one painted red? You've managed to get it still looking clear despite the paint. 1 Link to comment Share on other sites More sharing options...
exdraken Posted January 25, 2020 Share Posted January 25, 2020 nice progress! 1 Link to comment Share on other sites More sharing options...

Recommended Posts
Create an account or sign in to comment
You need to be a member in order to leave a comment
Create an account
Sign up for a new account in our community. It's easy!
Register a new accountSign in
Already have an account? Sign in here.
Sign In Now