clive_t Posted February 24, 2019 Share Posted February 24, 2019 I've used EZ-Line for rigging, and it looks ok - although I will be honest and say I've never done anything ww1 larger than 1:72. I'm looking forward to seeing how this pans out on 1:48 1 Link to comment Share on other sites More sharing options...
Wonky Donkey Posted February 24, 2019 Author Share Posted February 24, 2019 So the decals have survived their stay in various folks' attics/sheds and whatever. Slow and steady did the trick: The only one that gave any bother was the "le pilou pilou" legend under the cockpit. It shattered, but fortunately I managed to salvage 99% of it and I reckon it looks alright from far enough away... : I'll gloss them over tomorrow. Meantime I finished the machine gun. I must say the pin as a mounting solution is genius. Fairly chuffed with how this turned out (we'll see how it goes under primer/paint). Enough for today. Cheers. W-D 4 Link to comment Share on other sites More sharing options...
Wonky Donkey Posted February 24, 2019 Author Share Posted February 24, 2019 3 hours ago, clive_t said: I've used EZ-Line for rigging, and it looks ok - although I will be honest and say I've never done anything ww1 larger than 1:72. I'm looking forward to seeing how this pans out on 1:48 I have used it on 1/72, 48 and 32 clive and oddly it seems to look OK in all three (bit over scale for 72 maybe but what the heck). Tried the Uschi stuff too but just didn't manage to get on with it. I've got an academy camel in 1/32 on the go alongside this MS purely as a chance to try out some fishing line and Bob's buckles. Figured I'd try it on summat that cost £20 rather than £70! W-D Link to comment Share on other sites More sharing options...
clive_t Posted February 25, 2019 Share Posted February 25, 2019 Makes sense! With my recent SA.4 build I managed to split the EZ-Line lengthways to make it thinner than it would otherwise have been, meaning that the inter strut cross bracing wires could be made to look thinner without having to increase the amount of stretching. 1 Link to comment Share on other sites More sharing options...
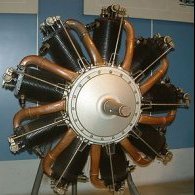
Wonky Donkey Posted February 27, 2019 Author Share Posted February 27, 2019 Hi there. OK, so having been too timid with the pre-shading IMO, I went to the other extreme on the staining. There's a couple of what look like pretty filthy Type Ls online (no copies in case they are ©), one in the snow especially. Staining seems to be partly random and partly more "logical" in following the airframe structure. Tamiya smoke thinned loads, and: Looks too stark as its glossed just now. Hopefully the matt coat and maybe some more filth(!) will blend it some. I also fitted the engine. I say "fitted", but it didn't. It didn't fit under the cowl, and even if it did it's got too great a diameter to sit anywhere near the centre of the fuselage. Some bending and filing got it closer and it'll have to do where it is, unfortunately. The machine gun (less the ammo belt) is loosely fitted just to see if it sits OK. Happy enough there. I've started the PE structures, starting with the tail skid. Some PE parts are very fine and brittle so I suspect t some bodging is on the cards. Hey ho. W-D 3 Link to comment Share on other sites More sharing options...
Wonky Donkey Posted February 28, 2019 Author Share Posted February 28, 2019 On we go, then.. I started with the tail skid. Predictably, several of the tabs that form the "Cup" that accepts the skid itself snapped when being bent. Probably just about got away with it (the white bits here will be painted red later). On then to the main undercarriage. This went more smoothly as the PE parts are more substantial. The tricky bit was lining up, and keeping straight, the central support so the axle assembly (three tubes) would slot through. Most of this evening spent on this element alone (again, this will be red): Plenty more of the same still to go... For a break, I added a couple of smaller external details and have finished the last interior pieces (two instruments) and the propellor. Cheers W-D 8 Link to comment Share on other sites More sharing options...
Antoine Posted March 1, 2019 Share Posted March 1, 2019 Splendid, really! Funny, I own this box too, but can't remember about the huge PE sheet. Got to check this. I've fond memories about my first MS, the type N, build nearly ten years ago, that seeing yours makes me want to start this L straightaway! By the way, I know about at least one set of AM decals, for a Russian machine. Big H 1 Link to comment Share on other sites More sharing options...
Wonky Donkey Posted March 1, 2019 Author Share Posted March 1, 2019 I was looking at your Type N build recently @Antoine. Very nice. I fancy the Special Hobby Type N in 1/32 one day. My dad's local air museum has built a replica. Those decals are cool - I'd have gone for those if I'd found them before I started this build. Shame. If I ever do another one... Cheers, W-D Link to comment Share on other sites More sharing options...
Britman Posted March 1, 2019 Share Posted March 1, 2019 I see how you may have doubted yourself , but may I suggest you have knocked this into shape in good style. Well done and thank you for sharing your project. Keith 1 Link to comment Share on other sites More sharing options...
Brandy Posted March 1, 2019 Share Posted March 1, 2019 The undercarriage looks great, as does everything else. Coming along very nicely indeed! Ian 1 Link to comment Share on other sites More sharing options...
clive_t Posted March 1, 2019 Share Posted March 1, 2019 Nice - that prop is a thing of beauty in itself! 1 Link to comment Share on other sites More sharing options...
Antoine Posted March 1, 2019 Share Posted March 1, 2019 10 hours ago, Wonky Donkey said: Very nice. I fancy the Special Hobby Type N in 1/32 one day. Thanks! Same here, and the kit is far from being pricey. I'd go for an RFC machine. I'd love to find another Ed kit, too. 1 Link to comment Share on other sites More sharing options...
Wonky Donkey Posted March 1, 2019 Author Share Posted March 1, 2019 Thanks for the encouragement folks! More PE fun this evening... I added the eyelets for the rudder and horizontal tail control wires (I'll drill them later) Added the instruments to the cockpit (sans blu-tac) I spent a good hour or more adding the vertical post under the fuselage. Its part of the wing-warp mechanism, and required threading some tiny pieces (see pic below) through the sort of A-frame structure Turned out not too bad, but we'll have to hope it doesn't collapse when rigging is attached.... On which, I actually think Eduard have some of the routing of the control cables wrong. I THINK the two eyelets (visible above, beneath the rear-most PE post) should be further apart and the single ring (visible just beneath the axles in the pics) should sit between them. I'm not sure yet though so will leave it for now... 🤔 I painted the undercarriage etc before I left it for the night. I'll add the "suspension" and wheels tomorrow. Then I need to work out whether it's better to sort the wing mounting next or finish the tail... 🤔 Cheers for now. W-D 5 Link to comment Share on other sites More sharing options...
Wonky Donkey Posted March 3, 2019 Author Share Posted March 3, 2019 Evening friends. Guess what? Yep, more PE action... 😂 Actually, for a break I decided to go ahead and finish the tail. There was of course some PE there too for the control horns.. This is the sort of PE work I really dislike. Tiny bits, nothing really to bond them too... well, you get the idea. Pleasingly, my mounting arrangements for the tail itself worked out nicely, and I decided to add the control wires whilst I was at that end. Obviously the model now has sticky-out/knocky-off bits which makes mucking about sorting the wing struts a bit more precarious... Despite [my own] dire predictions of how tricky this would prove, it wasn't actually that bad. A small amount of adjustment (i.e. bending..) and enlarging the hole I'd drilled in the wing and it was pretty much there. So I mounted the front and rear struts. I made an error here though. The rear set should be vertical but I simply couldn't get this to work out. They're mounted ever so slightly too far rearward but if I moved them so that they were vertical then the mounting point on the fuselage was noticeably too far forward. So we'll have to accept them Pitched forward a bit. Obviously you can see I have painted all the PE structures now too. I added the wheels (the pre-drilled holes were way too big so I had to drill smaller but deeper) and the PE representation of the "rubber band" type suspension. The latter was by far the most fiddly task on the kit. Six out-of-true ovals that hook over the three bars of the undercarriage. None fitted and each had to be filed and coaxed on. 😤 Much simpler was the post on top of the wing, although it did snap... I made a start on the rigging with the cross-bracing wires between the front struts. Next I'll dull down the newly painted parts and matte coat the whole thing before starting the rigging in earnest. Cheers W-D 8 Link to comment Share on other sites More sharing options...
Martian Posted March 3, 2019 Share Posted March 3, 2019 There is some exemplary workmanship occurring here! Martian 👽 1 Link to comment Share on other sites More sharing options...
Brandy Posted March 3, 2019 Share Posted March 3, 2019 (edited) She's looking very nice indeed! Re the rigging for the wing warping, I don't have my references to hand but Morane's (and Pfalz's) usual arrangement was this: The front circle is for the extension to the lower end of the control column (elevator controls). Two wires ran from that extension, back to the upper elevator control horns via two slots about where you have the pe under the "v bar" but the slots should be across the fuselage, and under the v frame. Two more ran back internally, above the control column pivot point, to the lower elevator control horns, thus giving positive pull action to both down and up elevator. The wing warping wires came vertically out from those same two slots, passed through the v frame (hence the slots in that part) and attached to the pivot bar which was mounted at the tip of the v frame. http://replicair.fr/avions/morane-saulnier-type-g/morane-premiers-vols/ This pic shows it fairly well, scroll down to the underside picture of the aircraft airborne. Hope that helps! Ian Edited March 3, 2019 by limeypilot 1 Link to comment Share on other sites More sharing options...
Eivind Lunde Posted March 3, 2019 Share Posted March 3, 2019 Very nice work, and gosh, Eduard has come a long way haven't they. I envy your patience with the photo etched parts, I have very mixed feelings about them myself. 1 Link to comment Share on other sites More sharing options...
Wonky Donkey Posted March 3, 2019 Author Share Posted March 3, 2019 That's monumentally helpful Ian!! 👍 I reckon I can persuade the eyelets under the V-bar off and back on through 90°. The rest I think I'd pretty much sorted. All I need to do now is plan the order to do it in and whether I can be are-said with any form of tensioner... Might cheat and just slip some brass tube over some ezline... 🤔 W-D Link to comment Share on other sites More sharing options...
Wonky Donkey Posted March 3, 2019 Author Share Posted March 3, 2019 Oh, and I must remember to add the windscreen. One of those acetate types - never really know the best stuff to stick 'em on with.... Suggestions welcome.. W-D Link to comment Share on other sites More sharing options...
clive_t Posted March 3, 2019 Share Posted March 3, 2019 5 minutes ago, Wonky Donkey said: Oh, and I must remember to add the windscreen. One of those acetate types - never really know the best stuff to stick 'em on with.... Suggestions welcome.. W-D Jeweller's cement? https://www.amazon.co.uk/Jeweltool-McGuinness-Hypo-Original-Packing/dp/B00K7ZVBRO/ref=mp_s_a_1_1?ie=UTF8&qid=1551650640&sr=8-1&pi=AC_SX236_SY340_FMwebp_QL65&keywords=jewellery+cement&dpPl=1&dpID=51etckHTD-L&ref=plSrch Link to comment Share on other sites More sharing options...
Wonky Donkey Posted March 3, 2019 Author Share Posted March 3, 2019 4 minutes ago, clive_t said: Jeweller's cement? Now there's a new one on me... W-D Link to comment Share on other sites More sharing options...
Wonky Donkey Posted March 5, 2019 Author Share Posted March 5, 2019 Hi folks I added the fuel (and oil??) tank filler caps and the windscreen. Just used CA glue in the end, after testing it on some scrap acetate from the kit. Screen is a bit too vertical I think but not too noticeable. After a bit of "thinking time" (i.e. a beer and some telly) I figured out a sequence for rigging and set about it. I rigged the top with the wing still separate. Wanted to minimise handling as the wing to strut mounts are pretty fragile. All the lines are continuous over the top and the "ends" will be on the underside mounting points. As I suspected, I went for ezline and some tiny cuts of brass tube to simulate the ends and the adjusters. It's cheating but I'm happy enough with it. Photos not the best - sorry. After that I got all confident and went ahead and mounted the wing. No photos yet though cos I'm not touching it til I'm sure it's 935% dry! Cheers W-D 4 Link to comment Share on other sites More sharing options...
clive_t Posted March 5, 2019 Share Posted March 5, 2019 Looking good 1 Link to comment Share on other sites More sharing options...
Ted Posted March 6, 2019 Share Posted March 6, 2019 Really nice, the weathering, the rigging, the precise PE...so good. 1 Link to comment Share on other sites More sharing options...
Wonky Donkey Posted March 6, 2019 Author Share Posted March 6, 2019 Thanks for the comments. So, as if by magic, it's done! ☺ Not much to report really. Wing mount is surprisingly sturdy if not quite 100% square. It's pretty close so unless you look at it square-on you can't tell. There's a mistake in the under side rigging as some stray CA grabbed a brass "buckle" at the wrong end of one of the lines, but again you have to be looking for it. Added the last dangly bits - steps, prop, machine gun and, well, that's it. Reasonably chuffed with how it turned out, and I can do PE after all (but not the stupidly tiny bits though... 😂). Here's a few pics: And finally with its future self! Thanks for your help and encouraging words. Need to finish the Academy camel in 1/32 I'm part way through, then an airfix Halifax in 1/72. That'll be in free French colours (inspired by a recent trip to Elvington). W-D 7 Link to comment Share on other sites More sharing options...

Recommended Posts
Create an account or sign in to comment
You need to be a member in order to leave a comment
Create an account
Sign up for a new account in our community. It's easy!
Register a new accountSign in
Already have an account? Sign in here.
Sign In Now