clive_t Posted May 24, 2019 Share Posted May 24, 2019 That's a great idea to have the head stuck on a piece of wood and sculpting it there. I must give that a try, thanks! Link to comment Share on other sites More sharing options...
Louis Posted May 24, 2019 Author Share Posted May 24, 2019 8 hours ago, clive_t said: That's a great idea to have the head stuck on a piece of wood and sculpting it there. I must give that a try, thanks! Thank you! This is the only way I have found to prevent the head from being deformed when I shape it. Regards 1 Link to comment Share on other sites More sharing options...
Louis Posted July 26, 2019 Author Share Posted July 26, 2019 (edited) Benoist and his son are finished: My first head for the son was too big. I have redone the son's head again. This time I do not touch it anymore: Regards Edited July 26, 2019 by Louis 9 Link to comment Share on other sites More sharing options...
clive_t Posted July 26, 2019 Share Posted July 26, 2019 Outstanding! Link to comment Share on other sites More sharing options...
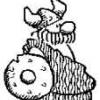
Louis Posted August 26, 2019 Author Share Posted August 26, 2019 Thank you. M. Poulet: Next one, the photographer. Regards 9 1 Link to comment Share on other sites More sharing options...
clive_t Posted August 26, 2019 Share Posted August 26, 2019 Brilliant! Is the pale yellow detail also made from Sculpey? Link to comment Share on other sites More sharing options...
Louis Posted August 28, 2019 Author Share Posted August 28, 2019 Thank you, No, it's Tamiya epoxy bis component mastic. Regards. 1 1 Link to comment Share on other sites More sharing options...
Louis Posted December 12, 2019 Author Share Posted December 12, 2019 Finished (almost)! The delivery was long and painful. The pieces of the camera are not glued, which is why it is not right. The straps are two-part Tamiya putty spread on "roll" and cut into strips with the razor blade. Photo familly : Thank you for your nice words. Regards. 9 Link to comment Share on other sites More sharing options...
fjaweijfopi4j48 Posted December 12, 2019 Share Posted December 12, 2019 Speechless. Fantastic work! Cheers Link to comment Share on other sites More sharing options...
Tzulscha Posted December 12, 2019 Share Posted December 12, 2019 Hou la la! Vos peintures sont incroyables! La finition en métal ainsi que le bois sont brillants Ta sculpture sur les figures est aussi magnifique! J'attends avec impatience le reste de la version. Bravo! (Désolé pour mon mauvais français ) Link to comment Share on other sites More sharing options...
Louis Posted November 26, 2022 Author Share Posted November 26, 2022 (edited) Hello , Kajetan passed away a few weeks ago. He had the idea for this assembly and should have produced the parts and the decals. https://www.britmodeller.com/forums/index.php?/topic/235049624-148-caudron-g-4-paris-melbourne-1919-conversion-kit-meliusmanu/ May he rest in peace. https://www.facebook.com/meliusmanu/ Edited November 26, 2022 by Louis Link to comment Share on other sites More sharing options...
Louis Posted November 26, 2022 Author Share Posted November 26, 2022 I thus continue this assembly which deserves to be carried out. E.Poulet took over Jules Vedrines' project on his own and prepared the itinerary. The flight is designed as a reconnaissance flight of the stages to be followed in order to open a regular line to Asia and Australia and to promote French aviation. He will take with him the mechanic Jean Benoist (former mechanic of Gilbert) who has accompanied him for several years and who was already present in 1914 during his record flight. The raid is undertaken for the benefit of the widow of Jules Vedrines and her five children. The plane he will use will be a twin-engine Caudron G-4 registered C.4251 bought by him (60,000 francs) and modified for the occasion "(...) and which Mr. Caudron was kind enough to refurbish him" (doc.la vie Aérienne p 683). It's a plane Poulet knows very well. "It takes off quickly, lands slowly and has all the guarantees of safety." [/b] It was his friend Jules Védrine “the glorious and regretted comrade” who came up with the idea of the Paris Melbourne raid. His death on April 21, 1919 prevented him from carrying out this project. PARIS, France, September 30, 1919. Mr. Henry J. Smith (Sea Land and Air vol II N°21) interviews Poulet: Mr. Henry J. Smith, who heads his story : '' Poulet to Fly to Australia Pays Own Way,'' describes the interview in the following breez style, to which, one offers due homage. PARIS, France, September 30. Link to comment Share on other sites More sharing options...
Louis Posted November 26, 2022 Author Share Posted November 26, 2022 (edited) After a long reflection I decided to enter the 21st century... I started drawing the missing parts to have them printed. Before that, I had to learn the software a bit (Freecad), which doesn't happen in 3 days. I show you the pictures. I need to have your opinion and an external and critical eye on the shapes and position of the appendages. To be "light" the tanks will be hollow. I'm only pretty sure of the length of the middle part which I think (hope) matches the gap between the masts that go through the engine nacelle. I don't have many photos of the details and obviously not photos from the right angles. The front part seems short to me... For the caps I took the diameter of the smaller ones that are on the model and the photos of the originals available on the net. I'm not sure if their diameters are the same. The one in front seems bigger. The butt joint at the front is "tapered". I thought I saw this on a photo but I can't find it anymore... Regards Edited November 26, 2022 by Louis 3 Link to comment Share on other sites More sharing options...
Louis Posted November 26, 2022 Author Share Posted November 26, 2022 Hi, This is the one from the last time: I made two more (I think the nose is the wrong one). The latest model looks best to me: Regards. Link to comment Share on other sites More sharing options...
Louis Posted December 8, 2022 Author Share Posted December 8, 2022 Hello, I also started a propeller. There are 4 to make, anyway... Back side: I can't get smooth surfaces yet but I'm working on it... Regards. 2 Link to comment Share on other sites More sharing options...
Louis Posted January 16, 2023 Author Share Posted January 16, 2023 (edited) Quote Edited January 16, 2023 by Louis Link to comment Share on other sites More sharing options...
Louis Posted January 16, 2023 Author Share Posted January 16, 2023 (edited) Hello! Here are the finished tanks (I hope), equipped with their caps and their pipes. Regards Edited January 16, 2023 by Louis 4 Link to comment Share on other sites More sharing options...
rob Lyttle Posted January 16, 2023 Share Posted January 16, 2023 My goodness, Louis, what an excellent and extraordinary build project!! 👍 The research, the concept, the superb figures, the 3D design, everything is just outstanding. I regret the loss of your associate and friend, but you are doing fine here, so carry on with this. 🍀 Link to comment Share on other sites More sharing options...
Louis Posted March 28, 2023 Author Share Posted March 28, 2023 (edited) Thanks! Hello! That's it!!! I received my 3D printed parts. Thanks to Edgar at Copper States Models who kindly printed them. I did not photograph the most beautiful pieces. I had not seen that there were differences. Some very small modeled details are not visible (the slits which limit the caps of the tanks for example or the levers which must have broken during the washing of the parts) but it's much better than if I had to do that at the hand. A spare wheel that will fit in the passenger compartment (I have 7, if someone needs a wheel...). Four propellers. They are too thin, I will have to chew to gain thickness. If I can't I will edit the file and buy myself a printer... Now I have to find time to make models.... See you soon Edited March 28, 2023 by Louis 5 Link to comment Share on other sites More sharing options...
Vesa Jussila Posted March 29, 2023 Share Posted March 29, 2023 Nice 3D prints. I missed this topic originally, need to start to follow now. Link to comment Share on other sites More sharing options...
Louis Posted August 26, 2023 Author Share Posted August 26, 2023 Hi, My first version of propellers did not please me. So I modified it to be more "rounded". And then I bought myself a 3D printer.https://www.anycubic.fr/products/photon-mono-4k I am weak. After many many tries I managed to print complete propellers. I had to sand them down and prepare them with Surfacer to make them acceptable. On the left the new propeller... [ /url] I printed boxes to put in the cockpit and the butt of the hunting rifle carried in the cockpit. I rounded it with sandpaper and glued a syringe needle barrel. [ /url] [ /url] [ /url] Anything with flat surfaces like crates is easy to print. As soon as there are curved surfaces it is another story. We see the lines marked by the different layers of resins and it is necessary to sand and pass the surface. 3D printing requires, I'm afraid, a long experience to obtain perfect parts... 1 Link to comment Share on other sites More sharing options...
Louis Posted August 26, 2023 Author Share Posted August 26, 2023 The aluminum floor is made of self-adhesive aluminum tape sanded with sandpaper. It can also be wood color. I wanted the boxes to be seen better, but they cover the entire surface of the floor. It is glued to a grid of a faucet "bubbler" and shaped by rolling a brush handle over it. The grid is deformed to obtain diamonds as in the photo of the original. With the naked eye it passes. [ /url] [ /url] [ /url] [ /url] [ /url] The cockpit will receive boxes, a wheel, 5 liters of water and the gun. The wheel does not fit as in the photo unless you cut into the boards on each side of the passenger seat. 3 Link to comment Share on other sites More sharing options...
Louis Posted August 26, 2023 Author Share Posted August 26, 2023 (edited) 750 Kg of material... The boxes take up a lot of space...probably too much. The wheel that I can't place yet: And the gun: And the new chair: Edited August 26, 2023 by Louis 5 Link to comment Share on other sites More sharing options...
Louis Posted November 14, 2023 Author Share Posted November 14, 2023 (edited) Still working on it. I'm making decals...and it's taking a lot longer than expected. In vector drawing to be able to modify the size without losing quality. The photo is a scan of the hood and the "Benoist" layered on top (made with free GIMP and Inkscape). The engine covers must be modified. Their opening is much larger than that of the Kit. I looked for other G4s with similar covers and haven't found any yet. The one on the left has been modified. Two superimposed digital images (decals and engine): The decals representing the texts are almost all finished. Flags too. The flags represent the "countries" crossed by the crew. The weather conditions prevented passage through Switzerland but the flag was already painted and obviously remained in place. In 1920, much of Indonesia was a Dutch colony (Netherlands Indies). This explains the presence of the Dutch flag on the plane. The Australian flag exists in blue or red. The same goes for the British flag. I'm not sure what color I chose, red. The actual size of the print is around 8mm high... I thought we would see the flags better. The advantage of vector is to be able to modify the size of the image at will without pixelation of the image: If anyone knows a good brand of printable decal (inkjet) I'm interested. Regards. Edited November 14, 2023 by Louis 3 Link to comment Share on other sites More sharing options...
Louis Posted November 14, 2023 Author Share Posted November 14, 2023 (edited) I wanted to print the flags on white paper and the texts on transparent paper. Or have it printed by a manufacturer. Froggy from FFSMC made me those for my Caudron C450. They were incredible! The texts are really very small, not sure that my printer will take up the challenge... 7mm x 12mm and it's not the smallest... Edited November 14, 2023 by Louis 4 Link to comment Share on other sites More sharing options...

Recommended Posts
Create an account or sign in to comment
You need to be a member in order to leave a comment
Create an account
Sign up for a new account in our community. It's easy!
Register a new accountSign in
Already have an account? Sign in here.
Sign In Now