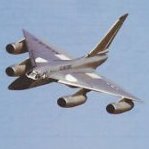
t15dja Posted November 28, 2018 Share Posted November 28, 2018 (edited) Having just enjoyed building the Revell 1/144 Airbus A380 in British Airways livery, I thought I'd stick with the subject of commercial airliners and have a go at this: On opening the box its certainly much bigger than I anticipated, being 86cm, or around 2 feet 10 in old money, long. As I understand it this is the former Airfix/Heller kit reboxed by Revell, and having read other build logs, can be a bit of a pig to build, allegedly with lashings of filler required. Even Revell seem to acknowledge that a modicum of filling may be required as can be seen in their instructions.... not sure about the trowel symbols, though, hopefully one of those won't be required! No matter, one can only try one's best, so let's have at it and see how we get on! I will be building it in flight with the nose up, especially since the kind folks at Revell have supplied us with a substantial stand in the box. I always thought Concorde was a beautiful bird with the nose up, whereas she looked a bit snooty with the nose down, so nose up in flight it shall be. It also means I can ignore all that infamous and fragile "working" nose-drooping mechanism that the kit comes with. Now, one thing that a plane in flight can't do without is a crew to fly it. I looked around the web and the only suitable commercial pilots that I could find in 1/72 scale are those produced by PJ Productions thus: Out of the bag they look like this: Painting those will be a real test of the eyesight! So, on with the office! The kit's cockpit is a very simple affair...3 seats, a "dashboard", a centre console, an engineer's console and two control sticks. There are decals for the control panel, centre console, engineers console and overhead panel. Reading other build logs I've gleaned that some folks have learned the hard way that if the control panel is fixed in its intended position it will not allow the inner canopy to fit properly within the forward fuselage. In anticipation of this I sanded of the locating lugs and positioned the panel a couple of millimetres aft of where the kit would have you put it..... I hope that will suffice - time will tell. Lots of eyestrain later, here are three shots of the completed cockpit and crew. Not much of this will be visible once sealed up other than the pilots - they will be seen and i think are a must for an in-flight pose. To be continued...... Edited November 28, 2018 by t15dja typo 21 Link to comment Share on other sites More sharing options...
Turbofan Posted November 28, 2018 Share Posted November 28, 2018 1 hour ago, t15dja said: one thing that a plane in flight can't do without is a crew to fly it. I completely agree with you, so why do airliner kit manufacturers include a cockpit and an option to build in-flight but never include crew? I've never understood that! Good start, I'm looking forward to following this. You might even inspire me to get one of mine out of the stash. Are you going to build it oob or do any corrections? Cheers, Ian Link to comment Share on other sites More sharing options...
t15dja Posted November 28, 2018 Author Share Posted November 28, 2018 Hi Ian, it will be purely oob, other than filler of course! As a fairly recent returnee to modelling my "skills" are nowhere near developed enough to contemplate corrections! Link to comment Share on other sites More sharing options...
CedB Posted November 29, 2018 Share Posted November 29, 2018 You're a brave man but that cockpit looks like a great start - good job! I (and others) have posted WiPs so it might be worth a browse to check on the pitfalls. I think most of them are covered in my build, link in my signature. HTH and good luck (you will need a trowel)… 1 Link to comment Share on other sites More sharing options...
AMB Posted November 29, 2018 Share Posted November 29, 2018 I shall be following this build, as I have this kit. How nice it would have been if Revell had given us a full seat-fit interior with the addition of a left side fuselage moulded in clear plastic. Well, I guess that would have doubled the price of the kit, so we have to do the best with it as it is. 1 Link to comment Share on other sites More sharing options...
Gimme Shelter Posted November 30, 2018 Share Posted November 30, 2018 looking forward to watching you build this pig of a kit - its a total bitch but a really good challenge for the determined modeller who doe's not let liquidised plastic balls get the better of them. Here's my contribution to your build - trust me, you will likely need both! 2 7 Link to comment Share on other sites More sharing options...
Gimme Shelter Posted November 30, 2018 Share Posted November 30, 2018 PS - Mr Braz told me he intends to release a 1/72 nose, engine and visor resin correction set for this baby in 2019, so when you get close with maddened frustration to wanting to see how well it explodes against your wall, you might want to put it aside and wait for Mr Braz's release next year.. Good luck buddy - and still looking forward to seeing this come together - G-BOAD over and out. 1 2 Link to comment Share on other sites More sharing options...
t15dja Posted December 2, 2018 Author Share Posted December 2, 2018 On 11/30/2018 at 2:27 PM, Gimme Shelter said: PS - Mr Braz told me he intends to release a 1/72 nose, engine and visor resin correction set for this baby in 2019 This is very interesting to know, thanks, especially having just attempted a dry fitting of all the front end bits only to discover various warpages, mismoulds and significant seams to deal with. Call me a coward but I am half tempted to wait and see what "Mr Braz" comes up with. Is there any more information on this on the interweb anywhere please? Also, I'm not familiar with "Mr Braz" .....does "he" have a website anywhere you can direct me to in order to find out more? Thanks in anticipation. Link to comment Share on other sites More sharing options...
picard Posted December 2, 2018 Share Posted December 2, 2018 He does indeed sir, also available though Hannants as well and brilliant sets there are too in my humble experience so far. here we go. Cheers http://www.brazmodels.com. 1 Link to comment Share on other sites More sharing options...
t15dja Posted December 2, 2018 Author Share Posted December 2, 2018 Thanks for that, Picard. I have just dropped brazmodels an email to ask them what plans they may have for this kit and, assuming that they are intending to release something, how soon that might be. Link to comment Share on other sites More sharing options...
picard Posted December 2, 2018 Share Posted December 2, 2018 1 hour ago, t15dja said: Thanks for that, Picard. I have just dropped brazmodels an email to ask them what plans they may have for this kit and, assuming that they are intending to release something, how soon that might be. Your very welcome, and I forgot to mention your terrific work on the the office so far, and the "trowel" symbol on the instruction sheet made me fall off my chair laughing, as that'a a fist for me, and I will be taking a seat with few cold ones for this one. And hope you have fun with the build out there. Cheers Link to comment Share on other sites More sharing options...
Gimme Shelter Posted December 3, 2018 Share Posted December 3, 2018 I had a chat with Mr Braz at Telford and politely reminded him that he had emailed me about the 1/72 Concorde parts - perhaps with more people nudging him, he shall give these correction kits a priority over the many other parts he has planned. The Revell/Airfix/Heller kit has so much potential for the modeller who has the determination not to let filling, sanding and improvisation not get the better of them; the kit just needs that front end re-vamping and a really great looking Concorde could be created. The windows and door positioning are not really a big deal in the grand scheme of things with a bit of filling, sanding and the use for Draw Decals 1/72 detailing set. Anyway, good luck with your build, and looking forward to seeing how it all turns out 1 Link to comment Share on other sites More sharing options...
neilg Posted December 3, 2018 Share Posted December 3, 2018 I really enjoyed my two builds of this kit, despite the inaccuracies and fit issues. I'll be interested to hear about/see the corrected nose. I remember someone commented on my build thread from a while ago that he's working on a motorized nose for this kit, but I don't know what's become of it as of yet.. I'm not sure if this is the same person: Hi Neil, I love the progress, will be nice to see an Air France machine built for a change. It's definitely worth creating the blank that sits underneath the visor and it can be made flush to the bottom of the visor and not be intrusive. If you want to wait, i'm doing a full 3D printed nose to the correct profile (see my WIP) as the Heller one is so bad. At least, it may be worth modifying your nose to shorten the visor if you don't want to go down that route Cheers, WV908 Link to comment Share on other sites More sharing options...
Caerbannog Posted December 3, 2018 Share Posted December 3, 2018 On 30/11/2018 at 15:27, Gimme Shelter said: PS - Mr Braz told me he intends to release a 1/72 nose, engine and visor resin correction set for this baby in 2019, so when you get close with maddened frustration to wanting to see how well it explodes against your wall, you might want to put it aside and wait for Mr Braz's release next year.. Good luck buddy - and still looking forward to seeing this come together - G-BOAD over and out. Will Mr. Braaz also release a corrected belly? Or better new fuselage and wings to get the U/C in the correct positions? :-) I already managed to correct the nose and visor on my kit - if not much else. I even started to correct the belly, but believe it or not: I cannot find that dammit part in the total mess I call a workshop :-( Good luck! 1 Link to comment Share on other sites More sharing options...
WV908 Posted December 3, 2018 Share Posted December 3, 2018 1 hour ago, neilg said: I really enjoyed my two builds of this kit, despite the inaccuracies and fit issues. I'll be interested to hear about/see the corrected nose. I remember someone commented on my build thread from a while ago that he's working on a motorized nose for this kit, but I don't know what's become of it as of yet.. I'm not sure if this is the same person: Hi Neil, yeah that was me. It hit a stumbling block when I realised it’s not just the nose, but the entire forward fuselage that is wrong. I couldn’t source any drawings, so as it is I have a correct droop nose that won’t fit the kit cockpit Cheers, WV908 Link to comment Share on other sites More sharing options...
xffw45343tg Posted December 3, 2018 Share Posted December 3, 2018 (edited) @WV908, which bits of fuselage inaccuracy are the blocker? I'm aware that: The nose landing gear is in the wrong position, The retractable visor is waaaay too long and consequently the nose section stops too soon The cabin windows are too large The fuselage is missing the flat profile where the windows are The "pannier" section on the underside is significantly too wide The nose and tail sections don't match the centre section (the prime cause of the need for shares in a filler company) But apart from that (as Monty Python might say) what else have Heller done for us on the-world's-greatest-missed-aircraft-model-opportunity? I have in mind for mine (should it ever see the light of day) that I'd like to add missing sections of the cockpit like the 2 super-numary seats and the "corridor" (electrical equipment cabinets?) aft of the flight engineer. I think there is also a fairly big fuse panel aft of the captain's seat that might just be visible? Nevertheless, I'm glad you've taken this on @t15dja as it was a truly amazing aircraft and this is by far the best 1:72 kit of it. Oh, it's also the only 1:72 kit. Kirk Edited December 3, 2018 by Kirk Link to comment Share on other sites More sharing options...
t15dja Posted December 3, 2018 Author Share Posted December 3, 2018 The faults I have with my cockpit section are: The "droop" section of the nose is about 4mm wider than the front fuselage on one side. The nose cone has some strange curved "gouges" on its dorsal surface.... I doubt very much they are meant to be panel lines! Also the profile of the nose cone does not match the droop section to which it joins. The section of the fuselage halves that meet above the inner canopy do not meet at a sharp point....looks like a slight mis-mold. The two sides of the droop section do not butt together vertically, resulting in "trenches" in the dorsal and ventral seams . The inner canopy doesn't fit in the forward fuselage very well. Even without the above issues, the kit seems to have been designed with large gaps around where the droop section meets the rest of the front fuselage. None of the above issues are insurmountable with a bit of effort, but if Braz models are intending to release some better parts I am happy to wait and see what they intend to come up with. As I say, I have sent them an email enquiring about their plans. If they have no plans in the near future then I shall invest in that trowel! Link to comment Share on other sites More sharing options...
neilg Posted December 3, 2018 Share Posted December 3, 2018 19 minutes ago, t15dja said: Even without the above issues, the kit seems to have been designed with large gaps around where the droop section meets the rest of the front fuselage. I have some gaps between the droop nose and the forward fuselage in both of my builds, but I think if it were any tighter, the nose wouldn't be able to move up and down easily: There is also a gap that opens when the nose is down, but I don't think it would have been able to close this gap and keep the nose mechanism working. Looking from the front, the gap isn't so noticeable when the nose is up: I think most of the people who have built this have fixed the nose in the up position, and filled in all the gaps. 7 1 Link to comment Share on other sites More sharing options...
cmatthewbacon Posted December 3, 2018 Share Posted December 3, 2018 As a matter of interest, are the nose mechanism parts still moulded on the clear sprue in the Revell version? It struck me as madness at the time I built mine that Airfix/Heller should have moulded the moving parts in the brittlest type of polystyrene you can get! If I was Revell, I'd have included that sprue twice, one in clear for the visor/screen etc, and once in some tough ABS type plastic for the levers and so on... best, M. Link to comment Share on other sites More sharing options...
neilg Posted December 3, 2018 Share Posted December 3, 2018 1 minute ago, cmatthewbacon said: As a matter of interest, are the nose mechanism parts still moulded on the clear sprue in the Revell version? It struck me as madness at the time I built mine that Airfix/Heller should have moulded the moving parts in the brittlest type of polystyrene you can get! If I was Revell, I'd have included that sprue twice, one in clear for the visor/screen etc, and once in some tough ABS type plastic for the levers and so on... best, M. I've built all three versions, Airfix, Heller, Revell, and the parts were exactly the same - including the clear parts for the nose mechanism. However, the stand was white in both the Heller and Revell versions, but moulded in black in the Airfix version. Link to comment Share on other sites More sharing options...
t15dja Posted December 3, 2018 Author Share Posted December 3, 2018 Concur with neilg - Revell has nose hinge mechanism moulded in clear. All parts then moulded in white plastic other than undercarriage (silver) and engines (black). Wheels are rubber. Link to comment Share on other sites More sharing options...
WV908 Posted December 3, 2018 Share Posted December 3, 2018 Hi again all, the issue I found with the cockpit is that the windowscreen is the wrong angle and width - this throws the rest of the cockpit out by a fair margin. I’ll post a photo when I dig it all out again Cheers, WV908 Link to comment Share on other sites More sharing options...
xffw45343tg Posted December 3, 2018 Share Posted December 3, 2018 15 minutes ago, WV908 said: ... the windowscreen is the wrong angle and width.... It's also too long. Link to comment Share on other sites More sharing options...
WV908 Posted December 3, 2018 Share Posted December 3, 2018 36 minutes ago, Kirk said: It's also too long. Hi Kirk, I’m on about the cockpit windowscreen in this instance, not the visor. But yes, the visor is too long and therefore when corrected doesn’t sit properly in the droop nose cone etc - what I found was that my corrected cone, made to the drawings I found with scaled measurements did not fit the heller cockpit section at all - the actual curved face at the front of the cockpit where the droop nose fits is way off too, made worse by the windowscreen Cheers, WV908 Link to comment Share on other sites More sharing options...
t15dja Posted December 5, 2018 Author Share Posted December 5, 2018 Whilst I'm awaiting a response from Braz models about what (if anything) they have planned for the front end of the 1/72 Concorde (no response at all as yet), I shall press on with the kit as far as I can. In readiness for that, can anyone advise, please, whether this slightly raised feature that runs along the length of the bottom of the tail section either side of the seam, as seen in the image below, exists on the real Concorde or is it just one more kit issue to deal with? Thanks in anticipation. 1 Link to comment Share on other sites More sharing options...

Recommended Posts
Create an account or sign in to comment
You need to be a member in order to leave a comment
Create an account
Sign up for a new account in our community. It's easy!
Register a new accountSign in
Already have an account? Sign in here.
Sign In Now