Filler Posted October 3, 2018 Share Posted October 3, 2018 So this isn't really a work in progress thread in the usual sense; more a plea for help. After taking up the hobby in about 2009 and building a couple of kits (whilst buying lots of gear and kits) before having to pack it all away in storage, I've had a couple of failed attempts to start again. This is the latest and perhaps it wasn't a great idea to tackle a wraparound camouflage paint job on my first attempt at airbrushing for about five years. This is what I achieved back then. Sensible grey schemes! So back to the present. For reasons I haven't quite fathomed, I decided to leave the masking tape and white-tac in the toolbox and try and freehand paint it. To make things more tricky, I then decided to faintly pencil mark the camo pattern onto the Halfords grey primer before spraying the grey camo pattern. With hindsight I'd have painted the whole thing grey over a white (or black?) primer so I could see clearly where I'd painted and not have to insert the green like pieces of a jigsaw. So last night I did try to fill in the gaps with the green. I spent 2 hours, yes 2 whole hours spraying green onto this thing. It took a few minutes afterwards for my hand to relax out of the airbrush grip position! And in the end I am not exactly happy with the result. Although, if i do say so myself, it's not THAT bad as a first attempt at free hand couple with not having used an airbrush for years and this being the first time I used the H&S after buying it about five years ago. The problem is, I want to achieve the finish I want, not a sort of acceptable practice finish. I'm using Mr Hobby Aqueous paint mixed roughly 50/50 with Mr Levelling Thinners sprayed through a H&S Evolution Silverline using the 0.2 needle. In my eyes, the Jaguars in this scheme had pretty sharp demarcation lines, but with just slightly soft edges. I think that I've missed that target by being inconsistent, wonky and struggling to paint the edge lines consistently. So my questions are, where do you guys think I went wrong? And what is the best course of action from here on to get the finish I want? 3 Link to comment Share on other sites More sharing options...
Lord Riot Posted October 3, 2018 Share Posted October 3, 2018 Looks good to me. Your grey looks more accurate than mine too, a smidgen lighter; I feel mine is slightly too dark. I'm afraid I can't help about airbrushing, I use a rattle can for the grey then hand paint the green so it's a hard demarcation between them. But on the down side, under bright light or close up my green looks a bit thick with the odd brush mark. Not easy is it! I'm sure someone will be along soon with some good advice. Your wheel-wells are a better colour too, more yellowy like they should be. I was too lazy and just used the closest I had. What markings are you going to use? 1 Link to comment Share on other sites More sharing options...
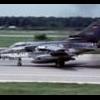
Filler Posted October 3, 2018 Author Share Posted October 3, 2018 Thanks for the encouragement. It's funny as I was thinking that my grey was a tad on the light side. The wheel wells are done with Tamiya XF-4 Yellow Green. I think I had bought the jar for this purpose a few years back. Goes to show these paints have good shelf lives. It is a pretty good match although it has suffered a from some over spray as I did the camo. I'm not sure if I was over confident or just lazy trying to free hand without any masking (except the canopy of course). I reckon a hard demarcation is actually fine considering the scale. The real things look like 95% hard edge to me. At the moment I am going with 6 squadron, with the 1989 anniversary markings - although as anniversary markings go, it's pretty much a plain jet. I'm planning on a slight variation to the load in the photo as I want to put the Phimat and ECM on the outer pylons (as in the photo) but will put a pair of tanks on the inner and I'll put the centre pylon on and in the future add a couple of the dummy 1000lbs bombs on that, if and when I can find a some. Hoping to find some in another kit where I don't need them. 1 Link to comment Share on other sites More sharing options...
Devilfish Posted October 3, 2018 Share Posted October 3, 2018 Looks good to me! Can I ask, which green did you use? I use Xtracrylic XA001 RAF Dark Green, which I'm happy with, but it's always good to find alternatives. For RAF Dark Sea Grey, I use the Tamiya version (can't think of the number off the top of my head) As a pair they seem pretty accurate.... NAM V Bombers day 2018 by Paul Carter, on Flickr As for your edging, I think it looks spot on! Bombs.....Flightpath do some, or alternatively, sources are the Italeri Tornado, Airfix Buccaneer or Canberra B.2. When I get some more mould solution, I plan to make some moulds up to cast my own resin ones, as I'm always wanting them 3 Link to comment Share on other sites More sharing options...
Lord Riot Posted October 3, 2018 Share Posted October 3, 2018 Filler - Doesn't the Airfix kit come with bombs? I got four in the Revell one, you can have them if you like? Devilfish that Hunter looks good! I've always used Tamiya XF-81 dark green, though that Xtracrylic looks the real deal, I might try it. 1 Link to comment Share on other sites More sharing options...
Filler Posted October 3, 2018 Author Share Posted October 3, 2018 (edited) Thanks Devlisfish, but I must say that your Hunter's edging is really spot on! I have used Mr Hobby Aqueous H330 Dark Green and H331 Dark Sea Grey and I'm very happy with those, just needs an extra coat in places on the green where it's a bit patchy. Also, I've got an Italeri Tornado that will be a Marineflieger bird, so I should be able to pinch a couple of 1000lb bombs from that kit. Thanks for that heads up. Lord Riot, I think that the box contents are identical and there are bombs in the kit, but they are BL755 cluster bombs as opposed to 1000lbs iron bombs. The BL755s are correct in that they were carried by the Jaguar at the time, it's just that in my research it seems that the blue painted dummy 1000 pounders were the most commonly carried stores. From what I've seen in online photos of Jags in the late 80's, I'd say the most common appearance would be just two fuel tanks on the inner pylons, then carry nothing (usually static at an airshow), followed by tanks plus centrline carried 1000lb bombs and then with CBLS on the outer pylons or centre line. And for recon squadrons as per your build it is usually camera pod centre, tanks inner and Phimat/ECM on the outers. Quite a lot of variation really, especially the bomber squadrons. Definitely going to build another Jag after I've finished this one. Just not sure whether to get another Airfix/Revell/Heller kit or try the Kitty Hawk T2. Edited October 3, 2018 by Filler 1 Link to comment Share on other sites More sharing options...
Lord Riot Posted October 3, 2018 Share Posted October 3, 2018 A T.2 in 1/48 would be amazing! Link to comment Share on other sites More sharing options...
bar side Posted October 3, 2018 Share Posted October 3, 2018 I must admit I have a couple of very old airbrushed - 1980s vintage Badger - and a newer one I haven’t got around to using yet, so your finish looks good. I do still go for blu-tac and masking tape with rattle cans. I don’t tend to flatten the blu-tac right down but roll it in to long ‘worms’ and then spray. It seems to give a little softer edge but I might be kidding myself. The Phantom was the first done like that Your Hawk and F-16 look great. Keep meaning to make a grey Hawk but that would make 3 Hawks. Mind you 4 Phantoms now..... 2 Link to comment Share on other sites More sharing options...
Filler Posted October 4, 2018 Author Share Posted October 4, 2018 (edited) Bar side, your Phantom, Lord Riot's in progress Jaguar and Devilfish's Hunter above have all achieved a better finish to the demarcation than I have. I'm close to good enough but I'm struggling to accept good enough is good enough as it seems like a waste of decals if I'm not happy with the paint job. I've used white-tac sausages in the past. I did a ESCI Mirage 2000C a good few years back (my first adult build I think) and I used that technique there and was very happy with my efforts. I think one thing with Blu-tac sausages is that it's a great technique when you've got a camo pattern on the topside only, but I found trying to get it wrapped around the whole aircraft difficult. Just couldn't get it to stay in place. Mind you, last night I did some touch up work on the Jag and at first I decided to try and tidy it up by using the Blu-tac method but the stuff wouldn't even stay put of the upper wing surface. So I just stuck to free-handing it. Anyway, despite my struggles with the kit (apart from painting I'm having the usual problems like I've snapped off both the pitot tube and the fuel dump pipe and I've also managed to snap off both the vertical fins when it landed heavily on the desk) I've definitely got the modelling bug back. Unfortunately I'm away this weekend though, but as long as the wife doesn't get brassed off with modelling gear all over the flat I feel I'm on a roll. Ps. You can't have too many Phantoms!! Edited October 4, 2018 by Filler Link to comment Share on other sites More sharing options...
Filler Posted October 15, 2018 Author Share Posted October 15, 2018 I returned from my short break and continued to try and sort out my ill-judged attempt at free-hand airbrushing my Jaguar. After the initial effort and then the second free-hand attempt, I've gone for a partial white-tac approach to try and tidy things up. I've now got an interesting mish-mash of very rough (probably 1:1 scale) soft demarcation, some acceptable bits and some areas that have ended up with hard edges. I also have a pretty patchy finish which I think is a result of using a 0.2mm needle on some fairly large areas. You wouldn't think that these images were taken after at least another 3 hours of work from the ones higher up the thread. The problem I have now is that I have used a lot of time and paint on this and I'm split between re-priming and starting again, accepting it as a first attempt back at the hobby and just getting it finished, or 'shelf of doom'-ing it and starting something else (less camouflaged). My problem with getting it finished with the current paint job is it would feel a waste of a set of decals (to the tune of £8). Again, not so much a WIP thread as a bit of a whinge really. Amazing how easy it is for my enthusiasm to falter at times. Link to comment Share on other sites More sharing options...
Lord Riot Posted October 15, 2018 Share Posted October 15, 2018 Don't give up! Can you handpaint over the green? Or how about do this as an all over grey Jag and get another from ebay to do in camo with your decals? 1 Link to comment Share on other sites More sharing options...
Filler Posted October 15, 2018 Author Share Posted October 15, 2018 That's certainly an option LR, especially as the boxing I have is for a grey Jag, so no need to use the aftermarket decals. I'll take another look at it this evening and decide. Another option I suppose is to go for a hard edged demarcation and use tape. That way I would have a consistent finish and could use the 0.4 needle and give it a couple of good even coats. 1 Link to comment Share on other sites More sharing options...
bar side Posted October 15, 2018 Share Posted October 15, 2018 Not like the real thing had a consistent finish - many faded bits and patched areas. How much would a weathering wash at the end tone things down & even things out? Link to comment Share on other sites More sharing options...
Filler Posted November 15, 2018 Author Share Posted November 15, 2018 (edited) I've continued to plod on with this kit for the last month now in fits and starts. It's largely been going round and round revisiting grey then green, even after I'd painted some other parts like the guns and the wing leading edges. Been like painting the Forth Bridge! Eventually I reached a point where I'd had enough and brushed some Klear on. That wasn't great and I had a pool on the underside of a tailplane that required sanding, re-painting and re-Klearing. I then went for another coat of Klear, this time with the airbrush. I think it was better but it's more difficult that way. Hard to see where it's going and tended to dry on the tip. Then came the decals (or jigsaws as they're so old and brittle). I've got the Airfix kit with a grey RAF Jag and an Ecuador AF camo bird. This meant using the Ecuador stencils, which may not be correct. And I forgot to check my references and applied a couple that I then decided 'looked' wrong and took them off and fitted RAF ones instead. Then when I did check my ref photos the original ones were right. I found some spares from a Tamiya Sea Harrier and decided that whilst not right, they were closer. But the wrong RAF ones weren't coming off without a fight. Eventually with some scraping they've come off and the Sea Harrier ones are on. The thing is now, I'm so underwhelmed by my work that I'm loathe to waste out of production Xtradecals on it. But I have no alternative if I'm going to finish it at all. Big decision; to hell with it and get them on, or save them for a better attempt in the future? Its been arduous and at times pretty deflating. The temptation right now is to start a shelf of doom and stick it on it and start something else. The daft thing is, my next effort is to be an Airfix Harrier GR.3 and that is remarkably similar in that it's a very old kit with the wraparound grey and green scheme and ancient kit decals. It'll feel like Groundhog Day! Edited November 15, 2018 by Filler Having a nightmare trying to post the photo using my iPad!!! Grrrrrrr 1 Link to comment Share on other sites More sharing options...
Filler Posted November 22, 2018 Author Share Posted November 22, 2018 (edited) Warning: This is more a tale of woe than a WIP post. I made the decision in the end to save the 6 squadron decals for a better stab at the Jag in the future and bought a fairly inexpensive Xtradecal sheet that Hannants and eBay have in abundance and thus not feeling guilty wasting decals. I also made the decision to remove the Tamiya Sea Harrier warning triangles, but this was an error on two counts. Unlike the the two Airfix versions that came off easily, these all but left hole in the plastic! So yet again it was out with the airbrush and green and grey paint to patch things up. After some more Klear it was finally on with some 54 squadron markings. They're from XX729 in 1991 which is a couple of years late for me (being fussy) but for this model I'm not fussed at all. Here it is fully decal'd and Klear'd for the umpteenth time and with the landing gear, tanks etc and the snapped off pitot to be attached. Overall, it's been a learning curve (again) but I am disappointed with the build for so many reasons. Airbrushing the camo proved very difficult, partly due to me attempting freehand and then spending ages repeatedly touching it up grey/green/grey/green and round and round, sometimes freehand, others with blu-tac. Decaling was generally ok, but I was prone to not bothering checking references (complicated by using the Airfix instrutions for an Ecuador AF jet and Revell kit instructions for a 1979 RAF jet plus Xtradecal 6 squadron sheet) and this lead to using a total of four warning triangles on the cockpit sides. Also, the Xtradecal sheet was badly out of register and lacking definition on many decals. Then there was the brushing then airbrushing and then brushing of the Klear coats. I seemed to challenge its legendary self levelling qualities and got pools and brush strokes and pebbling in the finish. Visible here. Of course there were the general problems I had with the build; snapping off pitot tubes and fuel vent pipes and last night a hour long battle with three minute antenna parts that I spent most of my time crawling around the floor trying to find after pinging them across the room with my tweezers. And super glue was getting everywhere. Anyway, it's slowly getting closer to being finished. I'm still mulling over any attempt at weathering as I'm not too clued up on that, so perhaps I'll just spray or brush some matt or maybe satin varnish on it and then glue on the weapons. One other thing that is nagging me is that I can't remember if I took the masking off the inside of the canopy. I must have done, surely? Last shot is of my improvised modelling 'desk'. It's not an excuse, but it'd be nice to have a permanent place to work where I don't need to pack up after every session. Edited November 22, 2018 by Filler 1 Link to comment Share on other sites More sharing options...
neil5208 Posted November 22, 2018 Share Posted November 22, 2018 When I airbrush the Klear floor polish I mix with tamiya thinners 50/50 mix unless it a hot day then I add some water to slow the drying. When thinned with thinners or water you can also see where you have sprayed. 1 Link to comment Share on other sites More sharing options...
Filler Posted November 22, 2018 Author Share Posted November 22, 2018 Thanks Neil, I'll definitely give that a try. I did read up on it quite a bit, but there's so many different opinions, brush or spray, thin or neat. I do wonder whether I should have micro-polished the paint job before I applied the Klear coat. It looked alright, but I suppose you can't ever have too smooth a paint finish. Link to comment Share on other sites More sharing options...

Recommended Posts
Create an account or sign in to comment
You need to be a member in order to leave a comment
Create an account
Sign up for a new account in our community. It's easy!
Register a new accountSign in
Already have an account? Sign in here.
Sign In Now