SUB-SAM Posted September 11, 2018 Share Posted September 11, 2018 I love my 1/144 ww1 and early aviation but have been getting frustrated trying to get the poor choice of kits available to work well. I managed it with the Fokker eiii but the Sopwith Pup has been an absolute pig and it's gone back on the shelf, not something I normally do. I just feel like I'm putting in most of the time correcting errors instead of enjoying building due to poor kit accuracy. I'm fairly confident with my modelling skills and have scratch built before, but never an aviation subject. So I'll jump in at the deep end with a 1/144 Rumpler built Etrich Taube. One of my favourite aircraft. I have been especially encouraged by recent examples of early aviation models posted here. 1 Link to comment Share on other sites More sharing options...
SUB-SAM Posted September 11, 2018 Author Share Posted September 11, 2018 Last night I experimented with a technique for very fine rib lines on this 1/144 Taube wing. Stretching out sprue wasn't cutting it for me, this technique is much faster and looks better in my opinion. 4 Link to comment Share on other sites More sharing options...
SUB-SAM Posted September 11, 2018 Author Share Posted September 11, 2018 The technique worked on the test piece so I start making the actual wings. I cut out a piece of styrene sheet and use the plans as a stencil and a flexible length of aluminium as a ruler. Then use a knife to score deeply. The wing pieces will stay connected until they are shaped with boiling water. With this technique, the scored lines push up material either side of the blade. This must be stabilised by painting the whole wing with extra thin cement, this 'seals' each score line and prevents it being a starting point for snapping. When primer and a thick layer of paint are daubed on, the 'trench' is filled and a canvas sag effect is produced between the ribs due to surface tension of the paint. This produces the effect shown on the first picture of last night's test piece. 10 Link to comment Share on other sites More sharing options...
SUB-SAM Posted September 11, 2018 Author Share Posted September 11, 2018 Wings shaped using supercritical water. (Heat water in a smooth container in microwave) as water from a boiled kettle just doesn't get the plastic pliable enough. 5 Link to comment Share on other sites More sharing options...
Bandsaw Steve Posted September 11, 2018 Share Posted September 11, 2018 Good start - am watching and learning. 👍 Link to comment Share on other sites More sharing options...
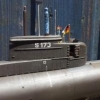
SUB-SAM Posted September 11, 2018 Author Share Posted September 11, 2018 Shaping the trailing edge. 11 Link to comment Share on other sites More sharing options...
Bandsaw Steve Posted September 12, 2018 Share Posted September 12, 2018 That looks great. 👏 Link to comment Share on other sites More sharing options...
Jonners Posted September 12, 2018 Share Posted September 12, 2018 Blimey. Every day is a schoolday etc. I would never have thought of that technique for producing the wing rib effect. I'll have to give it a try! Watching with great interest. Jon 1 Link to comment Share on other sites More sharing options...
SUB-SAM Posted September 12, 2018 Author Share Posted September 12, 2018 2 hours ago, Jonners said: Blimey. Every day is a schoolday etc. I would never have thought of that technique for producing the wing rib effect. I'll have to give it a try! Watching with great interest. Jon Well I came up with it on Monday after frustration with stretched sprue which is very hard to get a consistent thickness. I'm hoping that I can develop some new techniques for making decent 1/144 models because kits arnt going to take me very far. I think 1/144 can be super detailed, some people say there are limitations to the scale but I think it's just about using the right techniques. 4 Link to comment Share on other sites More sharing options...
Marklo Posted September 12, 2018 Share Posted September 12, 2018 Wow, lovely work so far, 1/144, now that's just torture . I used to have a book on Taubes (may still be hiding in the attic) and they are such interesting machines. I would love to add an Etterich Taube to my collection, but probably in a much larger scale. Link to comment Share on other sites More sharing options...
Brandy Posted September 12, 2018 Share Posted September 12, 2018 That's a very interesting technique for the ribs. I ended up with something similar on my 1:72 Bleriot XI-2 but only by accident after I removed the monofilament I'd added. Ian Link to comment Share on other sites More sharing options...
pheonix Posted September 16, 2018 Share Posted September 16, 2018 Only jusyt found this - WW1 and scratch built so it MUST be good! Actually it is! I really like the ribs - splendid idea! Will be following with interest in future. P Link to comment Share on other sites More sharing options...
SUB-SAM Posted September 16, 2018 Author Share Posted September 16, 2018 A touch more tonight (busy = slow progress) Wafer thin tail surface. The thing that looks like a dead fish is a thermoplastic clay that I roughly formed oversized and then set which will be whittled down as a plug for the fuselage. I will be press-forming sheet in two halves. 8 Link to comment Share on other sites More sharing options...
ajmm Posted September 19, 2018 Share Posted September 19, 2018 Crumbs. This is impressive. No surprises there judging from your past builds but wow. Shaping up nicely! Link to comment Share on other sites More sharing options...
Silenoz Posted September 20, 2018 Share Posted September 20, 2018 looking good so far.... Link to comment Share on other sites More sharing options...
SUB-SAM Posted September 22, 2018 Author Share Posted September 22, 2018 Fuselage is coming on nicely now. Sand, sand, sand... Lots of work to create 'organic shape' fuselages like this. Something slab sided would be much easier. 5 Link to comment Share on other sites More sharing options...
SUB-SAM Posted September 22, 2018 Author Share Posted September 22, 2018 (edited) Internal struts and 'rigging' was done prior to joining fuselage halves. It's extremely difficult using tiny pieces of wire to do this so I simply used scratches in the paintwork to emulate rigging, which unless you get the magnifying glass out (or this phone camera) you couldn't tell the difference. Cockpit details have to be added ship-in-a-bottle style now because I had to add curved top pieces and cut/sand them to make the openings correct, which would have disturbed internal detail. Edited September 22, 2018 by SUB-SAM 5 Link to comment Share on other sites More sharing options...
SUB-SAM Posted September 22, 2018 Author Share Posted September 22, 2018 Tiny dashboard and internal frame piece. 7 Link to comment Share on other sites More sharing options...
Murdo Posted September 22, 2018 Share Posted September 22, 2018 Absolutely fabulous work sir! Link to comment Share on other sites More sharing options...
pheonix Posted September 22, 2018 Share Posted September 22, 2018 That is truly amazing detail on the dashboard. Link to comment Share on other sites More sharing options...
SUB-SAM Posted September 22, 2018 Author Share Posted September 22, 2018 Dashboard fitted. The distinctive 'steering wheel' here with column and pedals and even the 'chain drive. Who says 1/144 has to lack detail? 10 Link to comment Share on other sites More sharing options...
pheonix Posted September 23, 2018 Share Posted September 23, 2018 Gobsmacked!! P Link to comment Share on other sites More sharing options...
mackem01 Posted September 23, 2018 Share Posted September 23, 2018 Not a scale I would attempt, but very impressive none the less. Great work. Link to comment Share on other sites More sharing options...
SUB-SAM Posted October 7, 2018 Author Share Posted October 7, 2018 Not done anything on it for a while but today I finished the interior with seats and front observer position 'dashboard'. Includes wires plugged into the dashboard, that are 0.01mm thick, the finest material I have worked with. 6 Link to comment Share on other sites More sharing options...
Martian Posted October 7, 2018 Share Posted October 7, 2018 This is highly impressive stuff! Martian 👽 Link to comment Share on other sites More sharing options...

Recommended Posts
Create an account or sign in to comment
You need to be a member in order to leave a comment
Create an account
Sign up for a new account in our community. It's easy!
Register a new accountSign in
Already have an account? Sign in here.
Sign In Now