Blitz23 Posted March 26, 2018 Share Posted March 26, 2018 Just putting my marker down, will add pics etc in the morning. Looking forward to this one! 2 Link to comment Share on other sites More sharing options...
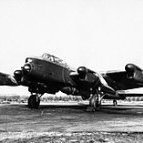
Blitz23 Posted March 30, 2018 Author Share Posted March 30, 2018 Here's the kit I will be using and the aircraft I'll be building. Haven't got a nightfighter in my collection so looking forward to seeing how I can weather it and portray the exhaust staining. 5 Link to comment Share on other sites More sharing options...
Robert Stuart Posted March 30, 2018 Share Posted March 30, 2018 Looks good Blitz, I think this is the first night fighter in the build. 1 Link to comment Share on other sites More sharing options...
Blitz23 Posted April 10, 2018 Author Share Posted April 10, 2018 Well I started work on her last night, nothing much worth sharing pics of really. Main wing assembly, rudder portion of the tail are now assemble with various other parts cleaned up off the sprue. I think I'm gonna enjoy this one, Tamiya know how to make a great fitting kit. Next I'm going to focus on the fuselage and interior and I'll probably post some progress pics at the weekend. 1 Link to comment Share on other sites More sharing options...
Blitz23 Posted April 17, 2018 Author Share Posted April 17, 2018 Small progress update, here's a mock up to test the fitting Heres the wings attached, this things a beast! Wings are actually glued together, and now just need the engines adding and wheel wells, which come as a separate insert which will make priming and spraying the black less of a nause with less masking having to take place. My next plan of action is to get the interior assembled and painted, hoping I can complete that within the next week or so. Here's what's been taking up most of my time along with a Sea Harrier for the Hawker GB. I think they'll make a pretty pair once completed. 5 Link to comment Share on other sites More sharing options...
MarkSH Posted April 17, 2018 Share Posted April 17, 2018 Its a great kit, but you're right its a bit chunky! 1 Link to comment Share on other sites More sharing options...
Blitz23 Posted April 17, 2018 Author Share Posted April 17, 2018 Sure is, I don't think I've ever not enjoyed building a Tamiya kit. 1 Link to comment Share on other sites More sharing options...
MarkSH Posted April 17, 2018 Share Posted April 17, 2018 Yes, all very well engineered, although I had some issues with the vertical tail and how it fitted to the 'triangular' locator on the rear fuselage a fair difference in thickness so watch out for that, I was careful when assembling the separate pieces but still had to use some filler to pad it out. In all likelihood it was me not the kit. 1 Link to comment Share on other sites More sharing options...
Blitz23 Posted April 17, 2018 Author Share Posted April 17, 2018 1 hour ago, MarkSH said: Yes, all very well engineered, although I had some issues with the vertical tail and how it fitted to the 'triangular' locator on the rear fuselage a fair difference in thickness so watch out for that, I was careful when assembling the separate pieces but still had to use some filler to pad it out. In all likelihood it was me not the kit. Thanks Mark I'll keep an eye on it. Link to comment Share on other sites More sharing options...
zebra Posted April 17, 2018 Share Posted April 17, 2018 Nice to see a Beaufighter in the GB, I’ll be following. 1 Link to comment Share on other sites More sharing options...
Blitz23 Posted May 11, 2018 Author Share Posted May 11, 2018 Just a small update, still waiting on some bits for the interior such as seat belts, an instrument panel and some canopy masks. Link to comment Share on other sites More sharing options...
Blitz23 Posted May 31, 2018 Author Share Posted May 31, 2018 Mosquito and Me 109 for MTO GB have been taking up my bench time, but I plan to get the cockpit finished next week. Question, can anyone tell me what the long piping is which runs down the length of the cockpit is for? 1 Link to comment Share on other sites More sharing options...
dogsbody Posted May 31, 2018 Share Posted May 31, 2018 13 minutes ago, Blitz23 said: Mosquito and Me 109 for MTO GB have been taking up my bench time, but I plan to get the cockpit finished next week. Question, can anyone tell me what the long piping is which runs down the length of the cockpit is for? Cockpit heating I believe. Chris 3 Link to comment Share on other sites More sharing options...
Blitz23 Posted June 17, 2018 Author Share Posted June 17, 2018 Finally got some work completed on the Beaufighter... Just need to give the interior a wash and its complete then I can finish fuselage construction, before working on the engines and getting paint down. 2 Link to comment Share on other sites More sharing options...
Blitz23 Posted June 24, 2018 Author Share Posted June 24, 2018 Fuselage together, making steady progress on this one. Once I get the canopies masked paint job shouldn't take to long. Her she is as it stands. 4 Link to comment Share on other sites More sharing options...
Blitz23 Posted July 13, 2018 Author Share Posted July 13, 2018 Small update with a week off I hopefully can get this one done with one last push! Duxford tomorrow then its all hand to the pump! 1 Link to comment Share on other sites More sharing options...
Blitz23 Posted July 20, 2018 Author Share Posted July 20, 2018 Getting there, I will keep plugging away over the weekend! 3 Link to comment Share on other sites More sharing options...
dogsbody Posted July 21, 2018 Share Posted July 21, 2018 Looking good but please repaint the engines central gear casings black. Actually, a semi-gloss black, as this was what Bristol used on the real, war-time Hercules. Chris 1 Link to comment Share on other sites More sharing options...
mick Posted July 21, 2018 Share Posted July 21, 2018 good start 1 Link to comment Share on other sites More sharing options...
Blitz23 Posted July 21, 2018 Author Share Posted July 21, 2018 6 hours ago, dogsbody said: Looking good but please repaint the engines central gear casings black. Actually, a semi-gloss black, as this was what Bristol used on the real, war-time Hercules. Chris Thanks Chris didn't know this, do you know the colour of the cowling interior at all? Link to comment Share on other sites More sharing options...
Blitz23 Posted July 21, 2018 Author Share Posted July 21, 2018 Decals also on... 3 Link to comment Share on other sites More sharing options...
stevej60 Posted July 21, 2018 Share Posted July 21, 2018 She's looking grand! 1 Link to comment Share on other sites More sharing options...
dogsbody Posted July 21, 2018 Share Posted July 21, 2018 7 hours ago, Blitz23 said: Thanks Chris didn't know this, do you know the colour of the cowling interior at all? RAF Interior Green. Chris 1 Link to comment Share on other sites More sharing options...
Robert Stuart Posted July 21, 2018 Share Posted July 21, 2018 Looking at this makes me want to build one, that looks great Blitz 1 Link to comment Share on other sites More sharing options...
Blitz23 Posted July 22, 2018 Author Share Posted July 22, 2018 Not gonna get this one done in time but ill update when I've managed to finish her. Great GB throughly enjoyed it 👍🏻 Link to comment Share on other sites More sharing options...

Recommended Posts
Create an account or sign in to comment
You need to be a member in order to leave a comment
Create an account
Sign up for a new account in our community. It's easy!
Register a new accountSign in
Already have an account? Sign in here.
Sign In Now