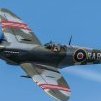
Laufeyson Posted March 25, 2018 Share Posted March 25, 2018 I hereby post my second build as a Britmodeller: The Tamiya A6M2b Zero, a straight OOB build. A great little kit, lovely detailed, fits together like a dream. Paints: Tamiya XF-12 IJN Grey, Vallejo Model Air Interior Green. For the aotoke in the engine(which cannot be seen in the pictures anyway), I used Sotek Green from Citadel mixed with Vallejo silver. Gloss and matt varnish from Vallejo. Micro Set for decals. Canopy is handpainted, not too happy about it. I need to find a way to mask canopies for airbrushing, really don't want to buy masks online for every build. (Got a Heinkel from Revell in my stash, the canopy is the only thing putting me off building it.) For the wash, I used light grey pastel chalk in odorless turpentine. Paint chips were done with Vallejo aluminum paint on a small sponge, powder marks with black pastels. Great cockpit deal, almost a shame to have to cover it up.. As I am new to this, I would greatly appreciate any helphul hints, tips and constructive criticism. Best wishes for a happy, paint fume filled, Easter! 18 Link to comment Share on other sites More sharing options...
Sturmovik Posted March 25, 2018 Share Posted March 25, 2018 (edited) Looks great! Did you use the kit´s decals? Edited March 25, 2018 by Sturmovik Link to comment Share on other sites More sharing options...
Corsairfoxfouruncle Posted March 25, 2018 Share Posted March 25, 2018 Very nice zero 👍 1 Link to comment Share on other sites More sharing options...
Nigel Heath Posted March 25, 2018 Share Posted March 25, 2018 It does look great - lovely looking model, maybe some surface modulation / weathering / chipping on the wings would look good. Link to comment Share on other sites More sharing options...
Laufeyson Posted March 25, 2018 Author Share Posted March 25, 2018 2 minutes ago, Sturmovik said: Looks great! Did you use the kit decals? Yes I did. This was a limited edition kit with an extra sheet for 5 aircraft, in addition to the original 3. Quite easy to work with, but I think I will get some Micro Sol for my next build Link to comment Share on other sites More sharing options...
Sturmovik Posted March 25, 2018 Share Posted March 25, 2018 Thanks, I want to build a Tamiya aircraft, but the stories about the decals put me off. Link to comment Share on other sites More sharing options...
Laufeyson Posted March 25, 2018 Author Share Posted March 25, 2018 5 minutes ago, Sturmovik said: Thanks, I want to build a Tamiya aircraft, but the stories about the decals put me off. You should absolutely get a Tamiya kit, it's quality stuff. Just use decals from another kit or buy them from a third party supplier. I can really recommend the DeHavilland Mosquito, the kit almost builds itself 1 Link to comment Share on other sites More sharing options...
Laufeyson Posted March 25, 2018 Author Share Posted March 25, 2018 25 minutes ago, Nigel Heath said: It does look great - lovely looking model, maybe some surface modulation / weathering / chipping on the wings would look good. Thanks! I just started experementing with weathering, hopefully there's more to come. There is chipping on the wing edges, it's just not visible in the photos. Turns out smartphone cameras are built more to take pictures of duckface teenagers than manly stuff like tiny plastic aeroplanes... 2 Link to comment Share on other sites More sharing options...
Corsairfoxfouruncle Posted March 25, 2018 Share Posted March 25, 2018 Hello @Sturmovik ... I use Tamiya decals all the time same with Hasegawa. The major trick is really hot water around 125*-130*. That and a good setting solution. I use Micro-set/sol. Ive never really had an issue except with one set. That was chalked up to poor storage issues as i got the model 2nd hand. The issue with Japanese decals is they use a thicker glue. It takes really hot water to dissolve the glue. I find 20-30 seconds soaking and slowly moving the decal through the water works fine. Dennis 1 1 Link to comment Share on other sites More sharing options...
kapam Posted March 26, 2018 Share Posted March 26, 2018 Very nice indeed! Quite a pricey kit I believe, but you definitely get what you pay for. Nice build. 1 Link to comment Share on other sites More sharing options...
Knight_Flyer Posted March 26, 2018 Share Posted March 26, 2018 Very nice. With the canopy masking, it is a doable task. It will need practice and after a bit of experience you should be ok. You just need masking tape to put onto the canopy and a very sharp scalpel to remove the area of tape not required. With the tape on canopy, use a pencil to draw the outline of the frame and that should make it easier to position the blade for cutting. 1 Link to comment Share on other sites More sharing options...

Recommended Posts
Create an account or sign in to comment
You need to be a member in order to leave a comment
Create an account
Sign up for a new account in our community. It's easy!
Register a new accountSign in
Already have an account? Sign in here.
Sign In Now