halcyonjet Posted February 4, 2018 Share Posted February 4, 2018 Hopefully got this photo sharing thing sorted, so I'd like to join with a Zvezda -800 kit finished with a set of Nazca's Monarch decals. Dave 6 Link to comment Share on other sites More sharing options...
feoffee2 Posted February 4, 2018 Share Posted February 4, 2018 Haven't seen this kit built so this should be intersting. Thanks 1 Link to comment Share on other sites More sharing options...
zebra Posted February 5, 2018 Share Posted February 5, 2018 Good choice. My entry in this GB will be a Zvezda -800 so hopefully I’ll pick up some tips from you. 1 Link to comment Share on other sites More sharing options...
Viking Posted February 5, 2018 Share Posted February 5, 2018 Ah another Zvezda kit, good! I haven't built mine yet, so will be interested to hear what you think of it. Great choice of livery too! 1 Link to comment Share on other sites More sharing options...
FortyEighter Posted February 5, 2018 Share Posted February 5, 2018 I don't have any of the Zvezda 737s but will be interested to see how it builds. 1 Link to comment Share on other sites More sharing options...
halcyonjet Posted February 8, 2018 Author Share Posted February 8, 2018 Nearly messed up with the first stage by forgetting to fit the front and rear bulkheads for the main wheelwell (I'm easily distracted!), but remembered just in time. Also drilled out a small area in the forward part of the lower wing structure inline with the intakes on the bottom of the wing roots to improve their look. Dave 6 Link to comment Share on other sites More sharing options...
Grandboof Posted February 9, 2018 Share Posted February 9, 2018 Looks like a good kit Like what you have done so far Martin H 1 Link to comment Share on other sites More sharing options...
Romeo Alpha Yankee Posted February 9, 2018 Share Posted February 9, 2018 Good tips, I have a couple of these. But I am unsure of which decals to use on them when the time comes. I hear from a friend who is about to finish this kit that the kit supplied decals are not much chop. Good move using aftermarket. You have picked a nice scheme 1 Link to comment Share on other sites More sharing options...
Lex77 Posted February 9, 2018 Share Posted February 9, 2018 Looking forward seeing a Zvezda 737 go together. 1 Link to comment Share on other sites More sharing options...
halcyonjet Posted February 9, 2018 Author Share Posted February 9, 2018 9 hours ago, Grandboof said: Looks like a good kit Like what you have done so far Martin H Yes, it does seem a very good kit. Had a dry run of the engines and it seems that you can finish the 'hot section' and the intake/cowling before bringing them together -very handy! 1 hour ago, Romeo Alpha Yankee said: I hear from a friend who is about to finish this kit that the kit supplied decals are not much chop. Good move using aftermarket. Well, the UTair kit decals were a tad uninspiring Dave 1 Link to comment Share on other sites More sharing options...
pinky coffeeboat Posted February 9, 2018 Share Posted February 9, 2018 Nice progress Dave. My next build will be the Zvezda kit, coming shortly. Strange to read about the UTair decals I thought they looked quite nice on the sheet. I'll pinch the "holes in the bulkhead" idea for mine. Looking forward to seeing it finished in the Monarch colours...poor Monarch. Jeff 1 Link to comment Share on other sites More sharing options...
Graeme H Posted February 14, 2018 Share Posted February 14, 2018 I am also building this one, and will also pinch the idea for drilling out behind the intakes, I sort of looked at them and though I needed to do something, but then forgot all about it, great idea 1 Link to comment Share on other sites More sharing options...
halcyonjet Posted February 25, 2018 Author Share Posted February 25, 2018 A small update on the progress. The main wing structure has been assembled and the wheel wells painted light grey and then given a wash of Humbrol 'Oil stain', which looks close to photos and what others have said the real ones look like. Sadly, my pictures don't show it that well (I got a new camera at Christmas, but I haven't got very far with the manual!). I've drilled out two small holes at an angle, just in front of the main wheelwells that are present on the RoG kit but not this one. Dave 2 Link to comment Share on other sites More sharing options...
busnproplinerfan Posted February 27, 2018 Share Posted February 27, 2018 I'll follow this build, see how it goes together. Just to bad it wasn't made with a flaps down option. i have three in line to make, might be stuck cutting the flaps out. Just because I'm a glutton for punishment. 1 Link to comment Share on other sites More sharing options...
halcyonjet Posted March 19, 2018 Author Share Posted March 19, 2018 Finally got some real progress, although I haven't been able to get a decent shot to show it. A very basic cockpit has been added, the fuselage halves joined and the tail cone added. This last item is the only part I've had that has not been a perfect fit -it just needed a quick bit of sanding to get it flush with the rear of the fuselage. Next up is to fit the clear cockpit piece, rudder and wings. Dave 5 Link to comment Share on other sites More sharing options...
stringbag Posted March 19, 2018 Share Posted March 19, 2018 I'm quite impressed with this new kit from Zevezda Dave. I'll be quietly watching as you go along. Chris. 2 Link to comment Share on other sites More sharing options...
halcyonjet Posted March 22, 2018 Author Share Posted March 22, 2018 A few more bits added, namely the clear cockpit piece and the rudder. I used a black paint pen I got from Hobbycraft to paint the bottom edge of the cockpit windows, which helps them to blend in looks wise (I think). I had a very slight problem with the rudder. I couldn't get it flush on both sides, and ended up with a very small gap on the right side. A small smear of filler will take care of it though. The later versions of the 737 have a very close fitting rudder of course. Strangely, I'm building a 'shadow' of the same kit that's a little behind my Monarch one, and that looks to have the same gap. Must be me I guess! Dave 7 Link to comment Share on other sites More sharing options...
zebra Posted March 24, 2018 Share Posted March 24, 2018 Dave, it's not just you - I had the same gap on mine. A touch of filler got rid of it easily enough. 2 1 Link to comment Share on other sites More sharing options...
halcyonjet Posted March 30, 2018 Author Share Posted March 30, 2018 On 3/24/2018 at 10:25, zebra said: Dave, it's not just you - I had the same gap on mine. A touch of filler got rid of it easily enough. Yes, an easy fix, thankfully. The cockpit glazing/roof now fitted and the upper join smoothed. A quick lick of 'Mr Surfacer' to complete the job. On to the wings next... Dave 6 Link to comment Share on other sites More sharing options...
Romeo Alpha Yankee Posted April 12, 2018 Share Posted April 12, 2018 Coming along nicely Dave, the filled rudder and cockpit glazing fitment looks good Link to comment Share on other sites More sharing options...
armored76 Posted April 12, 2018 Share Posted April 12, 2018 Looks really nice, so far! The fit seems to be spot on, too. Link to comment Share on other sites More sharing options...
halcyonjet Posted April 12, 2018 Author Share Posted April 12, 2018 Thanks Ray and armored76, yes it is going together very well with excellent fitting parts. It's taken me a couple of sessions to fit the clear landing light covers in the wing roots -only because they are so small though, and I kept dropping them! Once fitted, they are fine. The wing structure should be joined to the fuselage tonight, ready for the start of painting on the weekend. Dave Link to comment Share on other sites More sharing options...
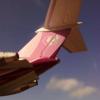
halcyonjet Posted April 20, 2018 Author Share Posted April 20, 2018 Got the wings on, and with only a minimal amount of filler required as the fit was very good. Now had a coat of primer applied all over, and it doesn't look like any remedial work required, so a bit of colour coming very soon (all being well). The more observant (ok -everybody then) might notice that I haven't fitted the winglets yet. I'm rather cack-handed and they looked prime candidates for me to knock off, so I'll mask and paint the fuselage before finishing the wings. Well, that's the current plan! Dave 7 Link to comment Share on other sites More sharing options...
halcyonjet Posted May 6, 2018 Author Share Posted May 6, 2018 Well, just over a week ago, I was looking on course to get this finished. The fuselage was painted except for minor details and ready for decalling. Engines completed and ready for fitting. I had kept things clear for 9 days. Then, last weekend, my elderly mother was taken ill and admitted to hospital. After spending most of the week there, she was finally released to come home, where I have been looking after her since. All of this has meant that I had no time to do anything on my GB builds. I can't tell you how disappointed I am to fail to complete on time, but some things are more important. Anyway, I shall do my best to get them finished now and post them in the RFI section. Dave 2 Link to comment Share on other sites More sharing options...
Viking Posted May 6, 2018 Share Posted May 6, 2018 Family always come first Dave, you did the right thing. Here's wishing your mother a speedy recovery. The 737 is looking very good, that awkward Monarch colouring looks great. Cheers John 1 Link to comment Share on other sites More sharing options...

Recommended Posts
Create an account or sign in to comment
You need to be a member in order to leave a comment
Create an account
Sign up for a new account in our community. It's easy!
Register a new accountSign in
Already have an account? Sign in here.
Sign In Now