Devcon 1 Posted November 6, 2017 Share Posted November 6, 2017 Hi, Started a cutaway version of the Takom kit. It's the Henschel version with Zimmerit any 505. Bear with whilst I get up to date with pics. Link to comment Share on other sites More sharing options...
BlackMax12 Posted November 6, 2017 Share Posted November 6, 2017 Sounds interesting. I've seen cutaway 1/16 kits but 1/35 is going to be tricky as it's so much smaller, for my fingers anyway. Got a coffee and a chair, putting feet up now.... Lloyd Link to comment Share on other sites More sharing options...
Devcon 1 Posted November 6, 2017 Author Share Posted November 6, 2017 Fingers crossed. How difficult can this be. I've got images on Flickr, I've copied the link and pasted it into the relevant box that pops up when "adding media" it then just hangs and does nothing. I'll keep trying. Link to comment Share on other sites More sharing options...
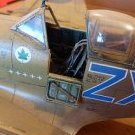
Devcon 1 Posted November 6, 2017 Author Share Posted November 6, 2017 https://www.flickr.com/photos/137184563@N08/26443156209/in/dateposted-public/ 1 Link to comment Share on other sites More sharing options...
Devcon 1 Posted November 6, 2017 Author Share Posted November 6, 2017 I paste the URL that is in the post above into the " insert image from URL" and nothing happens, the dialogue box just goes grey and hangs. I'll try from a PC tomorrow. Link to comment Share on other sites More sharing options...
Ozzy Posted November 6, 2017 Share Posted November 6, 2017 That's one way to show off the interior, nice going John. Link to comment Share on other sites More sharing options...
Devcon 1 Posted November 7, 2017 Author Share Posted November 7, 2017 Success at last, this was just a random picture that I was playing with. I'll put a few more on to bring the build up to date together with some comments. I'll then carry on with the build log as per normal. Here are some sub assemblies ready for installation. 4 Link to comment Share on other sites More sharing options...
Devcon 1 Posted November 7, 2017 Author Share Posted November 7, 2017 The gap in the front armour filled and ready for smoothing. My only criticism of the kit is the ammunition blocks which have the shells and racks all moulded together, I've separated them out and fit some AFV Club shells 4 Link to comment Share on other sites More sharing options...
Devcon 1 Posted November 7, 2017 Author Share Posted November 7, 2017 I've cut as much as I can whilst retaining the look of the tank from the other side, I hope. I've tried to adopt a painting regime that will give me ready painted items ready for final assembly. 5 Link to comment Share on other sites More sharing options...
Devcon 1 Posted November 7, 2017 Author Share Posted November 7, 2017 Ive taken the cut down to the torsion bars to show the suspension workings. I'll section the relevant road wheels as well. 4 Link to comment Share on other sites More sharing options...
Devcon 1 Posted November 7, 2017 Author Share Posted November 7, 2017 The microswitch will be activated by a tab on the turret ring to switch on/off 3 LEDs that will illuminate the interior. Gun finished in Ammo Mig Cream White 5 Link to comment Share on other sites More sharing options...
Devcon 1 Posted November 7, 2017 Author Share Posted November 7, 2017 I've done the same with the turret rack, the R/H is original and the left hand one has had the shells cut out ready for individual units. This will be the optional cut view of the engine bay Early picture of the rear section that will pull out to shoe the motor 5 Link to comment Share on other sites More sharing options...
Devcon 1 Posted November 7, 2017 Author Share Posted November 7, 2017 the vertical cuts will be covered by the exhaust stub and a kit box If I do another one I'll see if I can section out the wheels to show the true plate as opposed to solid construction. Almost up to date, I'll put some more on tomorrow John 6 Link to comment Share on other sites More sharing options...
Devcon 1 Posted November 7, 2017 Author Share Posted November 7, 2017 One of the cooling packs This won't be a 100% accurate build in terms of paint finish but a representation of the workings of a Tiger II that is based on a cutaway exhibit in an American museum 4 Link to comment Share on other sites More sharing options...
Devcon 1 Posted November 7, 2017 Author Share Posted November 7, 2017 2 Link to comment Share on other sites More sharing options...
BlackMax12 Posted November 7, 2017 Share Posted November 7, 2017 Well...I was concerned when you first posted but now I can see this is going to be a masterpiece. Like even cutting the wheels apart, awesome. Your painting and weathering skills are right up there with the best, impressive to say the least The paint sure brings it to life and it's going to be a museum piece on it's own, just a smaller scale. After all of your work can you just imagine how difficult it must have been to do a cutaway on the real tank? Boggles the mind. Take care, Lloyd Link to comment Share on other sites More sharing options...
Devcon 1 Posted November 8, 2017 Author Share Posted November 8, 2017 Thanks for your kind words Lloyd and Ozzy. Its a stunning kit in my opinion, Takom have gone to great pains to do a fabulous interior so it seemed a shame to not expose it. Here are the main units almost complete. 4 Link to comment Share on other sites More sharing options...
Carius Posted November 8, 2017 Share Posted November 8, 2017 Great job so far Link to comment Share on other sites More sharing options...
Blaubar Posted November 8, 2017 Share Posted November 8, 2017 This is stunning. Looks like a good kit and I do like and enjoy the cutaway models. I look forward to seeing more of this. /Stefan Link to comment Share on other sites More sharing options...
coneheadff Posted November 8, 2017 Share Posted November 8, 2017 Wow...stunning work!!! Link to comment Share on other sites More sharing options...
Devcon 1 Posted November 8, 2017 Author Share Posted November 8, 2017 Thanks peeps, I've loved watching this forum. It's inspired me to a few projects. I've put some pins in the hinges to make the central rear engine compartment workable. Now, I've deviated from the usual interior colour of red oxide primer for the lower part of the hull, partly as a nod to the American museum cutaway but also to allow a better view of the interior environment when it's illuminated. 9 Link to comment Share on other sites More sharing options...
Redcoat2966 Posted November 9, 2017 Share Posted November 9, 2017 Looking good, looking very good. Nice clean build.....👌 Rgs Simon Link to comment Share on other sites More sharing options...
Devcon 1 Posted November 10, 2017 Author Share Posted November 10, 2017 (edited) Had to have a go with the lights. There are 3 LEDs switched by a micro switch with a Cr2032 in a holder under the hull. Before After. Edited November 10, 2017 by Devcon 1 Forgot photo 4 Link to comment Share on other sites More sharing options...
Devcon 1 Posted November 10, 2017 Author Share Posted November 10, 2017 It starting to look rather busy. 2 Link to comment Share on other sites More sharing options...
Murdo Posted November 10, 2017 Share Posted November 10, 2017 Cracking work! Link to comment Share on other sites More sharing options...

Recommended Posts
Create an account or sign in to comment
You need to be a member in order to leave a comment
Create an account
Sign up for a new account in our community. It's easy!
Register a new accountSign in
Already have an account? Sign in here.
Sign In Now