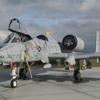
Shaun Posted January 9, 2017 Share Posted January 9, 2017 Made a start on this amazing kit,It just clicks together!....Here is my model dry fitted after cleaning up the parts. Shaun. 8 Link to comment Share on other sites More sharing options...
SimonT Posted January 9, 2017 Share Posted January 9, 2017 Fantastic engineering, no doubt about it. 1 Link to comment Share on other sites More sharing options...
Shaun Posted January 9, 2017 Author Share Posted January 9, 2017 8 minutes ago, SimonT said: Fantastic engineering, no doubt about it. Its brilliant, adding glue makes fit problems......lol Link to comment Share on other sites More sharing options...
Mr B Posted January 10, 2017 Share Posted January 10, 2017 lovely progress if all goes well mine will be on the table this year......looks lovely in the box Link to comment Share on other sites More sharing options...
Brad-M Posted January 11, 2017 Share Posted January 11, 2017 Hi, Any requirement for nose weight? Thanks Brad Link to comment Share on other sites More sharing options...
Shaun Posted January 12, 2017 Author Share Posted January 12, 2017 Nothing is stated in the instructions?. Would not hurt to add some, there is loads of room! Link to comment Share on other sites More sharing options...
Shaun Posted January 12, 2017 Author Share Posted January 12, 2017 Doing a later aircraft, so tail modified to the later type with the Furball PE Under primer Shaun. 1 Link to comment Share on other sites More sharing options...
Shaun Posted January 12, 2017 Author Share Posted January 12, 2017 Got the main rear fuselage together and added another feature of late A model Tomcats the ECM fittings, these were scratch built and added. 2 Link to comment Share on other sites More sharing options...
Shaun Posted January 14, 2017 Author Share Posted January 14, 2017 I love the way this kit builds compared to the Hasegawa kit,the design is very clever and its hard to make mistakes with any of the construction.The undercarriage was a right pain on the Hasegawa kit, on this kit assembly is simple but very detailed. I've added the Eduard Resin wheels to my build, which have a slack fit between main hub and tyre? but it will be simple to fix. Shaun. 2 Link to comment Share on other sites More sharing options...
fewr9fkr9595 Posted January 14, 2017 Share Posted January 14, 2017 (edited) Because the rim looks like it flares outwards a touch, if you sanded more off of the back of the hubs so they sit deeper into the tire would that not close the gap? Obviously not so much that then the tire ends up higher than the rim... Ps I suppose you've tried it but what about swapping them with the rear face of the hubs to see if that improves things? Edited January 14, 2017 by Tony Oliver Link to comment Share on other sites More sharing options...
Shaun Posted January 14, 2017 Author Share Posted January 14, 2017 Its the same on the rear hub with the brake detail for slack fit, you can't sand the rear of the parts because of a locating lug for the hub to drop onto.Also have a look at this photo of the real wheel, the rim sits well proud of the tyre. Link to comment Share on other sites More sharing options...
Tiger331 Posted January 14, 2017 Share Posted January 14, 2017 Great start and I will be following progress closely. I've got this kit but to be honest, I waiting to do a late model F-14A. It will be interesting to see what comes first…..the aftermarket parts (in particular the under nose sensors and ECM parts) from an enterprising manufacturer to do the late-model F-14A or A+ or a Tamiya re-boxing of the kit with the additional parts. Link to comment Share on other sites More sharing options...
Stephen Posted January 14, 2017 Share Posted January 14, 2017 36 minutes ago, Tiger331 said: Great start and I will be following progress closely. I've got this kit but to be honest, I waiting to do a late model F-14A. It will be interesting to see what comes first…..the aftermarket parts (in particular the under nose sensors and ECM parts) from an enterprising manufacturer to do the late-model F-14A or A+ or a Tamiya re-boxing of the kit with the additional parts. The after market parts are already out, Steel Beach have the TCS pod, ECM bulges and NACES vent panel for the gunbay as well as a forthcoming F-14B conversion. 1 Link to comment Share on other sites More sharing options...
Shaun Posted January 14, 2017 Author Share Posted January 14, 2017 1 hour ago, Tiger331 said: Great start and I will be following progress closely. I've got this kit but to be honest, I waiting to do a late model F-14A. It will be interesting to see what comes first…..the aftermarket parts (in particular the under nose sensors and ECM parts) from an enterprising manufacturer to do the late-model F-14A or A+ or a Tamiya re-boxing of the kit with the additional parts. Its not too hard to make late F-14A , The B it harder because of the engine change and NACA vents around the gun muzzle panel. I'll post up something later that may interest you. TBH, once you start researching you will be surprised how many of the TPS schemes are not late mod aircraft, the only thing to change is the reinforcing braces on the fins.Most jets pre 90's are lacking the ECM fairings. 1 Link to comment Share on other sites More sharing options...
drizzt73 Posted January 14, 2017 Share Posted January 14, 2017 following with interest. I just picked one of these babies up. What markings are you doing? Link to comment Share on other sites More sharing options...
Shaun Posted January 14, 2017 Author Share Posted January 14, 2017 The plan is for VF-84 Jolly rogers. Link to comment Share on other sites More sharing options...
Shaun Posted January 14, 2017 Author Share Posted January 14, 2017 I'm not expected Tamiya to release a B or D Tomcat that quick so as an experiment I done a little bit of trials work with the Aires Resin GE exhausts for the Hasegawa kit.With a bit of removing resin/trimming and sanding they will fit just fine with only a small area to reshape to match the contours on the shrouds. Link to comment Share on other sites More sharing options...
Shaun Posted January 14, 2017 Author Share Posted January 14, 2017 This is the area that will need a little reshaping. 1 Link to comment Share on other sites More sharing options...

Recommended Posts
Create an account or sign in to comment
You need to be a member in order to leave a comment
Create an account
Sign up for a new account in our community. It's easy!
Register a new accountSign in
Already have an account? Sign in here.
Sign In Now