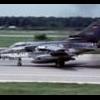
Filler Posted January 7, 2017 Share Posted January 7, 2017 My second build is a kit that I started about three years ago. I was just getting into the hobby at that time (the second attempt) but suddenly things changed and it looked like I might not get back into it. And late last summer I had really given up and even made the decision to give my parents loft a break and sell the lot – stash of about 90 kits, piles of paints and tools including a brand new airbrush that I’d never had the chance to use and a posh extractor that I had saved long for. However, a mistake on my part meant I missed the prime opportunity to try and shift it all and it returned to the folk’s loft. A few months later I have been surprised to find that I now have the possibility to pick up the hobby again (although not much time and space). So, the aborted build is an F-16A of the Belgian Air Force. I’m again using a Hasegawa kit, this time a later boxing with the cool NATO 50th markings. I have the Daco decals for FA-18 of 350 Squadron in 1987 in its 45th anniversary markings. As you can see in the photo (and if you’ve read the chat thread) that this has been started and is pushing the limits of the 25% rule. However, seeing as there are still a lot of parts to fit (there are 12 steps and I’m up to 6 but haven’t done step 1 and less than half of step 4)and some resin aftermarket goodies, plus a frankly frightening paint scheme and fancy decals, Rich has been very kind and lenient and allowed me to include it in the GB. I always planned to make the best job of this I possibly could, so if a build stalls it could be this one as I don’t really have the skills to achieve the result I want. But I will give it my best shot. 6 Link to comment Share on other sites More sharing options...
Filler Posted January 9, 2017 Author Share Posted January 9, 2017 Not a particularly productive weekend's work but I have at least done something. And I've really enjoyed it. Saturday was just getting my two build threads up. Today I spent some time just getting familiar with the instructions and going through references to check on what mods might be necessary for my particular aircraft. I decided to focus on this BAF build and a few things have come back to me such as that I'd fitted the Raport III antenas (nicked from an Italeri kit) either side of the intake. It looks to be a bit tricky getting the navigation lights fitted onto them as I reckon they're fractionally long and they'll be hard to reprofile. Tonights actual modelling work was assembling the tail plane. Pretty simple task gluing the two halves together but I had a few more problems when it came to adding the cool air scoop for the Raport III on the starboard side. I first tried to open a token opening in the kit part and then open a hole in the base of the tail to fit the parts locating stud. It took two efforts to put a hole in as the first was too far back. I got lucky as fortunately the part covered the first hole and having laminate floors saved me from a carpet monster episode with the tiny air scoop which made a few trips to the deck while trying to put the opening in it. This photo shows the opening up of the cool air scoop before it pinged off for its first trip to the floor. And this one shows the scoop fitted and pretty much in the right place, thanks to Verlinden's Lock On No.2 F-16 Fighting Falcon. Glad I took the trouble to put the tiny opening in it. It might be barely visable but I know it's there and I did it. Tomorrow I will either get the tail on and clean up the Two Mikes small stabilators or I may turn my attention to getting the 50th TFW build up to a similar point. 1 Link to comment Share on other sites More sharing options...
trickyrich Posted January 9, 2017 Share Posted January 9, 2017 and welcome again on your second build, and another nice set of bits you have to go with her. Nice start you've made, and a lucky escape from the carpet monster to I see, well done! Though they do like an offering every now and again unfortunately! Again good luck with the build, will follow with interest. Link to comment Share on other sites More sharing options...
Pappy Posted January 9, 2017 Share Posted January 9, 2017 Very neat work, I like! cheers, Pappy Link to comment Share on other sites More sharing options...
Erik Leijdens Posted January 9, 2017 Share Posted January 9, 2017 Looking good Filler. We are indeed about at the same stage with our F-16's :). Good luck. Erik Link to comment Share on other sites More sharing options...
mirageiv Posted January 9, 2017 Share Posted January 9, 2017 Very nice choice of scheme and looks like a great start. Man I wish those Hasegawa F-16As were more easily available, they look like great kits! David. Link to comment Share on other sites More sharing options...
exdraken Posted January 9, 2017 Share Posted January 9, 2017 Looking forward to this build! Take your time, and lots of photos! - please! Link to comment Share on other sites More sharing options...
Filler Posted January 9, 2017 Author Share Posted January 9, 2017 5 hours ago, mirageiv said: Very nice choice of scheme and looks like a great start. Man I wish those Hasegawa F-16As were more easily available, they look like great kits! David. It is a great scheme. Just a pity there's not many photos of it that I can find (although more than I can find of my other build). I agree about the kits rarity too. I feel lucky to have this kit. 1 hour ago, exdraken said: Looking forward to this build! Take your time, and lots of photos! - please! I will certainly take my time. I've put the tail on tonight but no photo yet. Too busy staring at the tail as I'm sure it has ever such a slight warp/twist. It's not obvious but it's bugging me. Don't suppose there's much I can do and wouldn't be surprised if I tried something it would go from hard to see 'sore thumb'. Thanks everyone for the kind words. 1 Link to comment Share on other sites More sharing options...
Whirly Posted January 24, 2017 Share Posted January 24, 2017 Hi Filler, very nice choice, I think I have the same scheme in a quite vintage Modeldecal sheet (1/72), really eager to see how it comes up! Link to comment Share on other sites More sharing options...
Filler Posted January 24, 2017 Author Share Posted January 24, 2017 Thanks for your interest Whirly. As is apparent, nothing has happened here for a bit as apart from limited opportunity to break out the cement, I've been struggling to find a satisfactory priming solution. I like Halfords rattle can primer but it's always seemed like a sledgehammer to crack a nut and I've been restricted to good weather outdoor priming due to the immense overspray. Anyway, I have just taken delivery of a bottle of Stylynrez (sp?) as the reviews are very good. Despite that, I'm still apprehensive of successfully putting it through my airbrush and getting it clean afterwards. On top of that I've been distracted by an Airfix Jaguar I'd started just before this STGB. The one evening I spent modelling was all about turning the kits overwing GR3 sidewinder rails into GR1 wing fences. This weekend looks promising though. Both Saturday and Sunday could see some F-16 action! 1 Link to comment Share on other sites More sharing options...
Lex77 Posted January 27, 2017 Share Posted January 27, 2017 Nice colour scheme! Looking forward to this weekends progress. Link to comment Share on other sites More sharing options...

Recommended Posts
Create an account or sign in to comment
You need to be a member in order to leave a comment
Create an account
Sign up for a new account in our community. It's easy!
Register a new accountSign in
Already have an account? Sign in here.
Sign In Now