Muzz Posted January 29, 2017 Share Posted January 29, 2017 Hi Vitaliy The small white disc is the GPS antenna, is that what you're referring to? Muzz Link to comment Share on other sites More sharing options...
Vitaliy Posted January 29, 2017 Author Share Posted January 29, 2017 Thanks Muzz !!! 1 Link to comment Share on other sites More sharing options...
Vitaliy Posted February 2, 2017 Author Share Posted February 2, 2017 Finished the tail 1 Link to comment Share on other sites More sharing options...
Muzz Posted February 3, 2017 Share Posted February 3, 2017 Nice riveting! Have you seen this site......... http://www.primeportal.net/hangar/luc_colin/harrier_gr7_walk_2.htm 1 Link to comment Share on other sites More sharing options...
Vitaliy Posted February 8, 2017 Author Share Posted February 8, 2017 (edited) Did some work and I ... Edited February 9, 2017 by Vitaliy bad photo 4 Link to comment Share on other sites More sharing options...
Muzz Posted February 9, 2017 Share Posted February 9, 2017 Coming along nicely, I like the riveting job on the wings. Theres some good pics in the Walk round section on this forum if you haven't seen it...... http://www.britmodeller.com/forums/index.php?/topic/235005930-mcdonnell-douglas-british-aerospace-2nd-generation-harrier/ 1 Link to comment Share on other sites More sharing options...
Vitaliy Posted February 15, 2017 Author Share Posted February 15, 2017 I worked a little more ... Link to comment Share on other sites More sharing options...
Vitaliy Posted February 27, 2017 Author Share Posted February 27, 2017 Made stage high-pressure compressor and low pressure 12 Link to comment Share on other sites More sharing options...
xffw45343tg Posted February 27, 2017 Share Posted February 27, 2017 Wow! 2 Link to comment Share on other sites More sharing options...
youngtiger1 Posted February 28, 2017 Share Posted February 28, 2017 Wow, some nice work going on here. The tail looks awesome. I'll follow along😉 1 Link to comment Share on other sites More sharing options...
Vitaliy Posted February 28, 2017 Author Share Posted February 28, 2017 Thank you friends , all done without the photo-etched parts !!! Link to comment Share on other sites More sharing options...
Vitaliy Posted March 2, 2017 Author Share Posted March 2, 2017 Now I'm done with HP 1 Link to comment Share on other sites More sharing options...
Vitaliy Posted March 2, 2017 Author Share Posted March 2, 2017 How do you think what color need to paint these elements 1 Link to comment Share on other sites More sharing options...
Muzz Posted March 2, 2017 Share Posted March 2, 2017 Hi Vitaliy, how about pale burnt metal followed by a Matt varnish? Alclad paints also do a good colour in their range call Exhaust Manifold which would suit. I doubt an operational jet would be quite as rusty as the example shown in your photo. As I'm sure you're probably aware this where the hot air nozzles would be and as such the area would be bare metal. Heres another view of the same area...... http://data.primeportal.net/hangar/luc_colin/harrier_gr.7/Harrier_GR.7_032.jpg 2 Link to comment Share on other sites More sharing options...
SkippyNZ Posted March 11, 2017 Share Posted March 11, 2017 Awesome work! Wouldn't be surprised if you start that Pegasus up. 2 Link to comment Share on other sites More sharing options...
Vitaliy Posted March 11, 2017 Author Share Posted March 11, 2017 Thanks for the comment SkippyNZ ! Now working on a part of the Pegasus in the cold nozzle Link to comment Share on other sites More sharing options...
Vitaliy Posted March 11, 2017 Author Share Posted March 11, 2017 A part of the Pegasus in the cold nozzle ( not finished ) 2 Link to comment Share on other sites More sharing options...
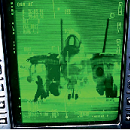
Vitaliy Posted March 16, 2017 Author Share Posted March 16, 2017 Link to comment Share on other sites More sharing options...
xffw45343tg Posted March 16, 2017 Share Posted March 16, 2017 Nice. So that's the compressor casing, right? Are you going to represent the cruciform fairings that go between it and the plenum? Just to help your lining up of parts, these contain the driveshafts (both LP and HP) to the accessory gearbox on the top of the engine and I believe there is also a driveshaft to a pump (oil? - can't remember) at the bottom of the engine. Superb detail at this scale though; very impressive. Kirk PS/ Notice on the thermocouple at the aft end of the engine that there is a tube that goes laterally to the right side of the casing - roughly the same size as the arms of the sensor. This contains the sensor wire and passes through the casing to a corresponding connector on the outside. Link to comment Share on other sites More sharing options...
Vitaliy Posted March 16, 2017 Author Share Posted March 16, 2017 Thanks Kirk !!! Do you think in some cases, the first stage of the fan could be 23 and 26 of the blades . And in some cases mounted trimer on the front and rear nozzles . Thank you ! Link to comment Share on other sites More sharing options...
xffw45343tg Posted March 16, 2017 Share Posted March 16, 2017 Yes - the number of blades varies depending on the Mk of the engine. If I remember correctly, the more powerful Mk.61 has 23 1st stage blades and the Mk.21 has more - but I need to check my books to be sure how many. The profile of the blades is subtly but visibly different between the 2 versions. Yes, the nozzles feature trimmers. I guess you know that the oil tanks are quite different between the 2 types. Which version of the engine are you modelling? Do you have all the reference photos you need? I can probably point you to some sources if not. Glad someone else likes the Pegasus nearly as much as I do!! 1 Link to comment Share on other sites More sharing options...
Vitaliy Posted March 17, 2017 Author Share Posted March 17, 2017 Thank you that I have shed light on troubling issues in my building . Now just have to redo the first stage fan , I'm confused, and made of 23 blades , I'm guessing that my plane was set Pegasus 105 or 106 with the fan blades 26 . Here is the Board which I build Since there are no frog eyes , LERX 65% .Then it could not stand Pegasus 11-61E with first stage fan 23 blades .I assume that my plane 26A there was a trimer in the cold nozzles such And rear nozzles do not understand or anything , a trimer this type or this type or this type How to choose don't know ???????? And I don't know how to look inside holes for extra air intake behind the cockpit It's all about what I don't know ... Huge thanks !!!!!!!!!!!!!!!! Link to comment Share on other sites More sharing options...
xffw45343tg Posted March 17, 2017 Share Posted March 17, 2017 Right, let's see: The original UK Harrier II series was the GR5. This had what Rolls Royce call the Pegasus 11-21 Engine, known by the RAF as the Mk.105 and roughly equivalent to what the US called the F402-RR-406 (or 406 for short). This engine has the teardrop shaped oil tank and (as far as I know) does NOT usually have trimmers on the nozzles. I'm due in a meeting shortly and can't lay my hands on the number of 1st stage fan blades in the 11-21 but I'll dig it out and post. The RAF had a requirement to increase performance in "hot and high" situations, and this led to the Pegasus 11-61, known by the RAF as the Mk.107 and by the US as the 408. This engine has 2 inter-connected tubular oil tanks (larger above smaller), 23 bladed fan and trimmers on the nozzles. UK Harriers fitted with this engine have an "A" somewhere in their designation (as in GR7A, GR9A) GR7s and 9s could interchange between Mk.105s and Mk.107s gaining or losing the "A". The "intake behind the cockpit" is actually an exhaust. There are 2 thin rectangular spring-loaded doors on the inside faces of the intake about 500mm aft of the pilot's seat. At speed, these doors open into a sort of chimney that takes air from the boundary layer and directs it upwards to the outlets you can see. I *think* this happens because of a suction effect created by the airflow above the outlets rather than due to pressure on the outside of the doors. The desired effect is to smooth the airflow presented to the fan. I'll see if I can find a link to the picture I have seen that shows a crashed aircraft that helpfully separated at this point showing the ducts quite clearly. As far as a model goes, there's not much to do other than give the duct more depth and some side walls. If you can get your hands on a copy of "Pegasus - The Heart of the Harrier" by Andrew Dow, this will give all of the above in much more detailed terms and though it does spend a lot of pages on all the internal and governmental politics surrounding the Pegasus' life is also a very good read. Cheers for now. Kirk 1 Link to comment Share on other sites More sharing options...
Vitaliy Posted March 17, 2017 Author Share Posted March 17, 2017 Oh , thank you so much !!! So it turns out if my board 26A it was set Pegasus 107 with trimers at the nozzle . Or the letter A in the number on the tail is something else meant ??? Link to comment Share on other sites More sharing options...
xffw45343tg Posted March 17, 2017 Share Posted March 17, 2017 Nope you're spot on - the 26A "tail code" means 107 in this instance. The only Harrier thing that I've ever seen to confuse this is the tail marking of Sea Harriers that were assigned to "700A Squadron". The big red "A" on the tail of these has nothing to do with the engine or aircraft type. My understanding is that each squadron assigns a "tail code" to each aircraft in their care to simplify operations (it's a bit faster than using the aircraft serial "ZD378" or worse still the manufacturers production number I suppose. The Royal Navy have their own tail code numbering system I believe using 3 digit numbers, although I'm not sure what approach was taken to giving tail codes to Harriers in "Joint Force Harrier" (the RAF+FAA units that got to share aircraft in the last months of the UK Harrier history) but I think the "A"s persisted). If UK Harriers had lasted long enough, all would probably had Mk.107 engines and we would have no fun at all. You're very welcome to the info, Vitaly. I take the view that the main purposes of acquiring knowledge are: 1) To share it 2) In doing (1), discover that you've not got it quite right and learn something. There's a fair chance that someone who knows more than either of us will correct my mistakes! Kirk 1 Link to comment Share on other sites More sharing options...

Recommended Posts
Create an account or sign in to comment
You need to be a member in order to leave a comment
Create an account
Sign up for a new account in our community. It's easy!
Register a new accountSign in
Already have an account? Sign in here.
Sign In Now