HP42 Posted October 19, 2016 Share Posted October 19, 2016 (edited) Decided to break out the 1:72 Concorde and have a go at taming the beast. I've Read so many accounts of it being a difficult kit I thought it was time to have a go and see what I thought. I also fancy having a Concorde in the cabinet. I bought an Extratech photoetch sheet a few years back from the Czech Republic (Llona Mullerova). I also bought an transparency mask and a weighted wheel set from Hannants a while back. The story so far... Started the engine bays to be finished later. The instructions say the darker areas are either Hu85 or Hu53 but I'm inclined to think it's more of a dark metallic (was it titanium?). I may opt for a dark Alclad and then do lots of panel variations. These things will go on towards the end and I'll probably pick some supplies up at Telford (for it is not all that far away!) The Extratech photoetch, one of two sheets. Looks to be very well made. Weighted resin wheels for later. Look much better than the rubber jobs it must be said....now where's my razor saw? Edited October 19, 2016 by HP42 Kant spel 2 Link to comment Share on other sites More sharing options...
HP42 Posted October 19, 2016 Author Share Posted October 19, 2016 Already buttoned up the cockpit. There's not much to see through the transparencies so I just followed the out of the box instructions. Lost the instrument panel decal due to it folding and shrivelling, a warning for things to come I feel. It's difficult to see the internal detail on the real thing so a model isn't going to warrant much fine detailing, well that's my excuse! Combing on the control panel interferes with the screen so I slid the whole flight deck back a few mm after a minor location lug adjustment Applied the masks to the main screen, just needs minor filling and finishing off before paint. This section will then be hidden behind the visor. I've decided to abandon the Airfix mechanism as it's utter rubbish. I'm told it breaks easily. Mine was broken in the bag! It's problematic and not accurate as it omits the black panel under the visor glass. I'm going to fix the visor in the closed cruise position as it looks better I feel. Modified nose with additional panel. Needs more detail work but it's a start. Now with mask applied. Just a dry fit. You can't see a lot on the real thing! 3 Link to comment Share on other sites More sharing options...
HP42 Posted October 19, 2016 Author Share Posted October 19, 2016 Started on the skid wheel assembly. Used the first of the photoetch. Made up some panel doors from parts, a bit fiddly but that the nature of the beast. I'll put them aside for painting later. Glued the tail fin and cone assembly now. Certainly more detail than the kit parts. 5 Link to comment Share on other sites More sharing options...
woody37 Posted October 19, 2016 Share Posted October 19, 2016 You're nearly finished, that was easy 😅 Looking forwards to your progress, nice start 2 Link to comment Share on other sites More sharing options...
CedB Posted October 19, 2016 Share Posted October 19, 2016 I have the Revell kit so I'll follow along if I may 1 Link to comment Share on other sites More sharing options...
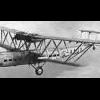
Sheepie Posted October 19, 2016 Share Posted October 19, 2016 I've been trying to tame the beast since March this year! Very frustrating kit but I assure you, so rewarding when you get on the home straight! Just watch out for engines that sit below the wing height that need dealing with, the visor being 10mm too far forward, front nose gear being 10mm too far back, and an absolute huge fight to get the fuselage flush! This is where I'm at with mine, hopefully will provide some motivation when it's needed 5 Link to comment Share on other sites More sharing options...
HP42 Posted October 19, 2016 Author Share Posted October 19, 2016 1 hour ago, CedB said: I have the Revell kit so I'll follow along if I may Please do! You may get ahead of me! 1 Link to comment Share on other sites More sharing options...
HP42 Posted October 19, 2016 Author Share Posted October 19, 2016 (edited) 51 minutes ago, Sheepie said: I've been trying to tame the beast since March this year! Very frustrating kit but I assure you, so rewarding when you get on the home straight! Just watch out for engines that sit below the wing height that need dealing with, the visor being 10mm too far forward, front nose gear being 10mm too far back, and an absolute huge fight to get the fuselage flush! This is where I'm at with mine, hopefully will provide some motivation when it's needed Sheepie, that's a great looking model. I think it was looking at your model and build thread that gave me the push to open the box on mine. Tell me more about the engines. What exactly is the problem I'll be facing? I'm thinking of finishing the engines as complete units, decals and all -then gluing them on. Will I come acropper if I try that? I see you dropped your flaps too. Is there a preferred technique for this? Edited October 19, 2016 by HP42 2 Link to comment Share on other sites More sharing options...
Romeo Alpha Yankee Posted October 19, 2016 Share Posted October 19, 2016 Anther watching, I have the Heller kit with Airfix decals in it Mine will be done wheels up though so I can seal up the gear bays and rescribe then in the right place. The etch set certainly adds detail. nice work HP Link to comment Share on other sites More sharing options...
HP42 Posted October 22, 2016 Author Share Posted October 22, 2016 A little more progress. I put the fuselage section together and the lower wing with wheel well. Then I began assembling the wheel well photoetch which is a big improvement on the kit offering. I left the wheel well kit detail in place as I felt the new unit was designed to go over it. I'm not so sure now but either way it works. A few area stand very slightly proud but a tickle with a flat needle file will sort it. The photoetch needed a little fitting to get it to sit properly, mainly a needle file in the holes to allow it to drop over the cylindrical undercarriage mounting lugs. Kit parts, the inner well will be hidden anyway as the doors returned to the closed position on the ground. A bit of folding later, very easy as it happens! Currently both are stuck in the wheel wells awaiting the extra detail. Stuck the tail assembly on. Yes there's a step but it's not too bad. It's now filled and waiting to harden off. 6 Link to comment Share on other sites More sharing options...
CedB Posted October 22, 2016 Share Posted October 22, 2016 Coming along nicely Phil. 1 Link to comment Share on other sites More sharing options...
HP42 Posted October 22, 2016 Author Share Posted October 22, 2016 I've now gone around the main fuselage with a tube of filler to sort out any panel gaps and ill fitting areas (wing leading edge roots). The wing/fuselage joints have a had a little treatment too but not as much as I'd expected. Wheel wells now have the photoetch but I've left off the fiddly bits until the sanding and filling work is complete in case they get damaged. I've decided to pose the aircraft on the ground and make a set of steps going up to the access door. I think I'll put it all in a diorama in a Barbados setting or similar, i.e. simple airstairs and an equally simple baggage truck. To that end I've opened up the door in the nose section and done a little scratch work on the door. I could really do with some reference shots of the door (especially the bottom part) and the 'lobby' for want of a better description just as one might step into the aircraft before turning right into the passenger cabin. I did photograph the one at East Fortune a few years ago but lost them due to hard drive failure (oh f-f-fiddlesticks!) The door... I decided to have a go at the stand. You need to glue the ball and socket joint together as it doesn't have enough friction to hold the aircraft steady on its own. I don't intend to display it like this, it's mainly a place to park it when not being worked upon. Starting to look like a Concorde now even though the nose section is just held on (for about 10 minutes before falling off) with tape. The nose has had further rhinoplasty in the panel under the visor. Looking at the visor it's going to need a little more careful fitting/filling. 6 Link to comment Share on other sites More sharing options...
CedB Posted October 22, 2016 Share Posted October 22, 2016 Nice work there Phil, especially that door and visor. Looking great on the stand 1 Link to comment Share on other sites More sharing options...
Alan R Posted October 22, 2016 Share Posted October 22, 2016 (edited) I have this in my stash, part started. Wish I had known about the Extra Tech photo-etch when I bought it.... Edited October 22, 2016 by Alan R Accidentally put in 'Spoiler'! Link to comment Share on other sites More sharing options...
Space Ranger Posted October 22, 2016 Share Posted October 22, 2016 What has happened to Extratech? I can't find their products anywhere, except on ebay at ridiculous prices! Link to comment Share on other sites More sharing options...
wanthony Posted October 25, 2016 Share Posted October 25, 2016 On 10/22/2016 at 8:07 PM, Space Ranger said: What has happened to Extratech? I can't find their products anywhere, except on ebay at ridiculous prices! They might not have their own website, but I imagine they're still in business. Try this: http://www.airline-hobby-estore.com/product-p/ex-72168.htm 1 Link to comment Share on other sites More sharing options...
Caerbannog Posted October 25, 2016 Share Posted October 25, 2016 My old link to Extratech still works but does not show their products anymore. Only a statement about their sole distributer: http://www.extratech.cz/?page=products Great build by the way. Mine is in hibernation at the moment but hope to return her to the bench soon. 1 Link to comment Share on other sites More sharing options...
HP42 Posted October 25, 2016 Author Share Posted October 25, 2016 I got my Extratech sheet direct from http://www.pmilona.cz/ back in 2014. They do have an English translation on the website if you click the US flag (harrumph! ). I actually ordered it on Christmas day as I was mooching about on the net for a few minutes, stumbled across the website somehow and awarded myself an extra prezzie under the pretext of 'that's too darn good to miss out on', well ...what else do you do on Christmas day?! The odd thing was I got a personal reply stating the postage (pretty reasonable as it turned out) within the hour! I've checked the website and there's no mention of the 1:72 Concorde set but I reckon if enough of us express an interest then I can't imagine it would stay out of stock for long. I might be wrong but I think Hannants did the same set for a while not long after I bought mine, so maybe pester Hannants? Personally I've just bought another 1/2 price Concorde kit from Wonderland as a gift for a mate and I'd like to add the photoetch kit too. I should point out however that if you decide to build your kit wheels up in flight then it's only the engines and a few small aerials etc that benefit from the etch so make a judgement call. 2 Link to comment Share on other sites More sharing options...
HP42 Posted October 25, 2016 Author Share Posted October 25, 2016 Sanding off the fabled tail step.... lots of dust. That Vallejo plastic putty stuff isn't half dusty and if you fill deep sections (i.e. more than 0.5mm) it takes days to go off. I look like I've stood next to an exploding flour mill. Good for small gaps but not much else and it's a bit hard to sand. Might revert to the green stuff.... I've been trying to find a few reference shots without much luck. I need to see the inside of the entrance from the passenger main door at the front so I can scratch build this section. I could also do with seeing a few quality daylight (for colour matching) shots of the side of the engines. From memory it's white paint in the front section, a sort of blackened/painted titanium before becoming much lighter NMF (in various shades) at the back. I had all these shots from East Fortune but on a now failed hard drive. 1 Link to comment Share on other sites More sharing options...
CedB Posted October 25, 2016 Share Posted October 25, 2016 Wow, you are going for the detail - in haste I did a search for 'boarding Concorde' and there are some amateur videos that might help? There's also lots of shots, including close ups, in the YouTube videos like this one: HTH 2 Link to comment Share on other sites More sharing options...
HP42 Posted October 26, 2016 Author Share Posted October 26, 2016 Thanks Ced, this one gives me enough to go on as the opening shot does a walk through the area I'm looking at scratching. I'm only going to attempt a small section as seen through the door from the outside, not one for zipping up hard work never to be seen again. 2 Link to comment Share on other sites More sharing options...
Alex1978 Posted October 26, 2016 Share Posted October 26, 2016 Thats an awesome build you are doing here.I will watch this with great interest as I have the Revell issue in my stash. Still undecided though if I go wheels up or wheels down.... Link to comment Share on other sites More sharing options...
HP42 Posted October 27, 2016 Author Share Posted October 27, 2016 A little progress tonight. Made the bare bones of the entrance porch from plasticard ready to slot in just as a test fit. I'll paint it soon and fettle it up with a bit of detail but in all honesty you won't see all that much. Test fit... 5 Link to comment Share on other sites More sharing options...
CedB Posted October 30, 2016 Share Posted October 30, 2016 Nice - glue it! 1 Link to comment Share on other sites More sharing options...
HP42 Posted October 31, 2016 Author Share Posted October 31, 2016 19 hours ago, CedB said: Nice - glue it! Lemmypaintitfirst! ;-) ;-) :-) Progress is going to be a tad slow for a while as work is taking precidence... just need a reference shot of the inside right as you'd walk through the door. 2 Link to comment Share on other sites More sharing options...

Recommended Posts
Create an account or sign in to comment
You need to be a member in order to leave a comment
Create an account
Sign up for a new account in our community. It's easy!
Register a new accountSign in
Already have an account? Sign in here.
Sign In Now