injidup Posted August 14, 2016 Share Posted August 14, 2016 (edited) While I wait for the decals to finish my Lotus 88, I've finished (just about!) two kits and started another. I decided to go for a rally car as I haven't made one since I was a kid. This is my first Hasegawa kit and it reminds me of the Fujimi kits I've made recently - nice detail on the body but some poor quality detailing on some parts, like th gearbox and driveshafts on this kit. I am looking forward to this though as 1) it's a Lancia and I owned two Lancias in the past 2) it's in Martini colours! I have the Hasegawa P-E kit for this and will be mostly oob with a few wires. Edited August 14, 2016 by injidup 4 Link to comment Share on other sites More sharing options...
vontrips Posted August 14, 2016 Share Posted August 14, 2016 Looks like a nice kit. Body shape looks very convincing. What Lancias did you have? I had a re-chipped Thema Turbo IE...mental vehicle! Had a lot of fun with that (until the cambelt went!). 1 Link to comment Share on other sites More sharing options...
injidup Posted August 14, 2016 Author Share Posted August 14, 2016 Nothing so mad! I had two Beta Coupés at different times. Both 2-liters, both free of rust. Link to comment Share on other sites More sharing options...
vontrips Posted August 14, 2016 Share Posted August 14, 2016 LOL, my Dad had one of the Beta saloons that Lancia bought back due to tin worm. Three years old and rotten as a carrot (we lived on the seafront!). The papers had a field day over it, but I thought Lancia were most honourable - not many British car manufacturers would have put the customer first back then. My Thema was rot free when I sold it at 12 years old. Missed the performance so got a Van Aaken Cinquecento turbo. Great fun again (in between regular engine rebuilds!). Link to comment Share on other sites More sharing options...
arni Posted August 14, 2016 Share Posted August 14, 2016 Nice,I had a diecast of this in the 80s. Link to comment Share on other sites More sharing options...
Windy37 Posted August 14, 2016 Share Posted August 14, 2016 Looks like a nice kit. Body shape looks very convincing. What Lancias did you have? I had a re-chipped Thema Turbo IE...mental vehicle! Had a lot of fun with that (until the cambelt went!). I built this kit and the quality is nowhere as good as , say , Tamiya kits . Finished article looks great though . By the way , do you remember the awesome Thema 8:32 ? Super saloon with Ferrari power . How many left I wonder ? Gary . Link to comment Share on other sites More sharing options...
vontrips Posted August 14, 2016 Share Posted August 14, 2016 I built this kit and the quality is nowhere as good as , say , Tamiya kits . Finished article looks great though . By the way , do you remember the awesome Thema 8:32 ? Super saloon with Ferrari power . How many left I wonder ? Gary . Haha...not many! I test drove one and it was slower than mine! Sounded great though. Link to comment Share on other sites More sharing options...
MetroRacing Posted August 14, 2016 Share Posted August 14, 2016 I have 10 of these in the stash to build lol. Are you building and evo1 or 2? The engine is wrong for an evo1 btw Also I recommend never removing the front cowl once fitted as the front framing is totally incorrect. Buy it's a very nice kit to throw together, I'll be watching on. I must get on with all mine too lol. Ashley Link to comment Share on other sites More sharing options...
injidup Posted August 14, 2016 Author Share Posted August 14, 2016 Let's have a race Ashley - see who can finish an 037 first! No idea if it's Evo 1 or 2, but the engine is an approximation of some average 037 engine in my opinion! The kit is the Motne winner. Hopefully it will look decent when finished, but then almost anything looks good in Martini colours! There's a build of the MFH 037 over on the F1M forums, and that is a very different beast! 1 Link to comment Share on other sites More sharing options...
MetroRacing Posted August 15, 2016 Share Posted August 15, 2016 Let's have a race Ashley - see who can finish an 037 first! No idea if it's Evo 1 or 2, but the engine is an approximation of some average 037 engine in my opinion! The kit is the Motne winner. Hopefully it will look decent when finished, but then almost anything looks good in Martini colours! There's a build of the MFH 037 over on the F1M forums, and that is a very different beast! Haha I need to finish my Days of Thunder build first lol. That is an Evo1 so the airbox in the kit is wrong. I revamped the Revell boxing last year and although I didn't fully correct the engine, I did make the correct airbox. My build is here: http://www.britmodeller.com/forums/index.php?/topic/234988934-lancia-rally-1983-tour-de-corse-updated-old-build/?fromsearch=1 Ashley Link to comment Share on other sites More sharing options...
injidup Posted August 15, 2016 Author Share Posted August 15, 2016 Thanks Ashley. I remember reading your post now you mention it! Can you explain your "seat belt trick"? Link to comment Share on other sites More sharing options...
MetroRacing Posted August 15, 2016 Share Posted August 15, 2016 My cheat trick is to use the seat belt decals and then just a peice of material to extend them from the top of the seat back to the bulkhead. Ashley 1 Link to comment Share on other sites More sharing options...
injidup Posted August 15, 2016 Author Share Posted August 15, 2016 (edited) Thanks Ashley. Progress while the boys are asleep. Dry fit of the rear subframe. Cut out the crossmember as Ashley did on his 037/Rally. Started wiring up the engine. I use a dead HDMI or DVI cable (can't remember which and I cut the plugs off!) for the wires and leftover pipe from other kit plug leads as spark plug boots. [ Getting the wires onto the distributor will be tricky, so I cut off the connectors and made some new ones from poly tube left over from the Honda RC166 superglued together. Hope it works! Edited August 15, 2016 by injidup 2 Link to comment Share on other sites More sharing options...
MetroRacing Posted August 15, 2016 Share Posted August 15, 2016 Looking good so far. I had no end of problems wiring up the dissy on mine. Chief among which was the fact I used too large gauge wire lol. Ashley Link to comment Share on other sites More sharing options...
injidup Posted August 21, 2016 Author Share Posted August 21, 2016 (edited) A little progress on the Lancia. I put Kevlar decals on the inner door panels and gave them a coat of Middle Stone. Did a bit more on the ignition leads, and sprayed a couple of coats of Gravity's Titanium White on the body.No,pic of the body as it still looks like white primer! This is just a dry fit, I want to do a bit more on the engine & gearbox before I stick it together. Trying to work out if it's worth using proper springs from ball pens or just use the moulded ones in the kit. The pen springs are just about the right diameter. Edited August 21, 2016 by injidup 3 Link to comment Share on other sites More sharing options...
MetroRacing Posted August 21, 2016 Share Posted August 21, 2016 Very nice. I wouldn't bother changing the springs as you can't see them very well through the rear screen. Obviously the fronts are different if you want to remove the cover but I glued mine on as it's all inaccurate up front anyway lol. Glad to see you using some kevlar decals. Are you going to apply them to the inside of the shell, behind the doors too? Or paint it a suitable colour. You need to cover a very large area, bigger than you think. I know I missed some out on mine lol. Or you could box the doors in like the real car lol. Ashley Link to comment Share on other sites More sharing options...
injidup Posted August 21, 2016 Author Share Posted August 21, 2016 Thanks for the tips, Ashley. I may just paint the inner doors and save the decals for something else! I may add the wire for the door handle as it should be quite easy. :-) Will probably save the springs for something else, then! 1 Link to comment Share on other sites More sharing options...
injidup Posted August 27, 2016 Author Share Posted August 27, 2016 Some progress. Have put the engine and gearbox in, plus front suspension, and done a little work on the interior. I made up an ignition coil but it's buried under the rear crossmember and pretty well hidden! The front shocks are painted silver then a marker pen was used the draw on the "spring". 2 Link to comment Share on other sites More sharing options...
MetroRacing Posted August 27, 2016 Share Posted August 27, 2016 Excellent progress there. BTW the Coil is mounted on the bulkhead in front on the engine I believe. From looking at pics the Coil ht lead goes forwards. I never bothered to even add on to mine. I doubt people will even notice lol. Have you started decaling the body yet? Ashley Link to comment Share on other sites More sharing options...
injidup Posted August 28, 2016 Author Share Posted August 28, 2016 I've seen pics of the coil ht lead going the the rear crossmember- I guess it depends who put the car together! Need to get a gloss coat on the body first - it's just arrived from Gravity Paints. Maybe in the next day or two. Hopefully they go on well as I'm looking fwd to seeing the Martini colours! Link to comment Share on other sites More sharing options...
MetroRacing Posted August 28, 2016 Share Posted August 28, 2016 Hmm I'll have to recheck my pics as all the cars were built by abarth. The decals can be a pig over the front wings. Patience and good luck are what needs to be attained lol. Ashley Link to comment Share on other sites More sharing options...
injidup Posted August 28, 2016 Author Share Posted August 28, 2016 I was thinking more of the mechanics at each rally! Will try not to get frustrated with the decals. After the interior of the McLaren F1 it should be a breeze! Hopefully. 1 Link to comment Share on other sites More sharing options...
MetroRacing Posted August 28, 2016 Share Posted August 28, 2016 All the mechanic's worked for Abarth lol. Looking through some pics it isn't clear where the Coil was mounted as I've seen the ht lead going off in 3 directions lol. Ashley Link to comment Share on other sites More sharing options...
injidup Posted August 28, 2016 Author Share Posted August 28, 2016 Like you said, no-one will notice ;-) 1 Link to comment Share on other sites More sharing options...
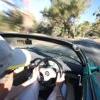
injidup Posted August 29, 2016 Author Share Posted August 29, 2016 (edited) I had a fairly productive day today, boys were happily playing in the garden so I was free to do some work on the Lancia. Trying to get this finished quickly so I can get back to the Lotus 88 when the carbon decals arrive.Finished the interior, decided to do no more detailing, although I haven't decide what to do about seatbelt set, the kit comes with decals for seat belts.And then decided to do the body decals which went better than I was expecting. I cut the long rear striped in two to help position them a little more easily. Got one side done...The body isn't fixed on yet as I may do a little more wiring on the engine. Edited August 30, 2016 by injidup 2 Link to comment Share on other sites More sharing options...

Recommended Posts
Create an account or sign in to comment
You need to be a member in order to leave a comment
Create an account
Sign up for a new account in our community. It's easy!
Register a new accountSign in
Already have an account? Sign in here.
Sign In Now