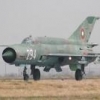
tonywood Posted January 18, 2016 Share Posted January 18, 2016 (edited) Hi allMy first WIP on here!Last year I purchased the Academy 1/72 KAI T-50, whilst regarded as a toy due to its lack of undercarriage and pre colours snap fit nature I decided to attempt to make a presentable model. The snap fit lugs were removed and the undercarriage bay was taken from a Revell F-16A with some additional scratch building.The seats are Pavla MB Mk16 with additional cockpit detail scratchbiilt. The new undercarriage bay with F-16 main legs attached, the detail is unlikely to be accurate for a T-50 but I'm happy with it, the undercarrige rams will be scratch built. The kit stickers are awful so the colour scheme was masked and airbrushed using the stickers as a template. For national markings and serials I have a dry transfer set for a RoKAF Hawk obtained from Japan A new nosewheel is being scratch built using donor F-16 parts. Edited January 19, 2016 by tonywood 2 Link to comment Share on other sites More sharing options...
SmashedGlass Posted January 18, 2016 Share Posted January 18, 2016 Hello Tony. You can directly post your pictures in your post: on the picture in Photobucket, left-click the box to the right labeled "Direct" under 'Share this photo'. Then, in the headers above what you are writing in your post here, you'll see an icon that looks like a little Polaroid photo. Click that, and right-click and 'paste', hit enter et voila: Link to comment Share on other sites More sharing options...
tonywood Posted January 18, 2016 Author Share Posted January 18, 2016 Thanks, was trying to do it from my phone at work, will re add them from desktop later. Link to comment Share on other sites More sharing options...
tonywood Posted January 19, 2016 Author Share Posted January 19, 2016 Photo's now added Link to comment Share on other sites More sharing options...
niki Posted January 19, 2016 Share Posted January 19, 2016 Many thanks for the In-Progress, Tony! The orange trim around the nose came out pretty sharp and I shall shamelessly copy your way of doing it Really looking forward to see this one finished! Cheers, Niki Link to comment Share on other sites More sharing options...
tonywood Posted January 22, 2016 Author Share Posted January 22, 2016 I have now added the nosewheel, the F-16 nose leg is too short so the undercarriage leg is scratchbuilt The main undercarriage doors will be modified F-16 doors, the chamfered corner of the F-16 doors is a different angle so plasticard was added, this will be blended and cut to the correct angle. Link to comment Share on other sites More sharing options...
tonywood Posted February 3, 2016 Author Share Posted February 3, 2016 A little more progress on the T-50, now the undercarriage has been fully fitted attention has turned to decalling, the RoKAF national markings and tail markings come from the Easycal Hawk T67 sheet which although are dry transfer decals are easy to use and adhere nicely. The stencilling is made up of various items from the spares box with walkway markings coming from a Revell F-16A. The only decals I cant source are correctly sized national markings for wings, these are larger than the fuselage ones but unfortunately the Hawk ones are all the same size, pondering wether to apply an undersized one or try and find a 1/48 one that would fit. 2 Link to comment Share on other sites More sharing options...
TonyR Posted February 23, 2016 Share Posted February 23, 2016 Hi Tony, You have been busy, but it's looking good mate - mine's not quite so far along but should be done in a few more days (hopefully!) - I've been looking to see if I could find something in my decal box you could use - Those wing markings, are they the same size as the 'orrible stickers?? Tony R Link to comment Share on other sites More sharing options...
Smudge Posted January 14, 2022 Share Posted January 14, 2022 (edited) @tonywood Thanks for bringing this to my attention. Nice work, that looks very smart. I guess I may have to give this 'conversion' a go myself, if I want a 1/72 T-50 anytime soon. Edited January 14, 2022 by Smudge 1 Link to comment Share on other sites More sharing options...

Recommended Posts
Create an account or sign in to comment
You need to be a member in order to leave a comment
Create an account
Sign up for a new account in our community. It's easy!
Register a new accountSign in
Already have an account? Sign in here.
Sign In Now