Shaun Posted February 9, 2016 Author Share Posted February 9, 2016 Looks very nice. May I ask, who makes the pilot figure? Mike He is my own work, I bit of a mishmash of items based on a standing figure that has been converted to the seated position. Still got to add the mask and oxy hose. Nice work there mate, I also like the figure. On a sidenote, are you going to have this model at Hornchurch Expo in March? No, won't be there sorry. Link to comment Share on other sites More sharing options...
xffw45343tg Posted February 9, 2016 Share Posted February 9, 2016 Probably just me but he seems just a little long in the body. I'm just going on the position of his shoulders relative to the Harness Power Retraction Unit. Maybe he 'just' needs to motor his seat down a tadge... Kirk 1 Link to comment Share on other sites More sharing options...
Shaun Posted February 9, 2016 Author Share Posted February 9, 2016 Probably just me but he seems just a little long in the body. I'm just going on the position of his shoulders relative to the Harness Power Retraction Unit. Maybe he 'just' needs to motor his seat down a tadge... Kirk Its not the final position yet, I think he needs to be lower myself.Easy to do before he taxis for take off. Shaun. Link to comment Share on other sites More sharing options...
Shaun Posted February 9, 2016 Author Share Posted February 9, 2016 Productive evening of pushing decals around the airframe, looking the part now. Seal and then the washes next. Shaun. 11 Link to comment Share on other sites More sharing options...
AjD Posted February 10, 2016 Share Posted February 10, 2016 Looking really, really good Shaun. Keep going! 1 Link to comment Share on other sites More sharing options...
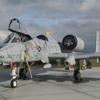
Alain De Loor Posted February 10, 2016 Share Posted February 10, 2016 He seems to agree with the fit... Al 1 Link to comment Share on other sites More sharing options...
Shaun Posted February 11, 2016 Author Share Posted February 11, 2016 Here is another area I've been working on. The kits undercarriage is another area that Trumpeter has sort of attempted to replicate. I'm sure you can see how much work I've done in this area. As you can see the kits wheels are skinny, so I widened and weight these and added tread detail.These were then cast in resin. The kits U/C legs are also poor, I've used the SAC metal items as a base and then modified these and added more detail. Shaun. 5 Link to comment Share on other sites More sharing options...
aviationandy Posted February 12, 2016 Share Posted February 12, 2016 Well, I have to say, I have been chatting to Shaun, via social media about his build, the build has totally blown me away. I can only dream of building to such a standard, I have the same kit on the bench, it wont be a touch on this. Amazing, truly amazing... 1 Link to comment Share on other sites More sharing options...
xffw45343tg Posted February 12, 2016 Share Posted February 12, 2016 ...I have the same kit on the bench.... Go on. Start a thread. Post some piccies. You know you want to. Link to comment Share on other sites More sharing options...
aviationandy Posted February 12, 2016 Share Posted February 12, 2016 I will politely turn down that request, as my builds are to such a low standard, compared to all the awesome work I see on BM... 1 Link to comment Share on other sites More sharing options...
SHAR67 Posted February 12, 2016 Share Posted February 12, 2016 She's looking real sweet Shaun nice one buddy. Clive 1 Link to comment Share on other sites More sharing options...
Shaun Posted February 13, 2016 Author Share Posted February 13, 2016 Well, I have to say, I have been chatting to Shaun, via social media about his build, the build has totally blown me away. I can only dream of building to such a standard, I have the same kit on the bench, it wont be a touch on this. Amazing, truly amazing... Thanks, hope you find this thread helpfull for your build? Panel wash now on and the next stage is the heavy sooty weathering for the rear end/underside.I've also got to the myriad of small detail painting to do. Shaun. Link to comment Share on other sites More sharing options...
rainstel109 Posted February 15, 2016 Share Posted February 15, 2016 (edited) I will politely turn down that request, as my builds are to such a low standard, compared to all the awesome work I see on BM... Well, for what its worth, everyone here had to start somewhere and I reckon that their standard was a lot lower than it is now, and I deffo include myself in that statement. Also, the guys here will help with any build in terms of suggestions, assistance, advice, techniques, etc, its just a case of building something as best you can and take that advice along the way, and the more you build, the higher your standard becomes. give it a go, you might be surprised now well you do. Thanks, hope you find this thread helpfull for your build? Panel wash now on and the next stage is the heavy sooty weathering for the rear end/underside.I've also got to the myriad of small detail painting to do. Shaun. Looking really nice now Shaun, liking that landing gear, looking forwards to more updates. Edited February 15, 2016 by rainstel109 3 Link to comment Share on other sites More sharing options...
F4u Posted February 15, 2016 Share Posted February 15, 2016 That landing gear looks miles better and look forward to seeing it on the jet. Guy 1 Link to comment Share on other sites More sharing options...
Shaun Posted February 16, 2016 Author Share Posted February 16, 2016 Making slow progress, got a few things done tonight so we are getting closer to the end. Shaun. Link to comment Share on other sites More sharing options...
Viper15 Posted February 16, 2016 Share Posted February 16, 2016 What a cracking job you're making of this. I don't half miss seeing the Harriers in our skies, I'd love to take on a large scale example myself one day. 1 Link to comment Share on other sites More sharing options...
Shaun Posted February 21, 2016 Author Share Posted February 21, 2016 Been hard to find time for this beast at the moment, but hopefully post up a progress shot later. Shaun. 1 Link to comment Share on other sites More sharing options...
Shaun Posted February 24, 2016 Author Share Posted February 24, 2016 Did 858 have the helmet sight?, being a 4 sqn machine was it fitted? Shaun. Link to comment Share on other sites More sharing options...
NG899 Posted February 29, 2016 Share Posted February 29, 2016 Hi Shaun, Checking my collection of photos from the final months of JFH and the last day, 858 does not appear to have the HMCS fittings behind the seat (page 110 in 'that book'!); hope that helps. Keep at it my friend. Having knocked out a couple of BoB Spit 1As I need to get ZG477 finished for Cosford in early April; I'd better start the painting! Cheers Nick Link to comment Share on other sites More sharing options...
Shaun Posted March 1, 2016 Author Share Posted March 1, 2016 Hi Shaun, Checking my collection of photos from the final months of JFH and the last day, 858 does not appear to have the HMCS fittings behind the seat (page 110 in 'that book'!); hope that helps. Keep at it my friend. Having knocked out a couple of BoB Spit 1As I need to get ZG477 finished for Cosford in early April; I'd better start the painting! Cheers Nick Thanks Nick, I had a feeling an OCU bird might not have it fitted. Need to get on and finished the model but Life is really getting in the way.... Shaun. Link to comment Share on other sites More sharing options...
Shaun Posted March 3, 2016 Author Share Posted March 3, 2016 Came home to one of the those modelling moments, when you question why you bother with the hobby!! This has been a tough build and it's still fighting!! I put the tail on the bench last night,and accidentally left it near a leaking bottle of micro sol!. Came home to discover the tail melted to the inside of the card box it was in!! I peeled the tail free and the decals are trashed, plastic will be fine after stripping. Has anyone got spare markings for the tail of ZG858??, I'm quite embarrassed to admit this accident. Shaun. Link to comment Share on other sites More sharing options...
xffw45343tg Posted March 3, 2016 Share Posted March 3, 2016 Eeek! Can't help with the decals I'm afraid but got to feel for you. I thought that kind of luck was reserved for this household. Hope you get it sorted. 1 Link to comment Share on other sites More sharing options...
Piero Posted March 4, 2016 Share Posted March 4, 2016 Hi Shaun, I should have what you need. Let me give a check at home this evening and I'll let you know. CIAO! Piero P.S.: You are doing a really good job on this GR9. BRAVO! 1 Link to comment Share on other sites More sharing options...
Simon Cornes Posted March 4, 2016 Share Posted March 4, 2016 Hi Piero I think your mail box may be full. I was trying to PM you recently about your latest resin castings! Simon PS Shaun, keep going, almost done!! Link to comment Share on other sites More sharing options...
Ex-FAAWAFU Posted March 4, 2016 Share Posted March 4, 2016 Well, for what its worth, everyone here had to start somewhere and I reckon that their standard was a lot lower than it is now, and I deffo include myself in that statement. Also, the guys here will help with any build in terms of suggestions, assistance, advice, techniques, etc, its just a case of building something as best you can and take that advice along the way, and the more you build, the higher your standard becomes. Give it a go, you might be surprised now well you do. What he said. I came back to the hobby about 3 or 4 years ago and was daunted by resin, PE, washes, modern painting techniques/theories, air brushing, and the astonishing standard of work on here. I have had nothing but supportive comments, help, tips and friendship on this site - to the point where I often log in now when I am miles away from home and my work bench just to check on how my friends are getting on with their latest epic. My own modelling is miles better than it was 3 years ago as a direct result of BM. We all started somewhere, every one of us has had disasters and made stupid mistakes. It's fun. Give it a go; you won't regret it! 5 Link to comment Share on other sites More sharing options...

Recommended Posts
Create an account or sign in to comment
You need to be a member in order to leave a comment
Create an account
Sign up for a new account in our community. It's easy!
Register a new accountSign in
Already have an account? Sign in here.
Sign In Now