gbondoni Posted January 1, 2016 Share Posted January 1, 2016 So, being completely new to Britmodeller, this represents my very first group build (and first ever anywhere), so it is with a bit of trepidation that I present my subject, the Tamiya MP4/4... Anyone who recalls the 1988 season knows that this car is one of the most despised vehicles ever to take to an F1 track. Other than fans in Brazil, Japan, and some people around Woking, everyone on the planet wanted the MP4/4s to DNF so the Ferraris could win a race. It finally happened on a glorious Sunday at Monza, and the world's tifosi went nuts. But, like Panzer tanks, this machine has gotten the respect it deserves from even those who hated it when it was new. Very few vehicles have shown this level of domination - perhaps the early Alfettas, that's it. Only Senna's freak crash with a replacement driver prevented a clean sweep in 1988. So... I hated this thing when it was running, but have grown to love it since. Box art - the usual art for Tamiya's Mclaren re-releases black with a silhouette of the car: Main sprue for the shiny bits: And black sprues for mechanicals and the floor: Finally, the clear sprue, tyres and the decals. Most of this will be utterly familiar to anyone who's ever built a Tamiya F1 kit. It looks like any of the others, except for the double-skinned body that was typical of the late eighties. Other than that, nothing to report. Sharp-eyed readers will spot a set of aftermarket decals with the tobacco sponsorship which Tamiya doesn't include, but which is vital to build a correct replica. I had forgotten I had these, so yet another set is winging its way towards me. If this one doesn't look good at the end of it, it will be my fault, as I know these are excellent kits. Probably going to be starting in a couple of weeks after I clear some backlog on the bench and also decide what philosophy I'll follow with this build. 4 Link to comment Share on other sites More sharing options...
wimbledon99 Posted January 1, 2016 Share Posted January 1, 2016 Watching this one!! 1 Link to comment Share on other sites More sharing options...
specky Posted January 1, 2016 Share Posted January 1, 2016 Nice one - and I am so pleased you are adding the correct sponsor livery - they just wrong without it ! I'll be pulling up a chair for this one, if I may. Cheers, Craig 1 Link to comment Share on other sites More sharing options...
gbondoni Posted January 1, 2016 Author Share Posted January 1, 2016 I'll be pulling up a chair for this one, if I may. Of course - the more, the merrier (unless I ruin it, of course!) Link to comment Share on other sites More sharing options...
Col. Posted January 2, 2016 Share Posted January 2, 2016 Wonderful choice As you say the Mclaren were hated by many for their domination but respect was due for that same reason. Link to comment Share on other sites More sharing options...
gbondoni Posted January 2, 2016 Author Share Posted January 2, 2016 Precisely - this car was just the perfect blend of chassis, team and engine in an era when everyone else on the grid was considerably less well-prepared. And then they gave one of these cars to each of the best two drivers on the grid. A truly amazing year. 1 Link to comment Share on other sites More sharing options...
gbondoni Posted January 4, 2016 Author Share Posted January 4, 2016 Started to think about this one, even though there are still some other projects left in my stash. What I need to think about is how, exactly, I want to go about building it. Most of my F1 kits are never really seen by other modelers or entered into competitions. So while the exteriors are usually very nice, the engine compartment is merely OK (unless the engine is a visible piece). I do paint the motor and make the inside clean, but don't wire them or superdetail them. Most of my cars are locked into display cases when done (below an example of an Ebbro Tyrrell, typical of the breed, and showing a non-wired Cosworth for all to see ), and viewed by laymen, not judges. But this build will take place in the public eye, so I am thinking that I may end up going that extra mile, even though I normally wouldn't with this one - the engine is invisible after all... We'll see - I still need to think about that a little more. I'm currently leaning towards box stock build, but might chicken out and start detailing at any moment! 2 Link to comment Share on other sites More sharing options...
wimbledon99 Posted January 4, 2016 Share Posted January 4, 2016 Go on - give the engine the attention it needs. We'll then all know it gleams 'under the bonnet' too 1 Link to comment Share on other sites More sharing options...
gbondoni Posted January 5, 2016 Author Share Posted January 5, 2016 LOL. Yes, that's probably for the best... if not, I might chicken out and give very few build updates, simply presenting the forum with a built up vehicle... 1 Link to comment Share on other sites More sharing options...
Sgt.Squarehead Posted January 21, 2016 Share Posted January 21, 2016 I'd certainly like to follow a detailed build.....My nephew is nagging me to build a McLaren of a more recent vintage for him & TBH I haven't got a clue about car kits. 2 Link to comment Share on other sites More sharing options...
gbondoni Posted January 21, 2016 Author Share Posted January 21, 2016 This one is a couple of weeks from getting started - need to clear some stuff out first. The nice thing about these kits is that like a lot of Tamiya stuff, they are very nice to build. I hope to do it justice so you can use some of the learnings from it... and McLarens of recent vintage are mainly difficult because of that mirrored silver finish - tough to get right on large surfaces. 1 Link to comment Share on other sites More sharing options...
Sgt.Squarehead Posted January 21, 2016 Share Posted January 21, 2016 I'm an AFV modeller, so shiny and silver is an alien world for me! 1 Link to comment Share on other sites More sharing options...
gbondoni Posted January 21, 2016 Author Share Posted January 21, 2016 Shiny and silver is fine, mirror finish is... well, I've never pulled it off to my satisfaction, for sure! Link to comment Share on other sites More sharing options...
wimbledon99 Posted March 14, 2016 Share Posted March 14, 2016 Have you started yet? Would be great to see some photos 1 Link to comment Share on other sites More sharing options...
gbondoni Posted March 15, 2016 Author Share Posted March 15, 2016 Have you started yet? Would be great to see some photos Timely comment, as yes, I just put this one back on the bench on Sunday (if you've ever built the Hasegawa Mazda 767B you'll understand the delay. It builds into a lovely model, but the green and black parts of the livery are all decals, and the day-glo orange was fiddly to get looking correct. I might post a photo of it later). Anyhow, enough with the excuses. I have splashed some paint and a single decal on the black bits, and will now attempt to get a good matt over it, as this is one of the few F1 cars I've build where the instructions call for matt as opposed to semi-matt for the carbon fibre. I'll post pictures this week - over the weekend at worst! 2 Link to comment Share on other sites More sharing options...
Bedders Posted March 19, 2016 Share Posted March 19, 2016 What a great car, though as a Williams fan I too loathed it back in 88: McLaren had nabbed Williams's Honda engines and Williams had to move into the post-turbo era a year before the other big teams. I bought this Tamiya kit nonetheless, but it lies half built on the shelf of doom. One reason for that was that I couldn't get the Marlboro decals back in the early 90s. Your build might inspire me to finish the task...! Justin 1 Link to comment Share on other sites More sharing options...
gbondoni Posted March 21, 2016 Author Share Posted March 21, 2016 For some reason I can't actually see any images on Photobucket or BM, but hopefully the ones I post will look ok. I've started this one and almost immediately shot myself in the foot (in my experience, when a Tamiya kit doesn't look good, it's usually the modeler's fault). In this particular case, I screwed up an operation that most AFV modelers can pull off in their sleep: matte clear. All my experience with beautiful glosses is mirrored by my complete lack of the dark art of matte! I have a good matte spray, but I know it sometimes reacts to the paint I use, so decided not to risk it. Instead, I used a matt that I know works well with my paint, and has always given a good finish, and self-levelled well. It can't be airbrushed (at least I've never risked attempting it), but brushing it on works perfectly. Of course, it didn't work out that way this time: It dried streaky and uneven, not visible in normal light, but very easy to see in bright light and from up close. I think the first photo shows it well. I tried sanding it off, but the finish delaminated, so I decided to leave well enough alone. This one will be displayed with the bodywork closed, so I will build it up and then attempt to fix the areas that are visible with the bodywork on. I've also thrown out what was left of that clear, just in case I ever forget about this and try it again. The kit itself is typically Tamiya. All of it goes together well. The single tricky bit is the steering rod: check the subsequent steps to see how it should be positioned, as the instructions are a bit ambiguous. It does fit correctly, however. So here are the pics - cockpit is done, the rest is going to be built up and get a lot of detail painting. The flat black? I'm still thinking about that... I'd appreciate it if someone could confirm whether you can see the images. It's very frustrating not to see anything on BM! Link to comment Share on other sites More sharing options...
Col. Posted March 21, 2016 Share Posted March 21, 2016 Got two images to admire here Gustavo; one overall photo and another of the cockpit. Both look good 1 Link to comment Share on other sites More sharing options...
gbondoni Posted March 21, 2016 Author Share Posted March 21, 2016 Thanks Col - I posted them, but can't see them! Link to comment Share on other sites More sharing options...
wimbledon99 Posted March 21, 2016 Share Posted March 21, 2016 Yep - I see them too 1 Link to comment Share on other sites More sharing options...
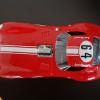
gbondoni Posted April 19, 2016 Author Share Posted April 19, 2016 Progress, amazingly, has occurred! I had some issues with the fluorescent paint, but now I have a finish I like. To my eye, this is pretty much the color that I saw these McLaren's racing in live (the color is a bit darker in reality than in my photo), but my photos show a more red and less orange finish - It does look good, though. Also continued to work on the chassis. Wasn't able to fix that matte issue, but as detail gets added it has become a little less noticeable. If anyone asks, I'll say it was a side effect of working with carbon fiber in the eighties (not true, but if you don't tell them, I won't). I think I will have this one done by the deadline! 2 Link to comment Share on other sites More sharing options...
wimbledon99 Posted April 19, 2016 Share Posted April 19, 2016 Looks great - Hope you finish in time 1 Link to comment Share on other sites More sharing options...
CliffB Posted April 20, 2016 Share Posted April 20, 2016 Yes, it would be great to see this one finish Gustavo Cliff 1 Link to comment Share on other sites More sharing options...
gbondoni Posted April 20, 2016 Author Share Posted April 20, 2016 Thanks for the encouragement! Worked on it a bit last night... Need to do some decaling still, and a ton of touch up, but we should be in good shape! 2 Link to comment Share on other sites More sharing options...
wimbledon99 Posted April 21, 2016 Share Posted April 21, 2016 Haha - No pressure 1 Link to comment Share on other sites More sharing options...

Recommended Posts