CedB Posted March 14, 2016 Share Posted March 14, 2016 I know how you feel BV but it will all be worth it when you get those gorgeous engines on and you get to take of the canopy masks... can't wait to see the results of all your early hard work 1 Link to comment Share on other sites More sharing options...
Blastvader Posted March 14, 2016 Author Share Posted March 14, 2016 You are of course both correct.I think one thing I need to remember is that this is only my second model aircraft, so I should probably give m'self a bit of a break (and maybe choose an easier project next time). Also, considering your proclivity for Valom kits Ced my suffering must be pure ambrosia compared to what you normally have to put up with.Anyway I'm going to type out a list of what I think I have to do before the Blenheim's done:1. Paint touch ups: the black has worn off MANY edges and needs a good going over in places, I also did a really pants job of masking the landing lights and there's a good sliver of kit plastic on the starboard side of it that I'm going to have to mask and spray.2. Exhaust staining: I've messaged Woody 37 as regards this as he's a dab hand at exhaust stain on night undersides. I've also sprayed a couple of spoons black to test paint colours and the like on.3. Light chipping around some hatches and crew ingress/egress points and some streaking from around the engine radiator gills.4. Wing tip lights5. Matte coat6. Final assembly7. Gloss wingtip lights8. ???9. Profit!I should hope I can now reference that as my final check-list though I'm sure there'll be something I've forgotten and I'm still not sure if I should assemble the thing first and then matte coat or leave it the way it is. Thoughts?Toodles,Paul 2 Link to comment Share on other sites More sharing options...
sean Posted March 14, 2016 Share Posted March 14, 2016 That's the spirit!! Sean 1 Link to comment Share on other sites More sharing options...
CedB Posted March 14, 2016 Share Posted March 14, 2016 Crikey, second build, I'd forgotten that!!! List looks good to me Paul - not far to go now and I can't wait to see her finished. 1 Link to comment Share on other sites More sharing options...
Col. Posted March 16, 2016 Share Posted March 16, 2016 How's that list going? You've done well with this one considering the fight it's put up. 1 Link to comment Share on other sites More sharing options...
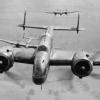
Blastvader Posted March 21, 2016 Author Share Posted March 21, 2016 How's that list going? Finished it mate. I'll get some better photos later (these were wonderfully sharp before PB got its mits on them and compressed them all to hell). But these will do for the noo. 11 Link to comment Share on other sites More sharing options...
CedB Posted March 22, 2016 Share Posted March 22, 2016 Very nice Paul... that canopy look really good - looking forward to the pics! 1 Link to comment Share on other sites More sharing options...
Col. Posted March 22, 2016 Share Posted March 22, 2016 Looking good 1 Link to comment Share on other sites More sharing options...
JimHead23 Posted March 22, 2016 Share Posted March 22, 2016 That looks fantastic! 1 Link to comment Share on other sites More sharing options...
Seahawk Posted March 22, 2016 Share Posted March 22, 2016 "Man completes Airfix Blenheim" shock horror. Proves it can actually be done. Lovely job! Link to comment Share on other sites More sharing options...
Sgeek Posted March 22, 2016 Share Posted March 22, 2016 The bar has been set. I can see it above my current position by some distance :-) As you sweep majestically from the building think kindly of those left behind trapped with their own personal hell! 1 Link to comment Share on other sites More sharing options...
PlaStix Posted March 22, 2016 Share Posted March 22, 2016 Hi Paul. Well, despite all the trials and tribulations, that has turned out beautifully! If I hadn't witnessed all the problems I would never have guessed they had happened. The paintwork and finish look gorgeous! Very well done. Looking forward to more photos. Kind regards, Stix Link to comment Share on other sites More sharing options...
sean Posted March 22, 2016 Share Posted March 22, 2016 I have to agree with what's been said already, a marvellous result, especially after the troubles you had during the build. I'm certainly looking forward to seeing the RFI, Sean Link to comment Share on other sites More sharing options...
CliffB Posted March 22, 2016 Share Posted March 22, 2016 Congratulations! What a fantastic result. Cliff Link to comment Share on other sites More sharing options...
Ray S Posted March 22, 2016 Share Posted March 22, 2016 Yes, well done on an epic build here. I know a few who probably would have seen if the model was aerodynamic, or needed a wall to stop its flight. Hopefully your trials and tribulations (along with others) will help the rest of us who have these in the stash, I have two versions and am tempted to give them a go soon You do have a really tidy model there now. All the best, Ray Link to comment Share on other sites More sharing options...
FalkeEins Posted March 24, 2016 Share Posted March 24, 2016 ..agreed ...nice one, super finish, looks much better than my two that's for sure! I couldn't live with that gap around the engine cowl and the collector ring though - it was huge under the magnifier and worse underneath - but in filling it I've made a right mess. Only two photos though and from an odd angle - does that tell its own story ? Link to comment Share on other sites More sharing options...
Blastvader Posted March 24, 2016 Author Share Posted March 24, 2016 Very nice Paul... that canopy look really good - looking forward to the pics! Thanks Ced, unfortunately I've scratched it up a little when removing the masking, but there's nowt to blame for that apart from my own cack-handedness and impatience. Still looks ok from a foot or so away though so it'll do. Looking good Thanks Col. Now, where's that Beaufighter? That looks fantastic! Thanks Jim. "Man completes Airfix Blenheim" shock horror. Proves it can actually be done. Lovely job! Nearly jumped out of my skin when I realised I'd finished it too...like putting a cucumber behind an unsuspecting cat! The bar has been set. I can see it above my current position by some distance :-) As you sweep majestically from the building think kindly of those left behind trapped with their own personal hell! Hah! You'll be reet chief. Not long to go on yours now eh? Last coat of primer and away you go surely? Hi Paul. Well, despite all the trials and tribulations, that has turned out beautifully! If I hadn't witnessed all the problems I would never have guessed they had happened. The paintwork and finish look gorgeous! Very well done. Looking forward to more photos. Kind regards, Stix Thanks Stix, it's a solid 12" model. But it looks ok sitting in the cabinet. Pretty pleased with some parts of it, and it's all a learning process isn't it? I have to agree with what's been said already, a marvellous result, especially after the troubles you had during the build. I'm certainly looking forward to seeing the RFI, Sean Thanks Sean, some new LED daylight lights turned up today and I have 10 days off, so I might manage to get some pictures of at least passable quality done soon-ish. Congratulations! What a fantastic result. Cliff Thanks Cliff, fantastic might be pushing it. Just glad it's done and I can stop having Blenheim based nightmares! Yes, well done on an epic build here. I know a few who probably would have seen if the model was aerodynamic, or needed a wall to stop its flight. Hopefully your trials and tribulations (along with others) will help the rest of us who have these in the stash, I have two versions and am tempted to give them a go soon You do have a really tidy model there now. All the best, Ray Cheers Ray. Believe me the thought of testing its aerodynamic capabilities crept in to my mid more than once. In fact not long before the end I did have to stop myself hurling it across the mannex, but sense prevailed...just. ..agreed ...nice one, super finish, looks much better than my two that's for sure! I couldn't live with that gap around the engine cowl and the collector ring though - it was huge under the magnifier and worse underneath - but in filling it I've made a right mess. Only two photos though and from an odd angle - does that tell its own story ? Cheers. The gap around the collector ring doesn't phase me that much, especially as there's a panel gap there on the real thing. Also keeping it separate until almost thew end of the build was the most expedient way to paint it. As for the lack of photos: those were taken at my club night, their paucity is due to my laziness and their angle due to the fact that any other would have presented you with the leering face of a middle aged man staring up the jacksie of a really rather lovely 48th scale Italeri Wessex that was next door. Cheers all, Paul 4 Link to comment Share on other sites More sharing options...
Blastvader Posted April 5, 2016 Author Share Posted April 5, 2016 RFI's up. 1 Link to comment Share on other sites More sharing options...
PlaStix Posted April 6, 2016 Share Posted April 6, 2016 RFI's up. ..........and looking rather good! Link to comment Share on other sites More sharing options...

Recommended Posts