F-32 Posted November 26, 2015 Share Posted November 26, 2015 Cracking piece of work, looking forward to seeing the end resut Link to comment Share on other sites More sharing options...
Ex-FAAWAFU Posted November 27, 2015 Share Posted November 27, 2015 (edited) The cockpit looks great. Interesting idea, and so far I reckon you're nailing it. Edited November 27, 2015 by Ex-FAAWAFU Link to comment Share on other sites More sharing options...
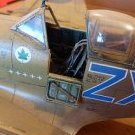
Devcon 1 Posted November 29, 2015 Author Share Posted November 29, 2015 Interior coming together. I have to say I'm greatly impressed with the fit/engineering of this kit, it's a real pleasure to build so far. I've got to make some bulkheads in the gap between the cabin roof and engine floor and maybe put some wiring looms in there as again I've got no idea what's inside the real one there. The sponson top cover will be removeable to show the undercarriage bay detail. Regards John 7 Link to comment Share on other sites More sharing options...
Martian Posted November 29, 2015 Share Posted November 29, 2015 Great progress! Martin Link to comment Share on other sites More sharing options...
rudi Posted November 29, 2015 Share Posted November 29, 2015 Great work, looking forward to the completed build. Link to comment Share on other sites More sharing options...
justaspitcrazy! Posted November 29, 2015 Share Posted November 29, 2015 Me likey! Desperate to get mine started! Link to comment Share on other sites More sharing options...
paul_c Posted November 29, 2015 Share Posted November 29, 2015 This is a fantastic project. Amazing work so far, especially with the interior. The fuel tanks (black rubber bags) live under the floor along with a couple of dry bays with various pumps etc so what you've done is a nice generic representation. Stick with a Quad and trailer as a load as Land Rovers do not fit unless fully stripped down. Quad facingback towards the ramp as well. As a rigger, I remember watching with horror as Para's practiced reversing Quad/trailer combo's up the ramp in theatre........ Link to comment Share on other sites More sharing options...
Leonl Posted November 29, 2015 Share Posted November 29, 2015 Awesome work, very impressive. Link to comment Share on other sites More sharing options...
Nigel Heath Posted December 1, 2015 Share Posted December 1, 2015 That's a great looking interior, most impressive. Link to comment Share on other sites More sharing options...
AdrianMF Posted December 1, 2015 Share Posted December 1, 2015 (edited) That looks very atmospheric and cavernous! I like the underfloor detailing too. Regards, Adrian Edited December 1, 2015 by AdrianMF Link to comment Share on other sites More sharing options...
phildagreek Posted December 1, 2015 Share Posted December 1, 2015 Nice! Link to comment Share on other sites More sharing options...
Devcon 1 Posted December 2, 2015 Author Share Posted December 2, 2015 Thanks for all your feedback.... Top cabling done, it was the smallest I had in stock but looks far too big in the photos, Will improve my research for further versions. I made the mistake of not looking at the details on the Eduard info sheet so messed up the door MG a bit but I guess only I would notice it. Regards John 2 Link to comment Share on other sites More sharing options...
Devcon 1 Posted December 5, 2015 Author Share Posted December 5, 2015 Been sorting some of the odds and sods out whilst contemplating the interior lighting but I've now got a solution. A micro switch operated by the ramp so when the ramp is open the lights are on. One LED mounted in the walkway between cockpit and cabin pointing backwards and one above the ramp pointing forwards. This gives a nice wash of light and is powered by a CR2032 mounted below the rotor mast, the two LEDs are wired in parallel. Wiring will be straightforward, the microswitch and LEDs look big in the photos but in reality looking from inside the model they hide quite well. Regards John 2 Link to comment Share on other sites More sharing options...
Gary West Posted December 5, 2015 Share Posted December 5, 2015 Lovin this Link to comment Share on other sites More sharing options...
Devcon 1 Posted December 5, 2015 Author Share Posted December 5, 2015 LEDs glued in place, I've put foil over them to get as much reflected light inside. I've missed a trick on this one but will put it right on the next one by making the wiring part of the detailing between the cabin roof and engine floor. Hopefully get the wiring done tomorrow and then back to some glueing.... Regards John 3 Link to comment Share on other sites More sharing options...
Nigel Heath Posted December 6, 2015 Share Posted December 6, 2015 Nice to see some lighting work on a helicopter cabin. Link to comment Share on other sites More sharing options...
Devcon 1 Posted December 6, 2015 Author Share Posted December 6, 2015 Wiring covered up so it's starting to look like a helicopter. Made a slight error when glueing the main side windows onto the fuselage sides which left them sticking out a bit, I contemplated taking them out out but resorted to sanding down the frames a little, lesson learnt for the next one.. All the outer skin now drying. Removeable side in situ, I'll use magnets for retention. Battery location which will be accessed by the removable left engine cover. This was the error with the windows although it doesn't look too bad from this angle. Regards John 1 Link to comment Share on other sites More sharing options...
Devcon 1 Posted December 6, 2015 Author Share Posted December 6, 2015 Ooopps, missed the last picture. 2 Link to comment Share on other sites More sharing options...
exdraken Posted December 6, 2015 Share Posted December 6, 2015 Ooopps, missed the last picture. nice! how does the main cockpit windscreen part fit to all this here? Link to comment Share on other sites More sharing options...
Devcon 1 Posted December 6, 2015 Author Share Posted December 6, 2015 Hi exdraken, The glazing just butts up to it's mating surface, although loosely placed for the pic the fit is excellent when held in place. The top engine fairings overlaps onto the top of the glazing a bit. Regards 2 Link to comment Share on other sites More sharing options...
Devcon 1 Posted December 6, 2015 Author Share Posted December 6, 2015 On with the folding tail. I know this model will be a hybrid of Merlin versions and may not be absolutely true to scale to any single helicopter but I guess it's a bit of a sandbox for further builds. The boom has been cut following the mould lines. Hinge brackets made from old sprue, the brass tube will form inserts into the 4 brackets with an old drill being the final hinge component. These 4 brackets will be made as small as I dare !!! Couldn't resist a test of the lights. Regards John 6 Link to comment Share on other sites More sharing options...
markjames68 Posted December 6, 2015 Share Posted December 6, 2015 That last pic looks terriffic!! Link to comment Share on other sites More sharing options...
Devcon 1 Posted December 7, 2015 Author Share Posted December 7, 2015 Looking at the first attempt at a hinge I've come to the conclusion it doesn't look like the real thing at all and also looks a bit rubbish so onto MKII.. Using the same brass tube and drill I've glued the tube directly to the edge of the fuselage, I had to relieve the fuselage a bit so I'll make a litho plate trim to overlay the hinge when displaying in folded state Regards 1 Link to comment Share on other sites More sharing options...
Martian Posted December 8, 2015 Share Posted December 8, 2015 Nice lighting effects! Martin Link to comment Share on other sites More sharing options...
Leonl Posted December 8, 2015 Share Posted December 8, 2015 I don't know what I'm more impressed with, the amazing work, the lights or the speed at which you're progressing! Fab stuff... loving it! Link to comment Share on other sites More sharing options...

Recommended Posts
Create an account or sign in to comment
You need to be a member in order to leave a comment
Create an account
Sign up for a new account in our community. It's easy!
Register a new accountSign in
Already have an account? Sign in here.
Sign In Now